Leaderboard

 Global Moderator


Popular Content
Showing content with the highest reputation since 09/11/10 in all areas
-
Here she is. Hope you like my KE20
 4 points
 -
Hi Peter, To prove the issue is a defunct fuel pump, simply remove it, put a piece of tube on the inlet; put it in a can of petrol, & work the lever by hand, & see if anything comes out. If it doesn't, then you've solved your problem. If it does work, then look for a blocked fuel filter, or a blocked fuel line from the tank. I think you are nearly there ! To check the fuel line, remove petrol cap, and get someone to listen at the tank filler, while you blowing back down the line. Do not use compressed air. If there are any rubber sections in the fuel line, then these can break down inside & block completely, even if the line looks OK on the outside. Good luck ! Cheers Banjo.4 points
-
HEY it's about time I sanded it back to metal and started this process all over again 😂3 points
-
Hey Chums, Bit of an update on the rolls. So I bought it earlier this year, had it running with the mighty K motor for a few months. Decided the 3k just wasn't doing anything it for me and had some spares kicking around from my Celica, figured I'd 3tc swap it... And while I was in the process a turbo and j160 6 speed would be easier to do at the time rather than down the track. So I rebuilt the 3t with stock 3tgte internals, made a manifold, tail shaft, cross member, converted it to hydraulic clutch, remote brake booster etc. Thats pretty much it for now, just been running on 7psi and having a bit of fun with it. In the process of sorting out an intercooler, before I up the boost a bit, going to run a water to air cooler on top of the rocker cover. Also have a M78 commodore diff I'm shortening at the moment for it. Cheers Jack.


 3 points
 -
3 points
-
Hi Ben, Dave's suggestion is excellent, as having the genuine Toyota "Yellow Bible" on the K Series, is probably one of the best investments you'll ever make, if you are going to play with a K series engine. I got one early in my journey, which covers 2K to 5K-C, and it has been invaluable. Most functions of reassembling a K Series engine are straight forward, simple, & logical, but fitting the timing chain, & aligning the crankshaft & camshaft sprockets, is one area, where if you get it wrong, it can prove dissasterous, & cause a lot of frustration, after the engine is assembled & ready to test for the first time. By that time the engine is probably already back in the engine bay, & all hooked up. The alignment is critical, & is covered in the "Yellow Bible" & the Haynes/Gregorys manuals. Essentially the timing is carried out with the engine at TDC on no: 1 & 4 cylinder. The crankshaft sprocket should be fitted first to the crankshaft, with its key fitted. The crankshaft should then be turned slightly, if required, until the "dot" marking on the outer of the crankshaft sprocket is on the lower side of the engine, and is in line with an imaginary line passing through the centre point of both crankshaft & camshaft. (see diagram in pictures below) The camshaft is then rotated, without its sprocket until the locating pin for the sprocket, lines up with inner mark on camshaft retaining plate, which again, are all in line with the imaginary line, passing through the centre points of both camshaft & crankshaft. This is now the critical point. The camshaft & crankshaft cannot be allowed to move, whilst fitting the chain. With both sprockets on a flat surface, off the engine, fit the chain to both sprockets, such that when you pick up both sprockets & chain, that they slide onto the keyway (crankshaft) & locating pin (camshaft) without rotationally moving either sprocket. When fitted, a straight edge, (like a steel ruler) should line up with both outer sprocket marks & the centre points of both crankshaft & camshaft. Actually much simpler than it sounds, when you describe it, but it is important, because if the chain is out one or two links, then the engines valve & distributor timing will be out dramatically. Have a look at the relevant scans from the manuals below, & it should all gell, as "a picture paints a thousand words". P.S. The manuals refer to markings on the chain, which I've never been able to find, because the chains are old & discoloured. Whilst laying the sprockets on a flat surface, with a straight though the centre point of both sprockets, & sprocket markings, I've just put a dab on "white Out" on the relevant link at each end to assist. Good luck, & let us know how you go. Cheers Banjo

 3 points
 -
Hi over here, long time no see, I'm back with another car. I already was here but no pictures are left on the old threads Many moons ago I had this KE71 That after a lot of hardwork came out looking like this And after a while without a RWD Corolla (I had an AE101 Corolla) I came across this, and I'm the proud owner of an 1973 Toyota Corolla, also known as mighty TE27. As a bit of history, the Toyota dealer for Uruguay is AYAX and it didn't import any Toyota until the 1980's so anything before that is very strange, so when I came across a sale post that reads "Toyota Corolla 1973" I had to have it, so I went to see the car, this are the first pictures I took... the previous owner fidieling with the engine interior shot After working for a while under the rain we made the engine idle and sort of run as it should, quite a feat considering that the car haven't been started for almost 5 years, after it heat up a little and it was not dying, we took it for a "test drive" given it very sorry state the car run great, much better than what one would thing after those pictures, and with that the deal was made After almost a month of back and forth with the notary, all the paperwork came clear (very important and tedious step in my country) the car was legally mine, and so the journey begins. As you can see the car is very very very (did I mentioned very) rusted, but is the only one that I know of in my country so I will try to do my best to restore it to it's former glory. I have many pictures to update this thread so I will try to do my best.2 points
-
So, it begins...2 points
-
So i may have bought yet another Corolla for the collection.. This makes 3 Ke1x chassis i own now, With a possible 4th and 5th in my sights also So basically, What we have here is a mostly original Ke17 Sprinter. Car hasn't been on the road since 1994 and it's sat outside ever since.. It's currently a rolling shell but it does come a 4k and a k50 Basic run down is it's quite straight, mostly rust free and very complete. Everything interior wise will need replacing besides the passengers door card and seat.. It's had a hit in the rear so the boot won't close, but certainly fixable! The main good bit of the deal is it came with 6x Ke1x chassis's spares.. So now i have about a dozen guards multiple bootlids bumpers etc all stashed away as a "just incase scenario" for any of my cars... This will not be getting worked on at all until the wagon is painted and on the road, It's in storage now at my friends house until such time2 points
-
Cowrolla
 2 points
 -
Ooh I didn't know you were a mountain biker Stu! Byron and I are off to Derby tomorrow. We normally spend most weekends these days doing dirty jumps somewhere. You've probably never seen his YouTube channel....I don't exactly plug out here.2 points
-
Few more progress photos.


 2 points
 -
...and not only that but those Goss pumps are noisy! Hang it off a lump of rubber if you buy one.2 points
-
You can't see it's...ugh... not so healthy side, so we'll stick to the propaganda view for a while. Steve, you are a legend for the photo & making it look like that! :)
 2 points
 -
So long overdue update. Guess I'll be doing what will become inevitable in a lot of backyard garages in the coming months (Hey let's look at the positives) and getting some work done in this!! Where to start... So shortly after run in and the initial tuning I started having some clutch issues. Wouldn't disengage fully making it hard to get into gear (especially grinding reverse) and would also want to nudge forward at the lights etc. Spent months chasing my tail with it getting new master cylinder, throw out bearings, having the fly wheel refaced etc etc etc. Finally worked out it was loose rivets in the brand new exedy pressure plate. Essentially the clamping part of the pp want disengaging parallel to the flywheel causing an edge to drag. After a pretty drawn out warranty process with exedy they finally decided to replace the kit. I can appreciate from there side though that this was: a TE72 clutch kit, mounted to a modified k series flywheel, inside a rare as rocking horse shit bell housing, using TA22 hydraulics behind a motor making about 4 times what it really should! 😂 There's still a little frustration around the situation as I spent a lot of time and moon by trying to find and fix the problem. Also that faulty pressure plate was the one that was balanced and indexed to my rotating assembly balancing for the rebuild. Anyway... I'll install that soon with another t50 I got recently as the current one likes to jump out of 4th sometimes. Head gaskets 🙄 I'm not entirely sure what's going on at the moment. When I rebuilt the motor I used a permaseal head gasket. About 500km or so in that 'blew' and I got the last 2 genuine 5k gaskets left in the country. Stuck one of those in (with the ARP's as well) and it went again not long later. When I say BHG... the only real symptom is when you start it first thing in the morning it'll run on 3... or maybe even 2 because of wet plugs where water has entered the cylinders overnight. Not heaps but enough. This is actually a slight problem a had a few years ago before I rebuilt three engine! I'm weirdly kind of 'hoping' this is a crack in the head, not really blowing gaskets! If it's not that, then it's a possible crack in the block... and that's harder to fix. Pretty sure that may have been found when the machine shop had the block for boring as well. Anyway watch this space. Things happening soon to 'help contain fluids' 😏 Oh and the contents of that cardboard box is a whole other side project!2 points
-
Exciting news news in the Parrot household as I finally have a shed that does justice to the collection! A three car garage! I will now have all three cars in a position where they can actually be worked on, instead of crammed down the side of the current garage where they are essentially inaccessible. Meanwhile the AE86 won’t be permanently covered in sawdust from son’s bat repairs. In a few months after settlement you can expect a photo with the doors up and cars inside! Wife says, you will have to throw some of your old parts out. Err no says I. I’ll be putting in racking for those. Oh, there is a house attached but that’s the boring bit.
 2 points
 -
I had the same issue with my daughters KE55 auto. It was a blocked idle jet. Best thing to do is rebuild the carby. I think I paid $45 for the gasket kit. It took me about 2 hours to remove strip clean and rebuild it. Heaps cheaper than a Weber and a whole lot less hassle.2 points
-
wow how about that. nearly a year since my last post. well I m still alive and married and still have the project cars. soon to have a "proper" sized shed to put everything in so I can actually do something with these things too...…..2 points
-
That is fantastic.2 points
-
Nearly there, battery is a bit down on charge so no start today. Finished that steering wheel too, looks mint. Repco stock this zinc stuff, so put some in the oil to help the cams bed in Beer That is all, maybe start tomorrow.2 points
-
The missus finally out of Hospital and into rehab. One step closer......2 points
-
Big relief to see the missus without a tube in her head today2 points
-
Very sorry to hear of your wife's brain bleed. Really trust you get a "Good Christmas News" that She is showing great improvement. Being Christmas, which is really for kids, & lots of fun, I can imagine, how you & your kids feel. As Dave says . . . It sucks ! I really, hope that in a couple of months, She is making a full recovery, & that you can look back at this period, as a very bad dream, in the past. I'm sure the thoughts of all of us here on Rollaclub, are with you & yours, at this time. Please yell out, if we can be of any practical assistance. "We are family",. . . . . although many of us, have never physically met. Cheers Banjo2 points
-
Well I don't like to brag but this time I can't help myself. The Garagmahal is finally complete. Just a bit of a shack to store the Princess' rolla and all the family cars with a bit of room for a long overdue work space. No more laying in a gravel driveway swapping a gearbox for me. I am currently in the process of linning it with a bathroom and kitchen as well as living and sleeping quarters. You see fellas this time I got smart, I bought the land, I got the shed before the house so if I run out cash ooops sorry no fancy kitchen instead of too bad not enough coin for a decent shed. We will be living in it until the house is built then its mine to do with as I please. I was even thinking of getting my own project rolla as well as looking after the Princess' KE55 but we will see. #Rollahouse

 2 points
 -
NAME: Scotty Dee CAR: 1973 KE20 Toyota corolla MOTOR AND DRIVELINE: 4K 4 speed with shortened LSD SUSPENSION AND BRAKES: Adjustable camber plates and coil over struts coil over with shortened shocks rear WHEELS AND TYRES: GENUINE B45 SIMMONS [B]Interior[/B]: [B]Body[/B]: [B]Other[/B]: I figured pictures speak 1000 words


 2 points
 -
Got this nice little 1 owner a few weeks ago with full log books, receipts and even a Polaroid of it when it was new, its my first Corolla and so far I love it Main reason I liked it so much was that it was kept stock its whole life so there isn't many parts I need to find and I thought it was quite rare to find one in this condition. The drivers side door had a good whack a few years ago the previous owner mentioned, I had to source a new glass window (got the whole door+mirror which was awesome). Wasn't as hard to find as I had firstly thought, other than that the passenger front guard has a small but decent dent in the front near the headlight and the chrome strip is all busted up :(. Not much rust at all considering its age I thought, rear passenger guard is the worst in the whole car. I believe the car had a touch up long ago as there's signs of repair in back of the roof/down between the windows, looks good from far away so that will do for now lol... Dumped the oil straight away and put some nice full zinc Penrite in and gave the engine bay and motor a good scrub. Thermostat was totally seized so that was replaced. New oil and fuel filter. Water pump has seen better days but I have it a good clean and slapped it back on for now. Sanded back the air cleaner housing as it was in a terrible state but gave up after it was good enough as I didn't have the right tools to do it properly. Gave it a paint in white but it looked weird so I went black, need to find the original color code or something... taped up the best looking original paint and the sticker on the housing so I could get it matched if all else fails (not a high priority at all). Rocker cover was sanded back with 1500 and it come up pretty good I thought. Flushed out all the crappy rusty water from the block and heater hoses - was filthy... Gave the radiator a flush with the hose and painted it and the fan cover. Noticed the distributor vacuum advance wasn't working, I think the diaphragm is seized up.. don't have a timing light handy so when I take it to the mechanics soon ill get him to take a look at the distributor and hopefully its an easy fix (doubt it). Does this need to be working for the secondaries to open up on the carb or is it just for the timing when decelerating ? In this photo the carb doesn't look like one of the throats have been working ? Read up a bit about them but still a little confused. I'm thinking ill just send it away and get it rebuilt when I have some cash to blow. Other than that there isn't too much mechanically wrong with it, going to change the wheel bearings cause that's cheap and probably start looking at the bushes and replacing them slowly over time. Ill take some nice pics when its up on the hoist. Really wanted to get the cassette player working so I pulled it apart and gave it a good clean (had to learn how to do this lol). Replaced the belt and found the motor to be seized, come good with some crc lectra-clean and a few spins. Took a while to get it sorted so when it finally worked I was so happy ... made some tapes on a $40 Yamaha tape deck I got off gumtree yesterday just for recording and they sound pretty good (not really) from the original speakers, when I'm cashed up ill get some 5x7 which Ive read should fit in the standard holes - ill check before I buy any as I def don't want to cut any holes anywhere. Video of the player working with a tape I made up :)) https://streamable.com/wvqww Main drama I still have is when I floor the pedal - even when rolling, it just bogs down until maybe 3000rpm ?? then it seems to liven up. Was pretty sluggish when I first drove it but after the little service I gave it and filled it up with 98 + upper head lube additive it seems to have come back to life somewhat. I'm thinking perhaps the timing is simply off, or worst case the carb needs a good service or tune at least. Still haven't got my hands on a service manual as some of them don't have the KE35 coupe and some do - I think... just going to get a newer one when I can which will def have the CS Coupe. So that's it for now, done about 300km over the past week with her all over Brisbane, up the lookout, over the gateway bridge and its very nice to drive! Next on the agenda are wheel bearings, gearbox oil gasket, sort out the carb. Long term goal is to slowly refurbish the rest of the car, the front guard needs to be beat out or replaced and the drivers side door needs to be swapped over with the one I got with the window. Hoping the a KE55 coupe door line up with the body lines on the KE35... I know the base of the mirrors are bigger on the 55 as I have one for my drivers door, the bottom hangs off the body a bit so I'm wondering if the door is slightly wider or something. Hate autos also, would be nice to swap it over to 4 or 5 speed as id like to drive long distance and the old trimatic is kinda limited to 90 unless I want to rev the hell out of it for an hour straight but I don't want to cut any holes to fit it. Ive read the early K gearboxes should bolt right in, but Ive also heard the autos may not have the mounting holes for the manual - its a low priority so not too worried about it for now - its just a cruiser anyway Anyway hope you enjoy the pics, hopefully down the road it will have a total respray in the original color and at this stage ill fix the rust, door and all the big jobs like that as it wont be very cheap to do it properly.


 2 points
 -
Looking great fellas, well done, it looked like a nice day to showcase your hard work. We don't have enough of these types of events in Perth.2 points
-
Few good updates.....My rear panel arrived and it looks like it's been a newish panel stitched on to a rustier car. It's been hacked off the back of the donor so thankfully all those rusty bits like the remainder of the boot floor etc can just be removed as I only need the actual face of the panel. It's got a bit of pitting along the bottom valance and a few small holes, but it's miles better than the bent swiss cheese on my car at the mo. And I had my suspension mounts, struts and a few other bits professionally welded and certified etc Bearings removed from axles and minor repair to axle - wire wheeled up the hub faces and will need to replace a stud. Ball joints removed from LCA's, bolts swapped into straight (non bent) strut bar. Rusty section cut out of backing plate........which I then proceeded to put a hole in when cleaning up the welds ha ha will get it filled up easily enough. And the main event........leaf spring perches onto the AE86 diff housing And after a quick mock up and to check alignment......it is the goods! (will need to get bigger U-bolts for the larger diff housing) MMMM......professional quality welding Gave a few bits a coat of primer the other day, then some top coats yesterday while the weather was......warmer atleast. It got pretty cold once I had finished, hopefully that doesn't effect the6-8 hour cure time?? Had them all hanging together with the fan heater going to warm up the area....complete with hi-tech corrugated cardboard insulation barriers! Powercleaned the diff housing, doused the inside with CRC and gave it a rub down with rust converter, and another coat on the leaf springs. Also had the shitty paint blasted off the callipers and got some crappy tyres fitted to the wheels to get it rolling atleast. Ordered some bigger U-bolts and the lowering blocks/brackets are being modified to fit them. Also got a massive stash of new seals, bearings, bushes etc..... Now I just need another good day to finish off the top coats and the fun part of assembling all of this to get it rolling begins!2 points
-
I joined the states forums 8 or 9 years ago and at that time there was still active interest.....they were useful forums, Now.......extinct. apparently everyone has morphed into faceplant and twitter, I have written before, it is a shame. Our entire society has latched on to the internet technology as the only acceptable way from now on......we are going down a bad path. anyway, it is nice to see that this site still has some interest and valid posts.....CHeers to you all. I have finished my original SR5 te27 project and actually found someone to buy my SR5 clone project and now my next build is a 2 door 74 RT104 corona. Just wanted to say...HEY.
.thumb.jpg.01cb28e96575c4671f123137f983ff0b.jpg) 2 points
2 points -
It's great driving weather! I tested out some new driving moccasins and a merino skivvy on a hot fudge sundae run.


 2 points
 -
This thread is exactly on point with what corollas are all about to me, a blank canvas to realise your vision. Well done,. you made an awesome little mini 4 runner!2 points
-
Don't over think it. whatever the manual says grade wise, and whatever brand name oil is on special at the time. and change it every 6000ish km. For years i bought penrite oil. for no other reason than Dad always bought Penrite oil. And he bought Penrite cause his dad bought penrite oil. Then one day i bought shell or something cheap (but something brand name ish, around the $30 mark, not $60 penrite). And my engine didn't explode. So i kept buying the cheap oil. Years later, no engine explosions and plenty of spare cash.2 points
-
I did most of the metal work and did, I do not have a paint booth and i'm not very good with painting so i decided to take it to a shop to get painted. So far its not looking too bad.
 2 points
 -
Finally more of the car started to take shape again. Lots of hammering and heating and forming and welding! But it finally started to look like a car again rather than swisschess.


 2 points
 -
I have had to butcher up the dash in order to fit back in around the cage, the Carlos bars have made it really hard to get it back in. It has to wedge between that and the A pillar bar for to fit in, gonna be a nightmare to fit it in without scratching the cage up once it's painted, oh well it's a race car anyway!!
 2 points
 -
2 points
-
Another day spent on the car with a bit of news probably worth mentioning to the thread. Have sorted more and more imperfections that we have discovered, as well as fixing some of the larger problems too. We decided to chuck on some high-build primer in a few of the more....wobbly areas. Then sand some off a bit, etc etc. All bare metals is covered currently so that's a bonus too. We are ever-more edging closer to the big day... Christmas? No no, the REALLY big day -painting the extieror of course! The primer has revealed a few more tasks that need to be sorted but it's all slowly coming together. -despite often looking the same as the last post. Regardless, It's progress. And it's welcome at that. This is the summer it's going to receive the luscious red! Then she'll be put back together and we'll go for reg at some stage in 2018. Supposedly my phone's having trouble with photos- I'll see what I can do..

 2 points
 -
Season's greetings Rollaclub! Thanks to the admins and financial contributors who keep our projects, anecdotes, images and knowledge base online. Cafe racer burger run.


 2 points
 -
She hasn't spent a day of her life in the barn. So sad.2 points
-
#8778's have been a nil stock part number at peders for 10+ years. Oh and until feb they only have one #8716 (ke20) in the aus warehouse too. The rear shocks work well. Been playing on my front-end lately. Best off keeping an eye on the other thread I'll be posting what ive done there. Are you planning on keeping the transverse leaf?2 points
-
Hi James welcome to the forum. There is a great deal of experience and enthusiasm on here, and the forum is still pretty active despite the drift to faceplant. Other than some pretty dubious info given out on the FB sites, the other great advantage of the forum is that you can easily search for info, the vast majority of which has been asked before. Can't do that on FB. Also have a good look at the rides forum for some inspiration. It's actually quite easy to load photos by the way. The inner wheel arch plate has long been unavailable, and second hand ones are rarely usable. But not to hard to fabricate a replacement. Rust is common in the rear pockets, bottom of front guard (due t those plates) and the front and rear sills. Also under the rear quarter windows. Really after nearly 50 years, they can rust anywhere. Well worth taking out the seats and carpets and having a good look. VIN numbers didn't exist when these were built, so you rely on the body number. Virtually all after market parts are pretty poor quality, and the dash pads are no exception. OEM can still be got with a bit of hunting, but expect to be paying around $300. It's not hard to retrofit a booster with twin circuit master cylinder. It's been discussed often on the forum. A booster doesn't improve braking performance, just how hard you need to push the pedal. Won't actually stop any better. Spoilers I can't help with, but they were never available when new. Anything available is a generally a Bodge job and needs to be screwed to the body. Not really a great idea. Webers are a topic of their own and a lot depends on the condition of the carb/s themselves. Then it's about balancing and tuning, and don't forget the general condition and tune of the engine.2 points
-
Sorry, let me clarify that. Toyota ECU’s don’t fail. Mindful that you’re the guy who modifies carbie jets with an angle grinder as I recall.... Stupid app won’t let me put an emoji in, but I’m a bit old for all that anyway.2 points
-
Long time no post.......2 business's and 2 small kids and buying the house will do that to your time and $$.....but....... KABLAM!!!!!! I've spent a bit of time working on my other Toyota project....to fund my other Toyota project..... I am waiting for space to clear up at the Panel shop to get the body work underway. In the mean time I've managed to track down a few panel cuts and some NOS to boot! There's been a few false leads of random shells around from as far as Horopito to the Phillipines.......Horopito turned out to be a ke35 and the Phillipines never eventuated. I am still excitedly waiting to hear on another potential shell. I was picking up some camera's for a video job and the guy had a 1200 coupe in the garage......as I usually do now, I asked him if he had a spare ke25 shell and turns out he does.......it is yet to materialise but I will keep chasing this up! Just need a drivers side now! Also have a complete rear panel (Taillight surrounds/lower valance etc) currently in the next ML Racing container form Japan. NOS indicator lenses - Much shiny goodness!2 points
-
I am really happy with the setup, nothing hektic about the drive at all. Tyre is a 225/50/15 drag radial bfg. A 24" tire. I'm really suprised how well they are hooking so will make it my goal to run a 9 on this tyre before i inevitably go to a 26" tyre. Previously i was using a 205/50/15 drag radial mt 23.5" tyre was quite amazed how well they hooked as well for such a small tyre.2 points
-
In 16 years time... "The Girl's AE86"2 points
-
Here's a test bed I knocked up in a day recently, to mount my 5K engine on, to do some COPs mods/experiments. I was going to sit it on the engine test bed / frame I made years ago, but it's got a 4K EFI engine conversion on it at present, & I didn't want to really undo all the plumbing etc. I recently purchased an olde ride-on lawnmower, which I only wanted for the good Briggs & Stratton engine therein. I was intending to dump the mower frame, but thought, maybe I could attach the 5K to it. It would also allow me, to wheel the whole thing around, as I only have 2 car bays in my shed, & our 2 cars should be parked there each night. Anyway, it fitted perfectly, and is so easy to work on, as everything is accessible & it is all at working height. Thought I'd throw it up, as someone else on here might want to build a simple test frame. Here is a few more shots of it, if anyone's interested. https://1drv.ms/f/s!AhTw-QJW1b_6iCOx7jZvpWJvbGuU My wife came home from shopping & thought I had gone stark raving mad. She really thought I was fitting a Rolla motor to a lawnmower, as her first question was . . . "Where are you going to sit ?" Cheers Banjo
 2 points
 -
https://www.rollaclub.com/wiki/index.php?title=Tech:Engine/K_Series/Valve_Clearances2 points
-
So I made up a parts bath using a big old plastic container and mixing 50/50 degreaser-water and letting parts go swim for a day or so then water blast them and tooth brush clean them. Today I did the bellhousing, the gearbox outer casings, tail shaft housing and rocker covers are soaking at the moment. After a clean, has come up pretty good! I then set onto installing the new clutch fork assembly. Using all new OEM parts gives the peace of mind that everything will be all nice and dandy. Strange, can't get the fork clips new from Japan but found them on https://partsouq.com/ so that was good. The ones I had spare were all rusty. Clean backside/booty. always nice. I dummy fitted the new bolts to make sure I had them all. Found that I was missing the starter motor bolts so those will be added next to the OEM order which is already 20 items long. Today was a good day! I got my head back from Barry at MRP. Here are some photos he sent me of the head. No need to take my own. The head had to have some extra work done on it so that the 10mm+ lift cams were able to rotate without hitting anything. With receiving my head I also received the last few gaskets and bolts that I was after. Especially for the intake side of things so I could get these beauties bollted together. I installed the front input shaft seal, the output shaft seal, and also the spacer ring between the box and the input shaft that I forgot to install first time round. Nice new slave cylinder I am using OEM head studs so I have used the Toyota torque specs, so need to do the +90 +90. I just did it by eye with my last engine, decided to do it properly this time round. [ Fastforward an hour of fiddling around I got everything bolted together. I am still waiting on some new shims to arrive from Australia so I will have to wait a little bit before I can install the cams etc. [ With that, not long to go before i drop it down the guts into the KE25 and can finally start on another task. I am thinking diff shortening next. Hopefully less expensive than this engine! Today I received my new shims, installed them and also the cams. Pretty self explanatory. I a have still got to dial in the cams which I will do sometime next weekend whilst I wait for my Dial gauge to arrive. Nearly complete, I have also ordered a brand new alternator and a starter motor also for a good price. still have to order a knock sensor and get the water pump -> back of head lines fabricated with a braided line. Have to do this due to the original piping interferes with the knock sensor, and I am also not running a water based heater so I will not be using those that are included on the original hard lines either. I have also ordered the SQEngineering COP valley cover plate to suit the 2nz coils that I will be using which I should receive sometime this week. Ahh. So i made a bit of a large cock up. The cams were far too big for the original pistons, the valve reliefs were to small and when I was dialing in the cams the lobe was hitting the piston by a long shot. Instead of crying about it, I ordered some 82mm (2mm oversized) 12.5:1 compression pistons from Barry at MRP. Took my spare 7-rib block in to the machinists and got that block bored, cleaned and decked also. All is not lost with the other block, I will be using that in my AE86. I put some new frost plugs in the new block and gave it a blase of semi-gloss paint Whipped the head off of the old block Removed everything as it was instead of dismantling it (take pulley -> timing sprocket -> oil pump off, all to put it back on again) Went over to the NEW block, gapped the rings and dumped the goods in. Much better I set about to degree the cams, this time. No fowling on anything! Reconned alternator which is an 80A one It's nice to work on an engine and still have clean hands at the end of it. new bits e'ry where. So that's that for now, I will be installing the clutch and then putting it into the car next. Excited So, lesson. Do more research before completing an engine rebuild so you don't have to take all apart again.2 points
-
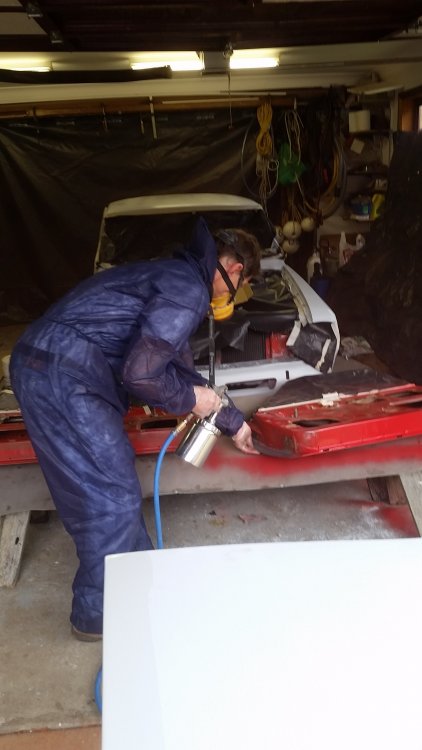
Hello all, about due for an update i reckon!! We got the car back from Havnadip with the rust repaired and body ready to go! Had the boys there really help us out and to them we owe thanks! With the car being beautiful and straight, we were ready for paint! So over the weeks trailing the car's return, we slowly readied her for the first glimpse of that beautiful Helios red. Lots and lots of prepwork. Masking, sanding, etc etc.. lots of time and effort. Both of which are a bit hard to find considering I'm now in Grade 11 as a student!! (Money, too!) One way or another, with the helpof spectrum paints, the boys from Havnadip, our mates from KTM hobart and a handful of others, she now has a glimpse of what is to be! The insides of the doors, boot and bonnet are now red! Next on the plate is putting them back on, then preparing the whole body for the final spray!!! Very exciting progress! and massive props to my dad, who has done a fantastic job spraying the sprinter. Especially considering how long it has been since he last did it!


 2 points
 -
Hi guys names damo from the gold coast, have just purchased my first ke 30 corolla, have always been a fan looking forward to cruising soon when i finish a few bits and pieces and get some rego... Few pics of the car ive just purchased from ACT just needs some finishing touches :) Some rear venetians with factory wheels, hide that intercooler back behind a new grill and front bar should be a nice little sleeper...


 2 points


.jpg.b241c4994b6839f0fc66ad493604e987.jpg)


