

Hiro Protagonist
 Global Moderator
-
Posts
2184 -
Joined
-
Last visited
-
Days Won
19
Content Type
Profiles
Forums
Events
Gallery
Blogs
Posts posted by Hiro Protagonist
-
-
So, some kind of progress happened...

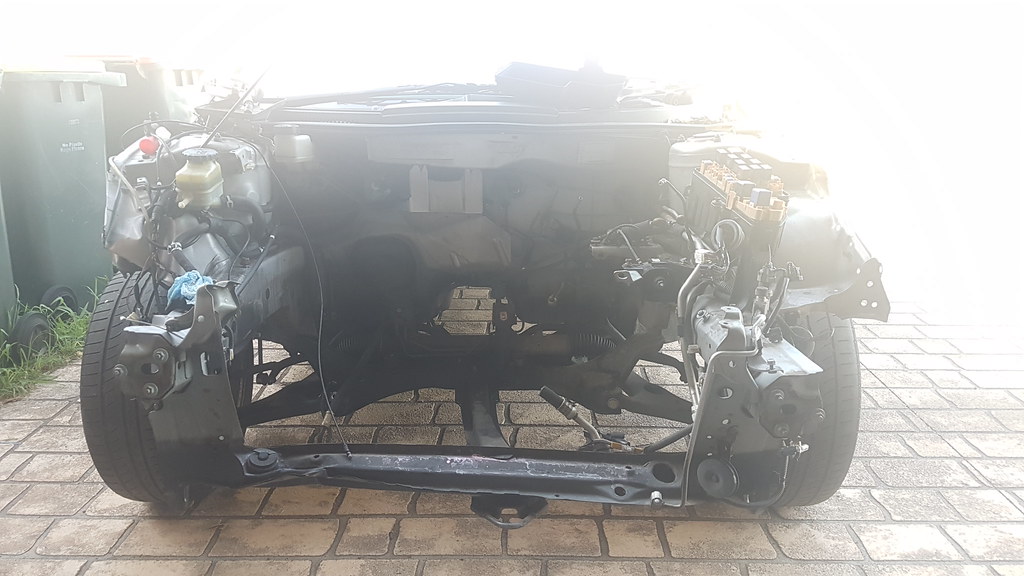
There's now a big empty hole in my life....I mean my engine bay
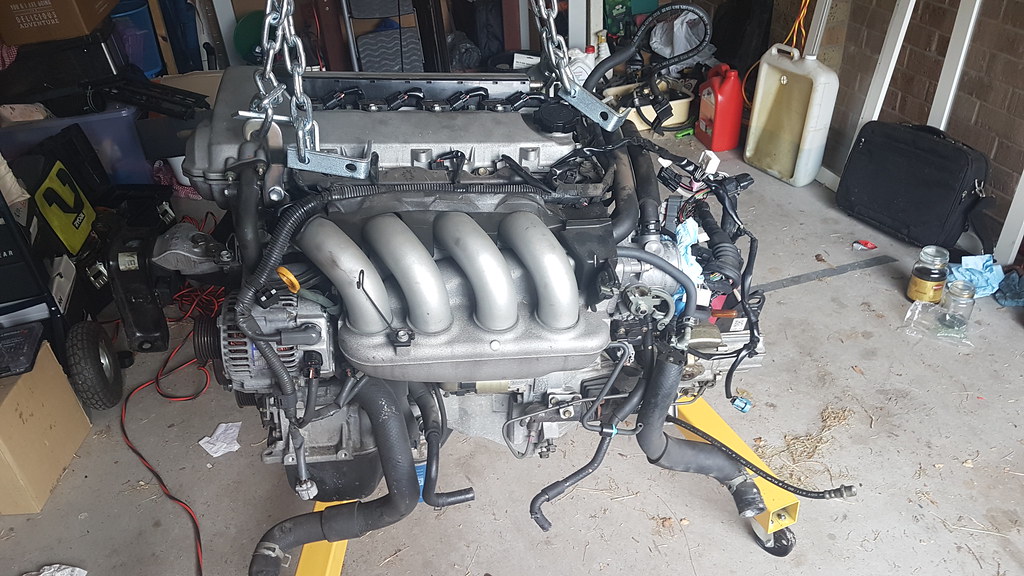
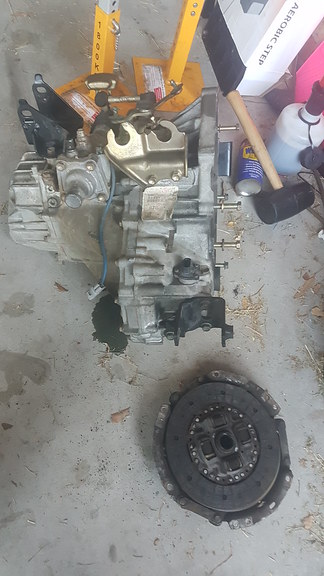
One 7AFE + C52 extracted as orderedAnd now the install begins...
Step 1: Check Euro-spec ZZE112 timing-end mount fits.

It does (no mods required)Step 2: Check C52 gearbox mounts fit Celica C60
They do (slight mod required to stiffener on top gearbox mount but could be left off)Step 3: Check fitment of C60 in to Corolla engine bay

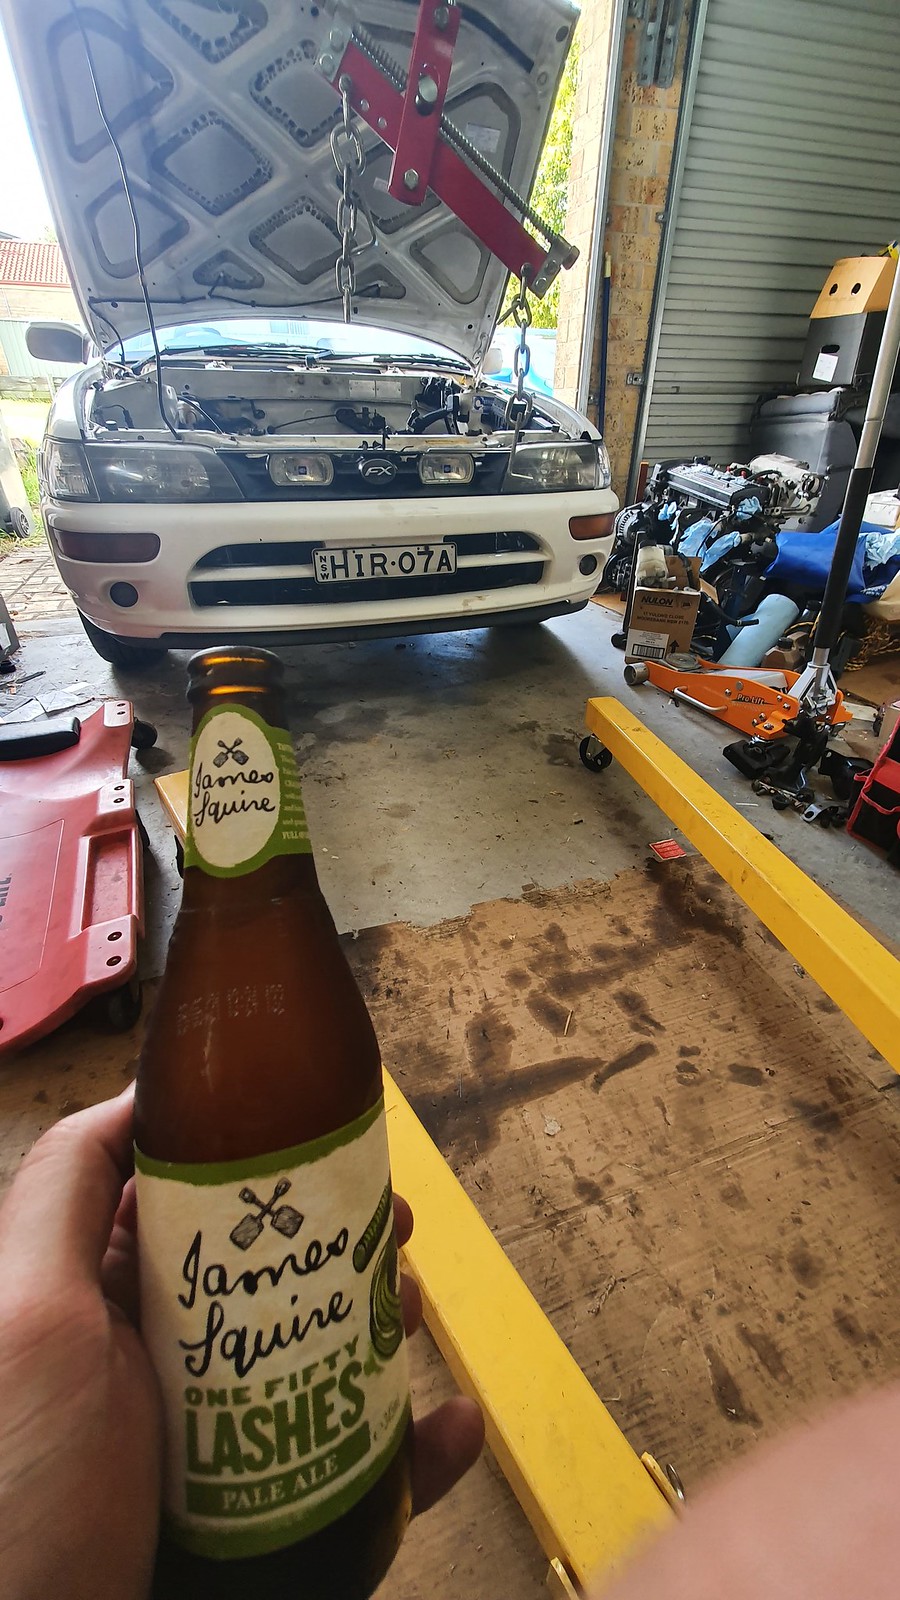
It fits (just), clears subframe (although will need sump/block attached to 100% confirm), however battery tray will require some surgery to allow the front-mounted Celica shifter to work (battery will be getting relocated anyway)Step 4: #getonthebeers
Check -
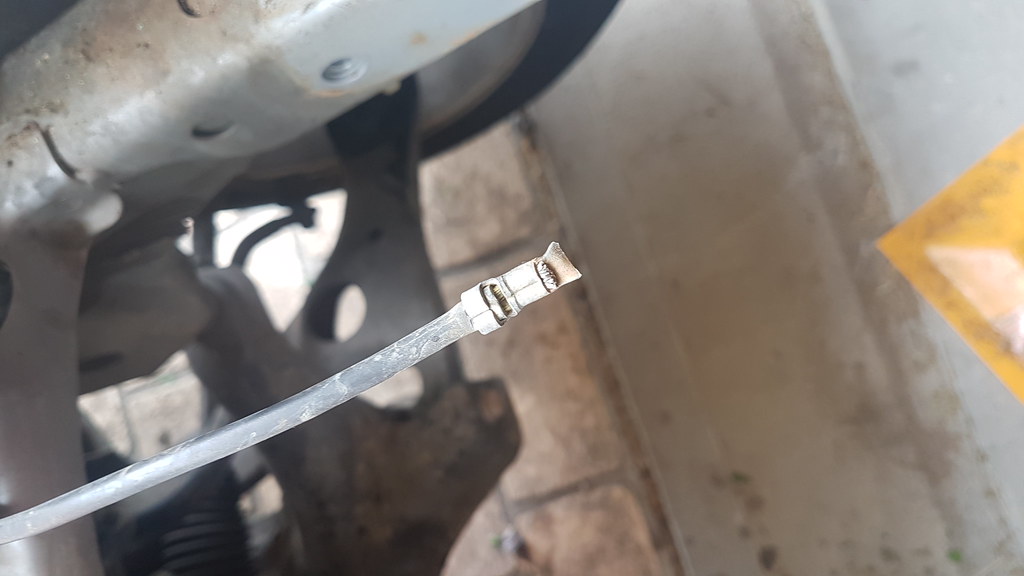
I don't think the shifter end of the cable is really "serviceable", you can get solid brass bushings for the gearbox end from Speedsource etc (or do the classic skateboard bearing hack) but if the shifter ends are really flogged out it might be a case of a new shifter cable (or shift arm if it's the ball on the shifter that is worn rather than the cup on the cable). Normally the shifter end it is the cradle bushes that you replace to try and firm things up.
Is it an all-round "looseness" or limited to front/back or side-to-side (which might indicate a particular linkage bush)?
-
Which bushings? The ones on the linkages on the gearbox, or the ones on the end of the cables under the shifter?
-
On 9/24/2020 at 5:12 PM, Is-2az said:
That gearbox also goes by the name AZ6.
Any idea if the AZ number, relates to bolt pattern ?
No, AZ6 is just the Aisin-Seiki name for the box (it is used in a bunch of other Japanese cars such as the MX5, 200SX, RX8 and even the 86/BRZ, but with different bellhousing patterns for all), has nothing to do with the Toyota AZ engines
-
22 hours ago, turbo ke20 said:
what combination of driveshafts/CV joints did you end up using?
None, because the 2ZZ is still attached to the engine-stand in the garage...
-
There's a Hoonigan half-hour video on the same car, goes _very_ indepth
-
So, time for another little catch-up.

Finally got around to getting rid of the donor Celica shell, managed to sneak it in under 2 years by a single day, which is a pretty decent indication of how slowly I move with most projects
Next was getting the SuperStrut brakes fitted

Calipers and carriers vapour-blasted ready for overhaul (second set for a mate's Sportivo)
Primed
Top-coated (I went matte-black, Andrew went silver)
New pistons, seals, dust boots and clip-rings
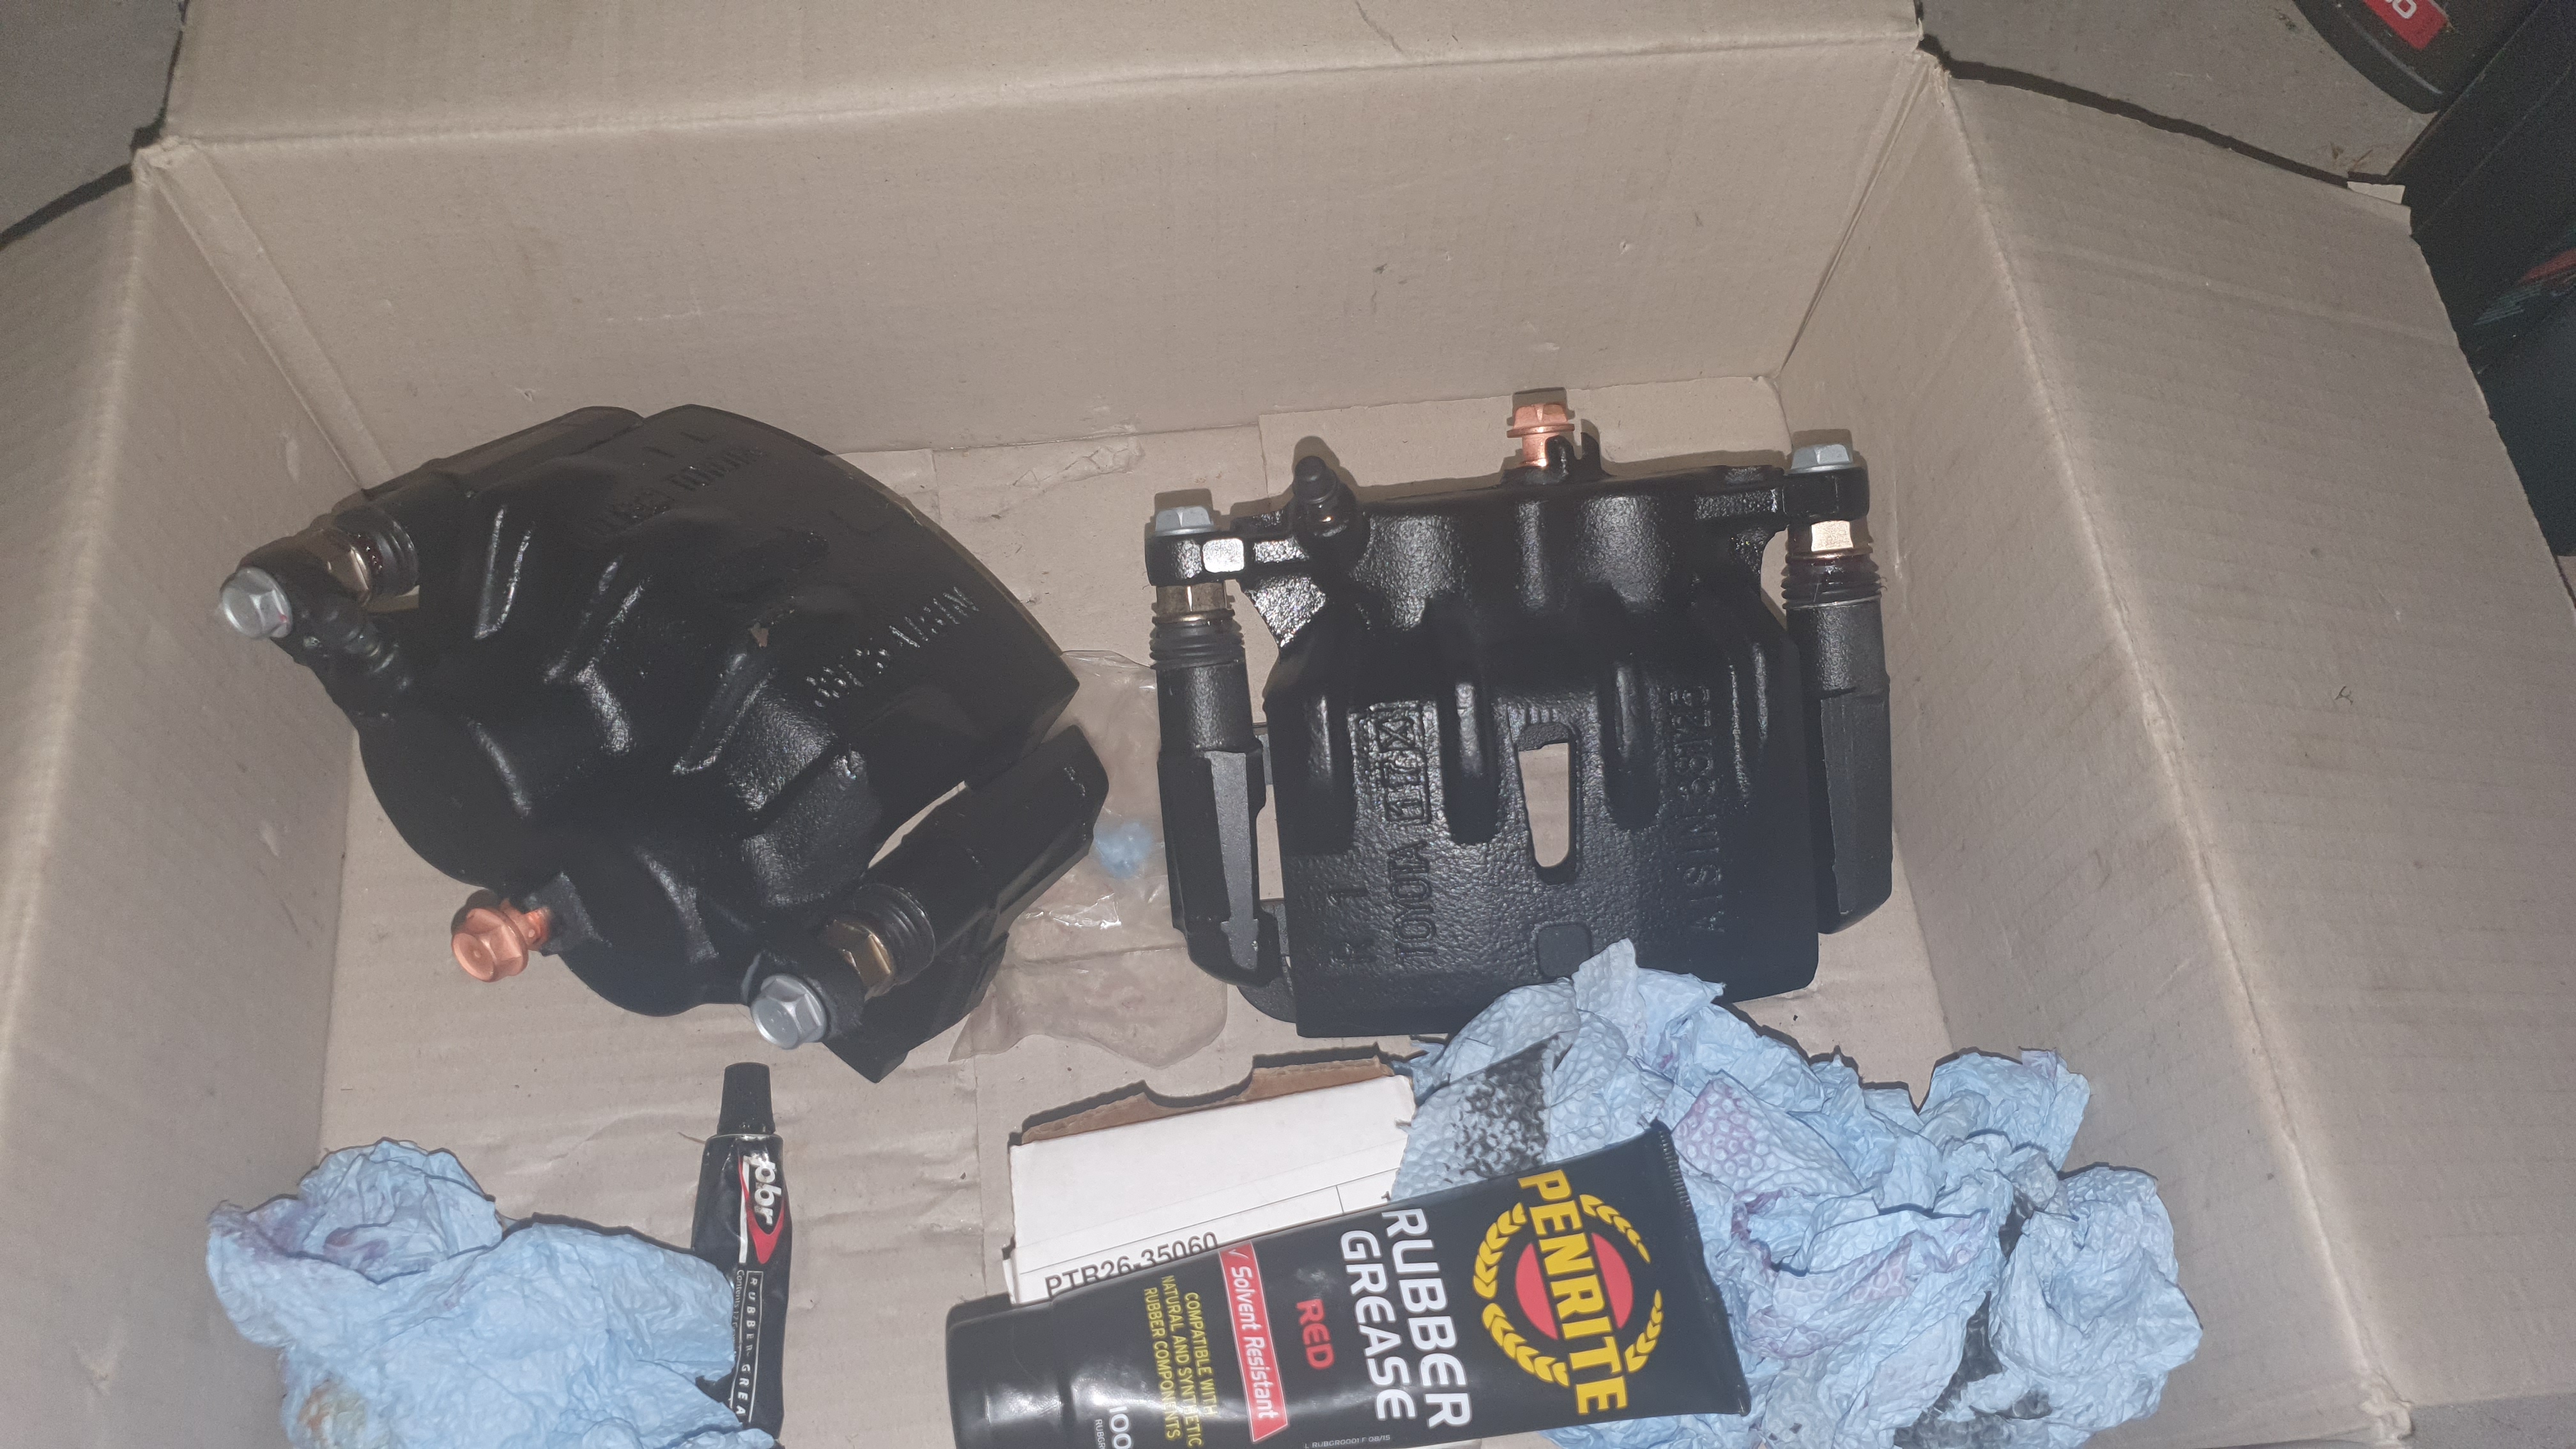
And new slide pins, boots, bolts and banjos
Interestingly when I got my wheel bearings replaced back in 2017 the new hubs came without the 55mm step in them.....so the AE111 rotors I sourced would no longer fit properly (also meant that the new rotors I got when trying to diagnose the wheel bearings have been flopping around with a mil diameter clearance for 2 and a half years, well that explains the brake shudder...). Good thing I still had the 54.1mm AE101 rotors as a backup

Rotor now centred well in the pad carrier, if I wanted to use the more commonly available DBA759 Sportivo rotor I'd probably have to get another 2mm machined off the carrier and that would be a little too much for my liking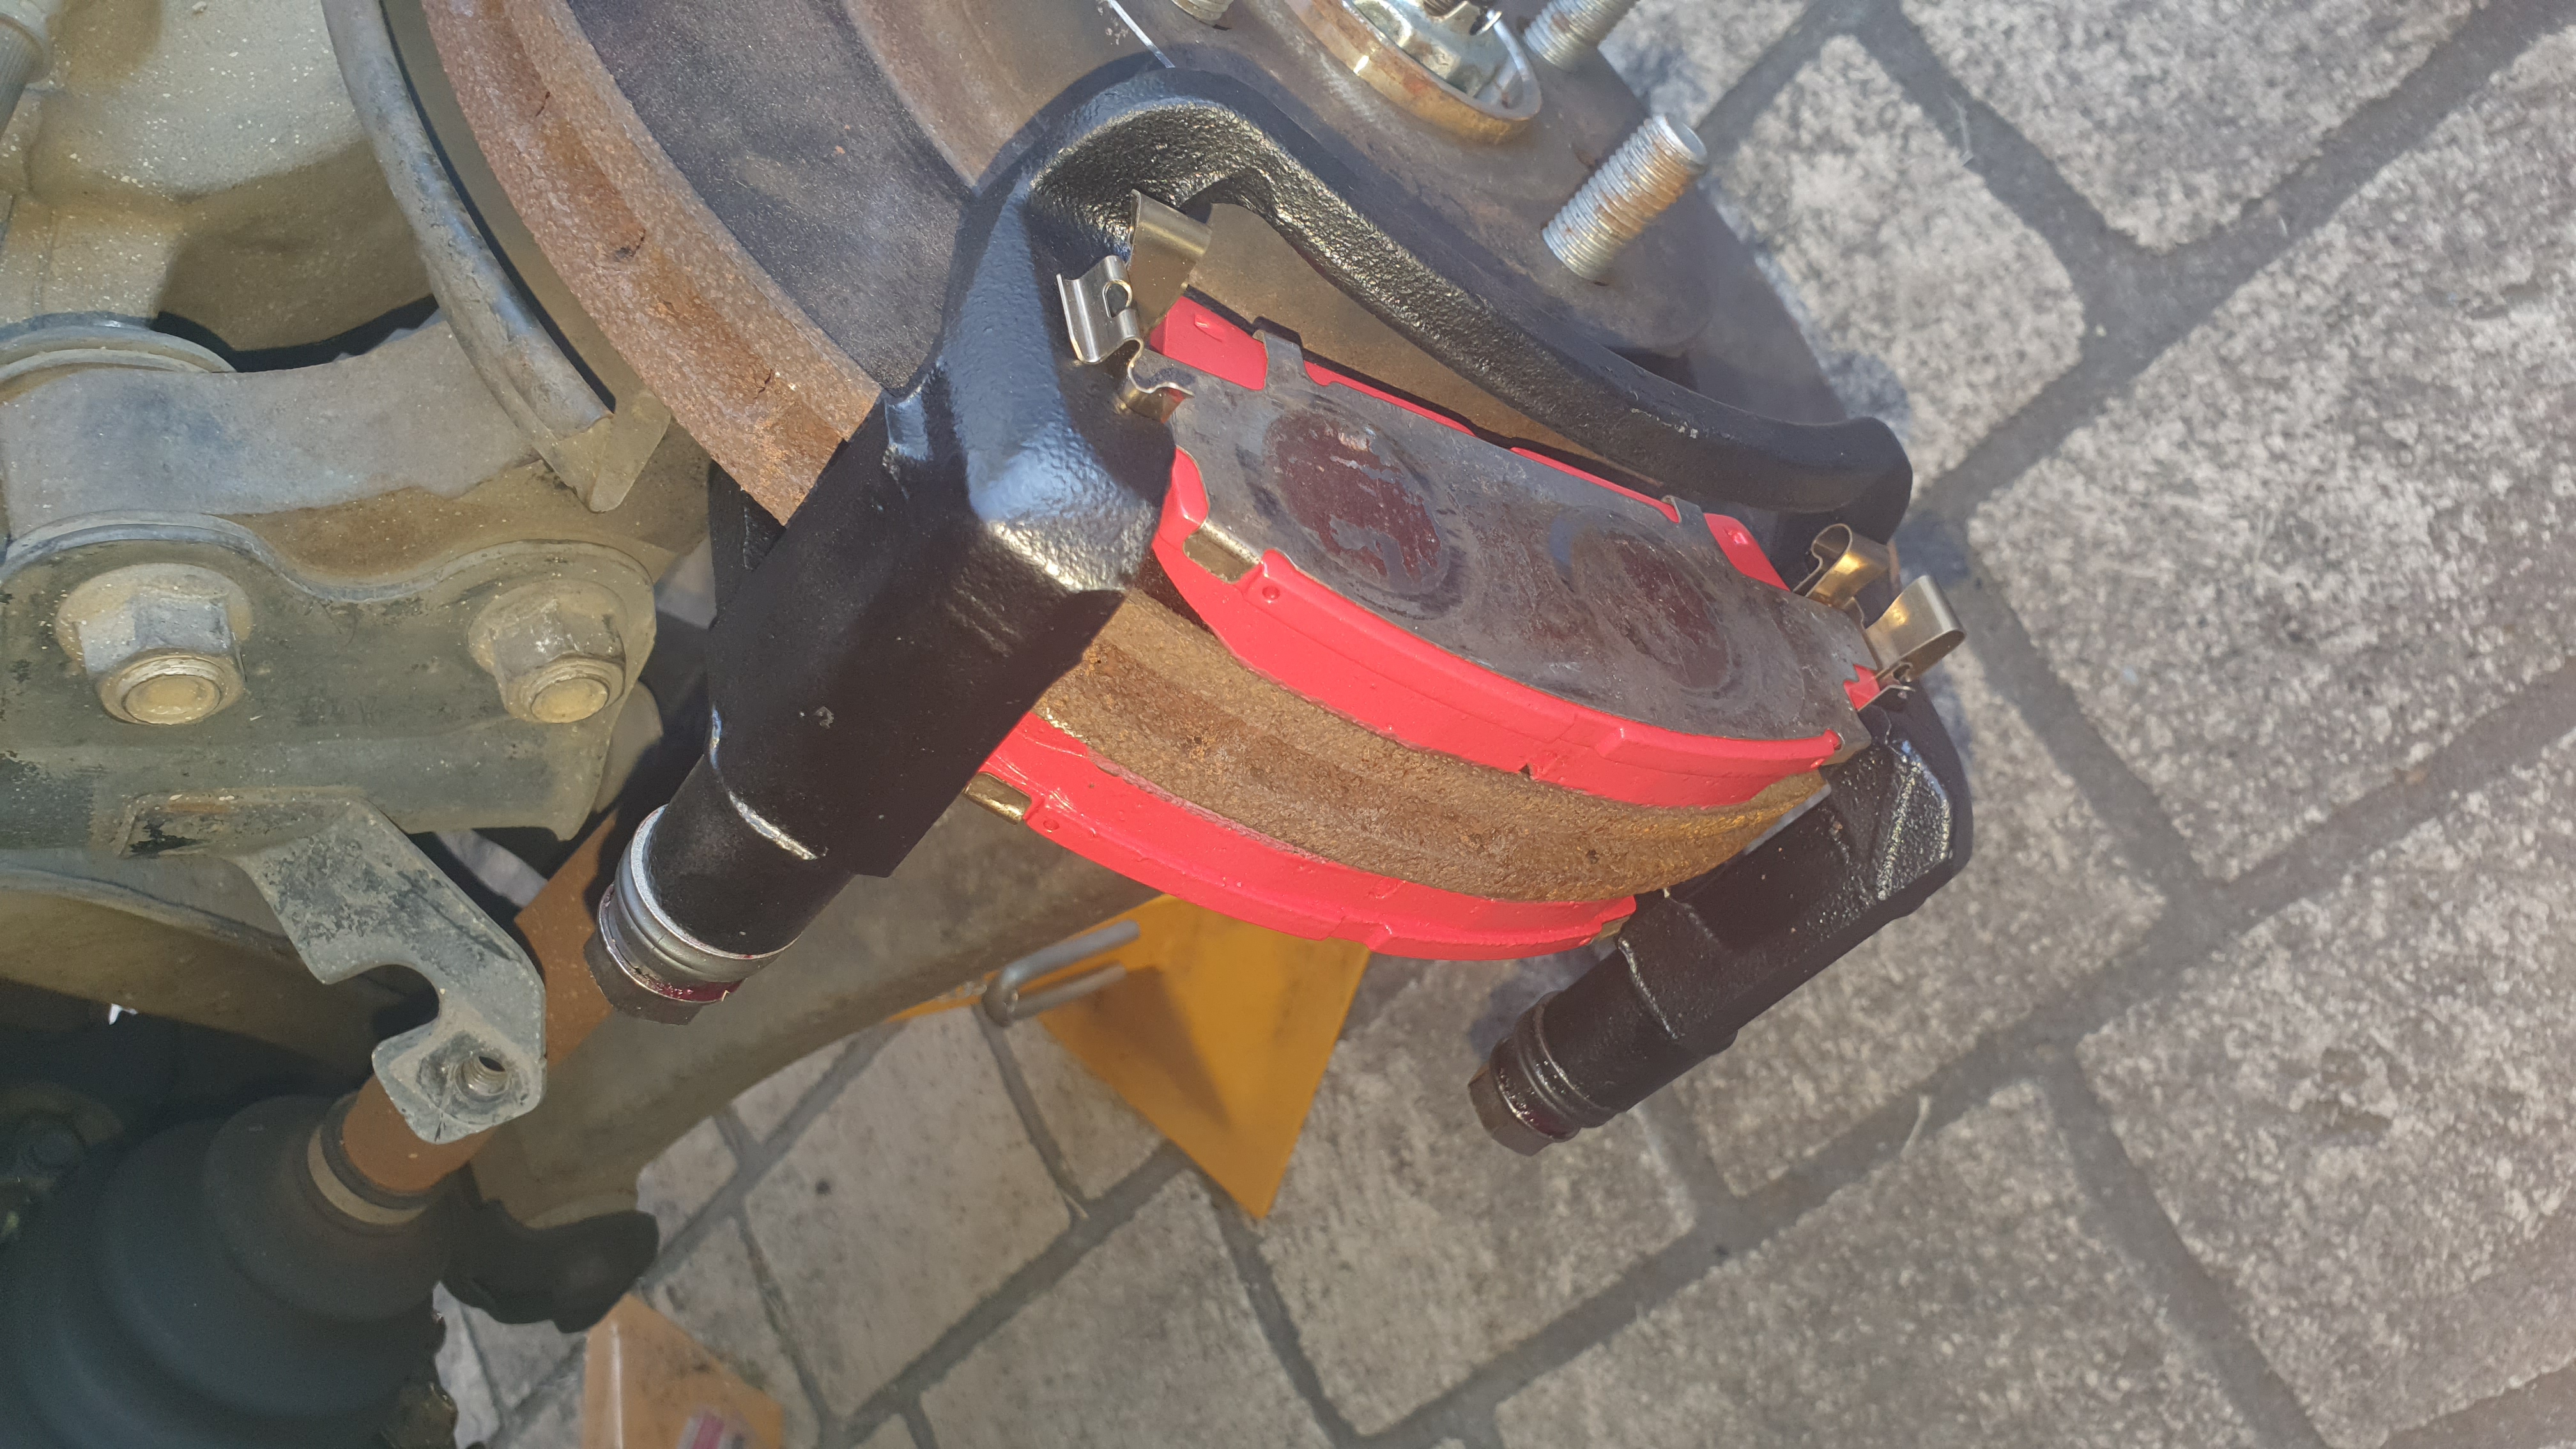
Make sure to use the SuperStrut pad not the ST204 Celica pad (Celica pads are thicker and the caliper won't fit over them), I used DP3995C EBC Redstuffs but any pad for the later SW20 MR2s will fit (same pad as the SuperStrut Corolla)
Caliper fitted
And new braided lines just for bling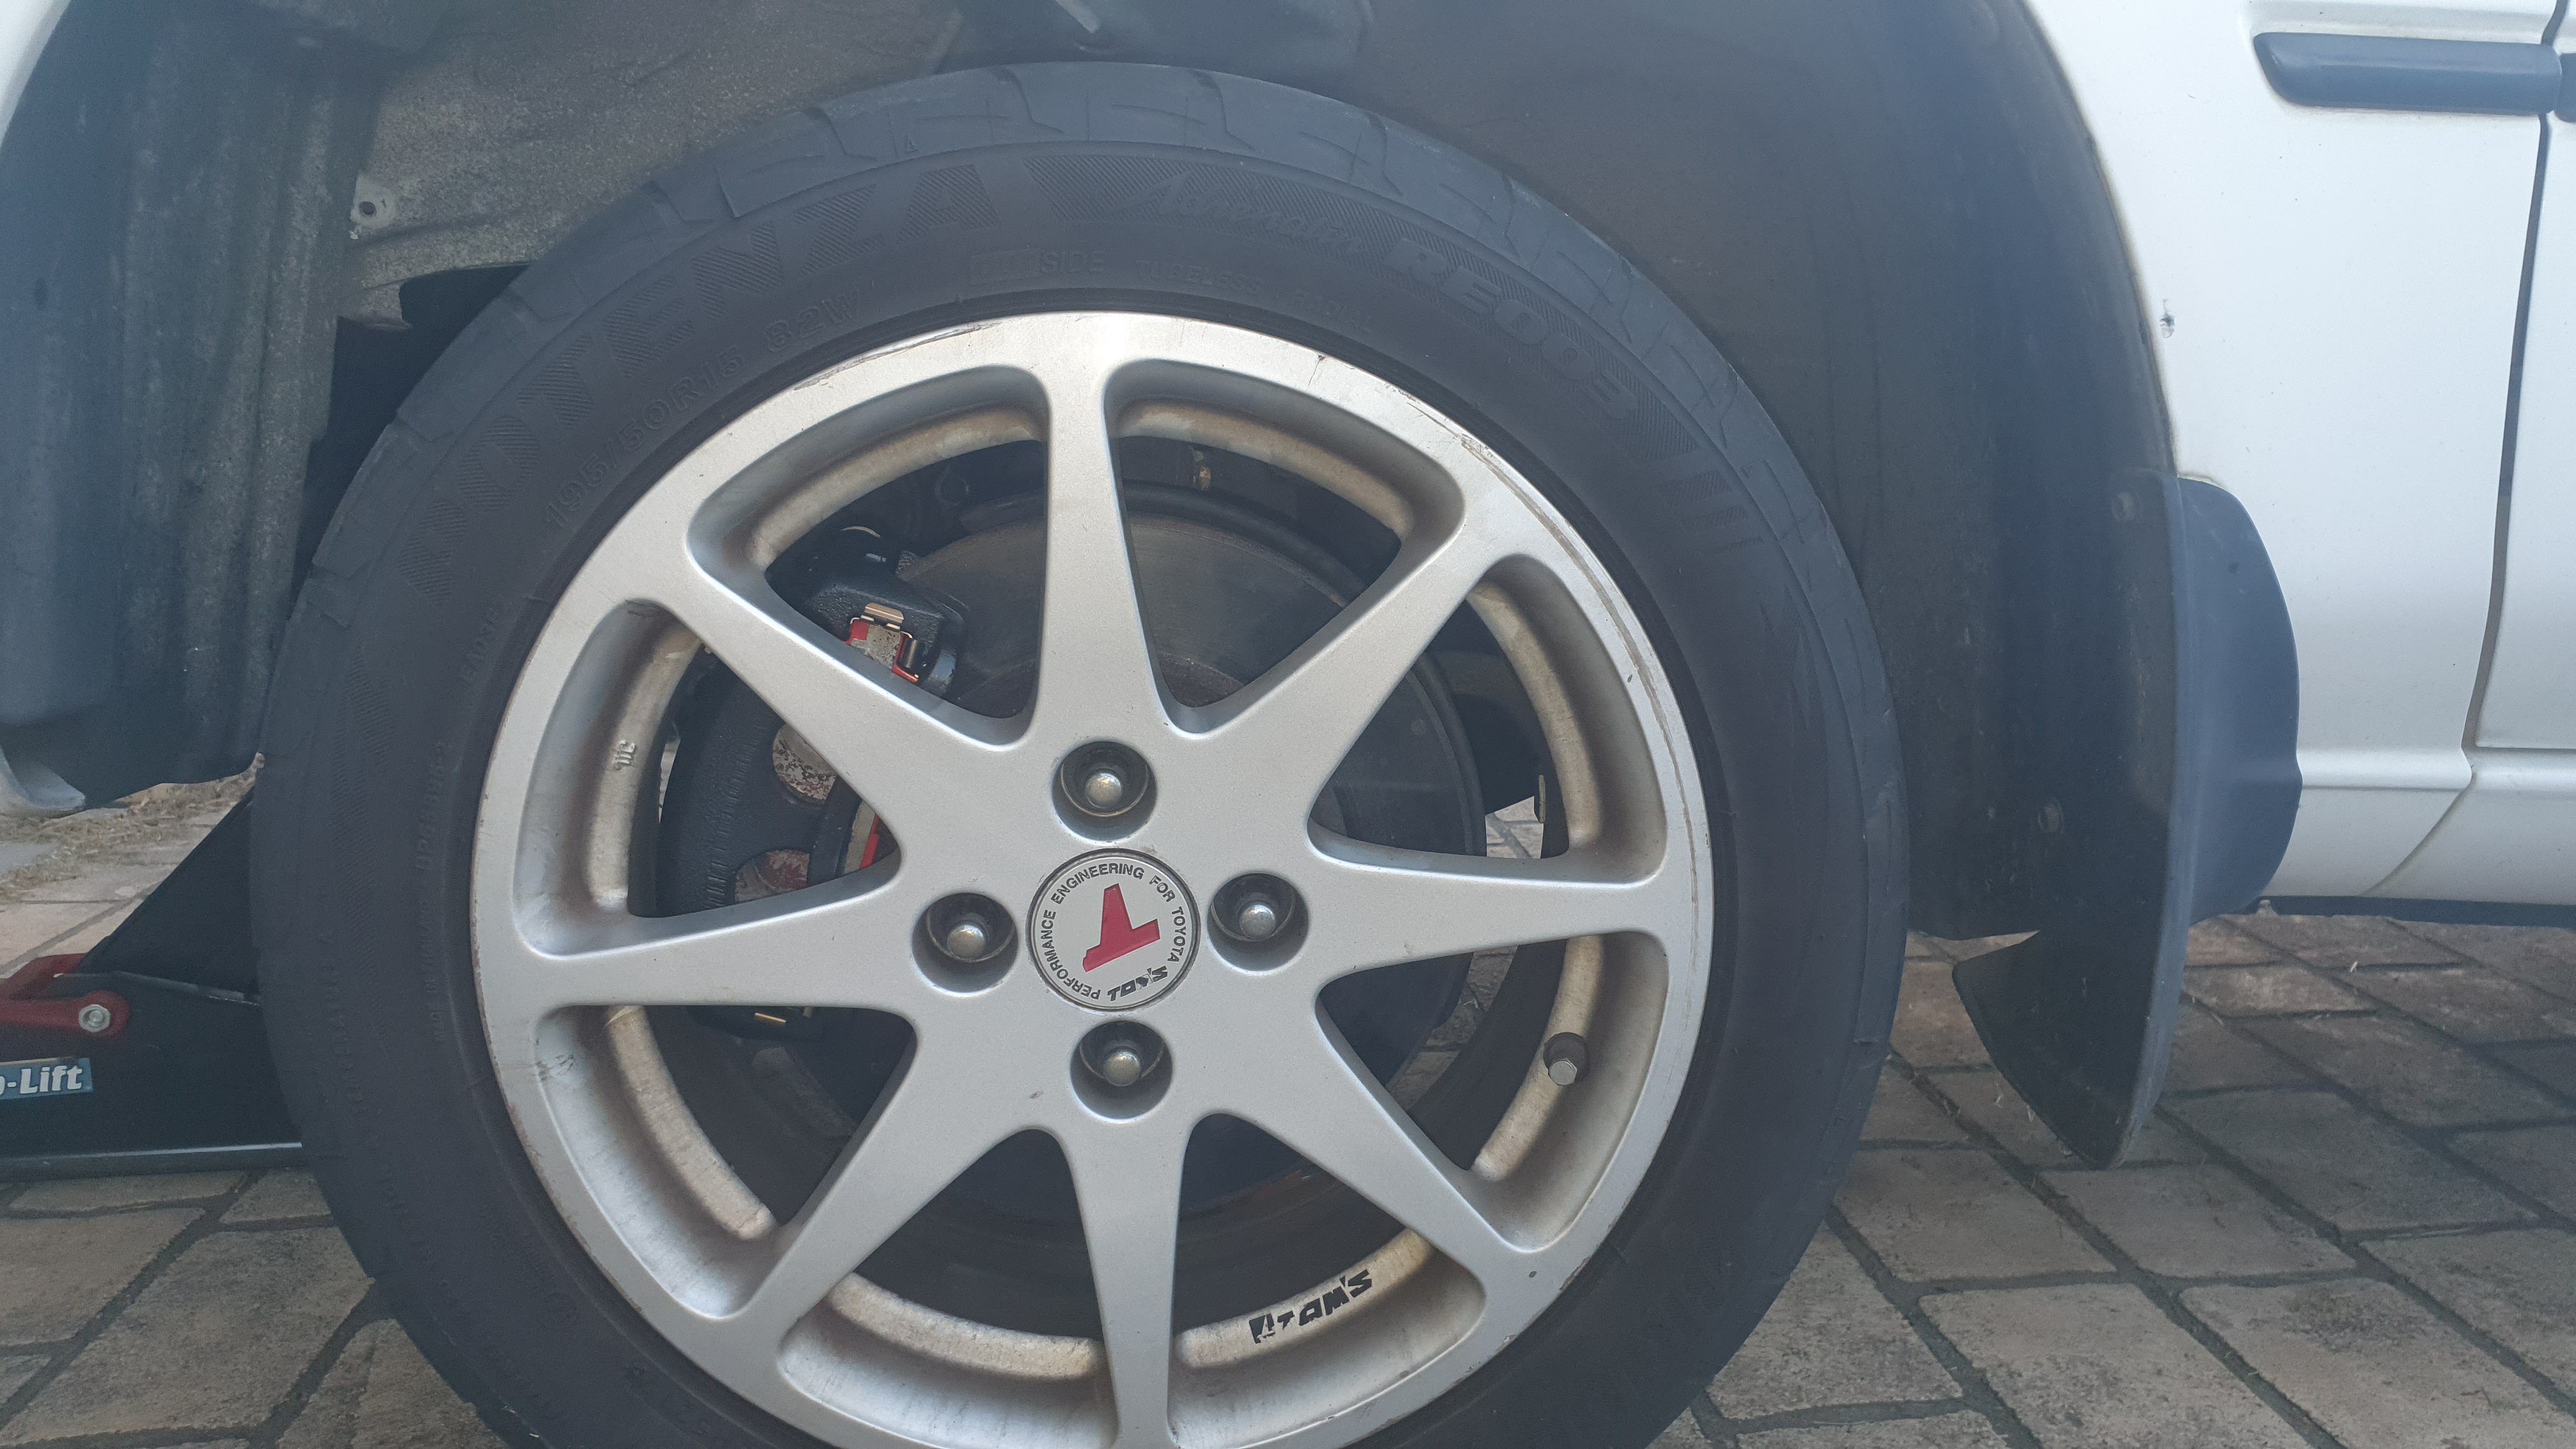
And the end result
-
AE101/102/111 coilovers will fit 100% (as long as they aren't for a SuperStrut model), I believe AE92 will as well but not 100% (some places say they do, others have different part numbers)
-
Just bought a second-hand set of Yellowspeeds (no, not Godspeed or maXpeedingrods or any other eBay crap), was never really certain that I wanted to go to coilovers but they came up at an absolute bargain so couldn't resist.
Interestingly they appear to be 7/4kg F/R which is a little different from the usual 6/4kg and 8/6kg sets out there
Will pull them apart and give everything a clean and oil (the threads look like they could use it) and maybe a bit of paint if I can be arsed).

by Ian Rigby, on Flickr -
Another piece of the puzzle (courtesy of bway)


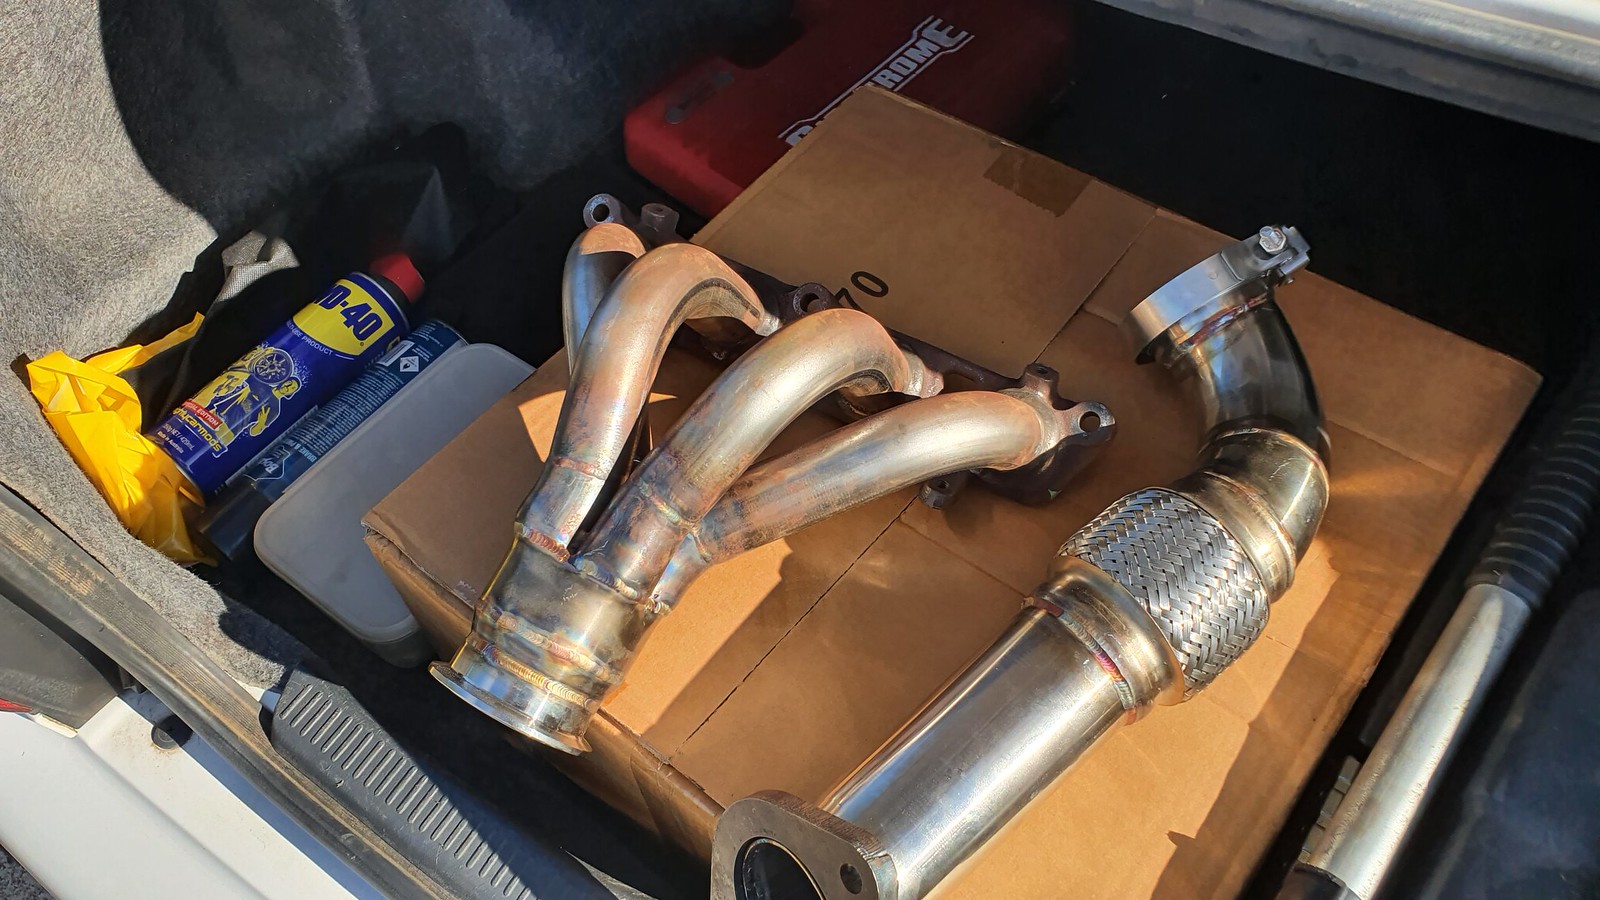
by Ian Rigby, on Flickr1-1/2" primaries, 4-1 merge collector, v-band mid-joint, 2.5" down-pipe. Many revs. Much shiny
-
I've been saying for a few years now that they should transition Supercars to a modified-GT3/4 category, probably the closest international-grade category out there to what the V8s currently are speed-wise, plus allows manufacturers an easy entrance back in to the Australian racing market (can still have Ford v GM v Toyota v Nissan et al, just won't be a Taxi Racing category any more). If they wanted to try and maintain more of a link to the "win on Sunday, sell on Monday" mantra then they'd probably need to go more towards an expanded TCR category, but you'd have better luck converting a dyed-in-the-wool Holden/Ford V8 supporter to a Camaro/Mustang GT4 than you would a Hyundai i30N or Golf GTi TCR.
-
Been a little while since the last update - 12 weeks/60 days and 48 flights worth of travel for work on one hand, plus my old man passed away in September on the other has meant that this year has basically been a write-off as far as car updates is concerned, but that didn't hamper much the accrual of parts. Latest haul below:
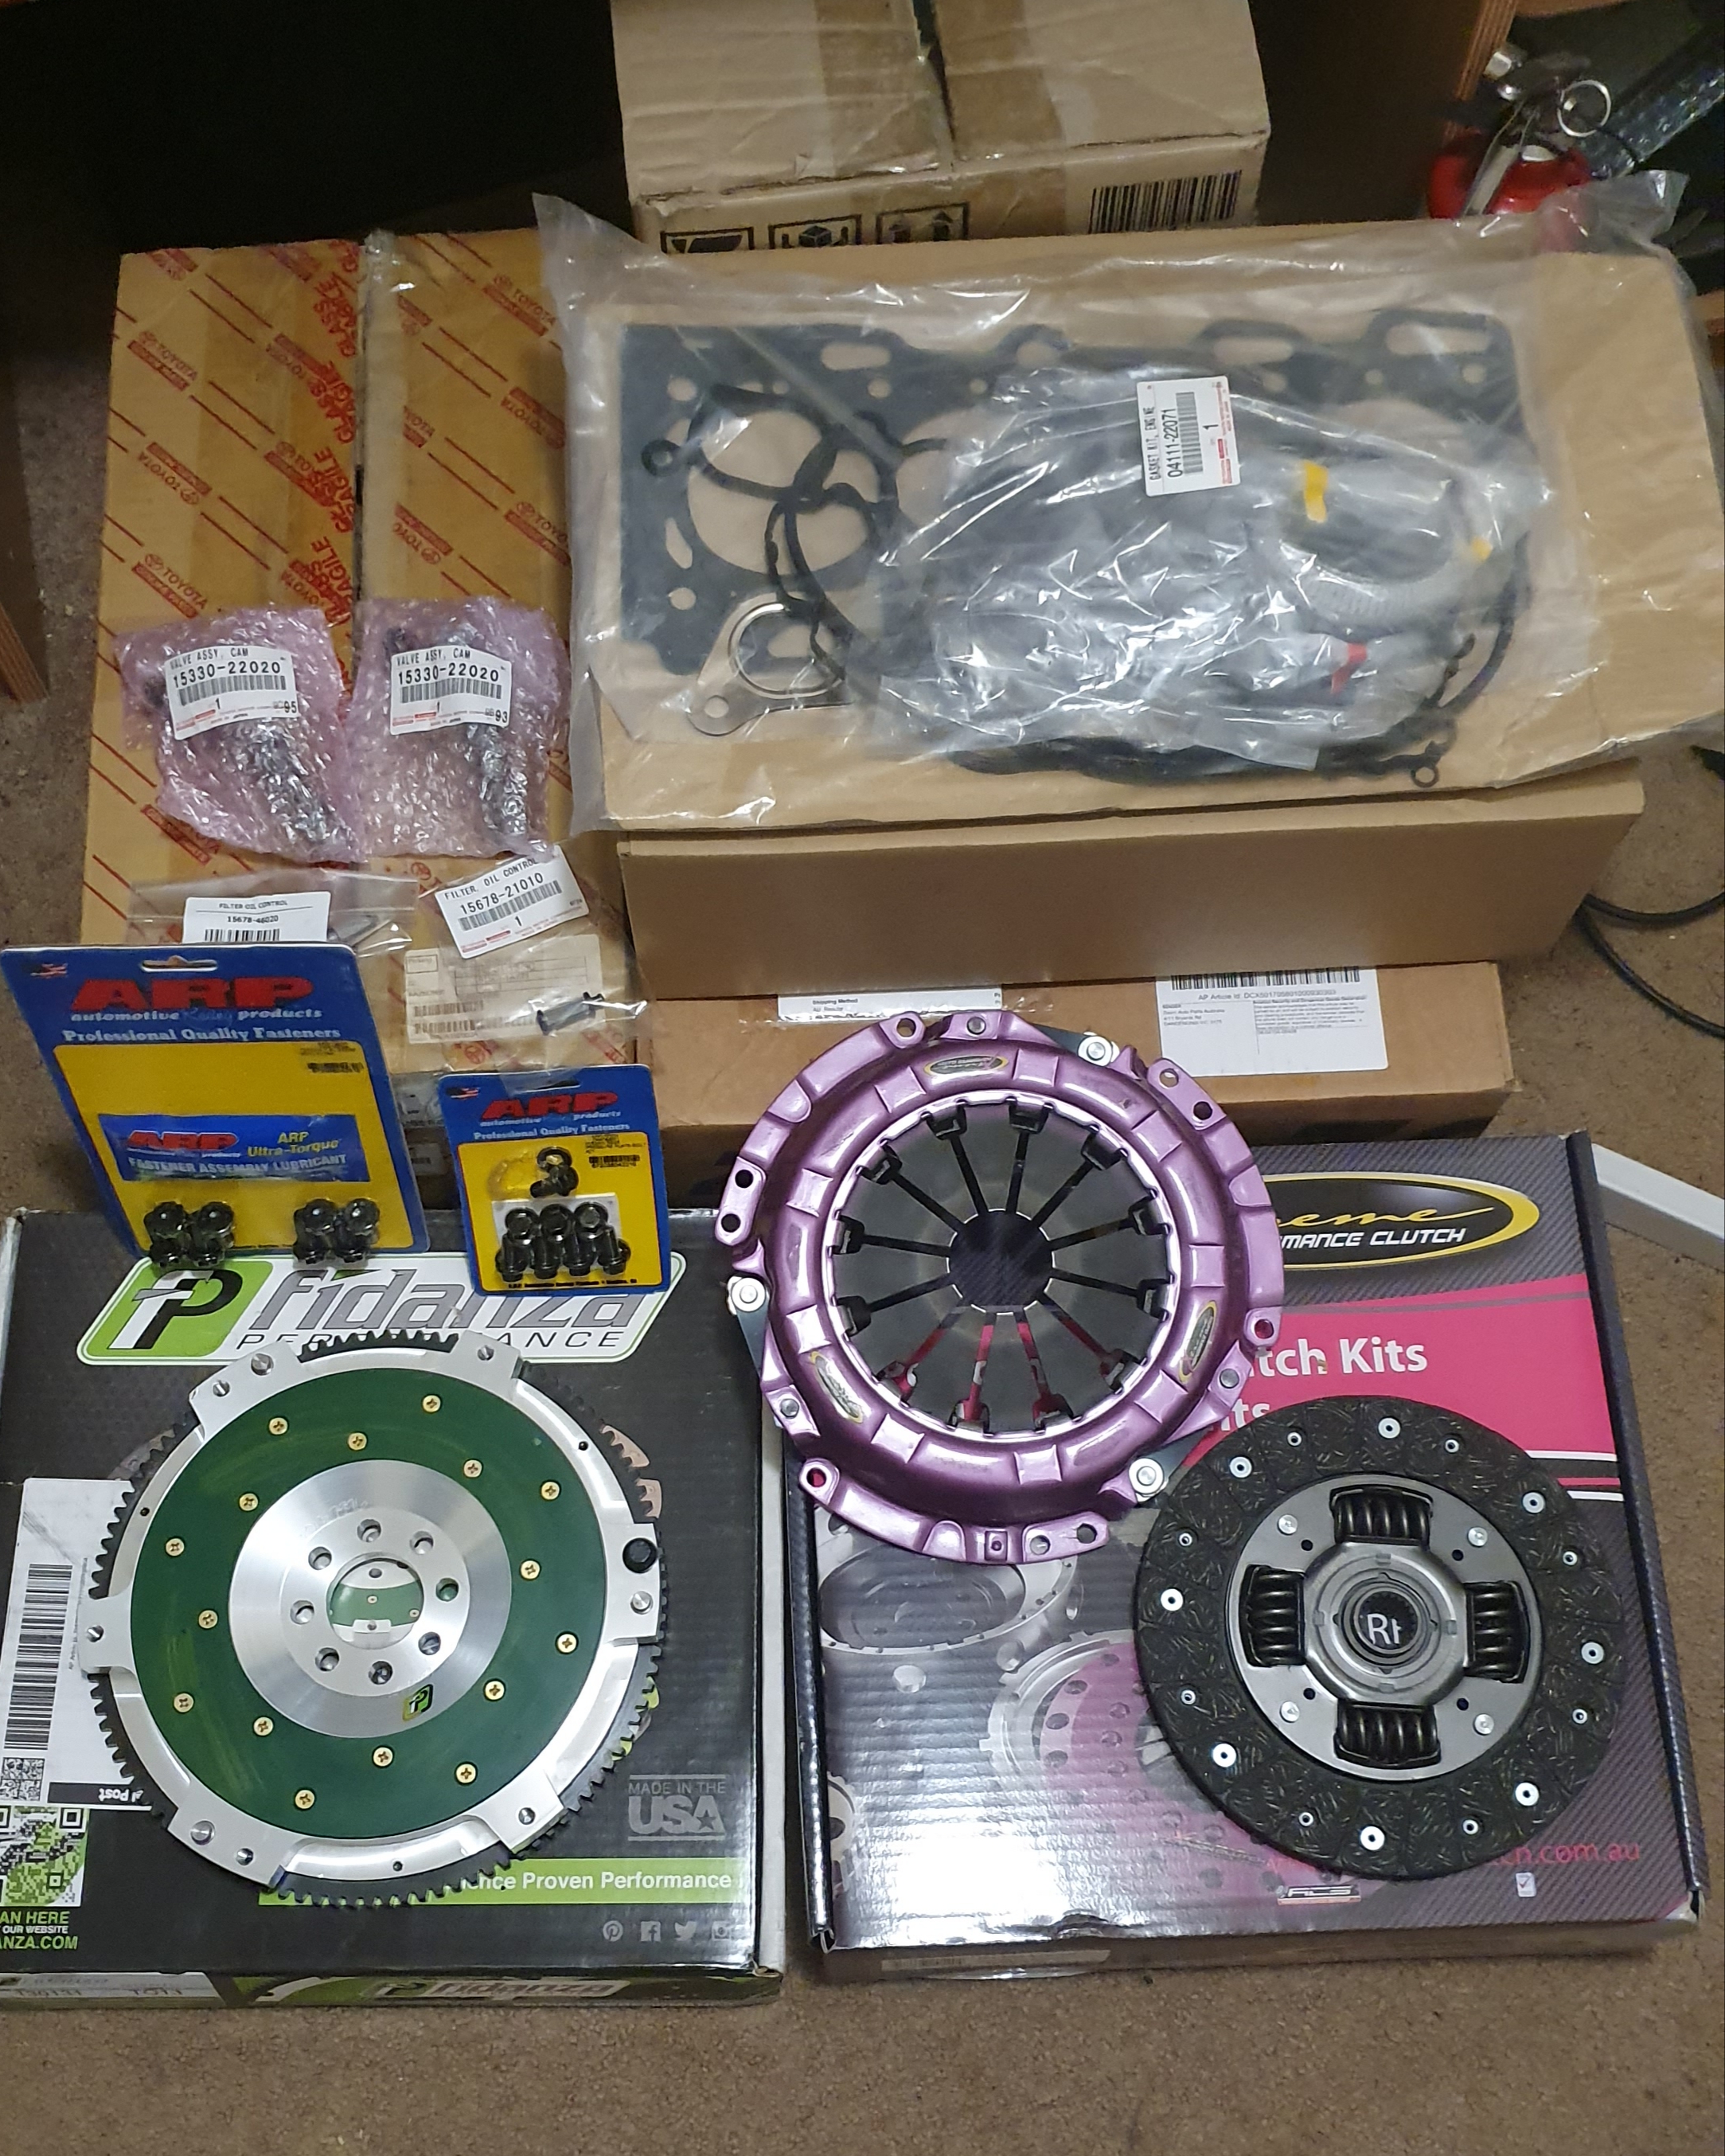
20191224_160022 by Ian Rigby, on FlickrFidanza lightweight flywheel (3.4kg vs 5.9kg factory)
Xtreme HD clutch
ARP flywheel and pressure plate bolts (the only Toyota bolts that ARP list for the pressure plate are to suit a Hilux and cost a fortune for no reason, however Skyline ones are dirt-cheap by comparison and same thread, just a little longer)
New VVT and VVL solenoids and OCV filters
Full VRS kit -
So that's how things stood at the start of this year.....basically nothing has happened since. Still got to pull the shifter cables out of the Celica shell (which requires disassembling most of the dash) along with some of the body harness (for the engine bay fuse box) but in the meantime I've started hoarding parts for the eventual conversion.
First things first - some tools, and something to put them in. Been wanting a decent roll-cab for ages but never really had enough to fill it, but eventually got sick of all my stuff being scattered between two separate toolboxes, a builders-bag, and the floor, so I snagged one of the limited edition Mighty Car Mods roll-cab set when they went on special. Knew we bought a hatch for a reason...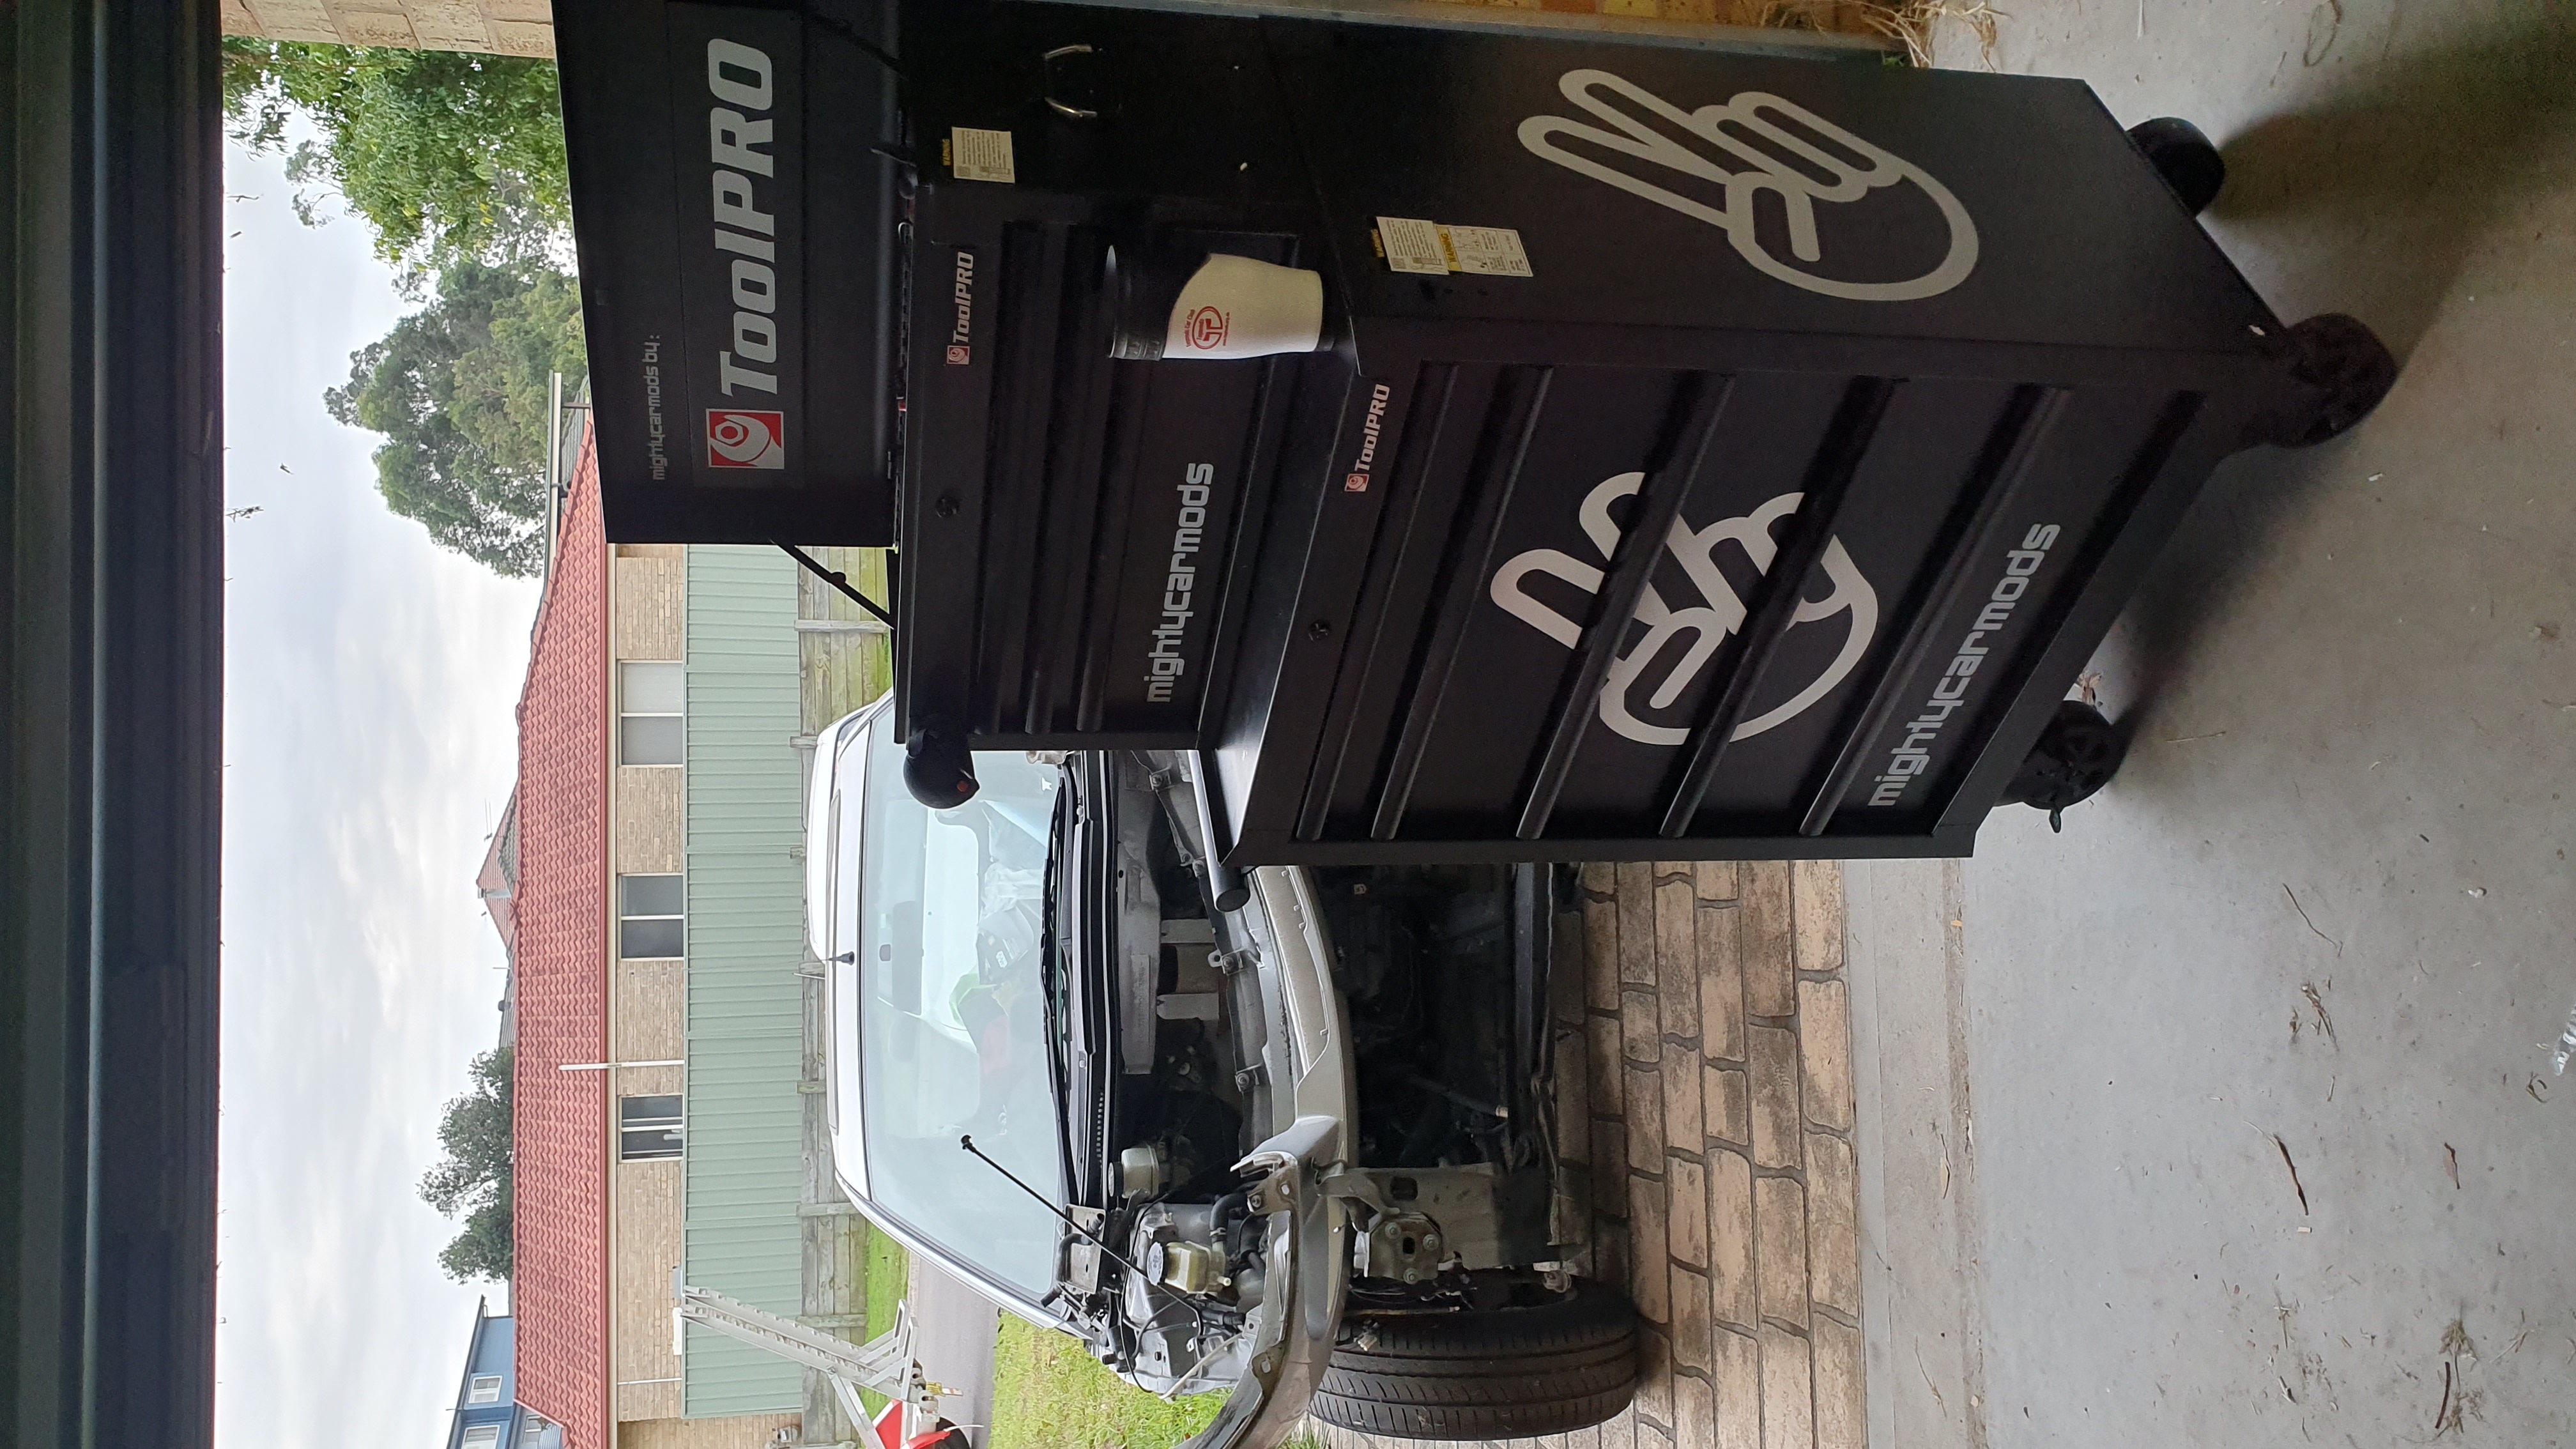

Then decided it was time to make the swap from Ryobi One+ to Milwaukee, much better tools as well as being smaller (with inline batteries too, much better for engine-bay/undercar work). Got a 1/2" power ratchet, 1/2" stumpy impact wrench and a 13mm hammer drill (for house stuff). Also just picked up a 1/4" hex-chuck impact driver for the small stuff (not pictured)

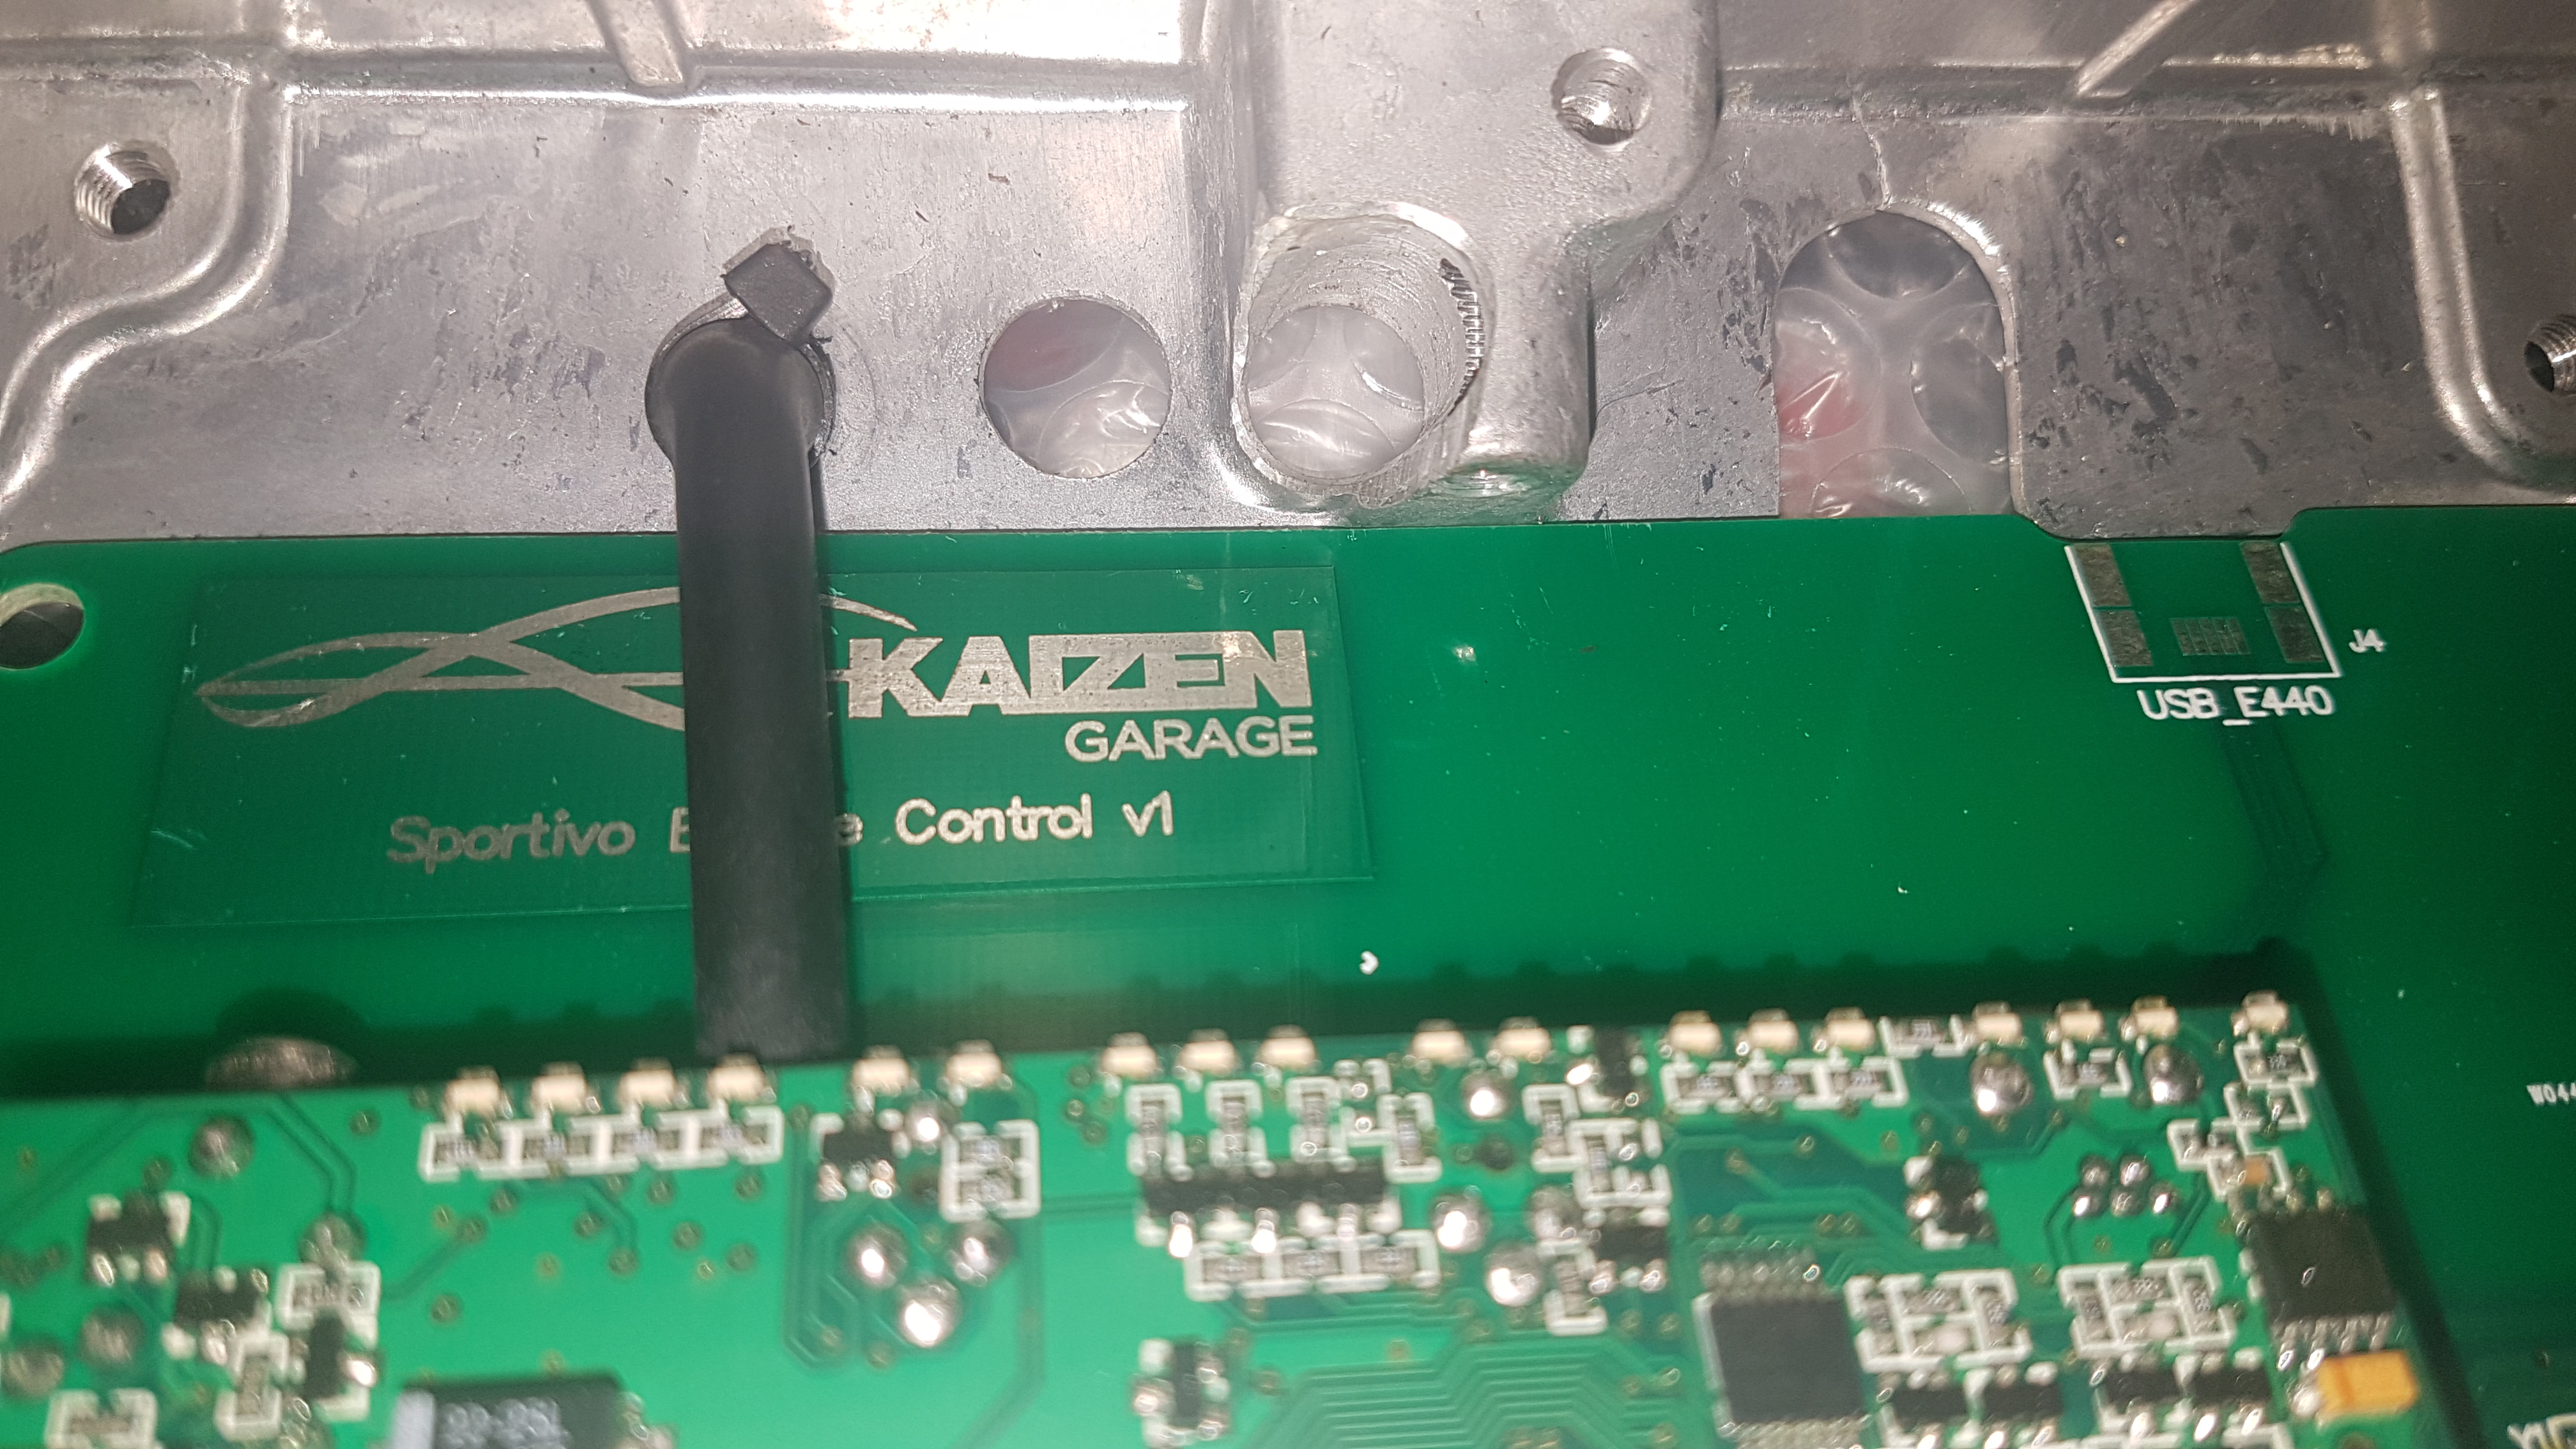
Then came the parts hoarding. First up was a plug-n-play Adaptronic E440d ECU modified by Kaizen Garage, which Jason Purcell had running in his AE82 2ZZ race car. This will allow be to do away with the factory immobiliser, run a bigger intake without the factory MAF (has onboard MAP sensor), as well as tweak lift and redline rpms to my liking (not to mention being able to support bigger cams).
Next was a bunch of little bits and pieces to try and spark my motivation again - a 6-speed TRD ball shift knob (from the Tacoma/FJ Cruiser), height perfectly suits the MWR short shifter. Also got the MWR underside WP and ALT pulleys for some extra bling, a 77° TRD thermostat, Speed Source extended slave cylinder pushrod, and an MWR MR2 2ZZ engine mount adaptor. Along with that I also sourced the RH engine mount from a 4ZZ Euro ZZE111, so between that and the MR2 adaptor I should have something close to built-in.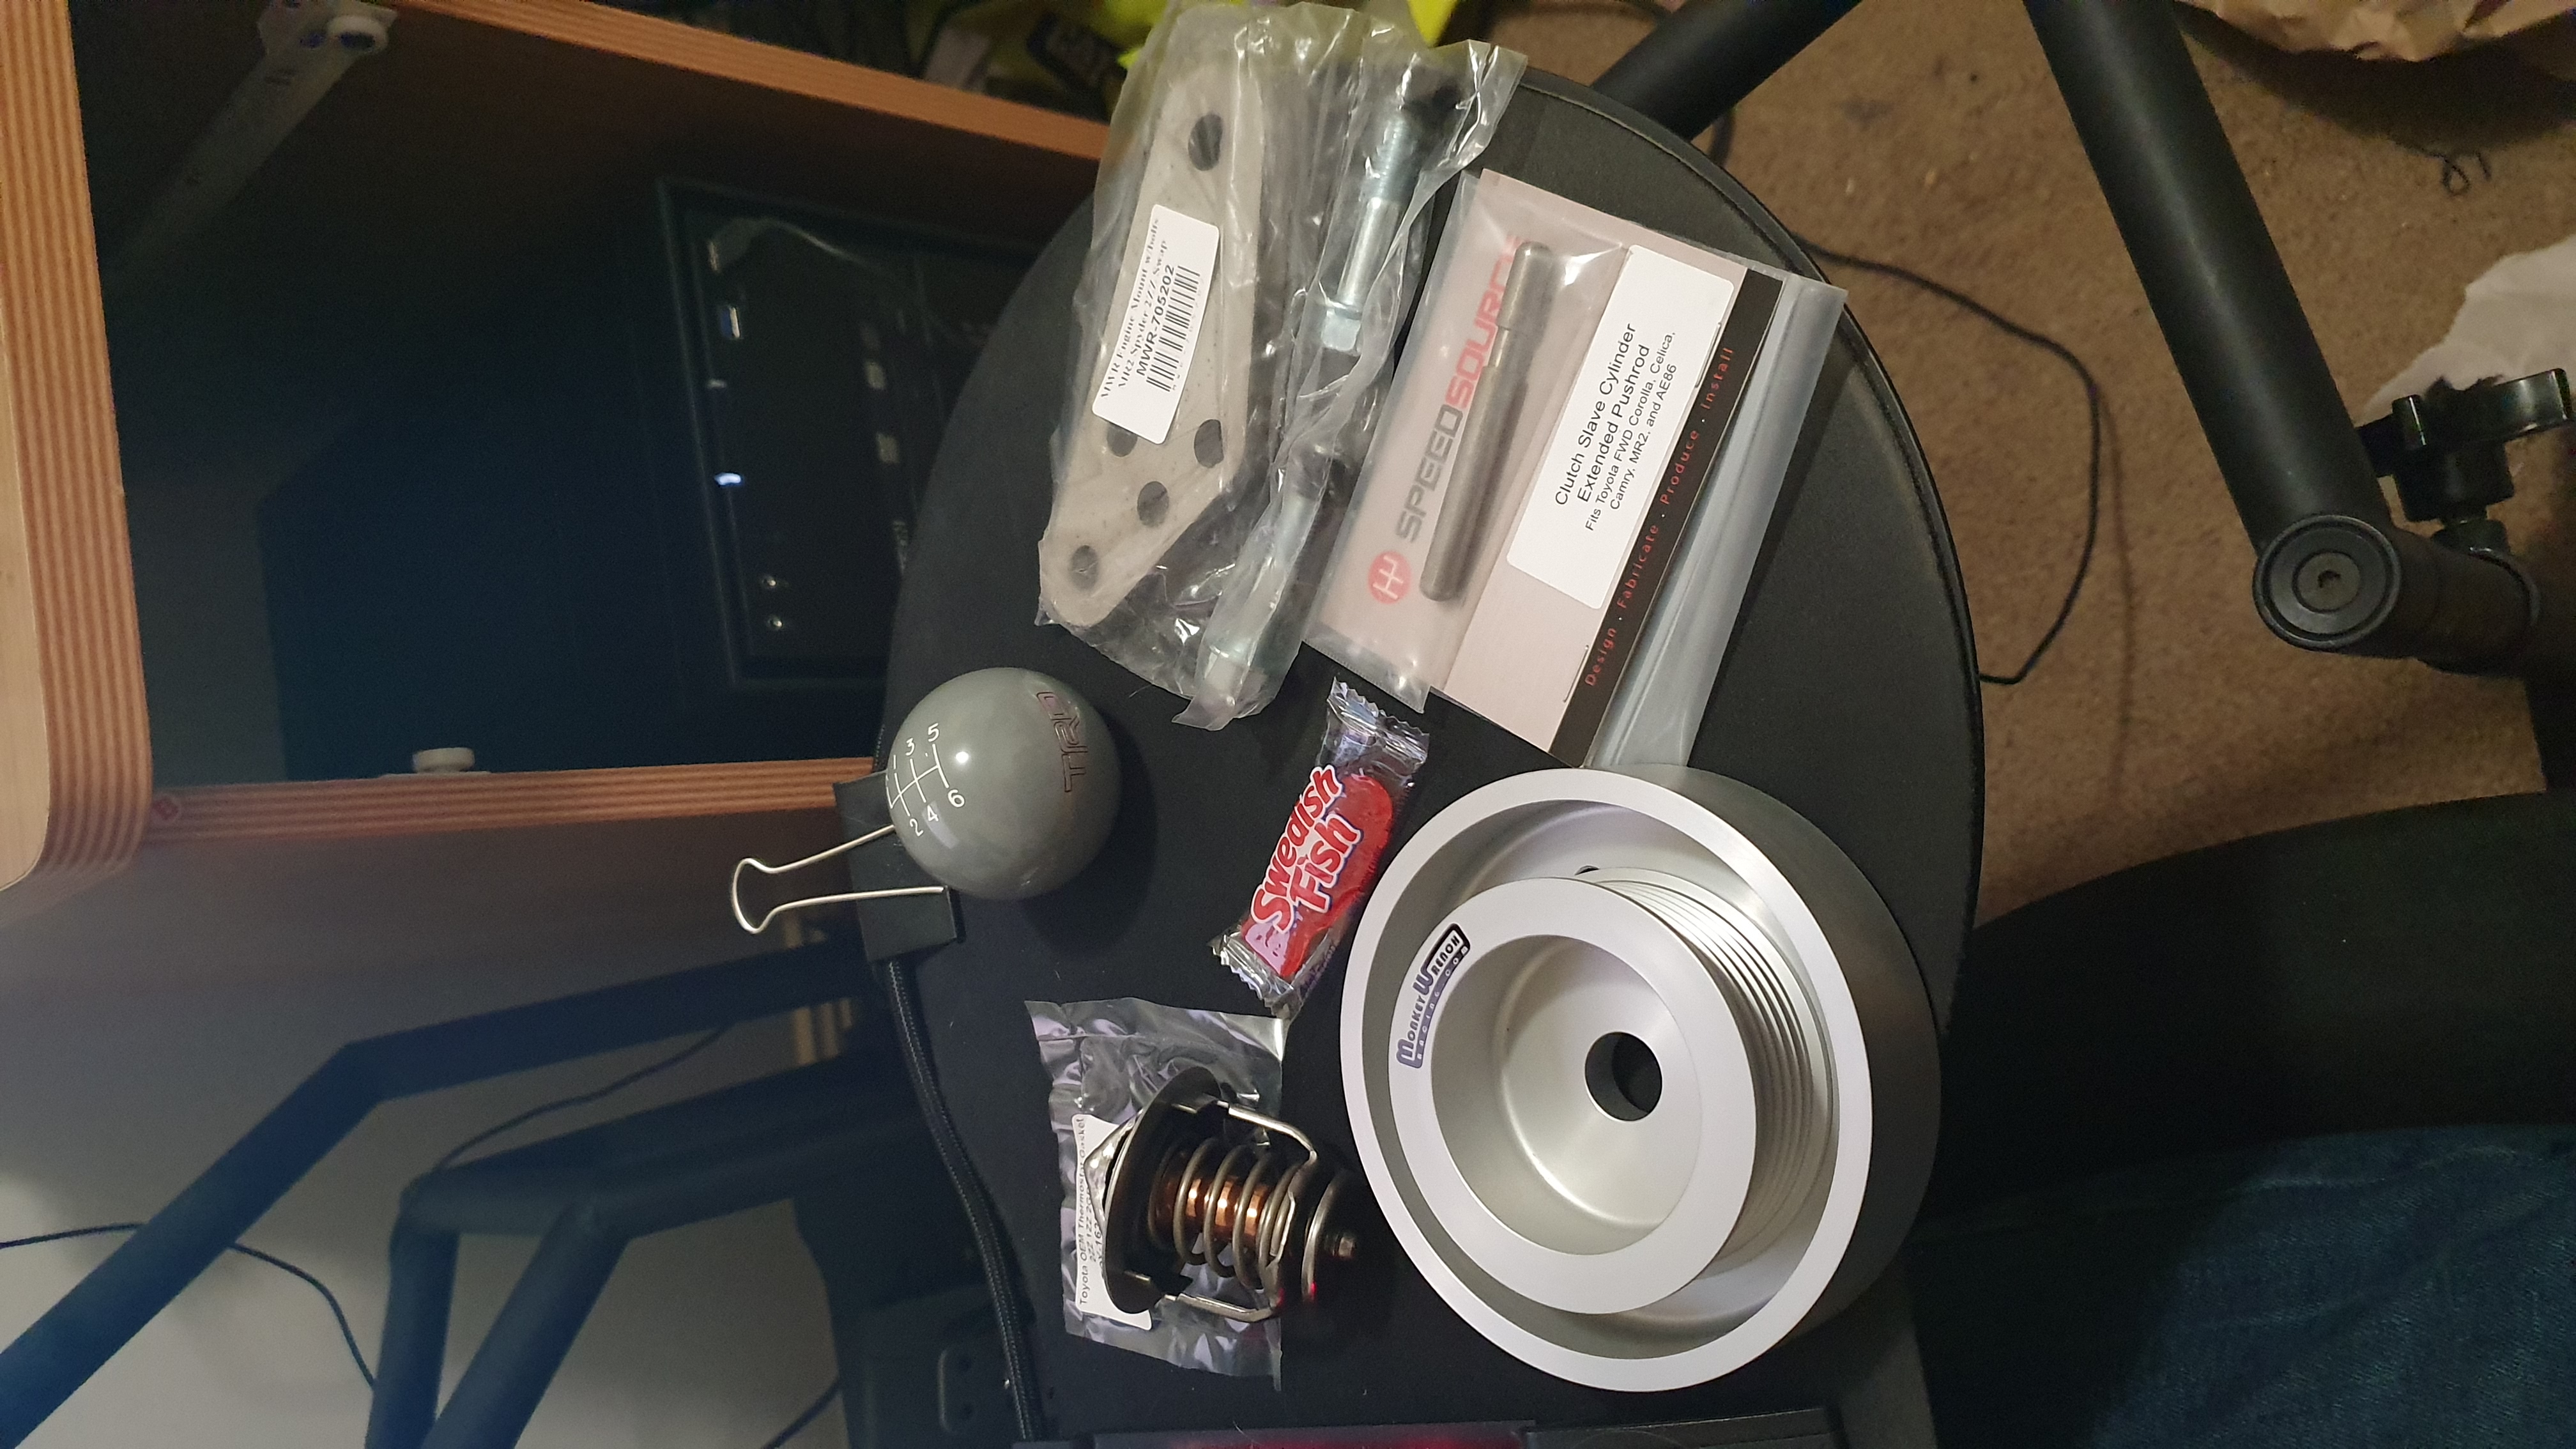


Next up will probably be clutch/flywheel, and maybe start looking at cams (but that opens Pandora's Box, because then I'll need valve springs, then might as well get new stem seals, then might as well get new valves, which means the head has to come off etc etc)
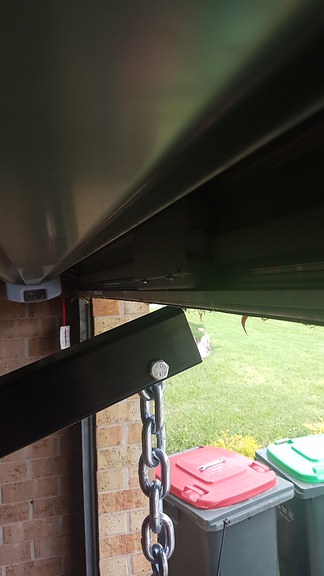
On, and the Celica shell is a bit breezy now too...
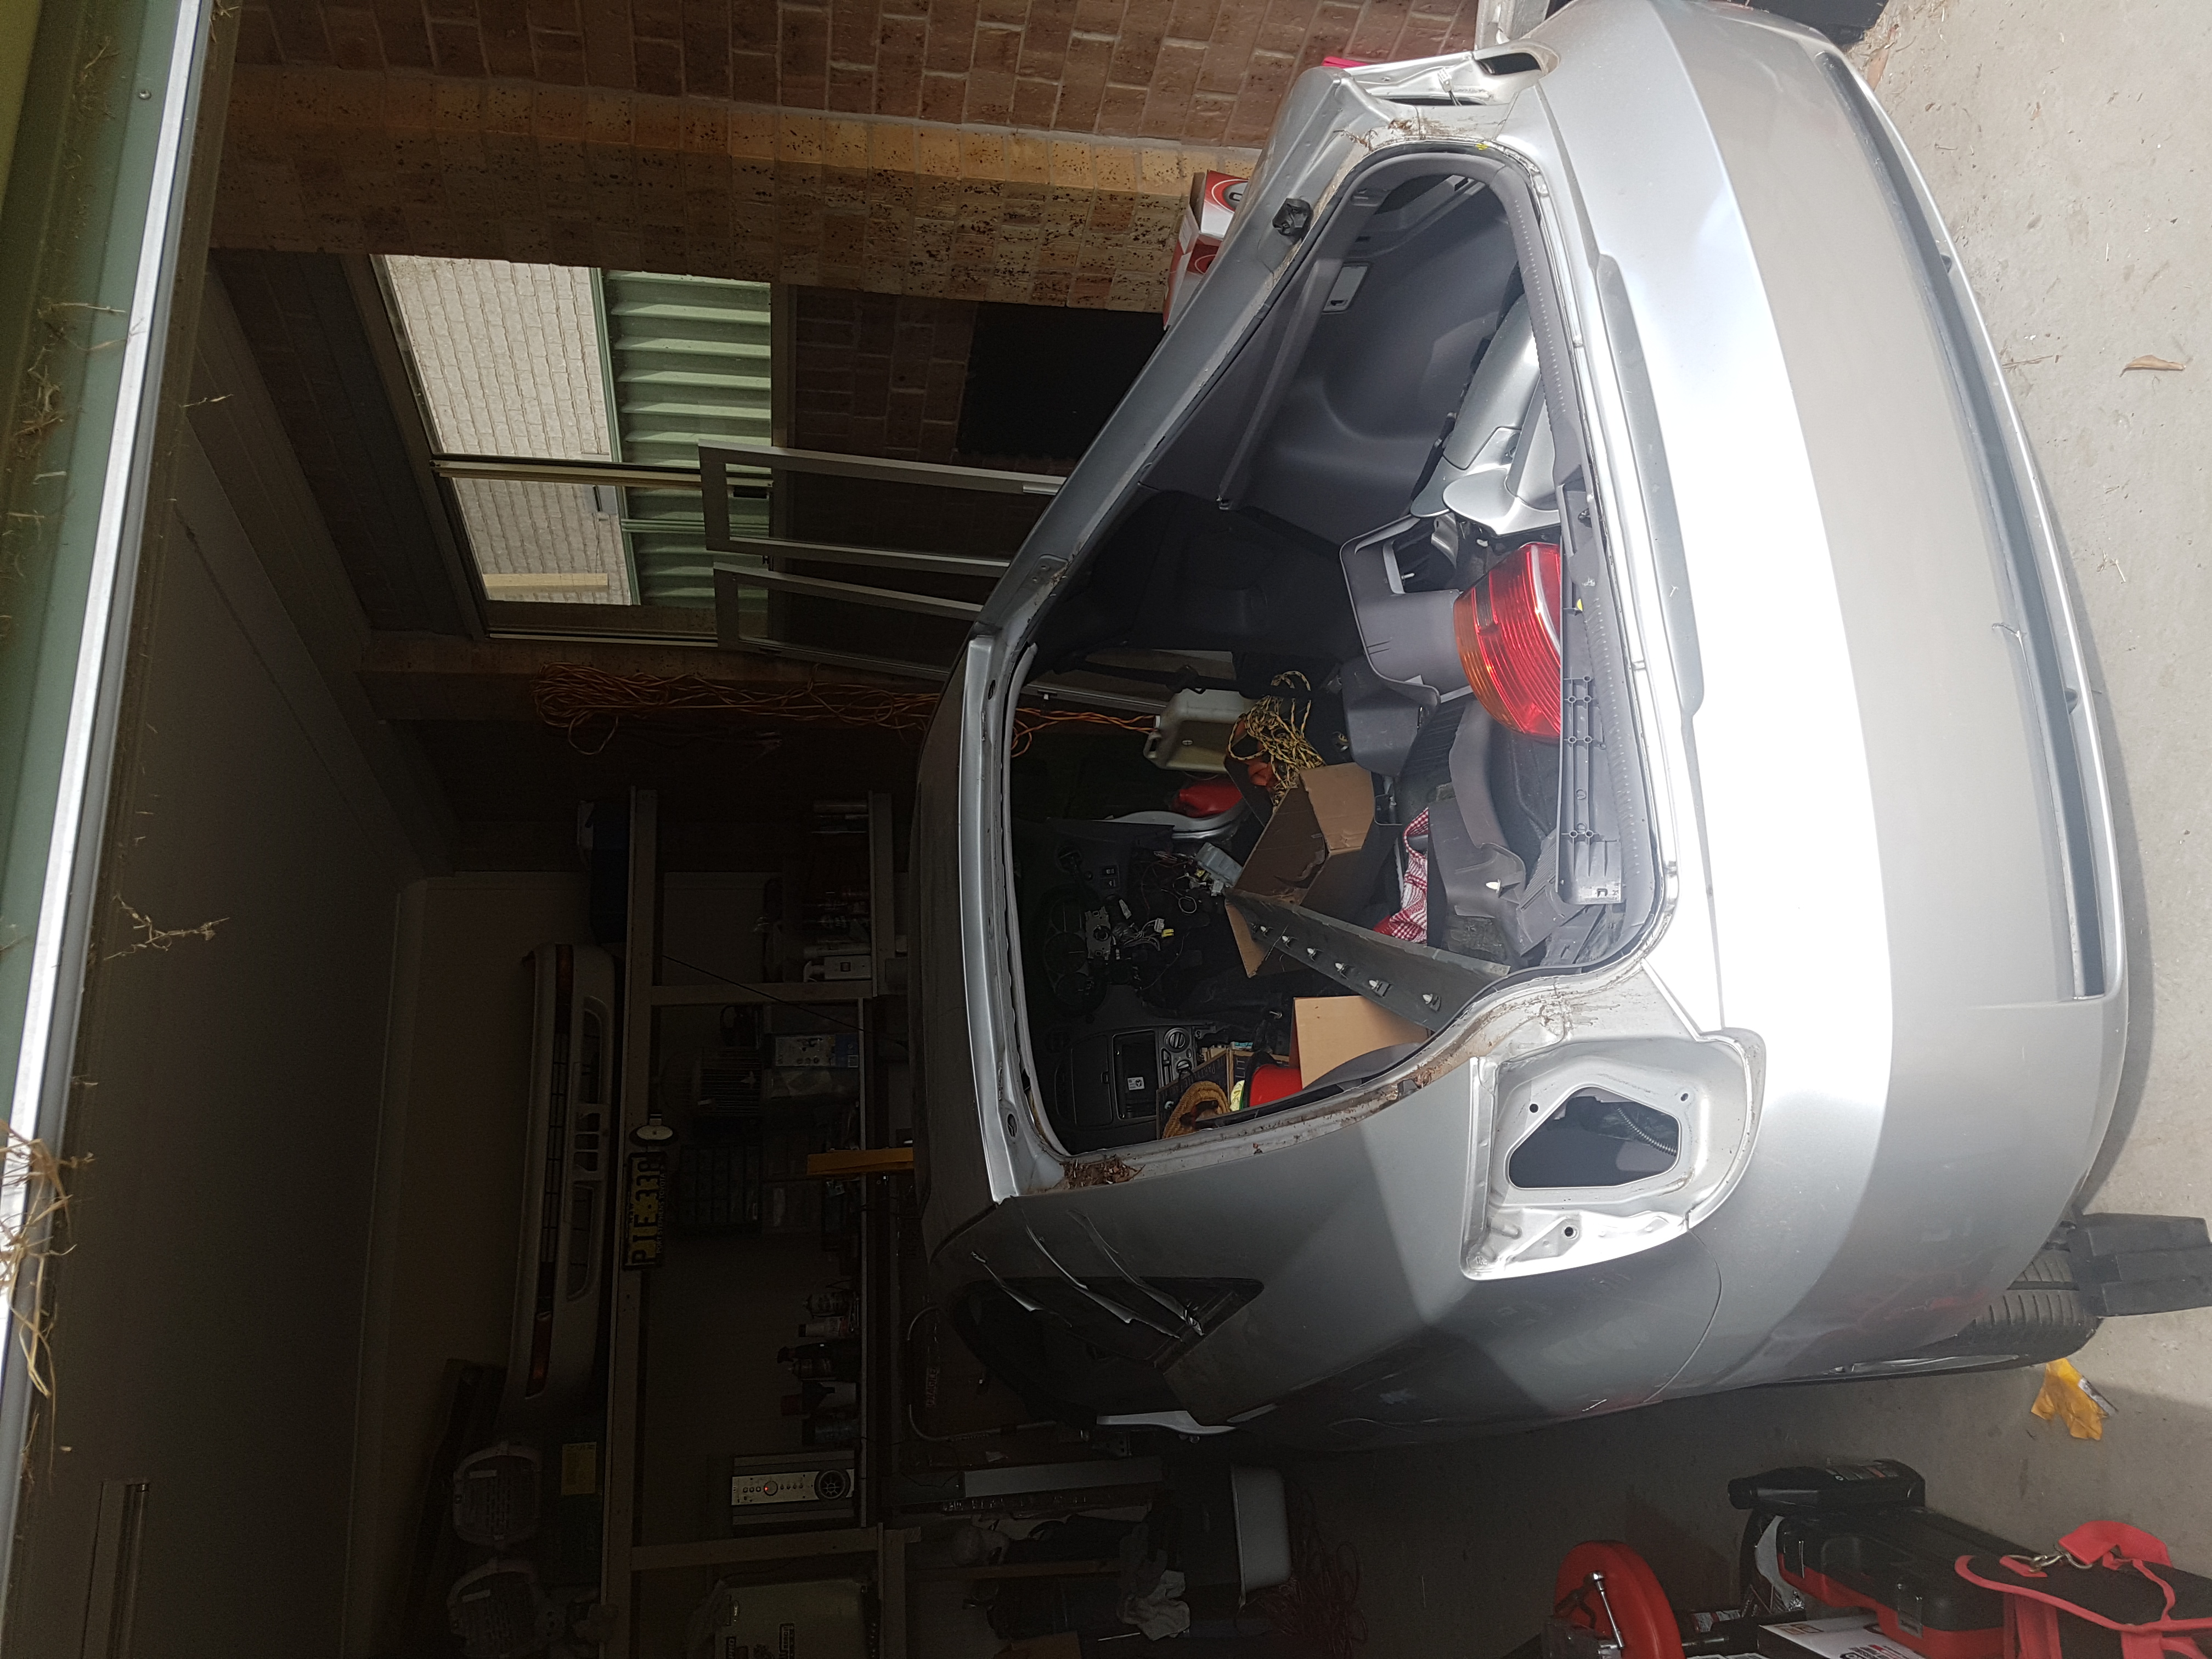 by Ian Rigby, on Flickr
kr
-
To get classic/historic registration in NSW you need to be a registered member of an affiliated club (and by club I mean an actual club, not an online forum). If you're in Sydney, and willing to be an active member of the club I'd recommend Toymods (their information can be found HERE), conversely I highly recommend staying away from Whitmore as they are known to be dodgy. Otherwise you'll need to look around your local area for an affiliated club (unless you're out in the boonies there are usually several around) and go through whatever procedure they require.
-
On 6/3/2019 at 8:31 AM, Banjo said:
Have a look at this website, which lists many of the Toyota paint codes.
https://www.uniquecarsandparts.com.au/colour_codes_toyota_A-G.php
Cheers Banjo
Pretty handy reference for the codes but I know some of the dates are wrong, OKA Diamond White is listed as being 2000- when in Australia at least it was available from the early/mid 90s on the Corolla and Camry (have had both).
-
17 hours ago, altezzaclub said:
You're really on the back foot with the carb version, 71KW and 127NM, even the injected F had a big jump to 84KW & 145NM. So it looks like a good porting job would be a start, you might ask odelskewoltoy his thoughts, he's a head porter in the USA. He's on here as well.
Pretty sure the 4AFE never had 84kw in Aus (some of the imported AE95s might have had the high-comp version), if it's a locally-supplied 4AFE then it'll be ~75-78kw
-
The 4AFC is 16-valve but it is the narrow-angle slave-cam arrangement which doesn't have anywhere near the aftermarket support of the GE.
-
Any wheel/tyre shop will have tonnes of 4x100s, it's one of the most common small-car wheel sizes out there.
If you're after used, just go to your local wreckers/parts-dismantler, they should have piles of wheel sets lying around.
-
23 hours ago, Mechanical Sympathy said:
It's one of those contemporary, proprietary iPad-looking devices that sits on top of the dash - which I don't mind! It's a grouse device - but I doubt there will be an aftermarket unit available.
The North American market struck a Car Play deal with Apple however, which makes Toyota Australia's insistence that the head units in the two markets are different seem disingenuous!
I wonder if a wrecked USDM unit would fit? Though I don't want to pull stuff apart yet haha

North American Toyotas have had Entune for a few years now (which I don't think ours did) and there is no end of hate for it.
-
 1
1
-
-
18 hours ago, ke70dave said:
You are only 6 months ahead of me hiro. And my starting point marks when i was sick of ae86dc....about a year after i bought the ke70 :|
I started on Twincam.org, then moved to Toymods, then here shortly afterwards, followed by TOCAU, OzCelica, AE82ownersclub, ToyotaNation, AE101ownersclub, SoarerCentral, MightyCarMods (before someone flicked a switch and deleted everything after 2013....)
Well I say "moved", but I've stayed on all of them (apart from Twincam which got bought by a douche-canoe and died a quick death, and AE82oc went defuct)
-
1 hour ago, ke70dave said:
ah the hay day of forums were good.
Just made me realise I've been on here for almost 13 years now (which will mean 13 years since I bought the then-gf a KE55...)
-
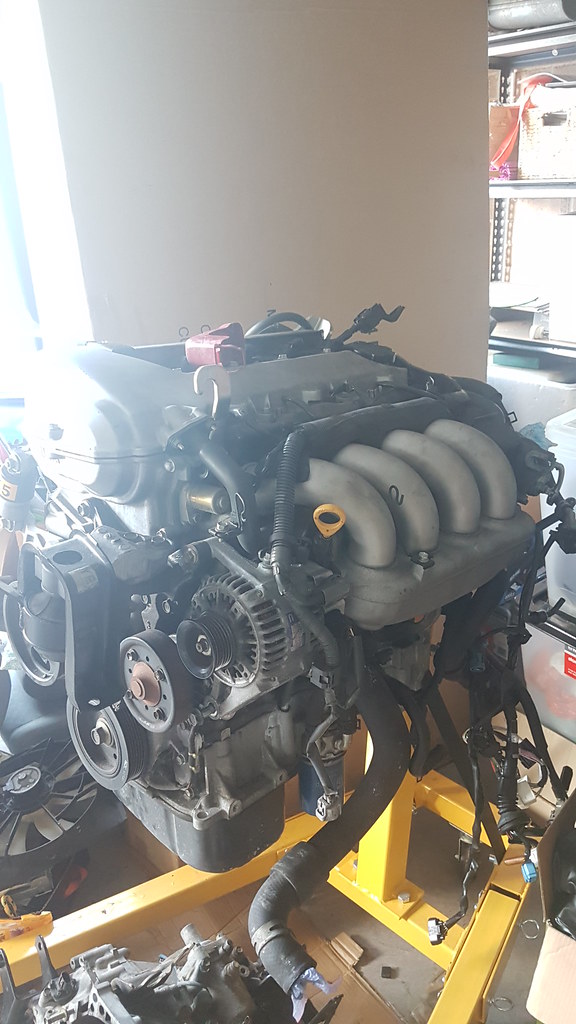
Day +next - engine is now on the stand. Had to take the flywheel off as the mounting arms were hitting the pressure plate dowels, and could probably use a washer or two on the top gearbox bolts as they just bottom out in the block.
Currently pivoting around the crank which makes it super hard to turn (2ZZ is quite top-heavy too), need to try and lower it as much as I can so it doesn't turn in to the Leaning Tower of Pisa. Actually ended up re-fitting the exhaust manifold just to try and balance it in the short-term.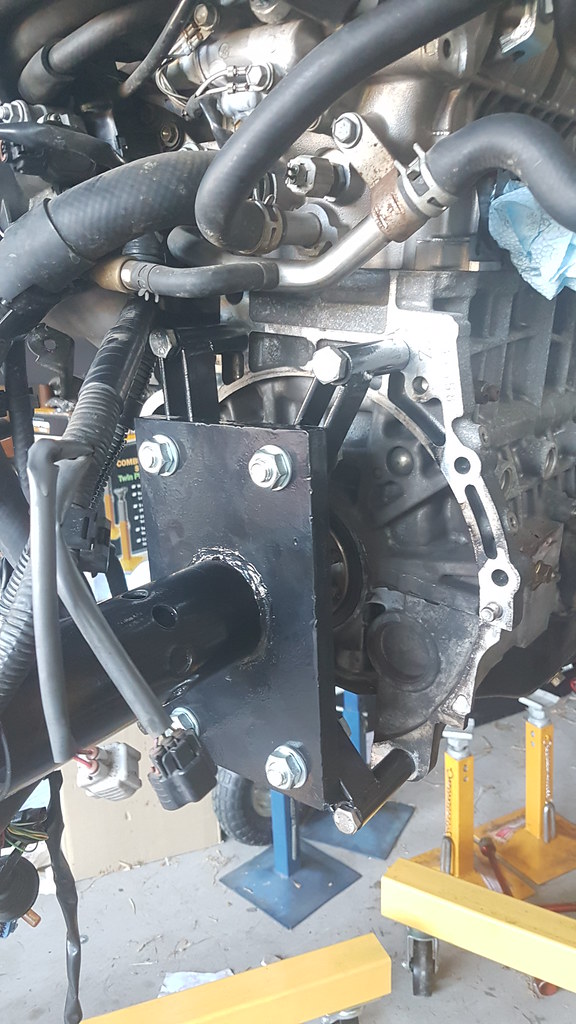
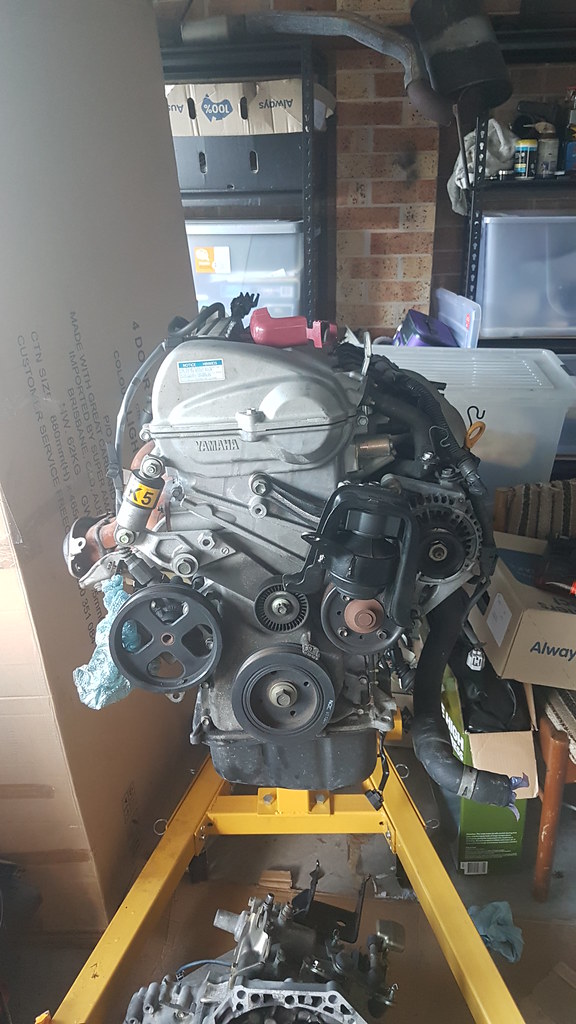
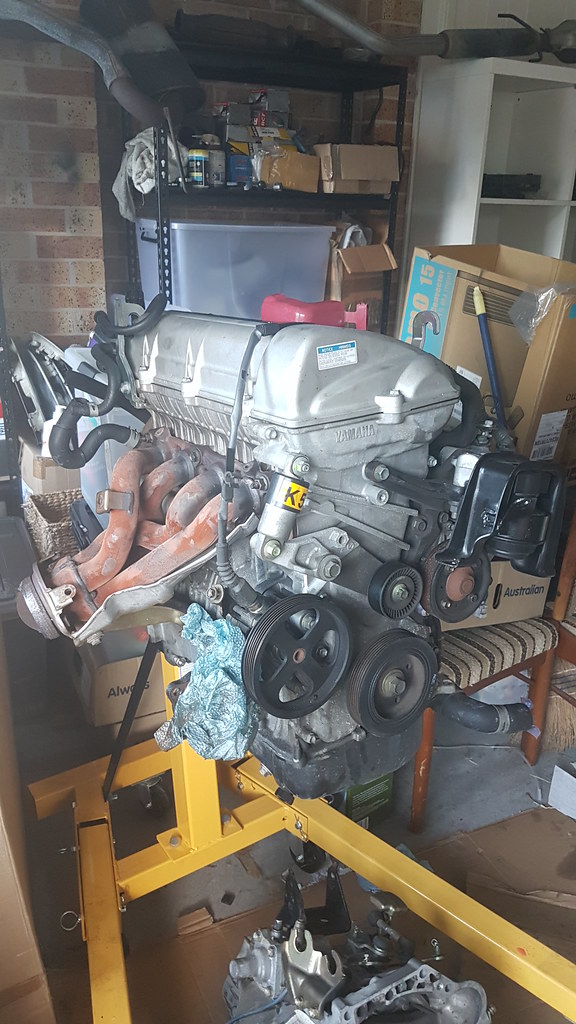
 by Ian Rigby, on Flickr
Next step (after balancing the stand) will be to label and strip off all the hoses etc, get the manifolds off and then pull the cam cover to do the lift bolts (and get an idea on the general condition of the engine).
-
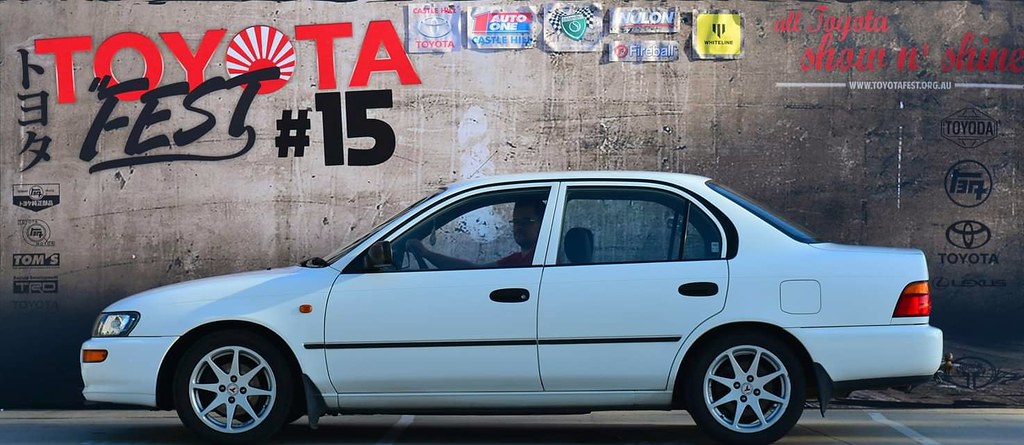
Oh, and I'm now rolling on 15" TOM's AE111 wheels, came up at a bargain price and I couldn't resist a piece of JDM dealer-option gold.
-
So as most of you probably know, about 12 months ago I finally pulled my finger out and get started on an engine conversion that I've been umming and ahhing about for the last ~10 years. Over the course of that time my mind would sway every few months, from a supercharged 20V to a high-comp smallport 7AGE, to a redtop BEAMS 3SGE, and then off to more exotic pastures like a 1MZFE or 2GRFE. Eventually though I decided that most of the standard conversions out there (A- or S-based) are getting long in the tooth design-wise, and I should probably look at something more modern (but not too modern that would make the electronics a nightmare) - enter the 2ZZGE. Good power straight out of the box, aftermarket support, locally delivered so parts aren't hard to find, plus the added fun/awesomeness of Lift and a 6-speed manual.
So with my annual bonus from work fresh in my pocket, I started trawling Gumtree/Carsales/Facebook for cheap ZZT231 Celicas to rip the drivetrain out of (my main reason going with the Celica rather than the Sportivo is the better final drive ratio for cruising, plus Celicas tended to be cheaper and more plentiful) Initially started to get slightly depressed when I realised I'd still have to burn half my budget buying a rego'd runner only to scrap 90% of it, until one day a wrecked but "complete" low-k 2000 SX fell in my lap for the ridiculously cheap price of $700 (the gearbox and engine combo alone can go for $2k). Cue a mad rush to clear space in my garage (because the wife wouldn't want a shell sitting in the driveway and I needed cover to rip stuff out) as well as organise a trailer/tow-car - borrowed my mate's diesel Ranger and found a local guy who rented out car trailers for $50 a day.
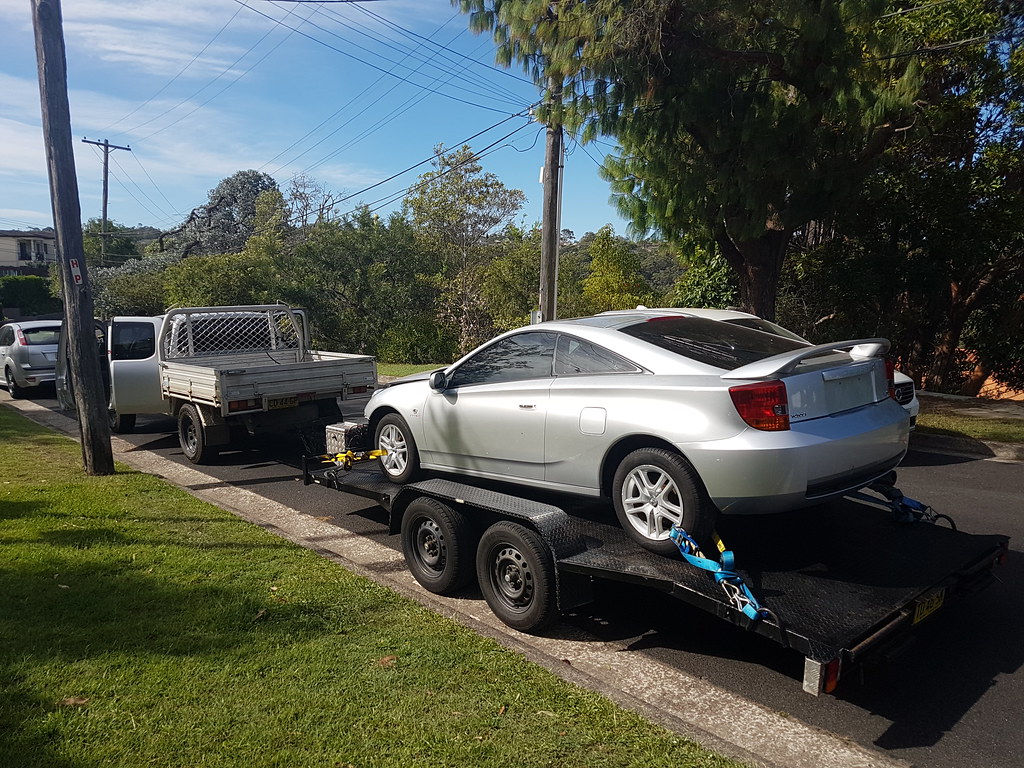
Just to make things more fun, picked up the trailer the afternoon before but none of the lights worked. Checked with my BiL's Jeep and everything worked fine (couldn't take the Jeep though as the brakes needed to be replaced), so figured it would have to be in the wiring on the Ranger....turns out whomever did the wiring harness for the trailer plug used Scotchloks instead of braincells, and had basically disintegrated. A morning-of patch job by another mate saved the day, however no trailer brakes (ute didn't have them fitted at all) left me a bit nervous negotiating the steep hills of the F3 on the way home with 2 tonnes of car trailer behind (turned out to be completely unwarranted though, the Ranger towed like an absolute champ).
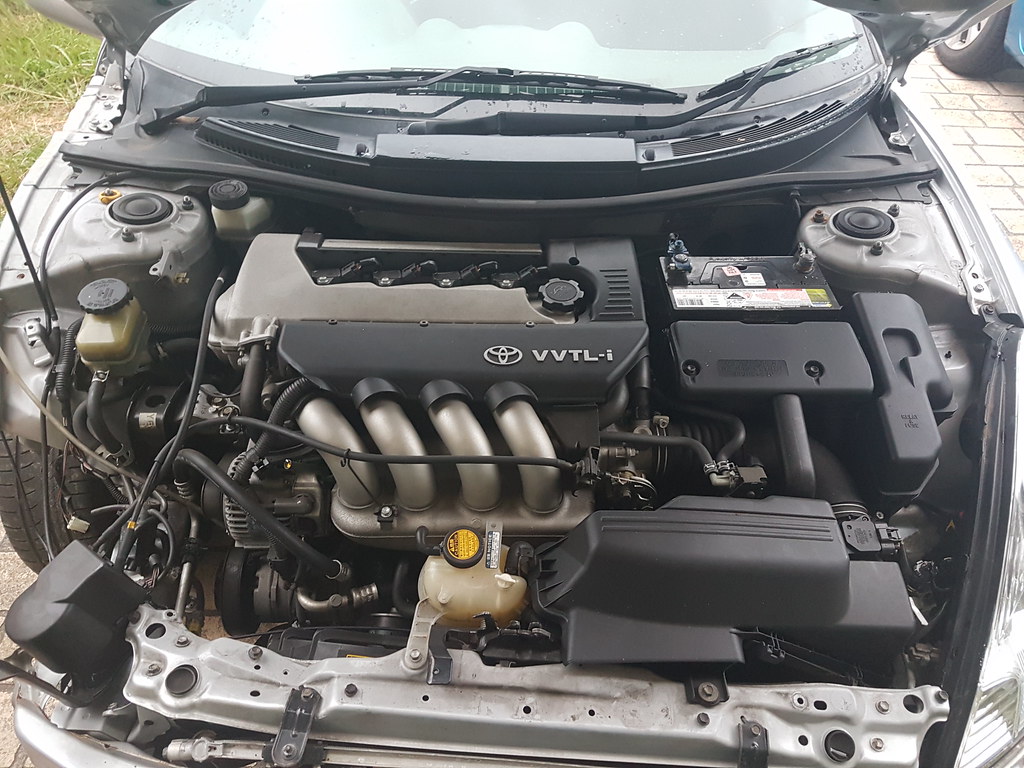
What will hopefully await me whenever I open the bonnet in the future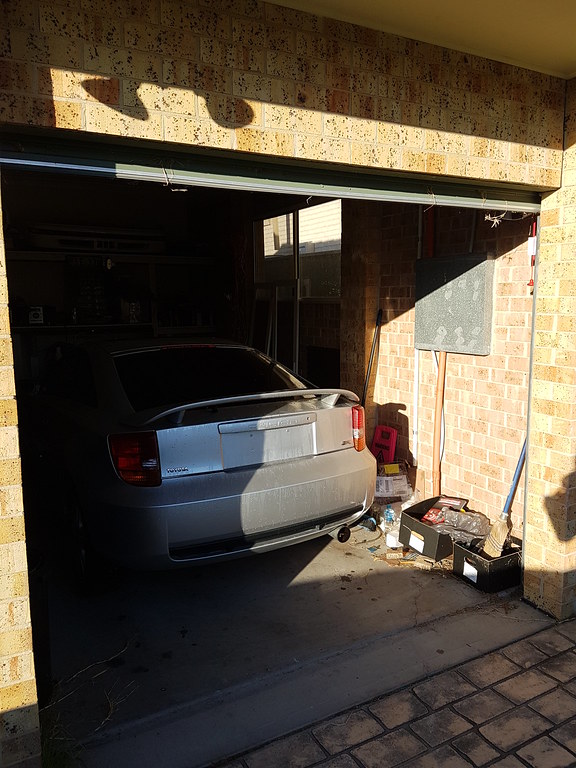
Back home and tucked awayFirst purchase was an MWR order to get the ball rolling - JDM ECU w/ no immobiliser, short-shifter (the Celica 6-speed housing bolts directly in to the Corolla), new dipstick (ring had broken off), solid shifter bushes, and the obligatory lift bolts.
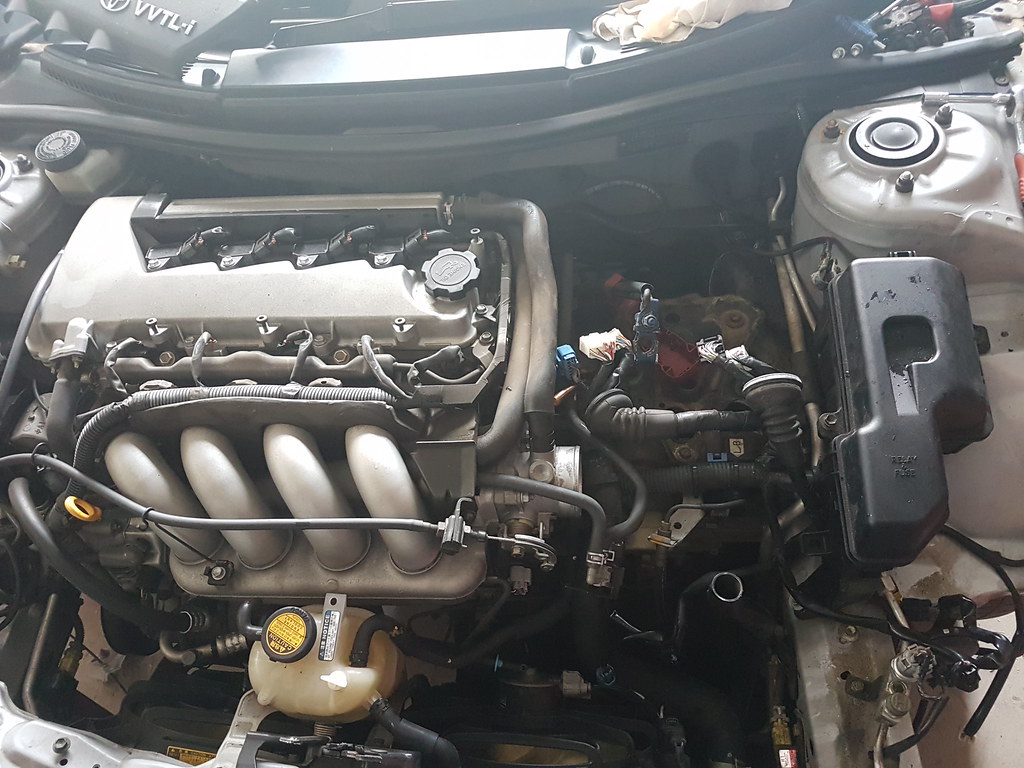
The beginning of the strip - battery, ECU and air intake removed. Over the next few months I would slowly chip away at the engine bay, focusing on making room and getting rid of anything that I didn't need and would just get in the way - radiator, air-con condenser, overflow bottle, by the end of it I had basically stripped the entire front of the car (one of the good things about the Celica is that you can unbolt practically _everything_ from the front end). Then moved my attention to the gearbox and the driveshafts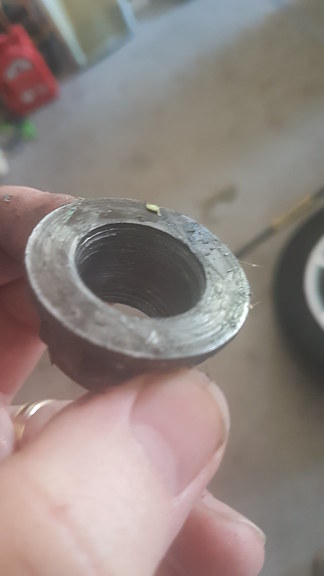
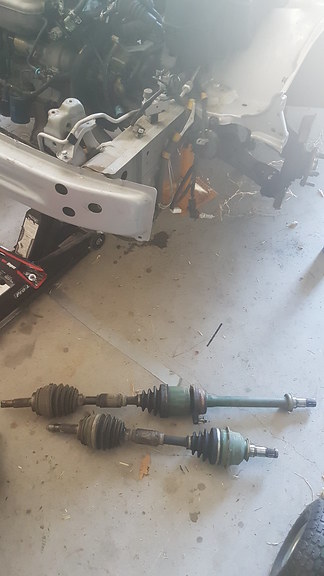
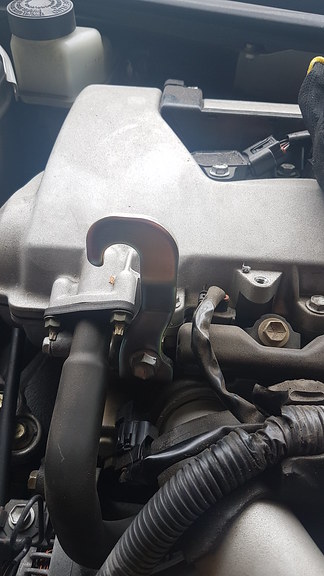
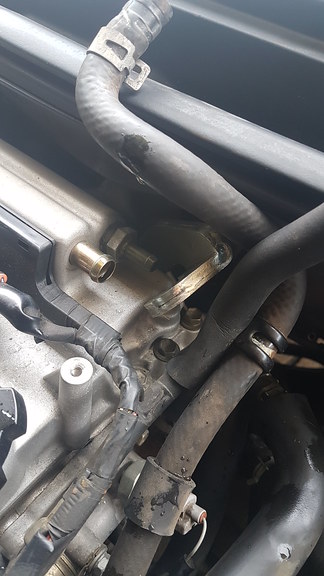
Turns out that you really do need to un-stake the axle nuts before you whale on them with a 300Nm rattlegun.....ended up with 2 stripped axles (wasn't planning on re-using them anyway) and 1 nut in particular that was stuck on because it had stripped but there was still thread either side of it on the axle (part-drilled it out and then pried off with the biggest bar I had). Gearbox oil was green too, which was a bit concerning as I hope it isn't the dreaded Redline Shockproof (which would indicate that the synchros could be on the way out, despite being only 130k). Equal-length driveshafts will be a bonus though.Then made a start on the plethora of pipes and hoses in the engine bay - heater hoses, power steering lines, fuel line (got to love factory-fitted quick-connects) vacuum lines, air-con (at which point I "accidentally" released the entire load of R134a in to the atmosphere as I assumed it had already leaked out from the accident....turns out noooooooooooope), and fitted the engine lifting hooks (figured it best to lift the engine the way Toyota intended, rather than via seat-belts/random bolts etc) - the rear one was a real prick as there is basically no room between the back of the head and the cowl
At this point I realised that the only thing holding the engine in to the car were the 4 engine mounts...........so I thought "bugger it, this thing is coming out today". Of course I chose to attempt this with the car parked in just about the worst position possible, had literally millimetres of clearance between the engine, gearbox, chassis and roller-door.
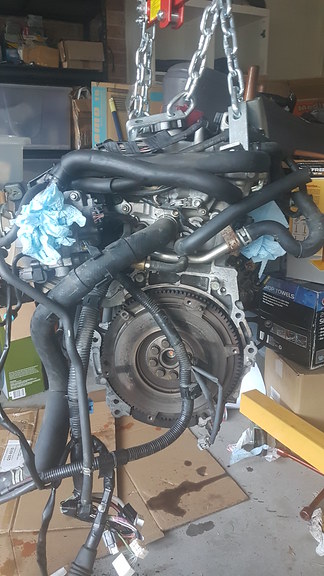
Success! Note for future conversions - load leveller is worth its weight in gold.And I only tested the tensile strength of a single ground wire strap.....guess who won.
Next step was splitting the engine and gearbox so I could measure the bolt lengths required and get the block up on the engine stand (stupid fine-threads...). Block and gearbox were slightly harder to separate than I expected until I realised the wiring harness was still attached to both.....oops.
 20190112_190806 by Ian Rigby, on Flickr
So that's how things stand at the moment. At this stage I'm considering starting the 7A removal around Easter (depending on when my bonus comes in and when rego is due on the Corolla, so I can have it off the road for the maximum amount of time possible without rego cancelling).
List
Timing-end engine mount from a Euro-spec 4ZZ ZZE111 (the E11x has essentially the same chassis as the E10x) - the 3 other mounts should essentially bolt straight on (benefit of the C-series transmission)
MWR adaptor mount (used to fit the 2ZZ in to the 1ZZ-powered MR2/S)
Fuel pressure regulator (so I can keep the returnless fuel rail)
Custom exhaust headers as the Celica ones will hit the firewall/steering rack
New clutch and flywheel (Fidanza probably, not sure on the clutch yet)
New intake (might need to relocate battery too)
New CVs (mix-n-match from a couple of different cars to get the splines and lengths right)
Obvious shits-n-bits for power steering, brake booster, clutch lines, air-con etc etc
Oh, and something about wires....meh, I'll cross that bridge when I come to it


Rare - Rare Find !
in KExx Corolla Discussion
Posted · Edited by Hiro Protagonist
Reserve lifted may mean that it has actually hit the reserve mark by that point, but the seller/agent has decided to remove the reserve (think of it as "lifting" a restriction) in a way of sparking further interest rather than waiting for the reserve to actually be met (sometimes bidding will peter out before meeting the reserve as people lose interest not knowing how high the reserve floor is). You'll see it a lot with house auctions, agents/auctioneers will notice that buyers are losing interest before the reserve is met and will pause/halt the auction to confer with the seller to see if they want to stick to their original reserve and possibly let the auction "pass in", ie not meet the reserve and there is no obligation to sell to the highest bidder (but there is the option for private negotiation afterwards) or if they want to lift the reserve and the auction then becomes "absolute" (ie it _will_ sell to the highest legitimate bid)
Not sure of the legalities, but increasing the reserve price once an auction has started would be incredibly unethical.