

aalaws
-
Posts
87 -
Joined
-
Last visited
-
Days Won
3
Content Type
Profiles
Forums
Events
Gallery
Blogs
Posts posted by aalaws
-
-
7 months for a heater box........yes, a pretty amazing custom fabricated heater box at that so not knocking it, but I was hoping for more........oh well........see you in 7 months ha ha
-
...............18th May!!!!
-
Weekend car, cruise into town for the bread and milk car if I'm not busy working.
Will hopefully take it around to some meets and shows etc - have a nosey in that scene -
1 hour ago, boost said:
your ke25 is looking sweet mate !
Cheers mate - very slowly, but it's nice to be getting some progress. It's going to be a bit surreal seeing it on it's wheels again soon
-
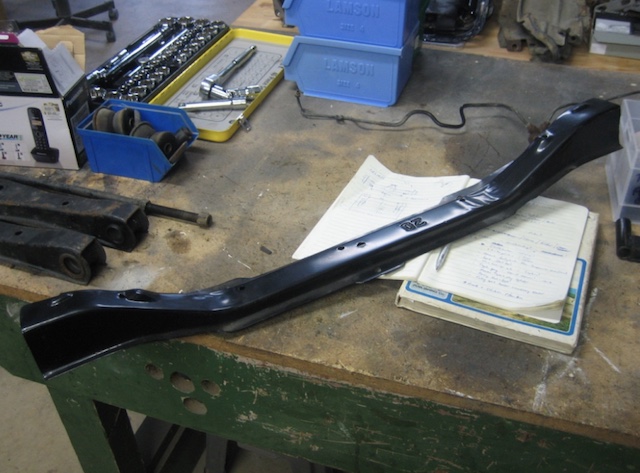
Some stuff has actually been happening.......

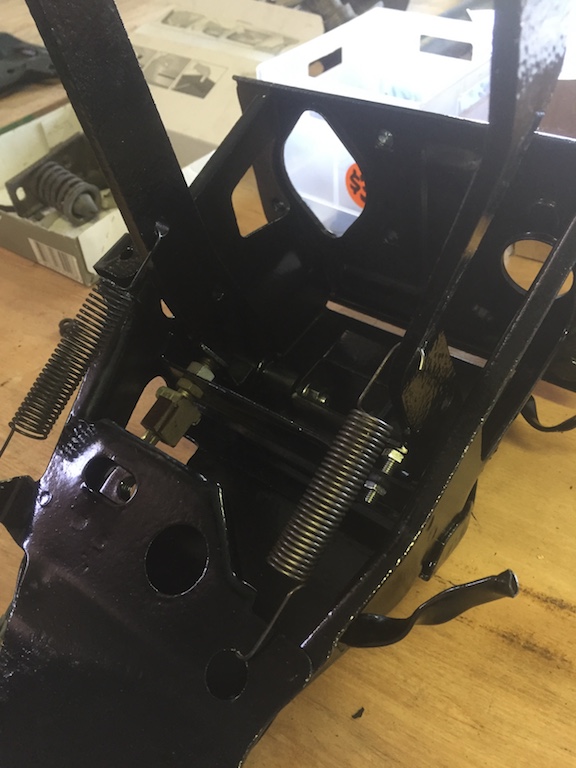
Te27 Pedal box all painted and re assembled
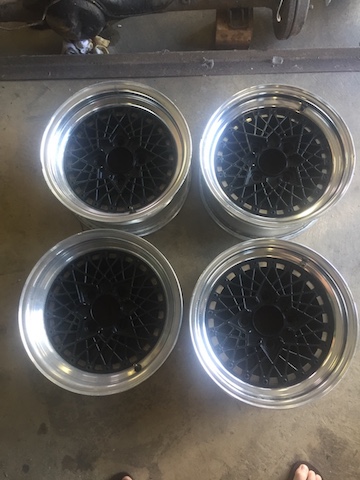
Got some wheels - 14x6 SSR Mesh. I need it on wheels for the panelbeater so these are good placeholders until they get a refurb or something else could pop up.
The lips are a bit scuffed and one is a bit bent, but they'll be getting widened once the car is done if I use them.Jig made!
It's a bit rudimentary and the welds are hideous but the Leaf Spring perches in pretty much the exact right space - tape measure measurements agree with the chassis repair manual. Just need to make a little bracket to keep the face at exactly 90 degrees, but after that everything is you see is ready for some professional cutting and welding.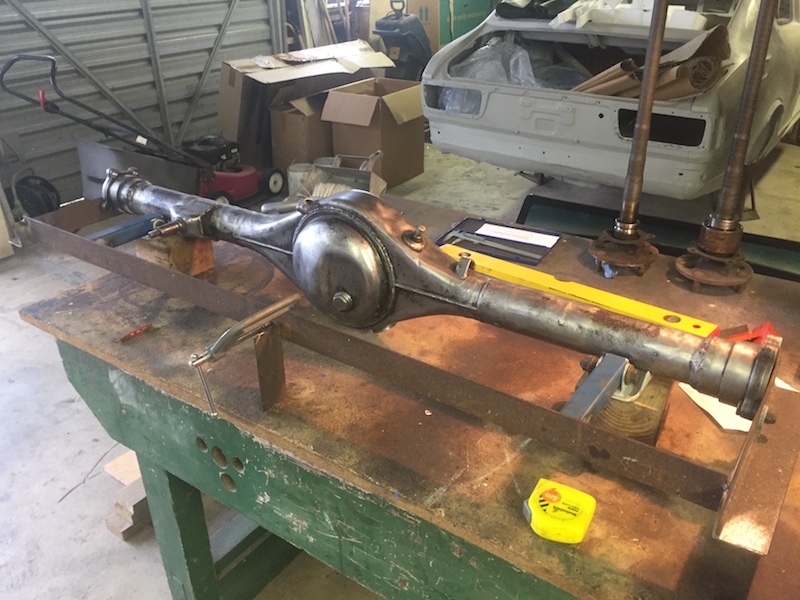

Also had a big stash of bits arrive ready for all the reassembly. All genuine Toyota except for the eBay bushes....didnt really want to go down the nolathane/urethane etc path.
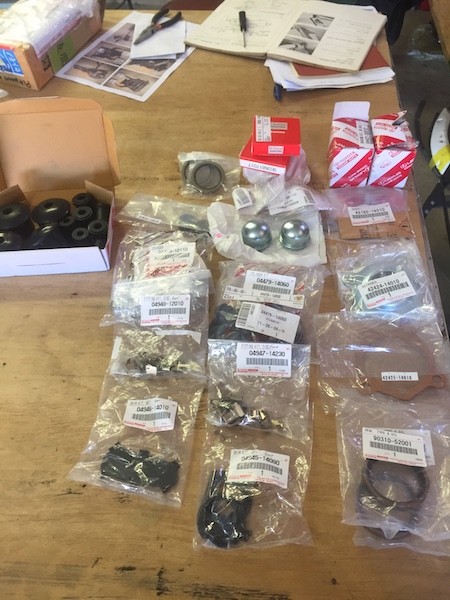
Included with all the bearings and shims etc were 2 little ae86 pedal cushions.....I took a gamble to see if they would fit my te27 pedal box....ah yesssss. OCD satisfied.
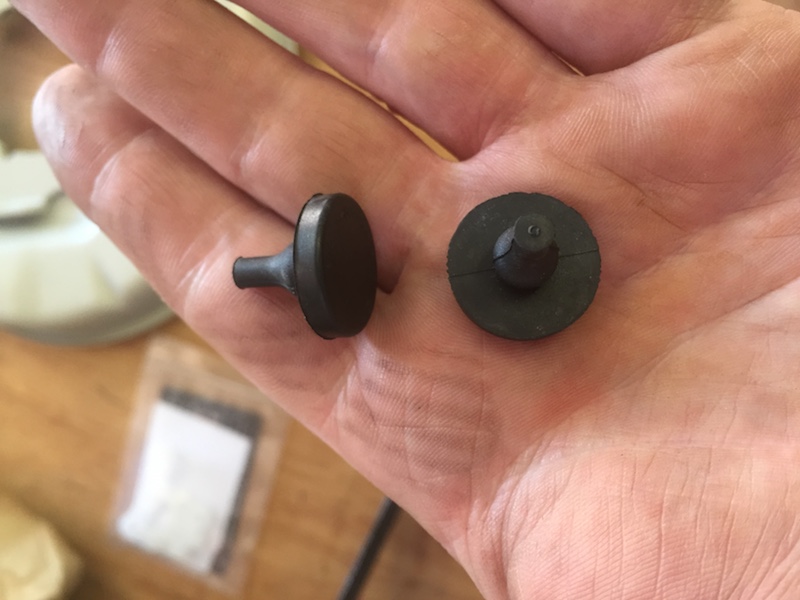
Before....
After.......perfik
-
 1
1
-
-
11 hours ago, Johnny Mac said:
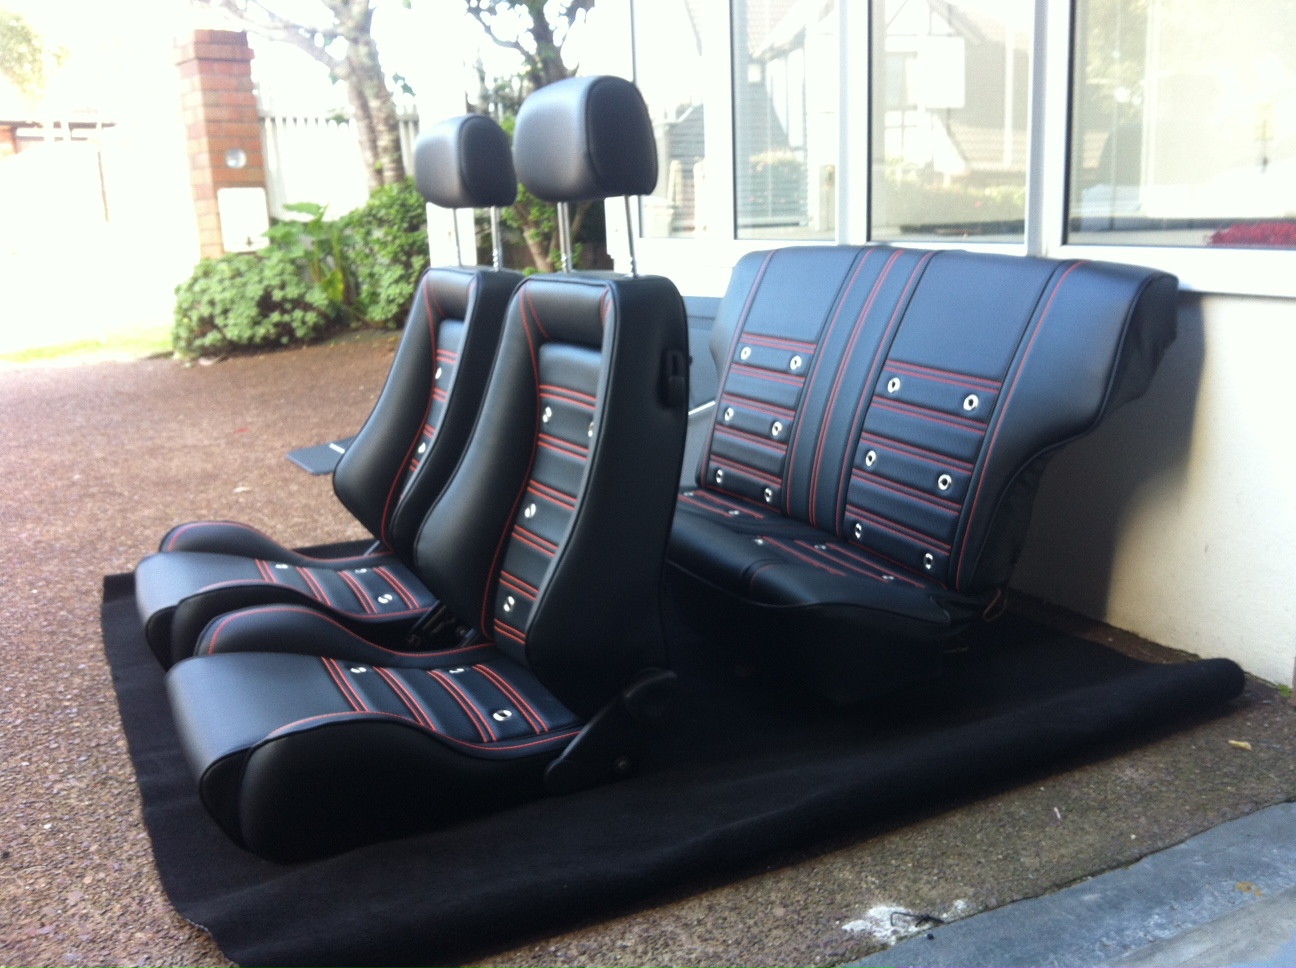
Love the seats! Did you have those door trims made or are they an off the shelf product?
Cheers, John.
There's a guy over here that makes te27 replica seat skins and door cards.......he does a few other models and celicas too. He does amazing work but is pretty much booked out months in advance......the legend is growing!
-
Long time no post.......2 business's and 2 small kids and buying the house will do that to your time and $$.....but.......
KABLAM!!!!!!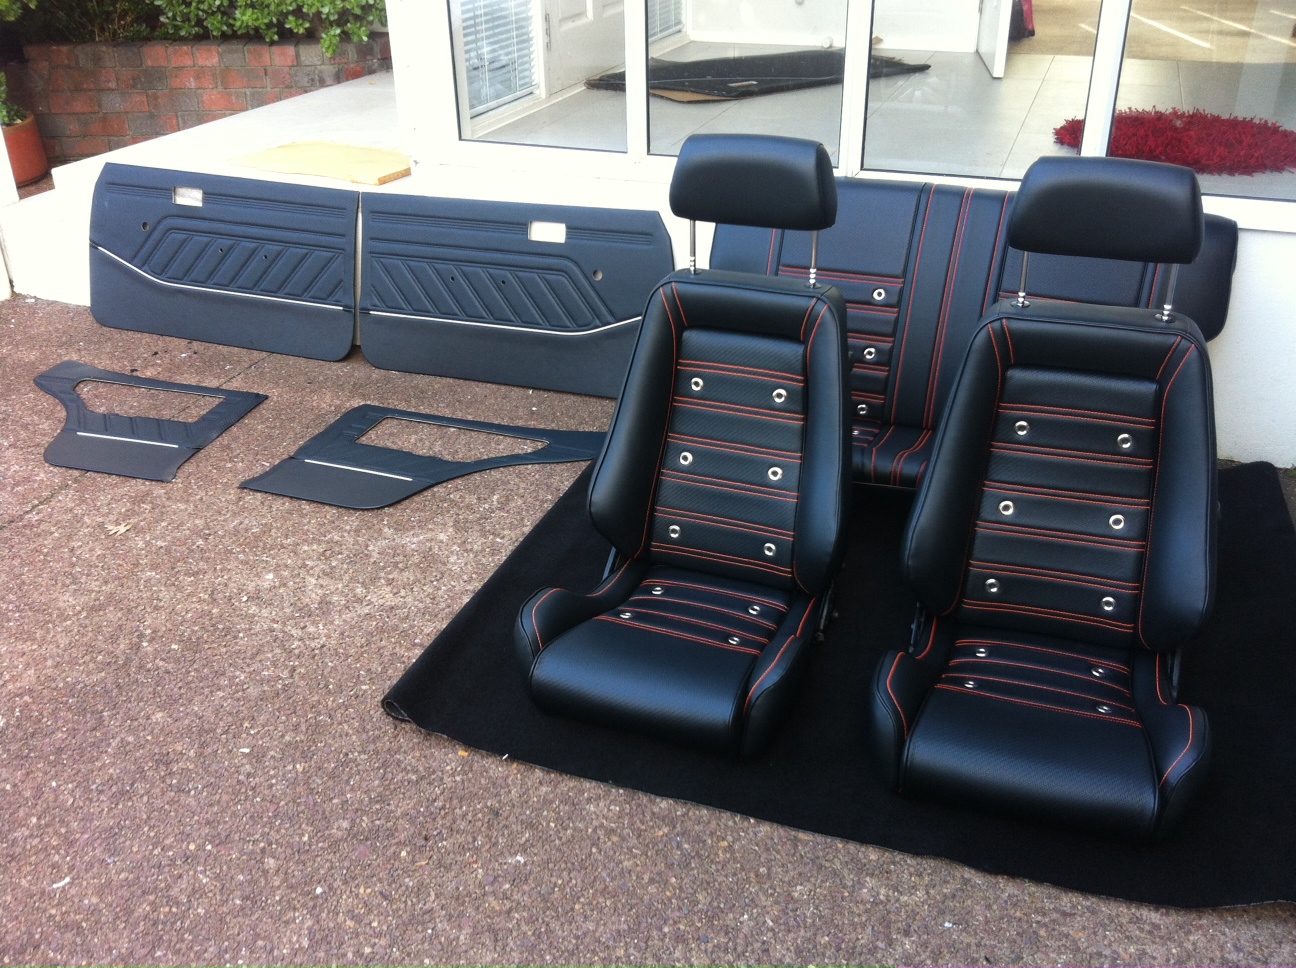
I've spent a bit of time working on my other Toyota project....to fund my other Toyota project.....
I am waiting for space to clear up at the Panel shop to get the body work underway. In the mean time I've managed to track down a few panel cuts and some NOS to boot!
There's been a few false leads of random shells around from as far as Horopito to the Phillipines.......Horopito turned out to be a ke35 and the Phillipines never eventuated.
I am still excitedly waiting to hear on another potential shell. I was picking up some camera's for a video job and the guy had a 1200 coupe in the garage......as I usually do now, I asked him if he had a spare ke25 shell and turns out he does.......it is yet to materialise but I will keep chasing this up!
Just need a drivers side now! Also have a complete rear panel (Taillight surrounds/lower valance etc) currently in the next ML Racing container form Japan.
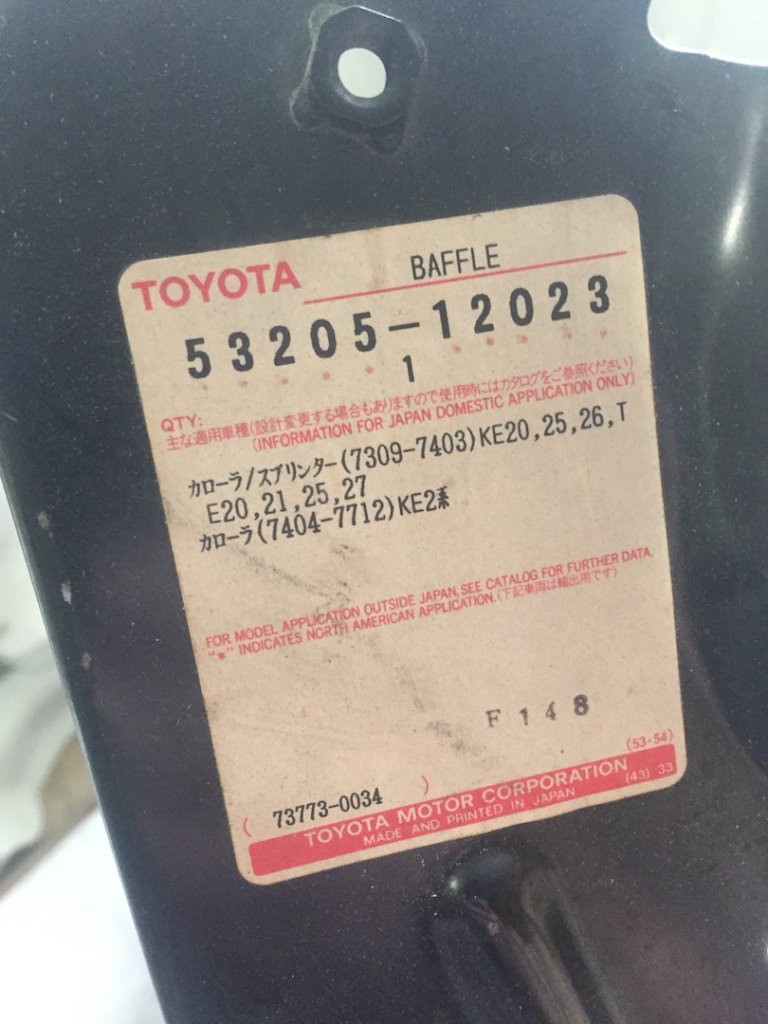
NOS indicator lenses - Much shiny goodness!
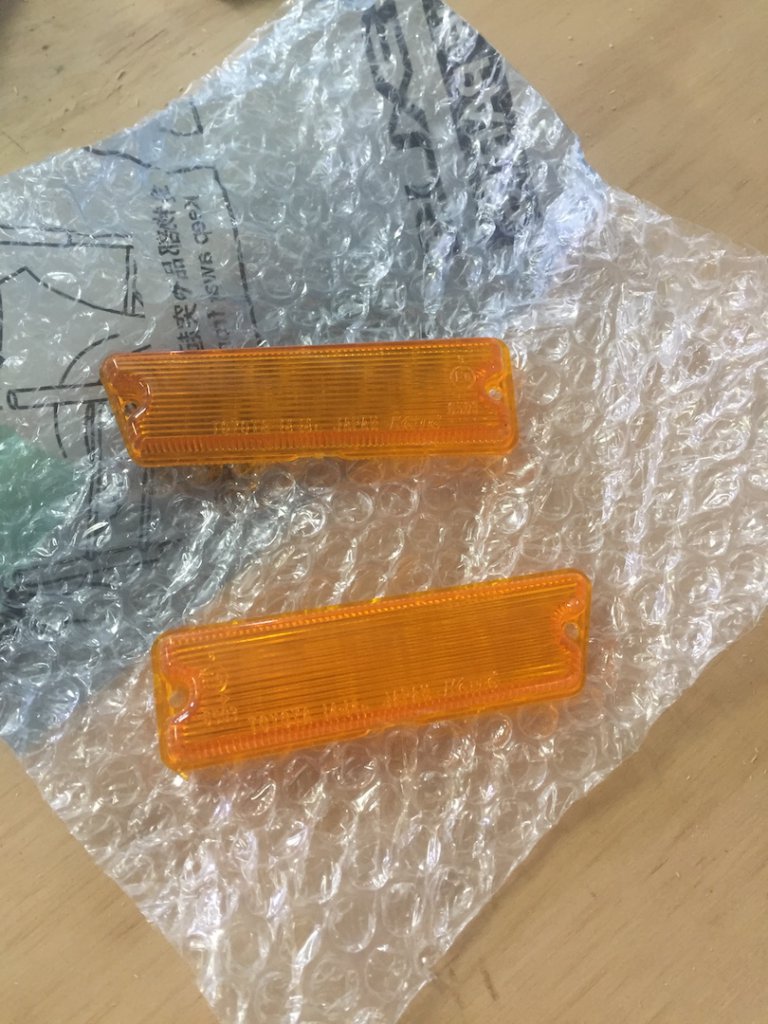
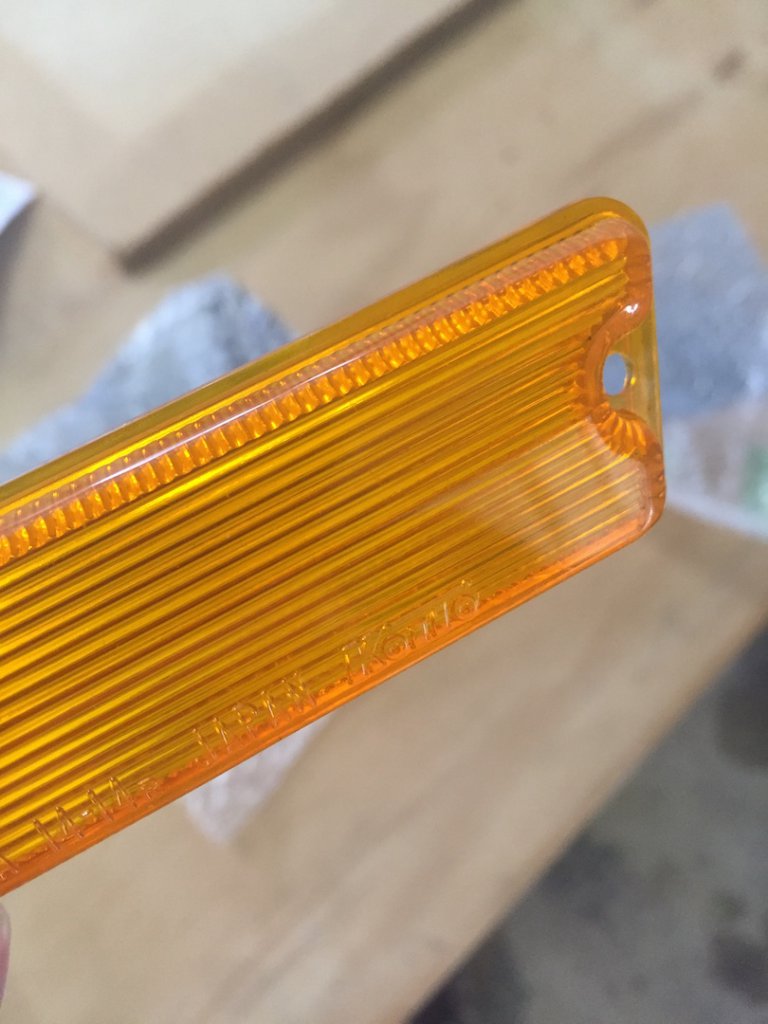
-
1
-
 1
1
-
-
that's looking pretty fly
-
next episode comping on the 25th!!
teaser trailer
-
My 75 had wood grain, so does my 73.....They're both facelift so not too sure on the flat front earlier models.
From what I can gather, the SR models like mine had the woodgrain and rev counter dash. The lower Spec models were the plain black.......which looks better IMO.
-
yup the NZ spec ke25 had the woodgrain dash
-
ahh woodgrain dash?! Thought all the TE27's were black interiors?
-
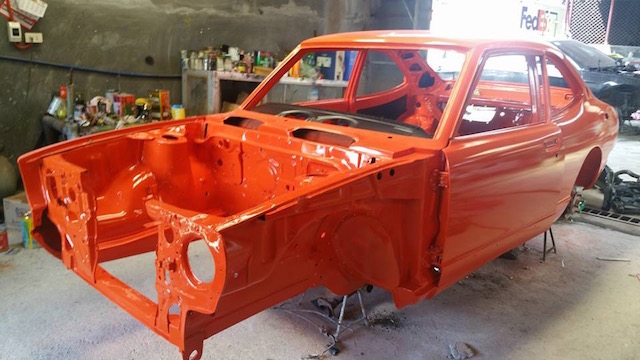
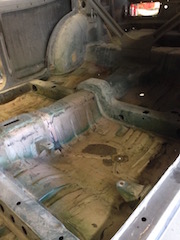
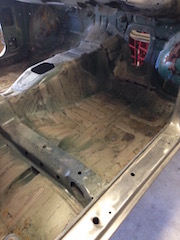
PROGRESS!!!!!!!
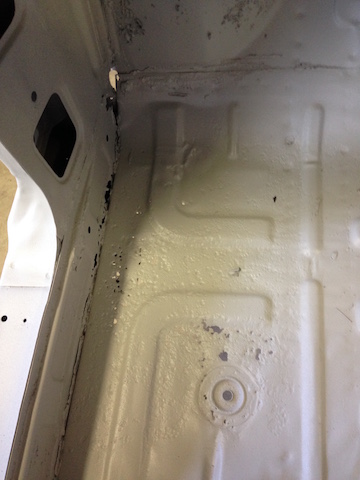
Picked up the shell etc from getting blasted and primed.
Waikato sandblasting did a good job of removing all the rust, paint etc from the underside and engine bay, and everywhere i couldn't........and with no panel warpage.
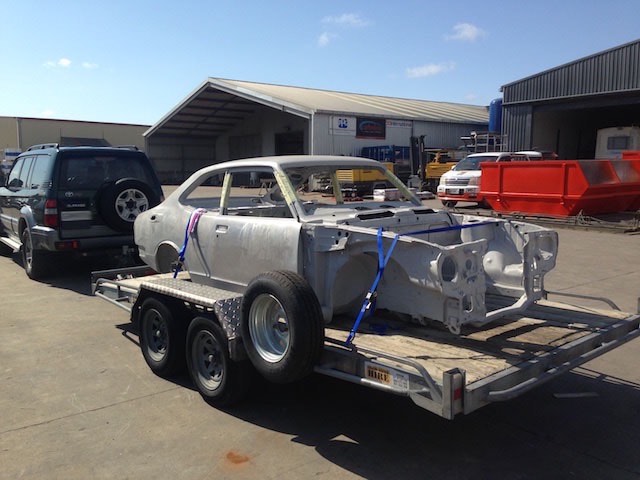
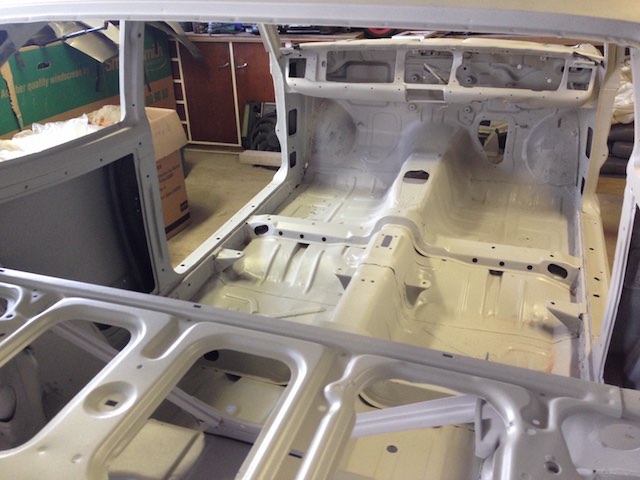
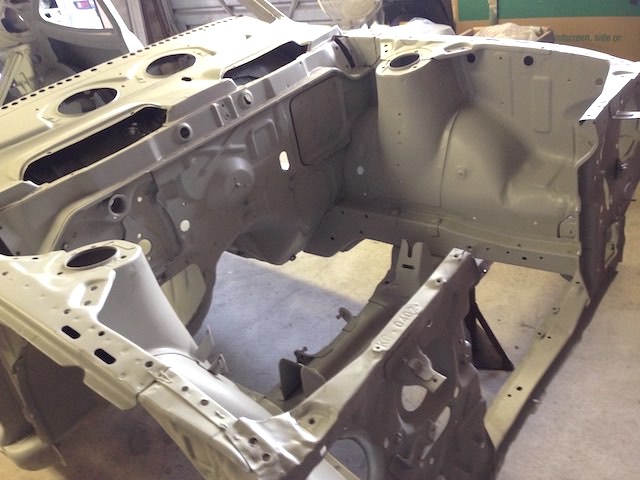
No extra rust uncovered! just a few spots where it's true extent was revealed
Also just a little bit of motivation (courtesy of some dude in the pillipines - SIC)
ALSO: Engine is all good, just need 0.5 OS pistons and new rod bolts.
Diff is all stripped and ready for leaf spring perches to be welded on.
-
so did they make you shorten your diff and axles in the end??
-
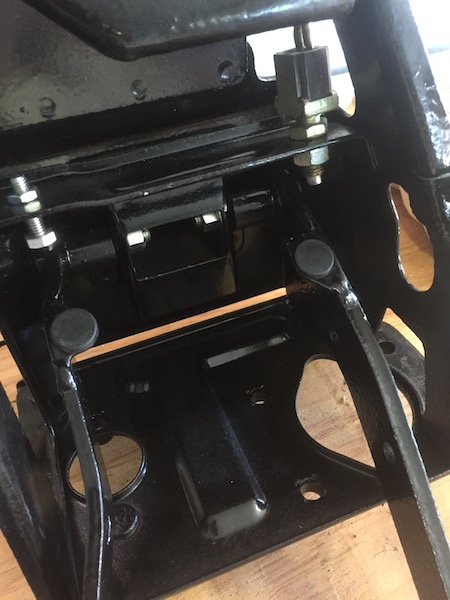
Hi there i think mine is like yours exactly. I had opened mine and its not that complicated. Here are some photos of inside it.
Good stuff! Those are some gnarly looking hard working hands :)
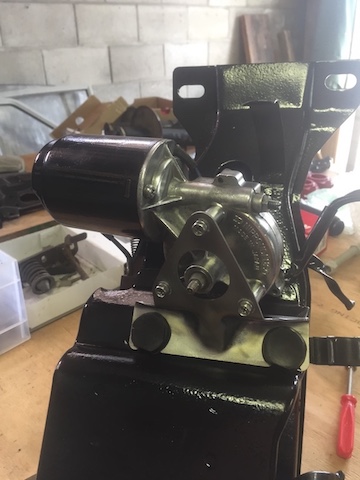
Looks like a LHD booster with that heat shield? did you need to replace much inside? some rubber seals?
-
The booster internals look moderately complex. I've got a NOS rebuild kit for mine and there are quite a few bits in it.
I've also got a 1974 brake manual that shows a rebuild procedure. I can send you that if you like.
Panhard mount is the one on the left halfway between the damper mount and the trailing arm bracket.
And yes, you mount a tower of sorts on the other side of the car. It comes down from the floor. There is some geometry involved in ensuring you have it in the right place, so you might want to spend a bit of time researching that. I vaguely recall that you could buy panhard chassis mounts for some other modified Toyota. I think it was a longer one for an AE86
That's a good NOS score! - what do you reckon about NovaLuke's booster in the pics above? same one?
I'd love a copy of the manual mate! don't suppose it includes re-assembling a te27 pedal box also??
Mines off to get sandblasted and painted so I can reassemble it.
I'll do some more digging about the pan hard, shouldn't be a major by the looks of it then.
-
Finally put an engine stand to proper use

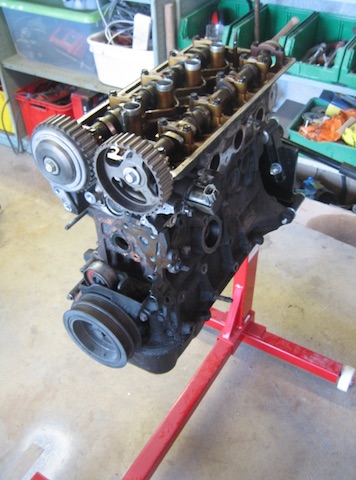
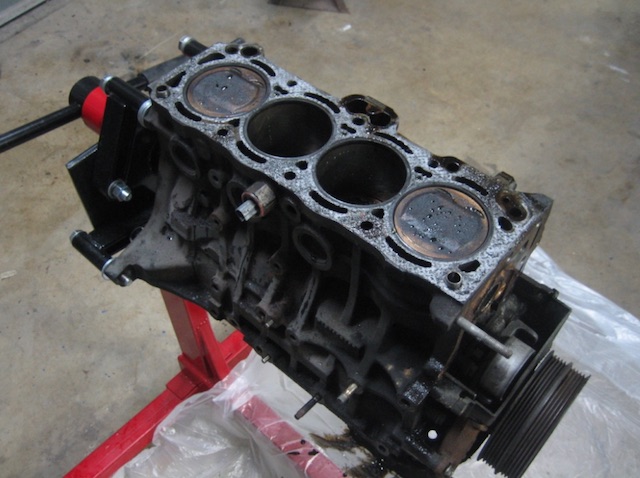
This is my first time ever pulling an engine apart and it's going pretty well so far. Filthy as but looks in pretty good nick for 250plus kms
Turns out I went to college with the guy that owns the local engine rebuild shop so I'll be sending the block etc off to them to get it cleaned up and sorted for the rebuild.
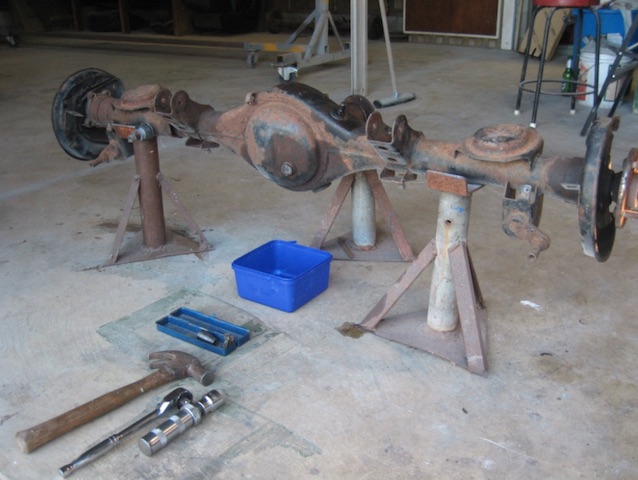
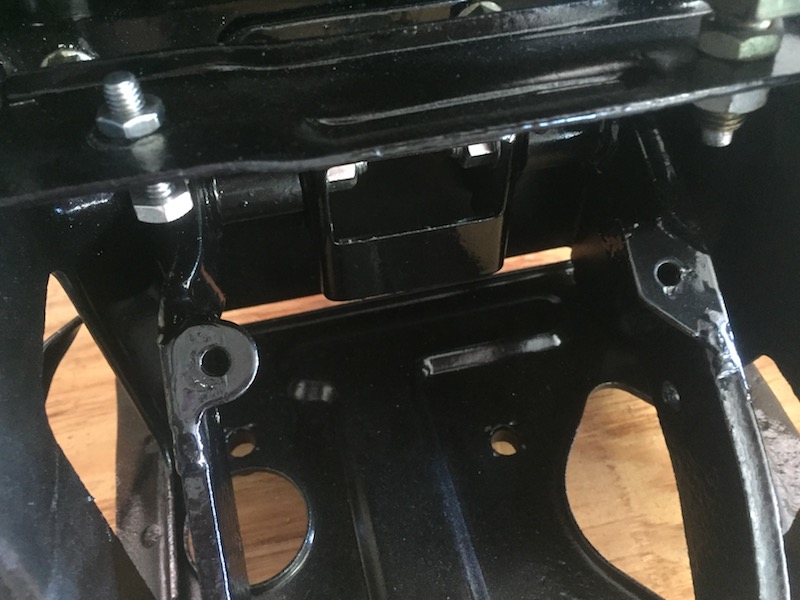
Started prepping the ae86 diff for trimming off the mounts. The drain plug is STUCK, oh well we'll sort that later.....I was told I could keep the pan hard bar mounts for on the ke25......
a) be gentle...........
 which one are the pan hard mounts? I assume I'll need to fab a mount on the chassis?
Also had a few more goodies turn up in the mail.....
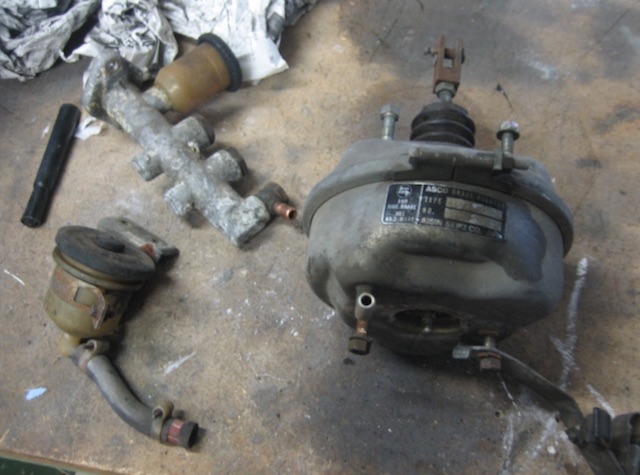
Te27 booster arrived!
Whats the story abut cleaning/fixing these up? will the guts go flying everywhere if I open up the booster to clean it up?
-
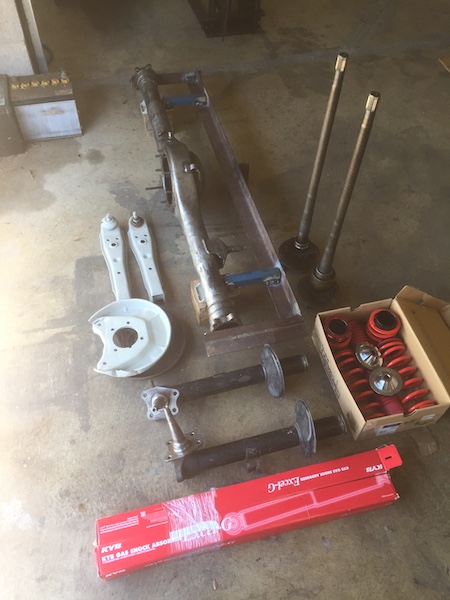
one shipment of goodies arrived.....few more parts to get and i'll get the front suspension all assembled and ready for later.

(just found my camera again so better photo's from now on too)
-
Got to love what filler can hide. I reckon just paint. I've had some really disappointing results with powder coating. From waiting forever, parts temporarily (thank god) going missing, poor finish due to poor prep etc etc
I'm going with Dulux Metalshield epoxy enamel in a satin black. That way I know it's done right as I have full control over the whole process.
I knew there was a possibility of finding some there......considering I completely recreated the front of the fenders on my first car with bog when I was 15 - a touch of karma.
Cheers for the tip regarding paint, I had the impression it was a 50/50 thing just wasn't sure if powder coating had any benefits over paint.
I need to decide which parts I get sandblasted and epoxied along with the shell so needed to decide on the finish.
-
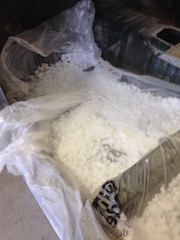
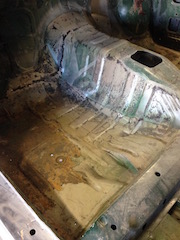
Dry ice works a treat when you grind it up a bit = no more sound deadening.
Only a few spots of surface rust under there thankfully.
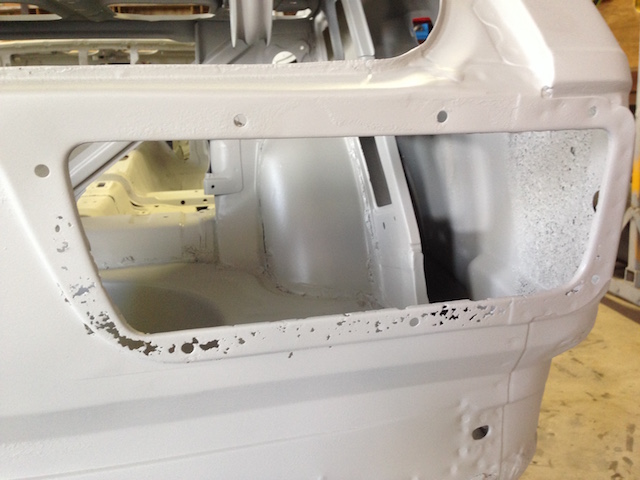
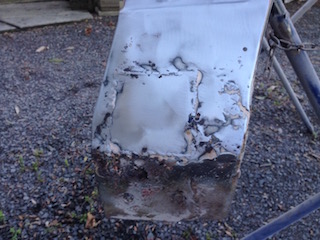
Stripped back my only genuine fender, found a mess on the bottom and another hack job on nose!!
I've got a few spare aftermarket ones but I hear they can be an average fit. I also ordered a rust repair panel for it and a few other goodies in the mail.
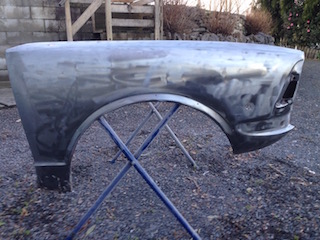
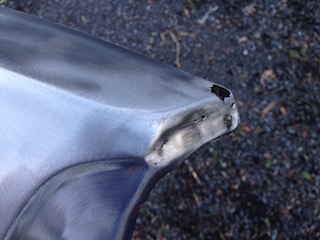
Now it's off to the sandblaster with a bunch of other bits.
Whats better for the subframe etc.......powdercoating or painting?
-
I just watch the whole thing with my jaw dropped wishing I had trained as a fabricator!!
-
post up some pics of the rear screen.....I have worked as an auto glazier for a bit so may be able to help.....
Looking good BTW :)
-
awesome....can't wait to see these clips, always checking you tube for a new one :)
-
nice bro......so good to see a coupe getting a resto.
I'll be getting some of grants trim here in NZ for my ke25. We didn't get the te27 here so I've imported bits from Japan and running ae86 gear and a Blacktop 4age.
I'm only at the early stages though :)


Ali's Ground Up Ke25 Rebuild
in Rollaclub Rides
Posted
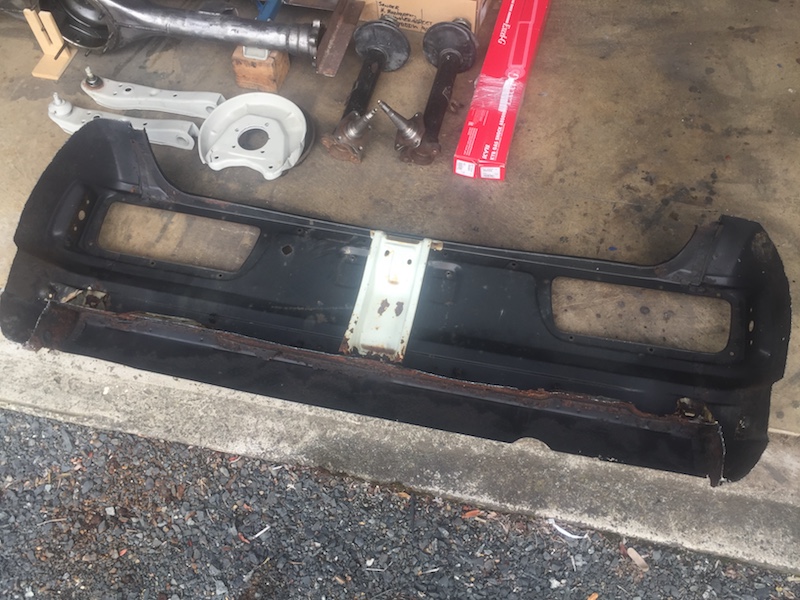
Few good updates.....My rear panel arrived and it looks like it's been a newish panel stitched on to a rustier car. It's been hacked off the back of the donor so thankfully all those rusty bits like the remainder of the boot floor etc can just be removed as I only need the actual face of the panel. It's got a bit of pitting along the bottom valance and a few small holes, but it's miles better than the bent swiss cheese on my car at the mo.

And I had my suspension mounts, struts and a few other bits professionally welded and certified etc
Bearings removed from axles and minor repair to axle - wire wheeled up the hub faces and will need to replace a stud.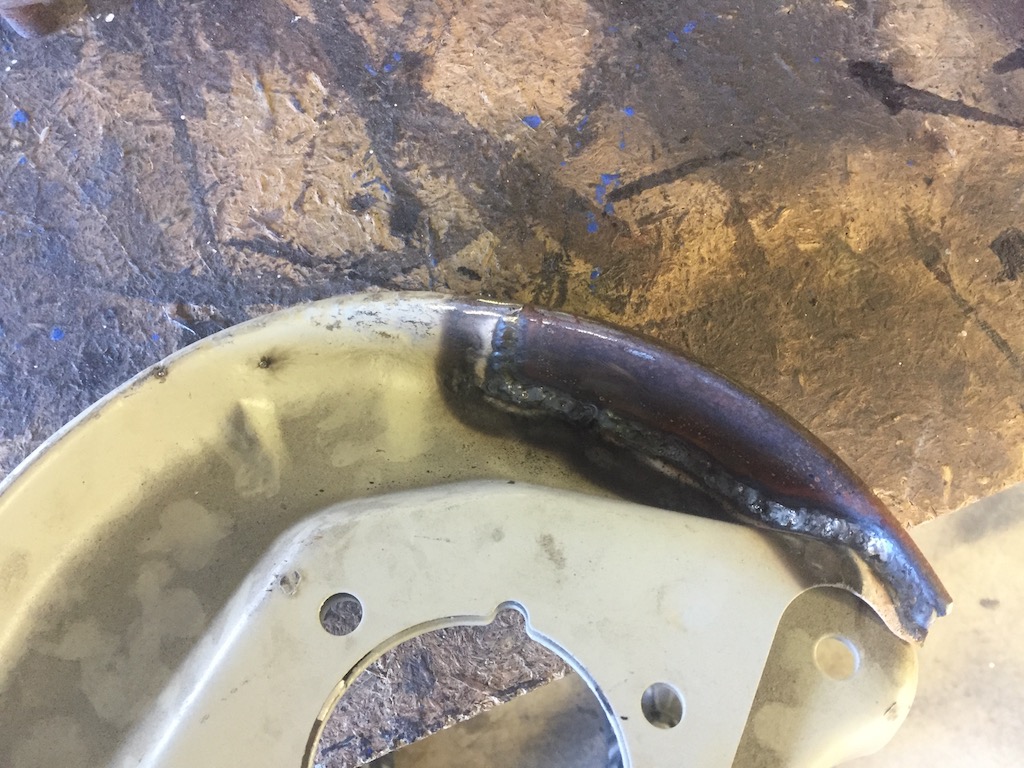
Ball joints removed from LCA's, bolts swapped into straight (non bent) strut bar.
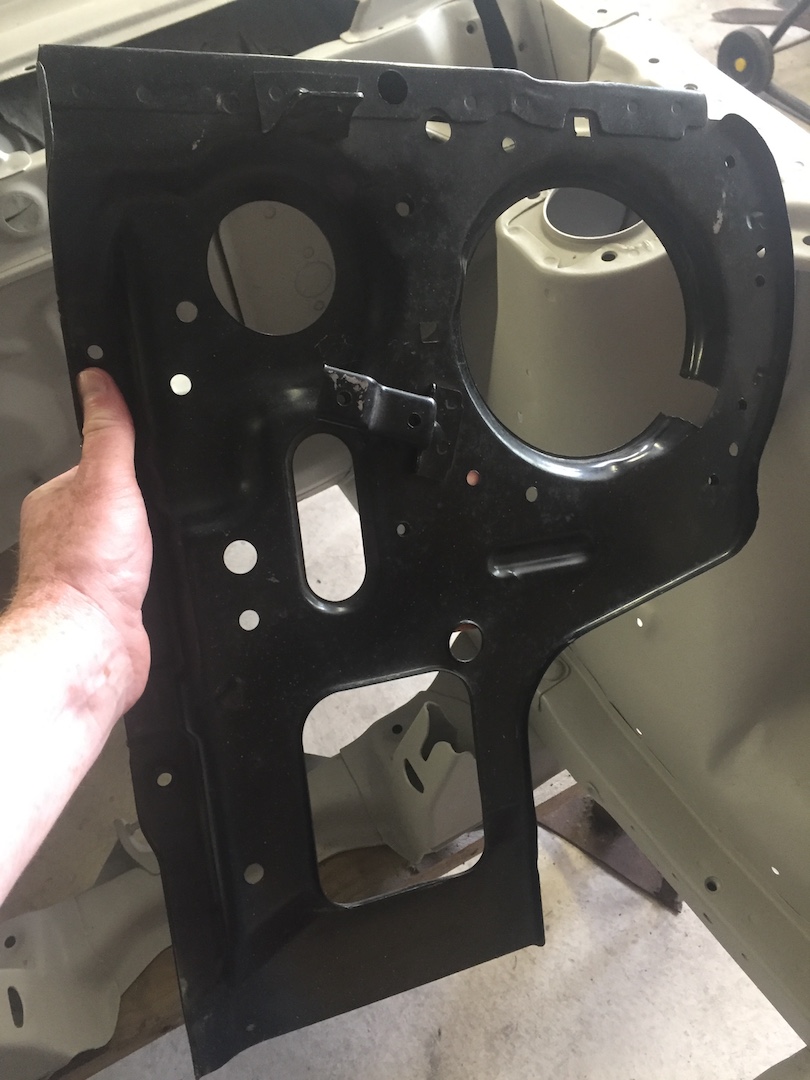
Rusty section cut out of backing plate........which I then proceeded to put a hole in when cleaning up the welds ha ha will get it filled up easily enough.
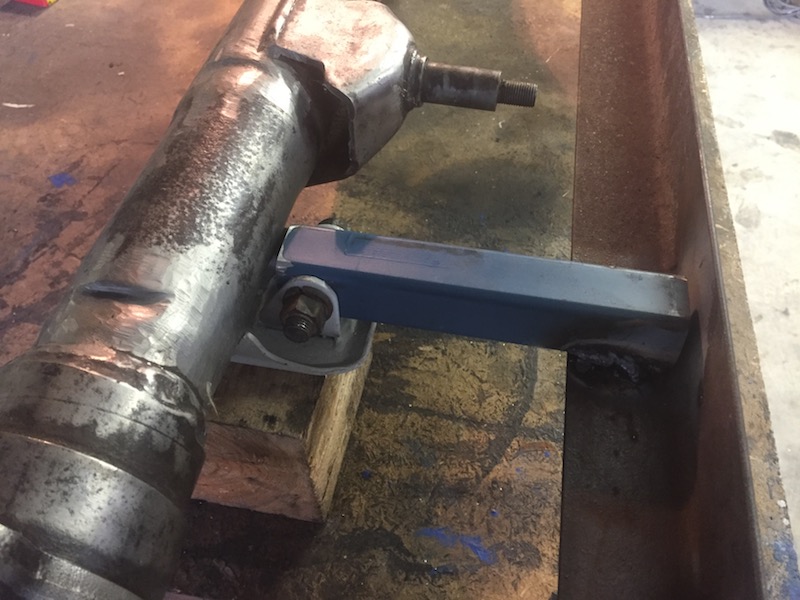
And the main event........leaf spring perches onto the AE86 diff housing
And after a quick mock up and to check alignment......it is the goods! (will need to get bigger U-bolts for the larger diff housing)
MMMM......professional quality welding
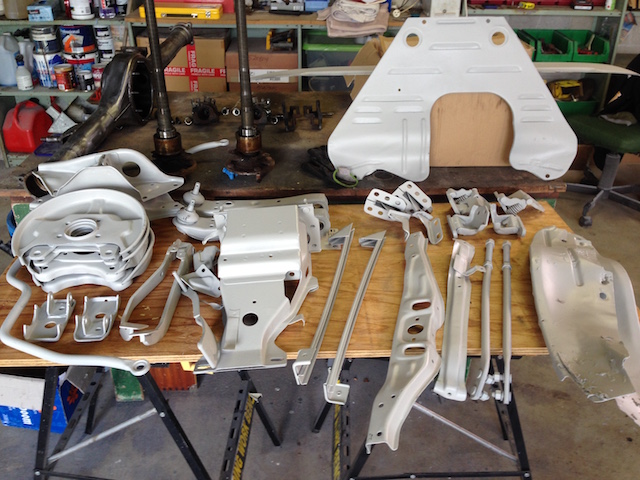
Gave a few bits a coat of primer the other day, then some top coats yesterday while the weather was......warmer atleast.
It got pretty cold once I had finished, hopefully that doesn't effect the6-8 hour cure time??
Had them all hanging together with the fan heater going to warm up the area....complete with hi-tech corrugated cardboard insulation barriers!
Powercleaned the diff housing, doused the inside with CRC and gave it a rub down with rust converter, and another coat on the leaf springs.
Also had the shitty paint blasted off the callipers and got some crappy tyres fitted to the wheels to get it rolling atleast.
Ordered some bigger U-bolts and the lowering blocks/brackets are being modified to fit them. Also got a massive stash of new seals, bearings, bushes etc.....
Now I just need another good day to finish off the top coats and the fun part of assembling all of this to get it rolling begins!