Upgrades:Nikki Carb onto K motor
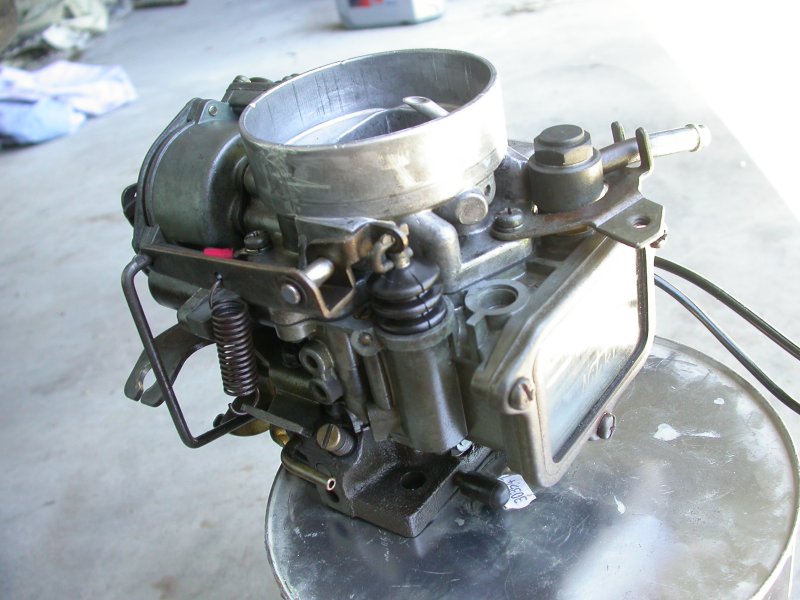
The only thing preventing a Gemini carby from bolting straight on, is the fact that it sits too low and the throttle linkage will jam against the intake manifold. The way to modify it to fit is to acquire an extra base gasket to step the carby up a bit higher. You then have to shave a piece off the throttle arm, where it will hit the intake manifold. By doing this you also need longer studs to mount the carby to the intake manifold as the stock studs are too short to get the bolt on. You then have to enlarge the hole in where the accelerator cable connects, as the hole is smaller than the cylinder on the end of the original Corolla accelerator cable. Once it fits you have to crimp something over the other end above the accelerator pedal so there is no play in the cable. Or alternatively you can take the cable somewhere to get it shortened..
Disclaimer : Mazda Nikki Carbs may be a bit smaller than the Holden Gemini (Isuzu Gemini) Nikki Carbys. This might make finding a suitable aftermarket air filter box a bit harder. Also, certain parts of this How-To may not be relevant with the smaller carby. Discussion of this issue can be found here - Demuire
Stuff you will need for the conversion..
1. Gemini carby (Auto Choke)
2. Intake Manifold Base Gasket (Ripped one off a 4K at the wreckers)
3. Longer Studs to mount carb (pulled a few off a Gemini motor exhaust manifold)
4. Gasket Paper
5. Fuel line / Hose clamps
6. Thin metal tube to crimp over accelerator cable
7. Sports air filter to suit Gemini carby
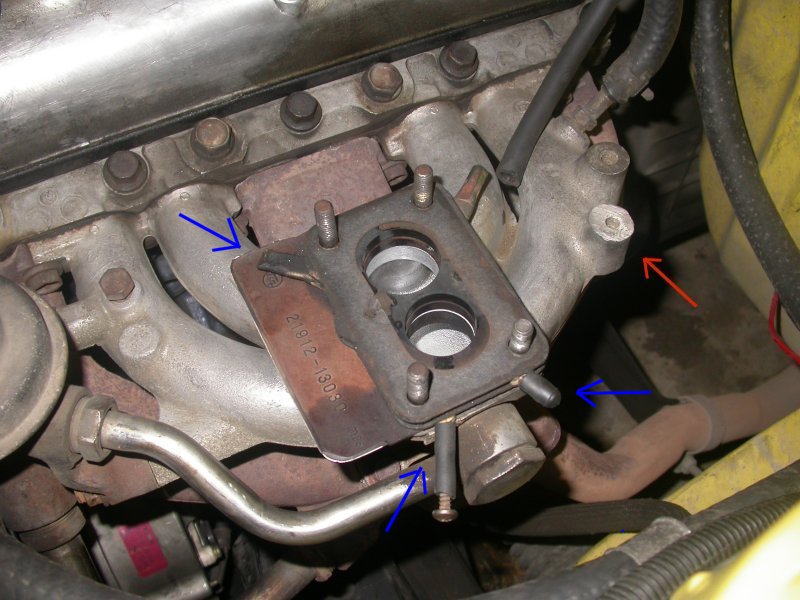
Once you have ripped off the old carby, shave the knob off the intake manifold (Marked by the red arrow). Now put on the second base gasket as pictured (Block all the ends marked in blue so you don't end up with a vacuum leak). Thirdly you will need to shave a small piece off the throttle linkage on the Gemini carby. Just test fit the carby at this stage and make sure you can open the throttle linkage to full throttle. Once you know that it no longer has clearance issues with the intake manifold you will need to trace and cut out some more gaskets from the gasket paper. (You will need 3 in total). These go in between the exhaust manifold and the first base gasket, in between the first base gasket and the second base gasket and in between the second base gasket and the carby.
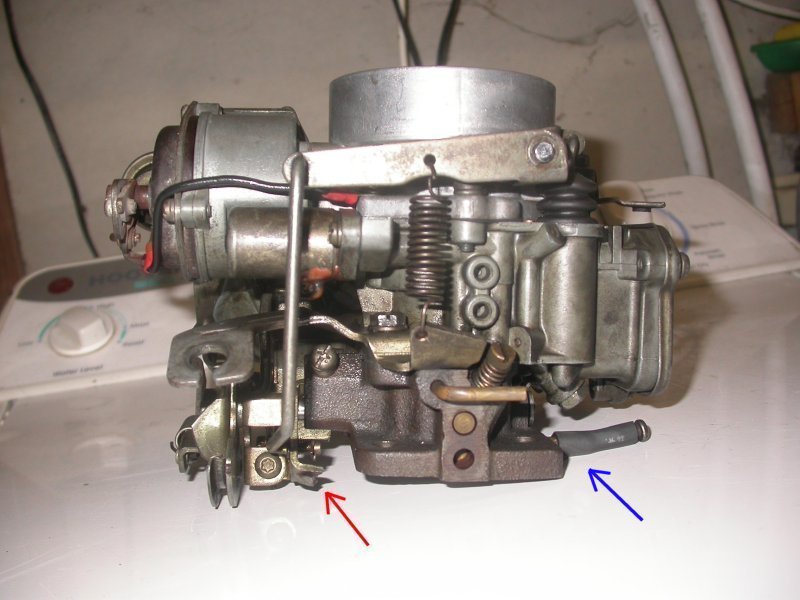
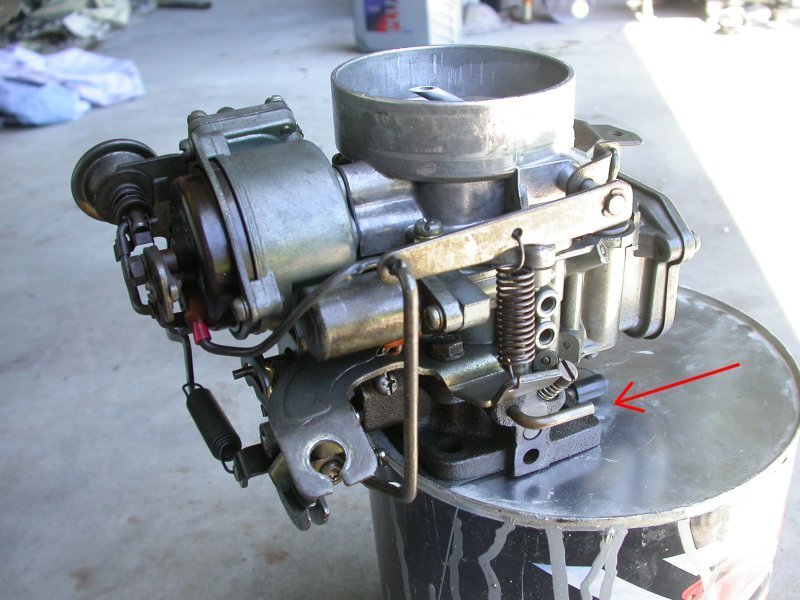
This picture shows you where you need to shave a piece off the throttle linkage so that it doesn't catch on the intake manifold. (Shown with the red arrow). Also block where the blue arrow is so you don't have a vacuum leak there too.
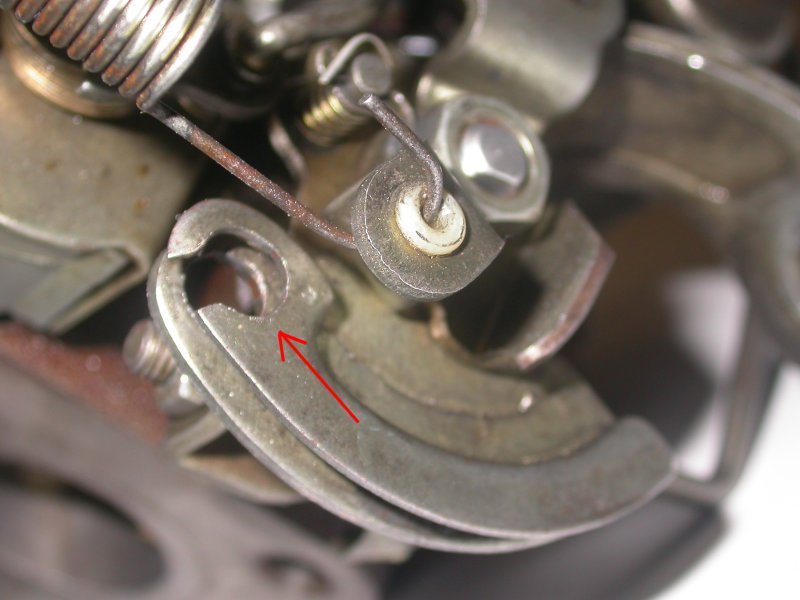
Next drill out the accelerator cable housing in the throttle linkage (Shown by the red arrow) so it can fit the larger cylinder in the end of the accelerator cable.
Once the carby is ready to mount on the intake manifold, replace any of the studs that aren't long enough to get bolts on (marked by the blue lines) and also re-connect the PCV line (marked by the red arrow) Now you can bolt the carby back down.
Crimp a piece of metal tube over the accelerator cable above the accelerator pedal (I cut a piece of tube down one side with a hacksaw and crimped it over the end with a few zip ties. Then connect up the accelerator cable and adjust it up. Connect a line up from your carby to your distributers vacuum advance (from the point marked with a red arrow).
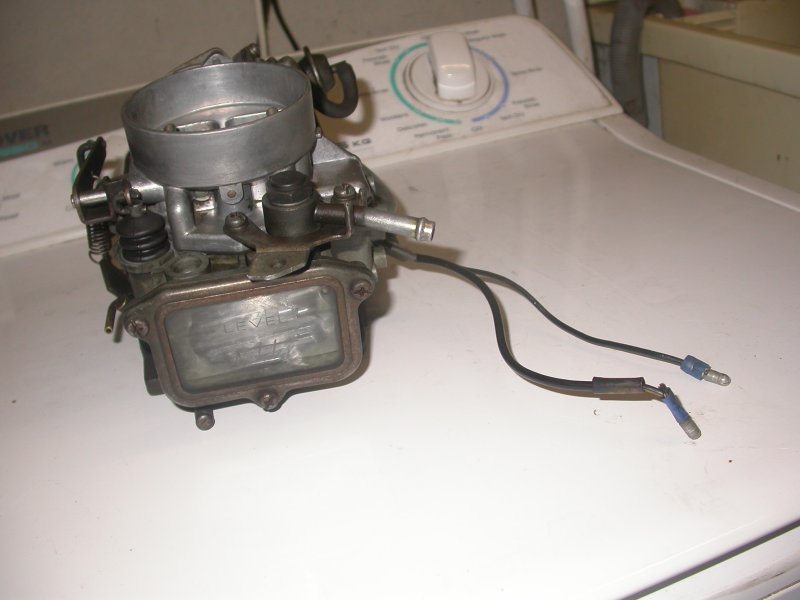
Next you can connect power up to your carbys fuel solenoid (you should hear it click when you connect it to power) I used the same power source that the origional carby used (Ignition switched 12V) best not to have it always chewing power) also you can connect the other wire to the same spot, the other wire just warms up a coil inside the carby to open the choke up.
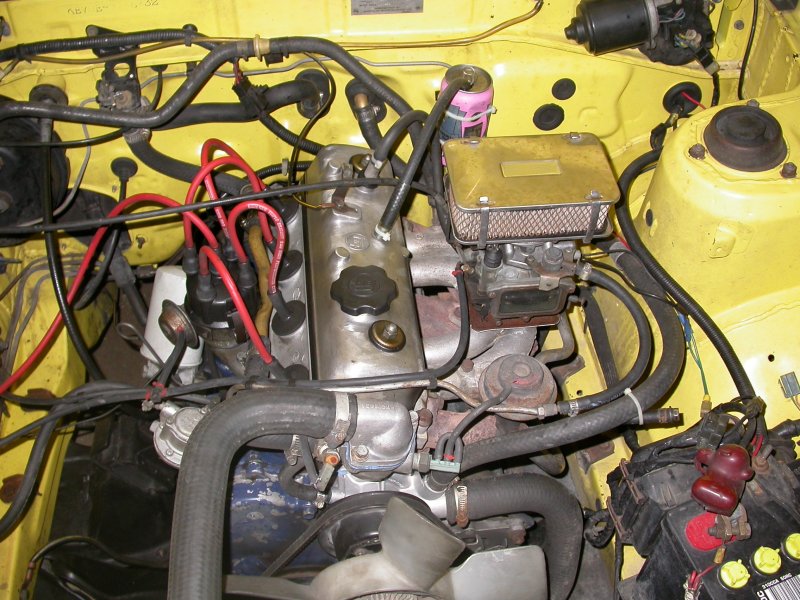
Now its just a matter of Connecting your fuel line up and clamping it down and installing an aftermarket sports air filter. You might also wish to invest in an oil catch can, I found that connecting the air filter up to the tappit cover casing gunked up the air filters pretty quick.
Article by Medicine_Man
Back to Upgrades
Back to Main Page
