

mage0r
-
Posts
17 -
Joined
-
Last visited
-
Days Won
1
mage0r's Achievements
")


-
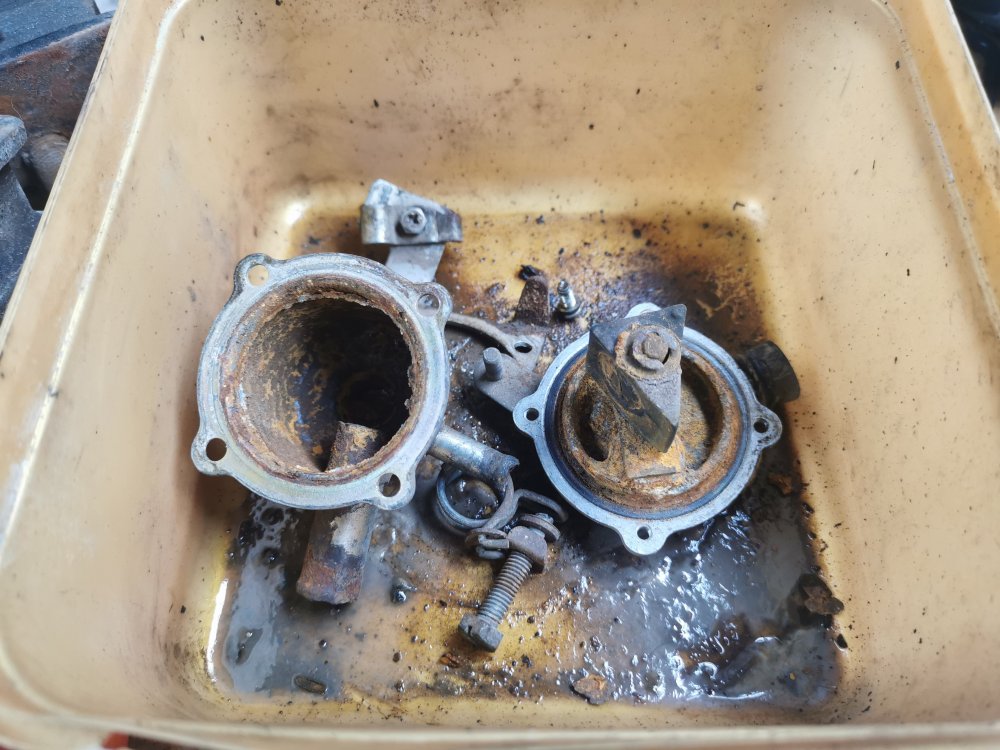
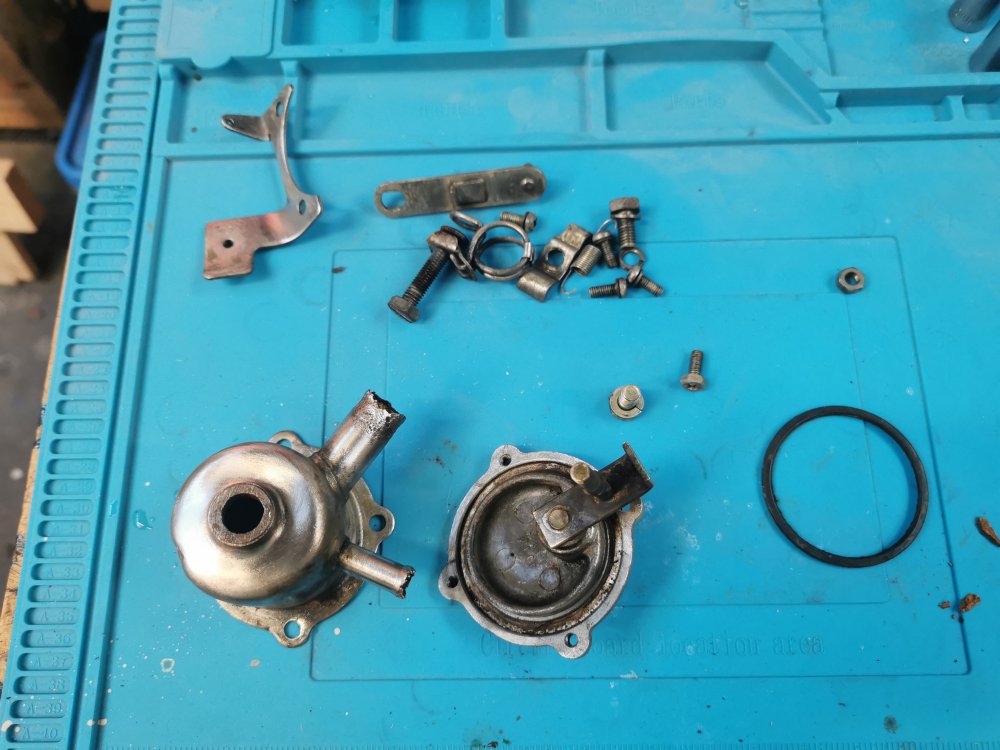
I may actually have a chance to recover this one. After it met my evaporust bath and some vigorous brass brushing, a lot of the corrosion disappeared. The arm still moves, albeit stiffly. I suspect if I force it off I will remove whatever is left of it's seal. The rubber stopper has seen better days. As far as I can tell all that happens is it gets moved in front of the outlet valve. Might have to ask around for a master welder to get the inlet pipe back on....
-
Thanks Parrot! Knowing what it actually is makes it easier to look for. Mine looks like it's been butchered. I'll strip it down and see if it's recoverable, but given it's clearly been cut off I don't like my chances. I assume it wasn't working and my grandfather removed it to stop any leaks, rather than the more darwinistic approach of him trying to toughen us up for driving to the school bus in the cold. I'll ask Peter about a replacement. I'm not fussy on it being original, given the rest of the car is already a Frankenstein and my non-traditional engine paint job (the body will be white though). Does anyone have any suggestions on coolant/heating/fuel hoses? The ones I have with me look ok, but I don't know what I don't have at the vehicle.
-
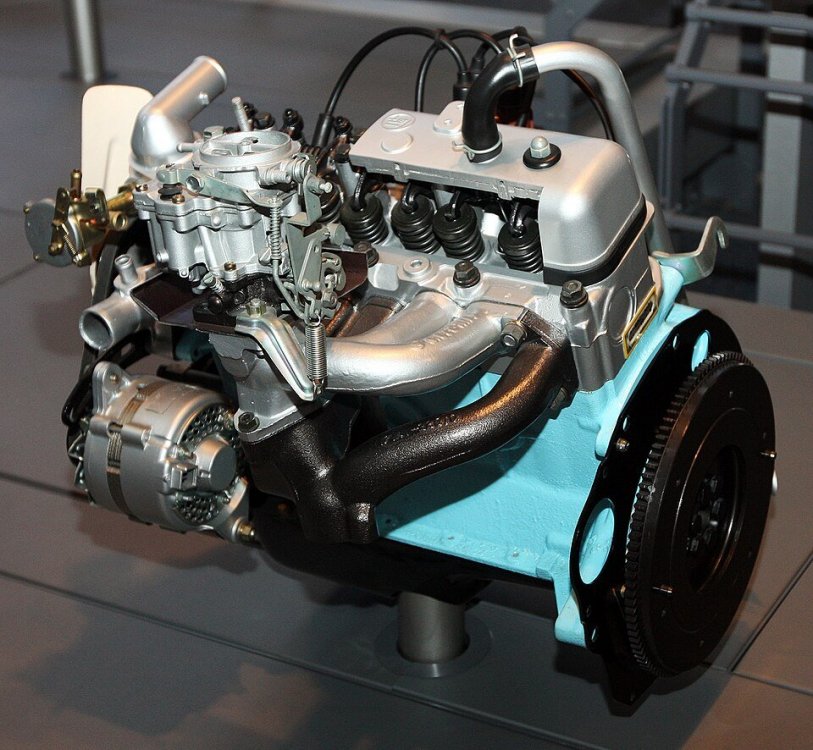
Good summary, in this case it's clearly one of the K 1077s. I may have used my share of AI to get an understanding of the model too. A lot of that information comes straight from the wikipedia entry though. I only progressed with this because when I pulled it out, the drive shaft spun freely and when I popped the valve cover off all the parts still had a healthy layer of oil. There's very little play in the timing chain as well. Honestly, the restore process has been a bit of good mental break for me, although the stress of finding which of the bolts go where has been higher than expected. Always important to remember that it doesn't take much WD-40 to wipe out your carefully placed permanent marker labels. I had spotted that photo before (it's the wikipedia creative commons one for this engine variant) but I hadn't noticed the radiator return bypass. My motor obviously bypassed that bypass with the use of an ugly bit of pipe. I found the bypass I have in a box of lose parts (including 2 horns!), and it doesn't look salvageable. ChatGPT had decided that it must be a fuel pump.....
-
I tend to agree, but it's so thin I don't have a lot of room for grinding My next door neighbour is repairing a 1989 Saab Turbo for the Mystery Box Rally and he's pretty good at the thin stuff. I'm resisting the temptation to just ask him to do it.
-
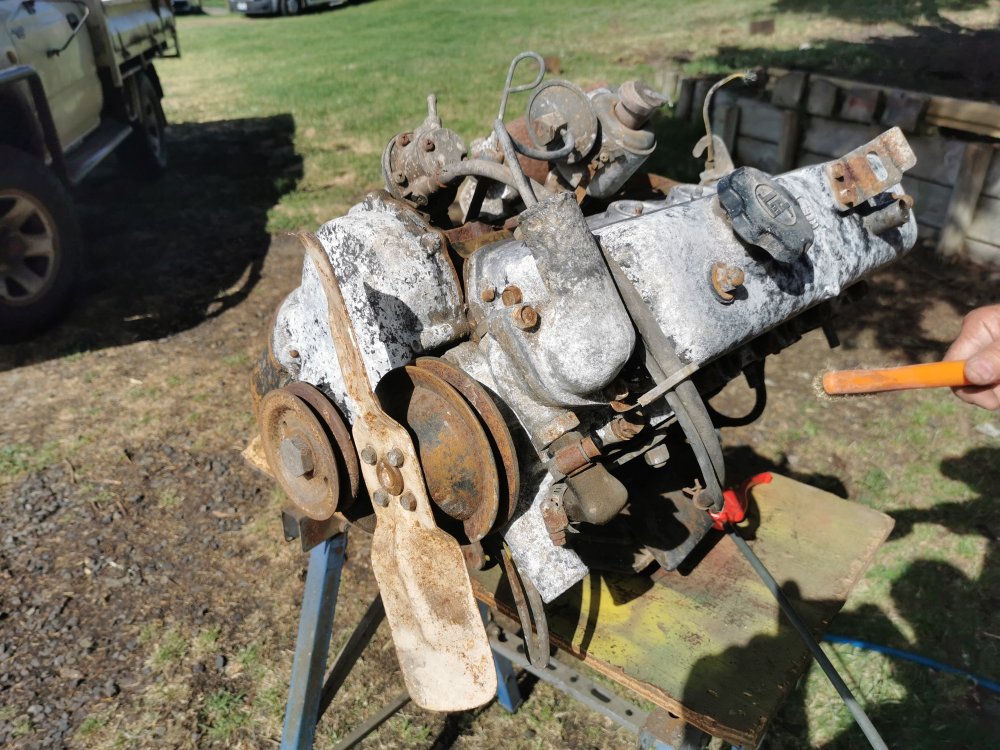
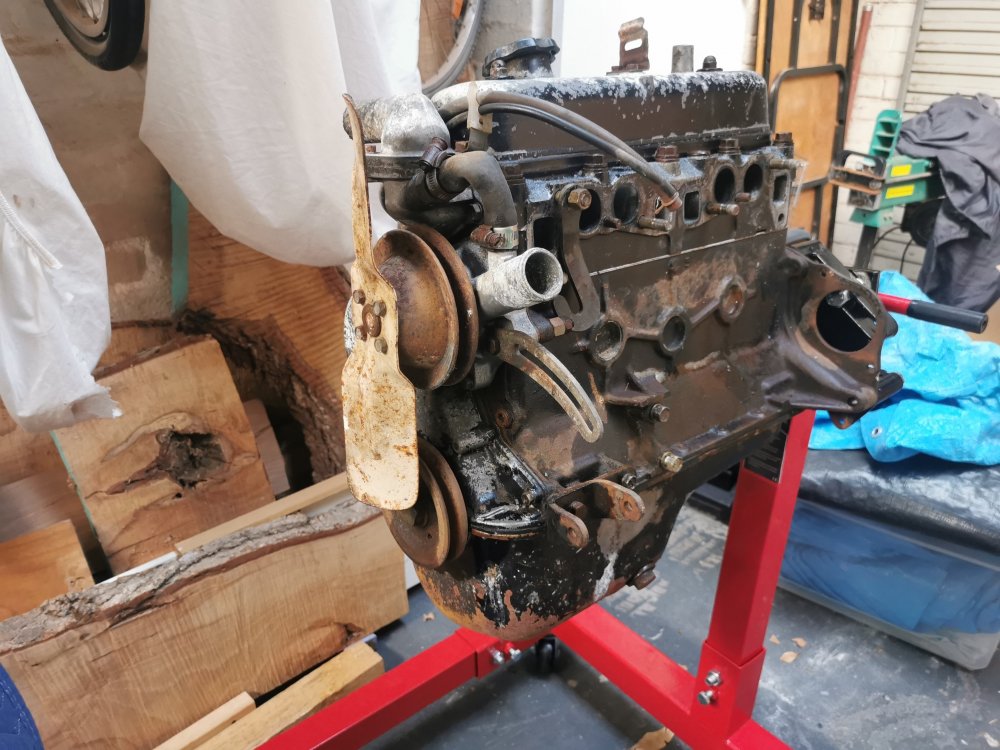
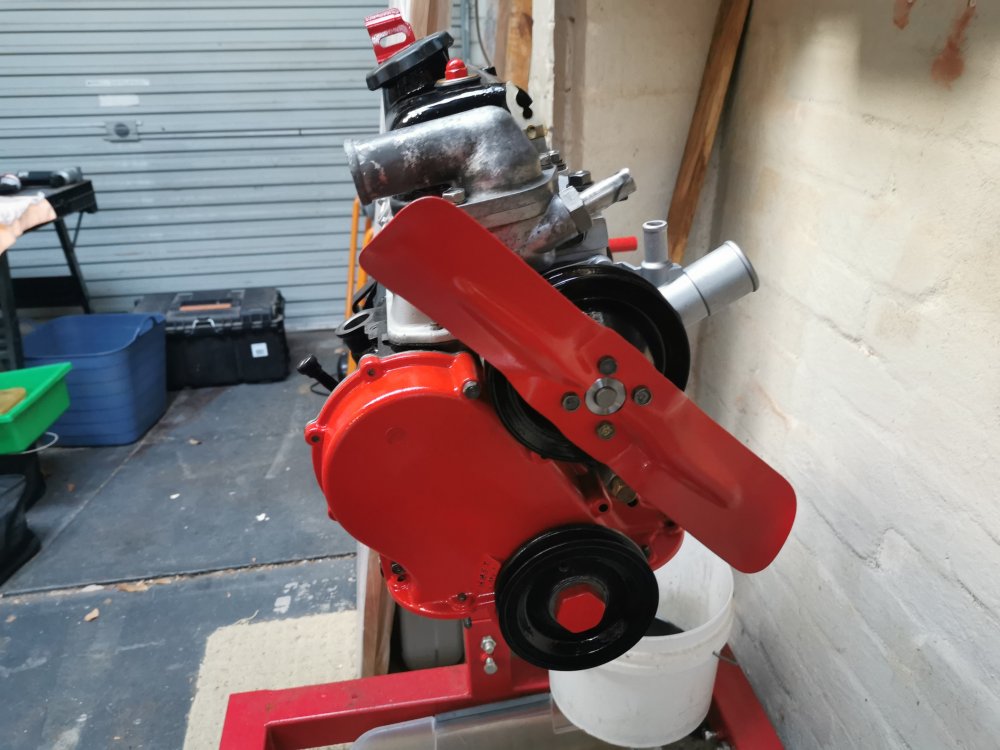
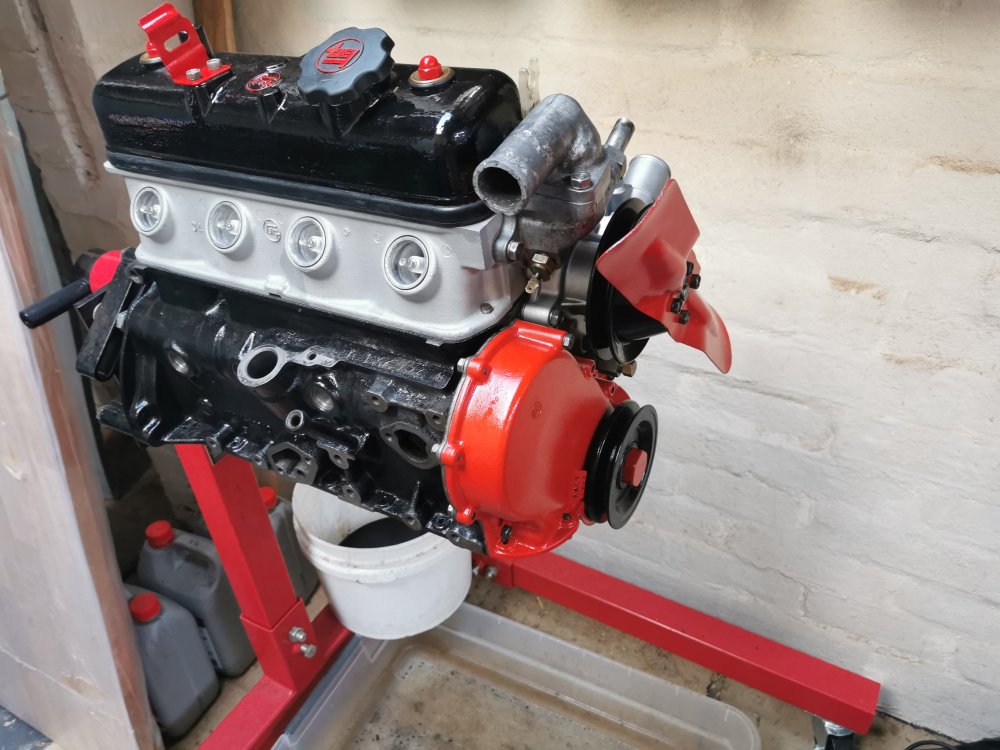
Hi Everyone It's been a while, life gets in the way and I got a bit disenfranchised by being a terrible welder. With that in mind, I picked up my engine to restore over Christmas and have spent the last few months wrenching on it. I had original expected it to be a 3K, but turns out I was wrong and it's another original K (SN K136926). It was in pretty rough shape after several decades in the hayshed, and it looks like someone had done a rattle-can spray job on it. All the paint was flaking off. The heads water jacket had a fairly big corrosion problem, but so far that and the water pump are the only two parts that are completely unsalvageable. Captain Kerolla helped me out with replacements, and he got the carbi restored. The head has by far been the most expensive part of the whole process by a good margin! I've stripped everything else down and run a lot of it through a degreaser-evaporust-brass wire process. I've made a few mistakes, but hopefully nothing terminal. My push rods and tappets may have slid out when I wasn't paying attention, so their order is going to be very much not right. I've used a non-traditional combination of black and red KBS MotorCoater. No real reason, other than I think it looks good. I think I'll try and get some red silicone pipes for fuel and water. I'm not sure what conditions the ones I have are in. I also forgot to grab the starter motor and alternator, so those are very much unknowns as well. I'm honestly not sure if this is going to start, but its looking a lot better than it did, so I'm going to count that as a win. I've got a gallery of my progress here if anyone wants a look at all the progress. And it's live so as I add photos it updates. Added here are a essentially the before and almost-last. I've tried to add before and after photos for each component, but I often forgot to grab photos while I was working. One good example is the coolant temperature/return. It was heavily pitted, so I coated it in JB-Weld and sanded it back down. https://immich.mage0r.net:8443/s/corolla-restore
-
I have some of the Ranex Rustbuster, but my googling indicates it doesn't leave a zinc layer after it's done the rust conversion, so it's probably not suitable for leaving on for any length of time. KBS ship straight from their website too, might be worth cutting out the eBay middleman. They also have a Por-15 style primer/sealer I'm going to give a try.
-
Thank you everyone. I couldn't find it on the Bunnings site, but I'll keep looking. I've got Ranex Rustbuster and Evapo-Rust, but you can never have too many chemicals. I've got some Upol #2 on order.
-
Thanks Banjo, I have a few Rotisserie videos in my queue and I'll add those. In this case I'm focusing on the bonnet for a few reasons. 1. They are in demand, so if my build goes nowhere they still have value. 2. The bonnet is in my garage but the rest of the car is 500km away. The bonnet (and guard) are from Captain Kerolla, so their condition is not reflective of the rest of the vehicle. I'm going to school on these parts, and I can get them up on the bench under my workshop heater. John
-
Hi Everyone I'm still working on my bonnet but I feel like I'm chasing my tail a bit with the rust removal. I've de-skinned the bonnet to get at the surprises underneath. Lots of pinholes I couldn't see from the top. I've been using a combination of stripper disks to remove paint and Evapo-rust to get in to the nooks and crannies. This works (pitting and blow throughs expected) but because I'm just doing an hour here and there I feel like the surface rust is back as fast as I remove it. Should I be hitting sections with a weld through primer as I go? Can I leave paint in place where it's clear the metal beneath is good? Will that impact the final finish in a big way? Thanks for any advice.


-
Well, I've cracked out the stripper wheel to have a look at what's under some of the paint, and in a few spots the answer was "rust" so I feel entirely vindicated in being a bit aggressive. I also discovered a nice lump of bog around the front curve that I'd not paid attention to earlier, and under that bog? Also rust. Still feels quite doable. I'm debating how difficult it will be to get the frame de-skinned, which is feeling like the best way to make sure I get it out completely.


-
A brief update, I caught up with Pete and now have a replacement bonnet and left guard. They'll need a bit of work. The bonnet skin looks like it's been separated from the frame and sprayed at one point, but I need to dig a bit deeper and get a good look. The adhesive isn't, so it's separated out a bit. It looks pretty straight though. The guard has two points of rust through, inside near the light and through the outer shell bottom near the door. It also has some bog in it near the blinker. Dad has sourced some tyres for me to help move it around. It's got YR 78 S12's on it and they are clearly toast so he's putting some second hand 165-12's on just to move it around. He's also getting the rims sandblasted and painted for some beer money. I expect that to be the only activity that doesn't cost me money. Also included, the two workshop manuals that were located in the boot of the car. The Scientific Publications one had absorbed so much cigarette/cigar smoke that I think I'm still coming off the nicotine high from touching it.


-
He has a repairable bonnet and left guard. I'm dropping in on Monday (last week was just a bit too busy). Fortunately I think I have the chrome trim from the old one.
-
Thanks Banjo, I'll add those to my "Inspiration" folder. Looking at the rear windows I'd say these are all station wagons rather than vans. I honestly don't know how my grandfather got the smaller windows in. I do know the wood paneling was made by the carpenter at Rowntree-Hoadley (now Nestle) where my parent's both worked. Does anyone know what the difference in grille is about? Is it simply that the deluxe version had a centre channel with the logo where the regular had a sort of floating logo? The one I have has the centre channel, but dad has reminded me a few times that it's not the original. Somewhat related, the Toyota Centre for Excellence (what used to be the Altona factory) has a mint condition KE10 in the museum/collection located in the old Powertrain building. Unfortunately not generally available to the public though.
-
Thanks Parrot, that's incredibly helpful and Peter is less than 10 minutes from my house. I'll give him a call tomorrow during reasonable daytime hours.
-
Thanks Banjo It's currently in South-Western Victoria. Not the worst place, but an unfortunate 10 hour round trip from me in Melbourne. I can't honestly remember if the radio worked back when we last drove it, it does have a very nice late 70's tape deck though. The photo possibly doesn't do the passenger guard justice. It's deformed enough that the passenger door barely opens and the moisture has definitely gotten in. Good advice on using the concrete floor and I'll pencil that in for my next visit. It's going to be a slow process though. I haven't heard of any car restore that didn't cost $$$$$$$.


