

Kebin
-
Posts
610 -
Joined
-
Last visited
-
Days Won
3
Content Type
Profiles
Forums
Events
Gallery
Blogs
Posts posted by Kebin
-
-
On 7/24/2020 at 10:18 AM, altezzaclub said:
Love it! Especially the water tank!
Shame about the dog dying...
Haha!
Thanks mate
Dog is playing dead so he doesn't have to help swing spanners! -
New Rubber.
Over the last few year I had been running/testing ultra cheap 185R14C sized retread truck tyres and for the money they were great however they eventually let go and delaminated in true nasty retread tyre fashion. To be honest they held up longer than I initially expected.
It was time to upgrade to some decent offroad tyres this time around however I insisted in running my little 14" wheels so I could maintain the bigger sidewall on the tyre.
Now finding 14" mud tyres proved to be quite the challenge (just like taking a softroader offroad! haha) in comparison to finding 15" mud tyres in small profiles.To my delight my research identified that Kumho was one of a few manufacturers who make 27" x 8.50" R14 MT tyres. This particular size is a little larger than the 185R14C tyres that are already on Gezza and by all research found there was plenty of good feedback on the performance of Kumho Mud Terrain tyres in general!
After a dozen phone calls around the local tyre shops and having the tyre dudes telling me no one makes 14" mud tyres I managed to find my local Tyrepower store in Seven Hills NSW were happy to source what I needed.The old 185R14C retread truck tyres with winter tread pattern.
The final tyre choice was the 27x8.50R14 Kumho Road Venture MT KL71
Very impressed with their performance after some initial testing.
-
Audio Upgrade.
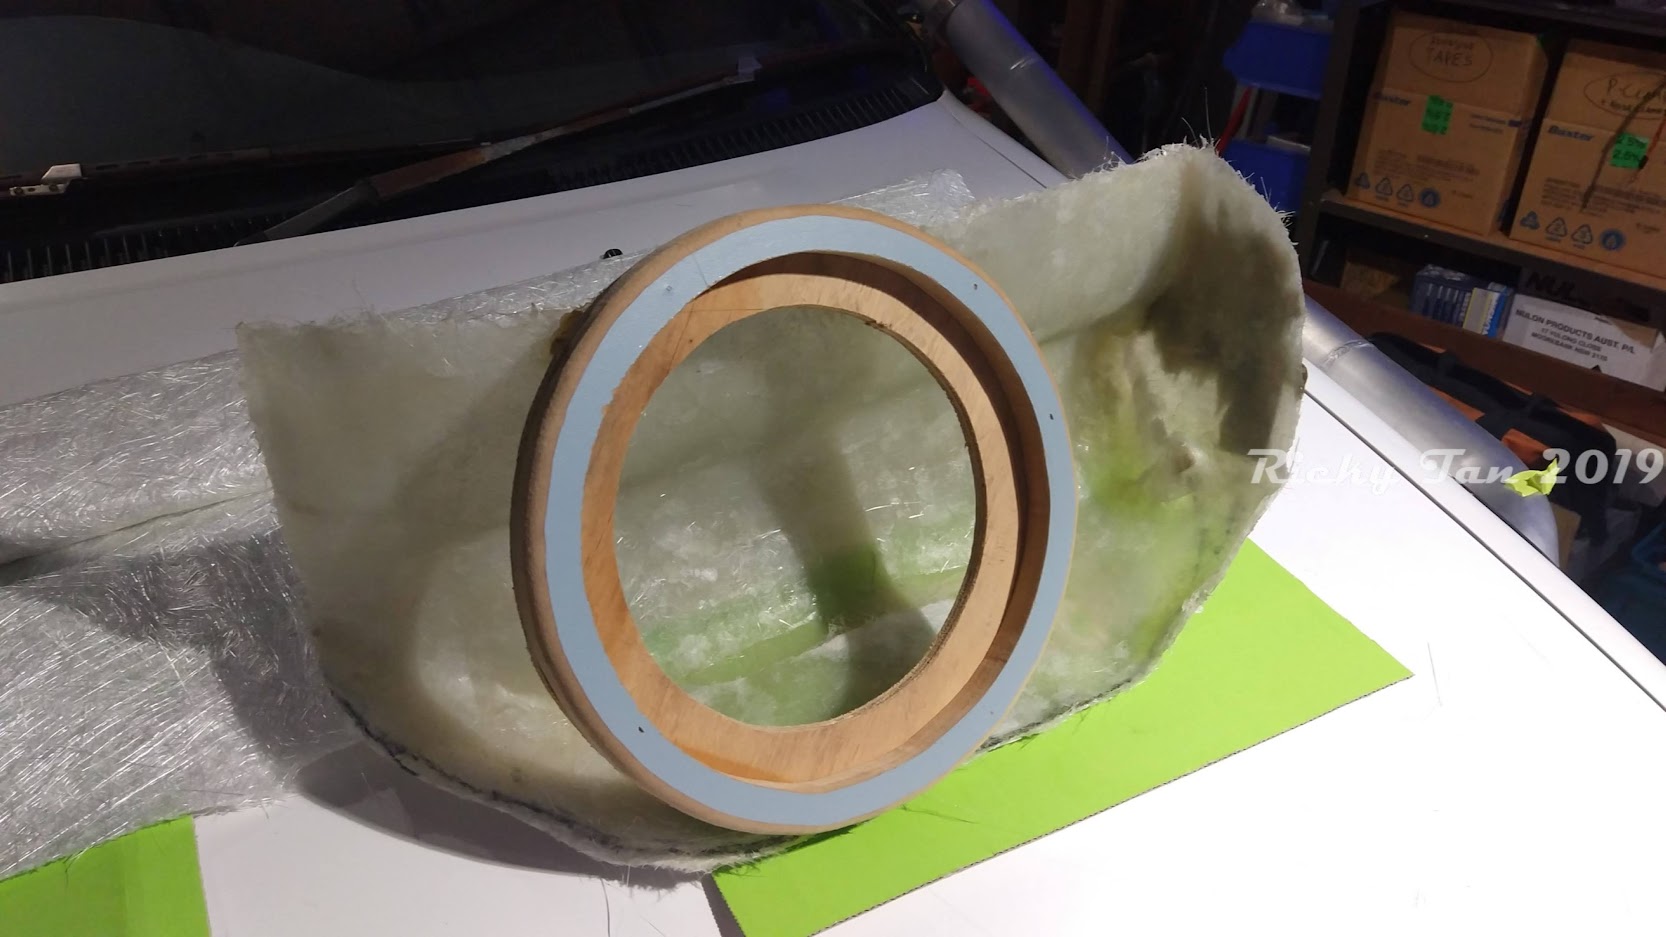
Continuing with the space saving theme, the downside to a having a small offroader is storage space. Much like most people I like my music and I like to listen to decent sound quality.
Rather than having a bulky sub woofer enclosure taking up precious boot space I figured I should continue to utilize dead space in the car. On my airbagged wagon I applied the same logic by installing air tanks in the rear passenger footwells. In Gezza this was an opportunity to do the same yet still keep space for passengers to sit comfortably.Fiberglass is great to work with as it is lightweight and rigid!
All trimmed up
The finished product.
Two shallow mount Pioneer sub woofers installed together with the second battery mounted on top of the trans tunnel as well as the amplifier mounted on top of that. I have them mounted this way high and dry in case the car potentially floods during a water crossing haha -
Rooftop Water Tank.
Over the Summer period of 2019 I began to spend most weekends on the beach with Gezza and my family. Instead of dragging a portable water tank along and setting it up every time we needed to wash hands, I came up with an alternative solution that we could use on the beach or when we went away camping in the bush.
Rather than taking up precious cargo space inside the car I decided that there was an opportunity to utilize the dead space between the roof basket and the roof of the car and squeeze in a water tank.
Getting creative on a budget led me to raiding the local building sites of new housing developments where I picked up various off cuts of 50mm PVC water pipe from the rubbish piles. I then purchased various elbows and fittings from the local hardware store and from there I began to build the following tank:The tank features a tap with a regular garden hose fitting and filling the tank is done from a screw tap which poke through the upper side of the roof bask in the corner.
All up the tank holds around 8L of water which is sufficient for washing hands for a day out or overnight camping.
When we are out and about all we need to do is plug in the green hose and clip the second tap onto the bumper. We open the upper tank tap and allow the water to gravity feed to lower bumper tap.
A few few more pics on my Instagram post:
https://www.instagram.com/p/CAEMg_XHxYh/?utm_source=ig_web_copy_link -
More Suspension.
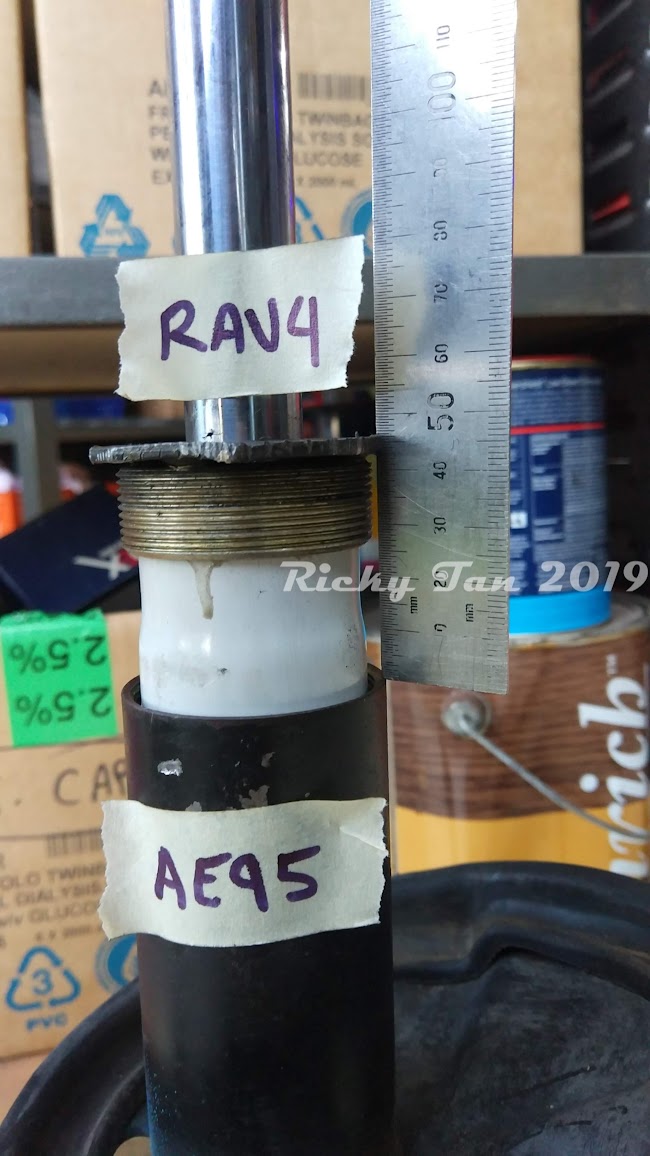
The standard front suspension has its limitations when off-road. The aim was to increase shock absorber travel/stroke to allow further flex. A little bit of experimenting and we worked out that we can squeeze taller 1st gen Rav4 components into the AE95 strut housings with a little modification.
Standard Rav4 front struts are very similar and will bolt up to AE95 hubs except the spring perch is way too big therefore will not physically fit into the Corolla.
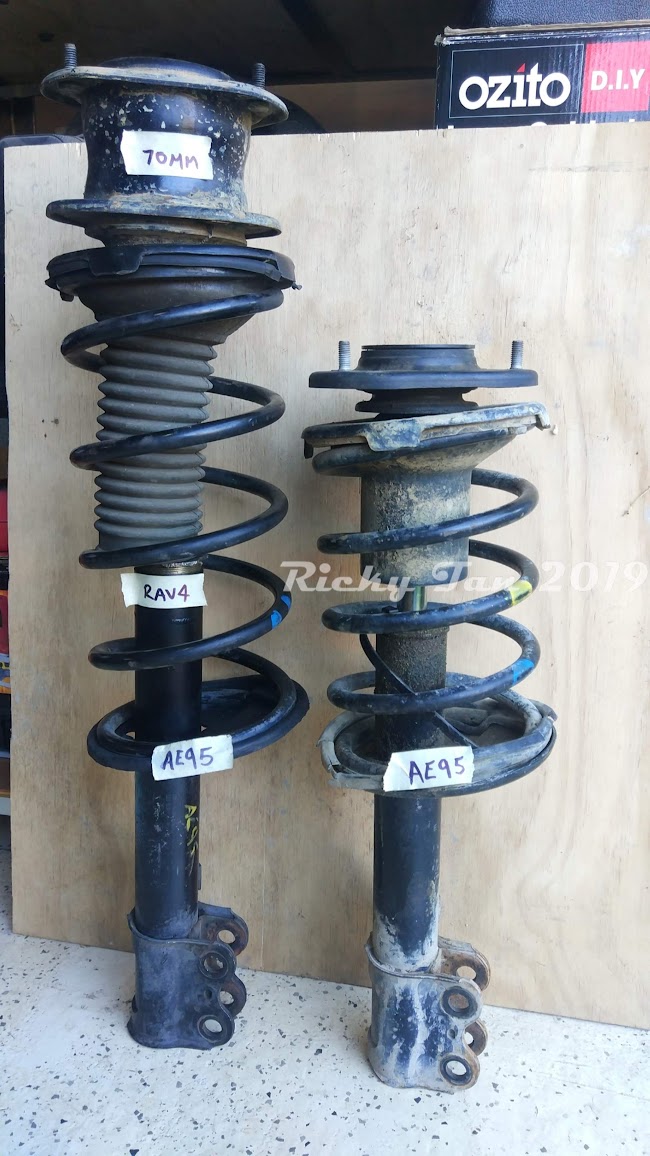
Side by side they are 100mm taller than the original AE95 struts.
Left = AE95 strut and shock
Right = SXA10 Rav4 strut and shock
Rav4 shock shaft has 60mm more length than AE95 shaft.
The cool thing is that aftermarket replacement Rav4 shock absorber inserts are pretty much identical and slide straight into the AE95 strut tubes however they are around 40mm longer.
Easy solution is to cut 35mm off the end of the old Rav4 struts and weld it to the top of the AE95 strut housing so that it makes the tub section longer to suit the Rav4 shock insert. This will also retain the thread so you secure the gland nuts back in.
Simply reassemble AE95 struts and reinstall (quite difficult to get back in haha). By extending the struts we ended up gaining about another 15mm of lift over the original setup once the Corolla was back on the ground.
Left = extended AE95 strut, aftermarket Rav4 HD shock, AE95 standard spring and 70mm strut top spacer.
Right = standard AE95 strut
At the same time we upgraded the rear suspension with some further heavier duty springs and shocks.
New shock = Ultima branded replacement SXA10 Rav4 rear shock absorber
Old shock = original oem SXA10 Rav4 rear shock absorber
Yellow spring = King springs branded heavy duty rear springs to suit EL Ford Falcon model (Australian car)
Black spring = original oem EL Ford falcon rear spring
-
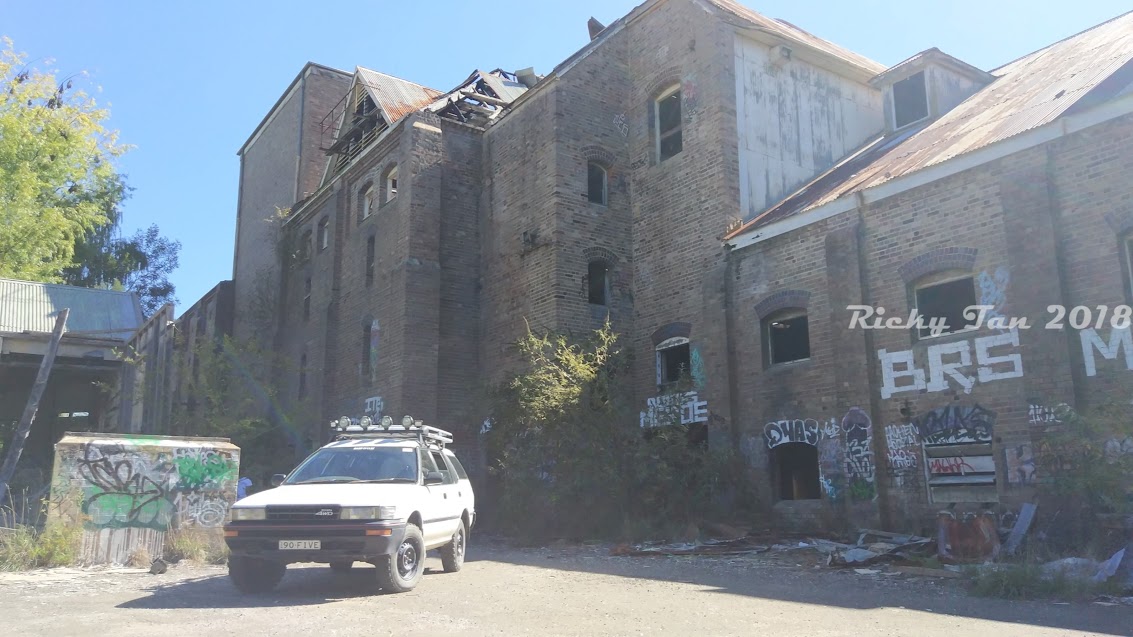
Built and Driven.
Driving this wagon has been so enjoyable. It is just amazing how far off the track you can take this little Corolla! -
On 5/17/2018 at 8:08 PM, Jono.C said:
Although this is quite a different interesting topic, I'm wondering what the go with that ke11 is! Is it on here and i've missed it?
It is 4AGE swapped but unfortunately never got finished
-
Gezza the Shelter.
Added more to the camping setup and scored a Rhino Sunseeker 1300 dome awning. Fits perfectly to to the side of the roof basket.
Set up camp next to the Turon river within the Turon Gates campground to test it out. The dome feature works a charm with all the extra head room. -
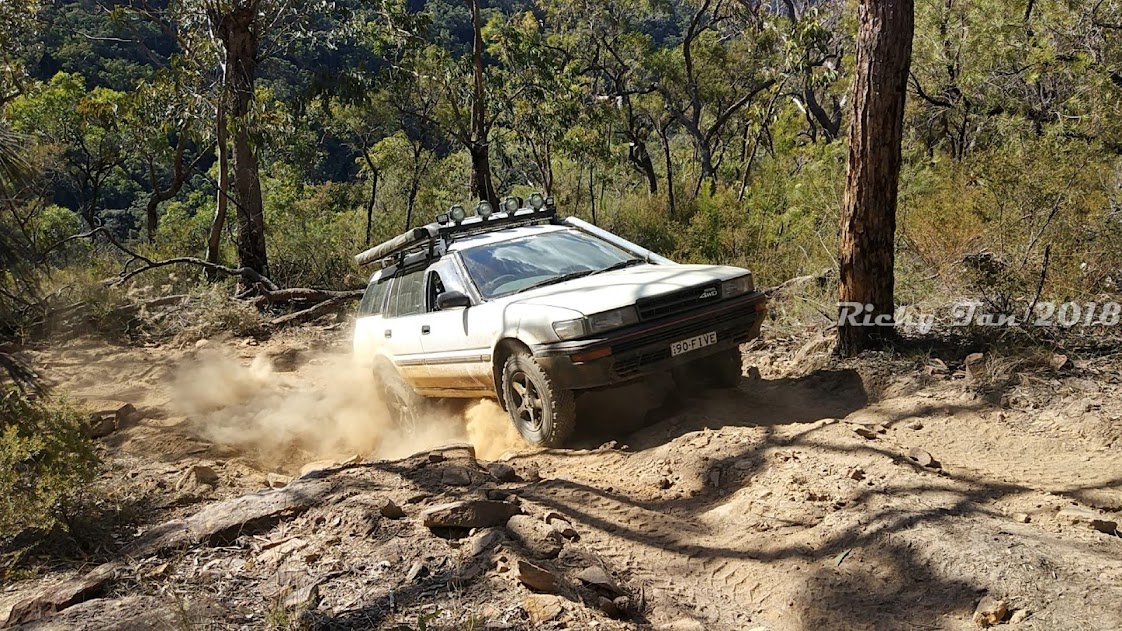
New Shoes and Breathing Apparatus
It was finally time to replace the tires. The retreads lasted longer than I had expected. At the same time I lined up some period correct ROH Reflex mag wheels to go with the new retread tires.
Testing out the new shoes with some of the AE95 boys.
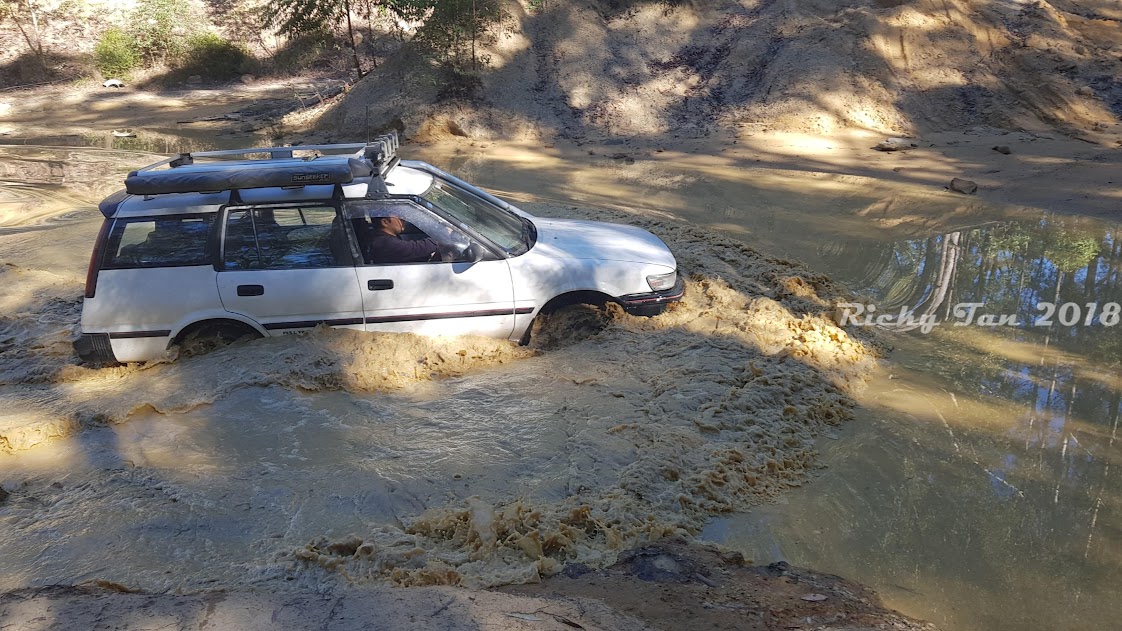
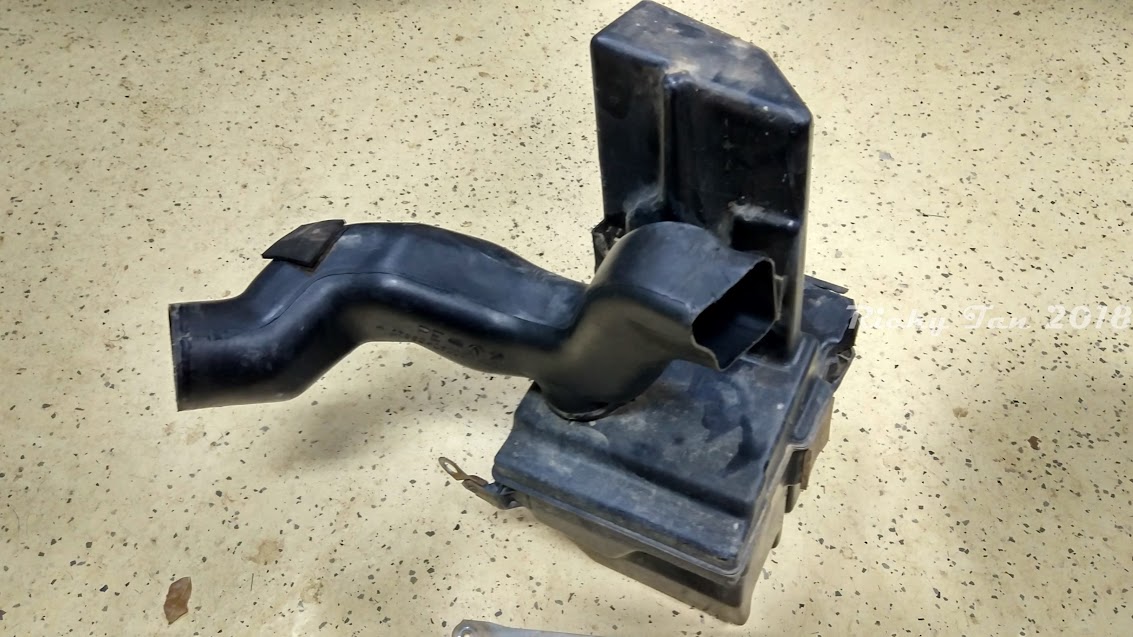
Had some close calls during some submarine action so it was time to drop old Gezza into Performance Exhaust Centre to get a custom made snorkel sorted.
The original airbox that was removed from the bumper bar.
-
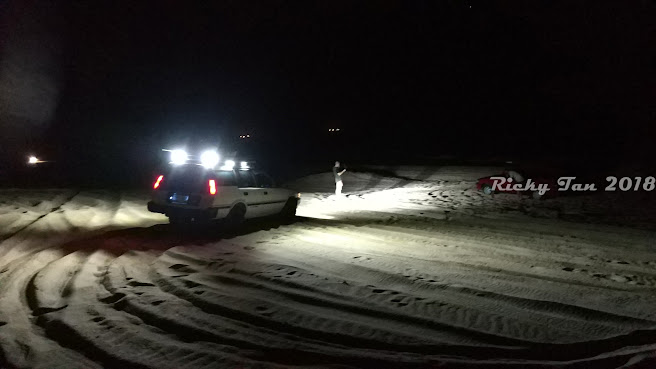
Gezza The Explorer.
A few pics from some of the many weekend adventures (My Instagram feed is updated on the regular)
-
Camping.
One of the things I wanted to achieve with this build was to get out of the city and go camping more often. Happy to say that I've been camping quite a few times now.
-
It's been a fair while between posts. I have taken the old girl on road for a year, driven a handful of times and now back off the road into the shed.
Before road registration ran out recently, I managed to get some ripper photos taken by the talented J_Hui-Design-Photography/ with some beautiful "lowkey" backdrops.
Enjoy!
-
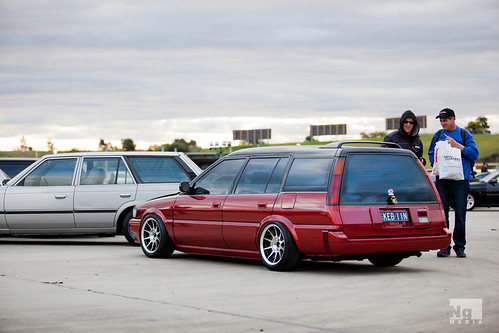
New Wheels again.
Measured up offsets and realized I can fit 9's under the rear! Went back to 15's as had more tire selection choices. Ordered some cheap Varrstoen wheels from the USA with a speedy delivery just in time for this years Toyotafest and WTAC 2013Specs are: 15x8 and 15x9 +25 all round with 185/55/r15 rubber.
And a short vid on the switches: http://instagram.com/p/fHMcknnHAk/
-
Another reason that encouraged the road trip was to meet the some fellow AE95 enthusiasts who were keen to meet up. Big Thanks to Jed, Mick, Brian and Andy for coming together at such short notice. Was well worth the trip to have a 95's all together even if it was dark. You guys are legends!
Some further appreciative shots of my "car show humor" floating across facebook:
-
So the real reason for modifying the panhard rod was apart of a couple of little preparations i had for a spontaneous road-trip interstate down south to Melbounre, Victoria where i attended the first automotive festival held by 100mm called "Certified". 100mm
I got new DTM Racing Wheels from www.jdmyard.com, specs are 16x8 +25 offset with stretched 195/45/16 tires.
I'll let the pics do the talking:
Chilling by the Yarra River overlooking the city of Melbourne.
-
{Making The Diff Sit Center}
I've had the car for quite some time now sitting tucked away in the garage but never forgotten. Fortunately i make the effort and tow it around to attend the odd show and rep the AE95 culture. Every time i get the car out i cringe at how the diff sits to one side when its aired out due to the panhard rod design.
I found that to push the diff to center i would need to lengthen the panhard rod. Easy. cut it and weld an extended sleeve pipe on to the required length.
Further thinking saw a high tensile bolt and two nuts welded in, thus adjustable cheap panhard rod. Works well.Cut section out and tack in the bolt.
Welded, painted and installed.
-
Blew the dust off yet again after 1 year in storage and trailered my wags to World Time Attack 2012 this year held at Sydney Motorsport Park AKA Eastern Creek Raceway.
Entered the Show n Shine and brought the Radrollaz car club with me")
New wheels yet again (borrowed) 15″ x 8″ +35 and +20 Enkei Barrels wrapped in 195/50's
IMG_4251 by STi BRZ, on Flickr
Big Thanks to Gorilla Industries yet again!Alot more flusher this time round
-
Toyotafest 2011 came around and this year i borrowed some 15x8.5 +5 SSR SP1 wheels from the Gorilla Industries boys, Stretched on some cheap tires for shits and giggles and to the show we went.
-
Some more pics from the shoot
-
couple of shots from the recent Radrollaz photoshoot for Hot4s Magazine.
-
Here's a funny pic from a while back... Purchased a 2m long solid timber low line for the home entertainment... One word : Versatile

-
I'm not up to much on mine atm as i concentrate on other cars/house etc. So far just collected parts namely an ST215 Caldina 3sgte front cut and an ST185 5 speed
I have however done some research over the past year and found this guy over in W.A. has dropped an st185 engine into his ae95 and i have managed to track down some pics for you guys.Found some E series gearbox info on MWP's gt4 website. Some good information on the pdf.
-
A couple of random shots from Toyota Fest 2010:
-
ae95 measurement:
st185 measurement, its roughly 30mm longer overall:


")


1988 Corolla AE95 7AFE 4WD Project
in Rollaclub Rides
Posted
Loving the build!
Keen to see it finished