

aalaws
-
Posts
87 -
Joined
-
Last visited
-
Days Won
3
Content Type
Profiles
Forums
Events
Gallery
Blogs
Posts posted by aalaws
-
-
Awesome mate, I'm pretty much doing the same with my Ke25 here in New Zealand :)
Coincidently I was actually born in Scotland too - born in Glasgow and lived in Neilston for a few years before family emmigrated.
I get a lot of TE27/ke25 parts out of Japan and have a contact here who produces brand new replica TE27 door cards, seat skins and I hear there's a headlining in the works too....
Looking forward to see how you get on......cutting the rust out, and then protecting it from the scottish weather/roads etc
-
So overrated!
:) he means very nice, M I N T you could say?
-
Sucks about the gearbox mate!
If I wasn't neck deep in my ke25 restoration i'd probably be into a e30 - and modding my e46 325i a bit - but that's the family car so I don't trust my wife enough to put any nice rims on it ha ha
-
Wire wheel on a drill to get into the pitted sections.
Inside the doors and panels is tough. Worse case is your have to de-skin them.
Maybe soda blaster ?
cheers, i'll give it a go with the wire wheel
get yourself some metal conditioner. (Deoxidine) follow instructions. prime right away. the use cavity wax/fish oil
the panels are coated in Keyphos until the shell is blasted and they'll all get primed together.
Are you suggesting putting the cavity way straight over the surface rust inside the doors etc?
-
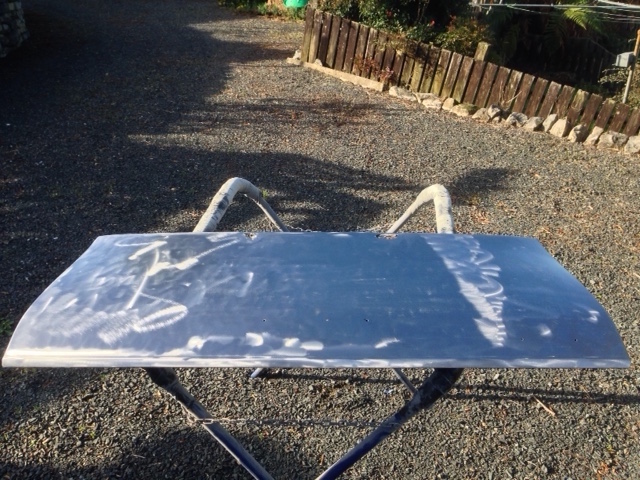
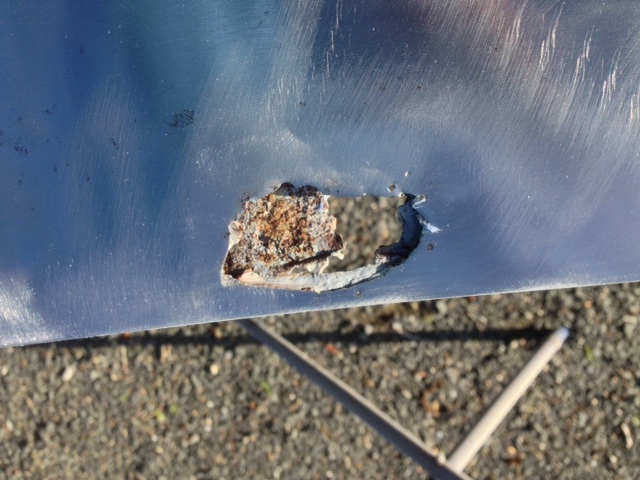
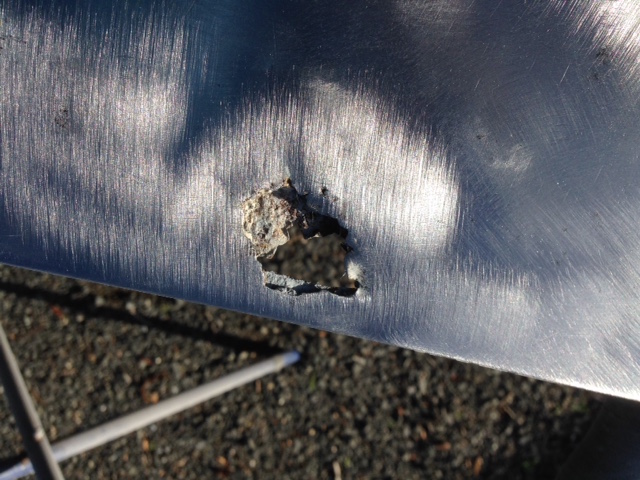
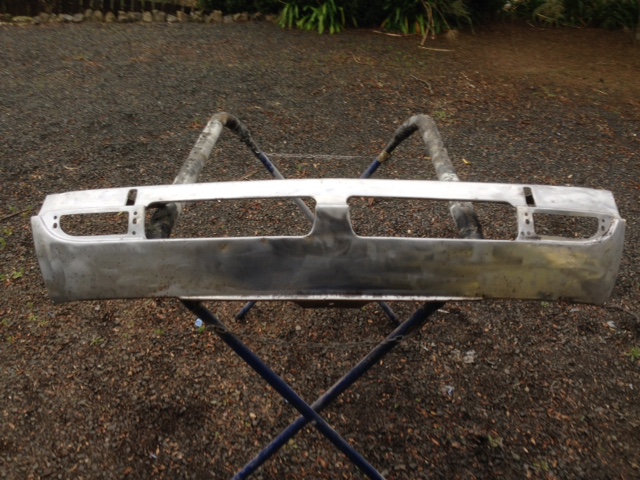
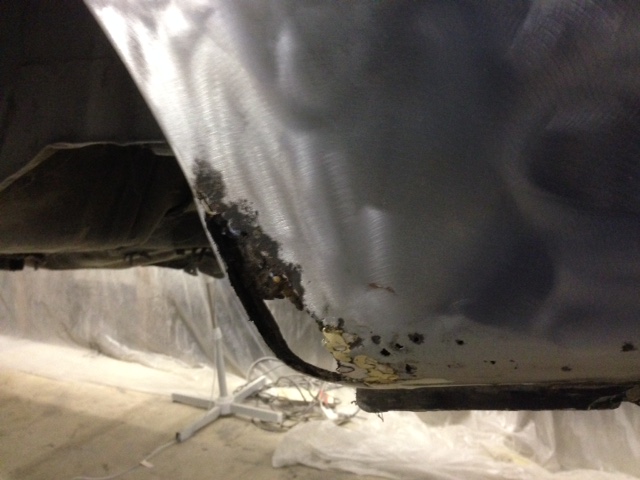
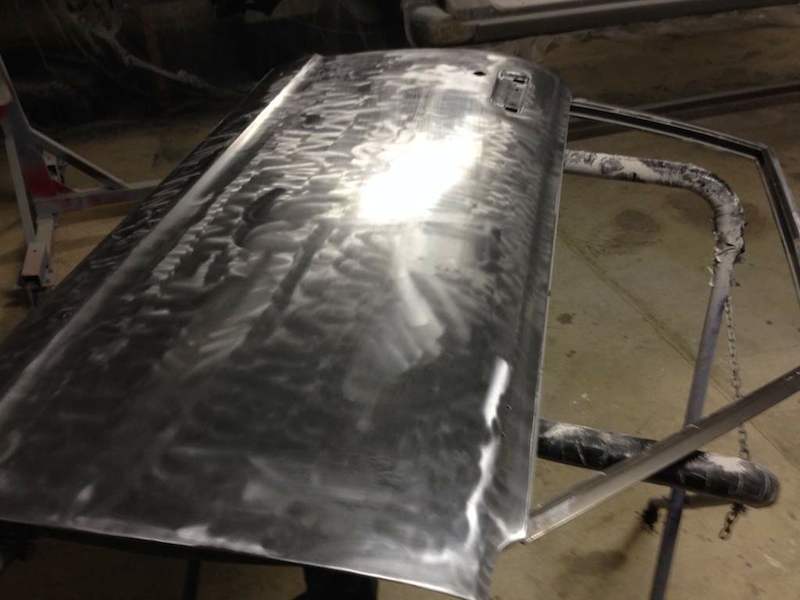
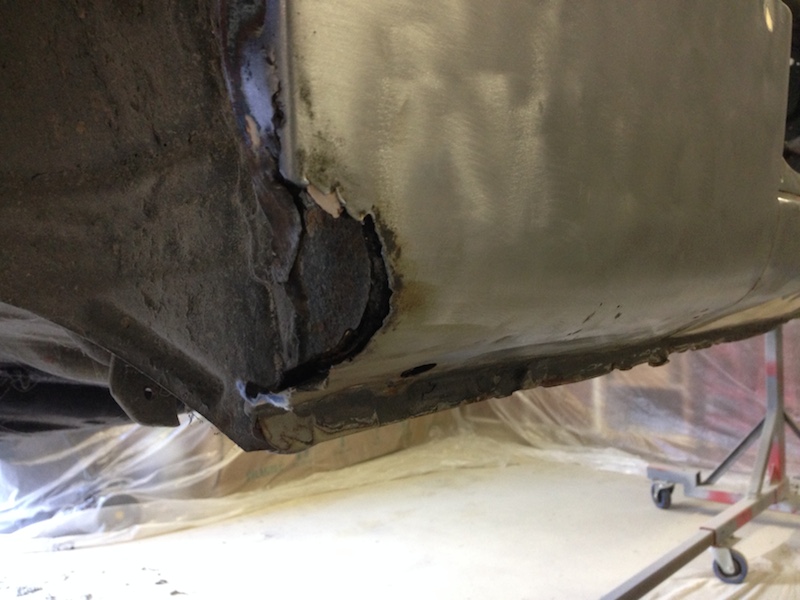
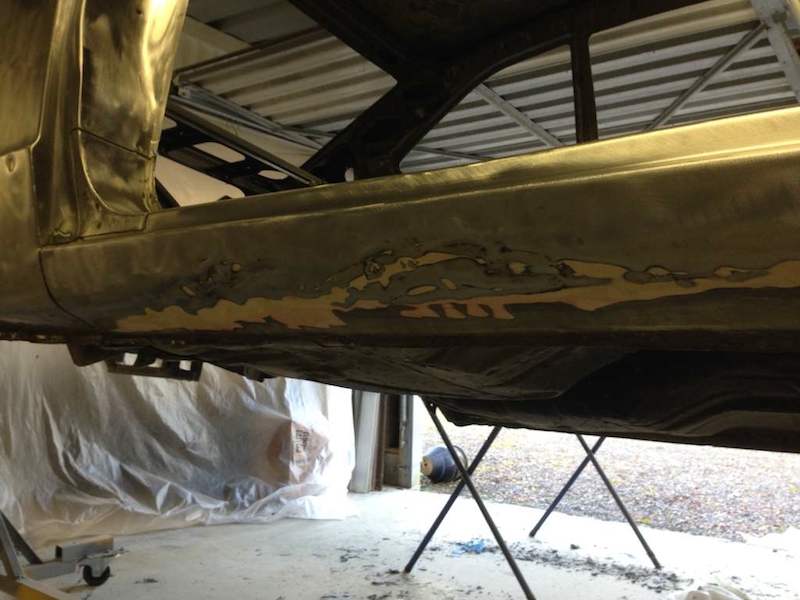
Got the boot stripped today - two big holes to deal with, all the way through

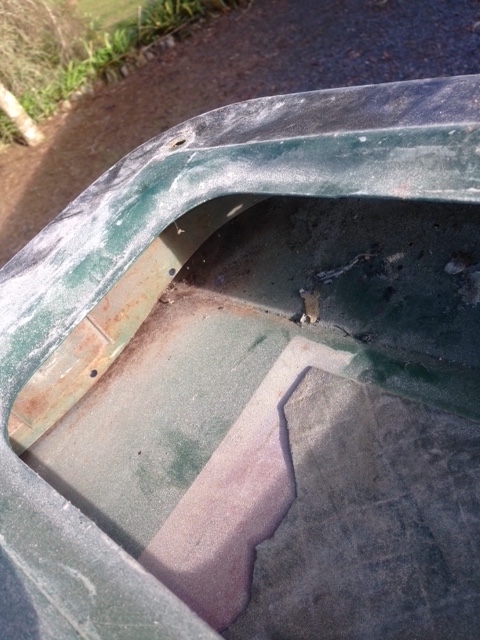
Also......what do you guys of to get rid of the surface rust inside your doors/panels like this stuff?
Some I could reach with a dremmel, just seeing what other options I have.....
Churning through the strip discs now......just when Mitre 10 is going to stop stocking them!!

Only minor surface rust, a small dent and some bent corners........these are usually swiss cheese along the front - SO STOKED!
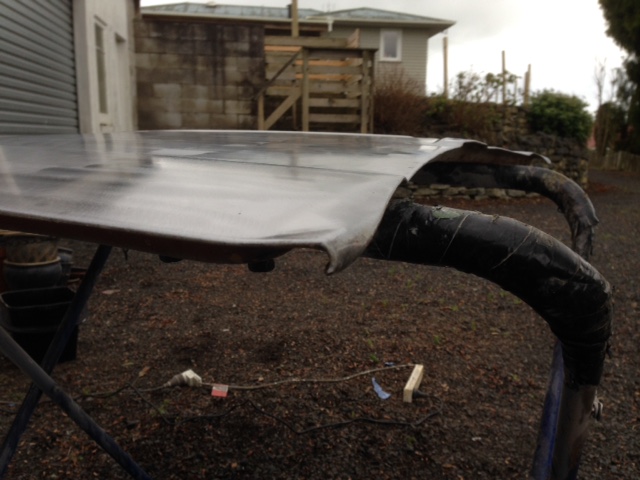
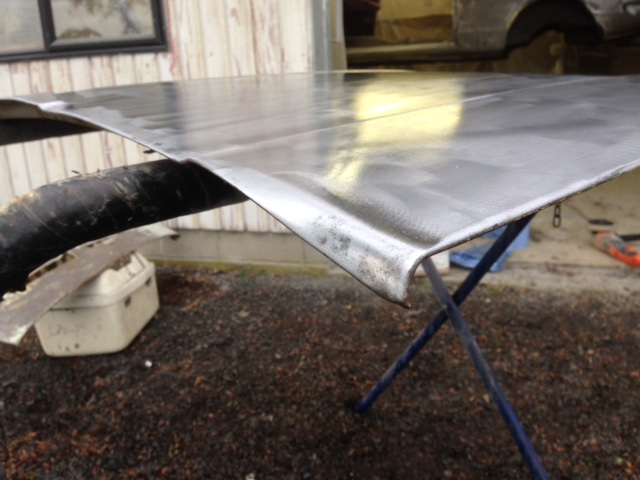
Easy fix for a panel beater?

I have lots of small spots of surface rust here and there like this - do I leave it for sandblasting or what?
Help me out rust guru's!!
-
I found the stripping discs the best too albeit slow.
Pain stripper and bog and many layers of paint doesnt play well.
Looking good! Not too much body work so far
Yeah seems the discs are the best way to go.
If there's heaps of bog, the stripper only really lifts the top layer and exposes it - I'll put it down to experience now.
Yeah maybe only around 9-10 spots that need a bit of new steel so far, I guess it could be worse??
-
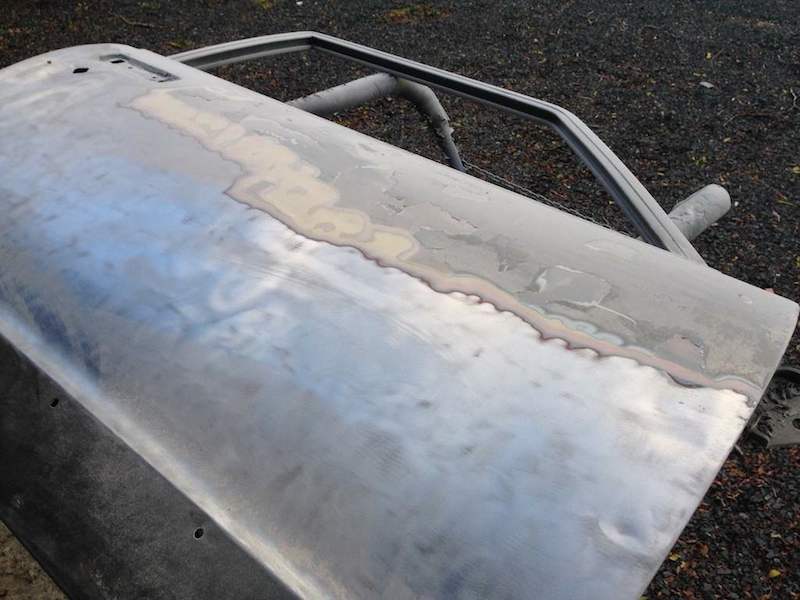
Got some shed time in yesterday avo......Stripped the roof/coated in Keyphos - great stuff! Just wipe it on and it stops any surface rust forming.
And no I haven't primed the inside - that's just the new layer of bog dust EVERYWHERE. SO MUCH DUST!
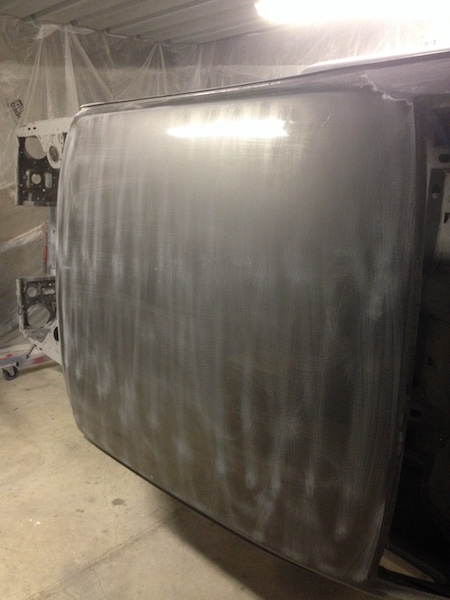
Only one small dent under it all which was nice.
I had two coats of the gunmetal grey, a layer of spray filler in spots and some red primer (didn't see any original green up there) to remove,
and even after scuffing the paint with some 60 grit, applying the stripper and wrapping it in plastic, I find I have to do it 2/3 times in some spots, and very thickly......is this normal?
I seem to spend HEAPS of time on the grinder with the strip disc too, thought the stripper would be more potent.....I'm using TERGO STRIP.
Stripped the passenger rear quarter and a few smaller spots......
Hardly any bog so came away nice and easy this time.
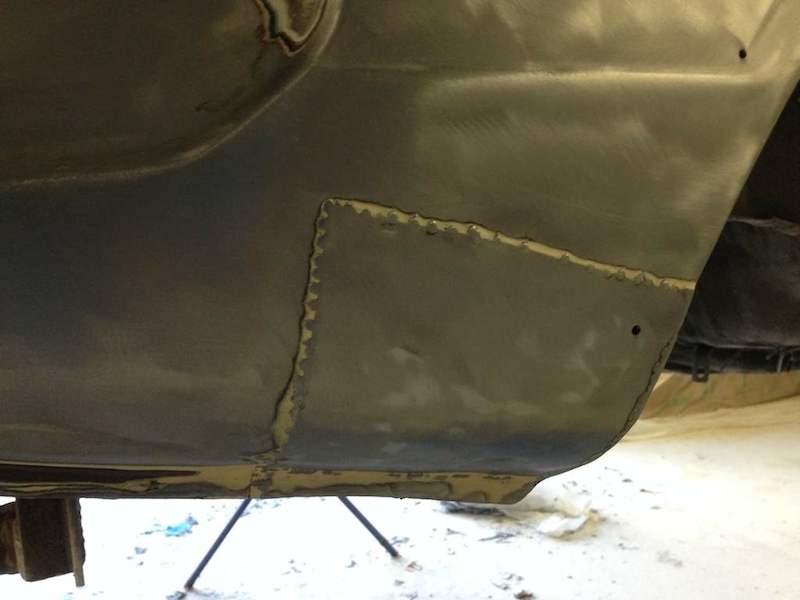
Bit of a crease/dent leading up to the tail light and a hole in the bottom corner, but otherwise really clean!
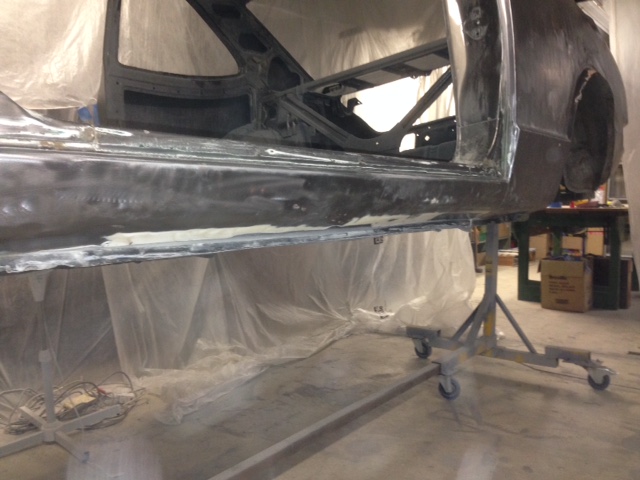
The sill is pretty straight compared to the drivers side, a few dents but doesn't need to be replaced thankfully.
-
moved to a new town, set up new business, had a baby, set up shed........finally got some progress

I set up the second half of the shed for the car by closing it in with some plastic.
Best decision EVER! SOOOOO much BOG! discovered already = So much dust!!
Got the rear quarter and drivers door stripped and coated in keyphos.
The lower section was about 6mm thick with bog, covering up a few dents and a massive hole, and surprisingly the sill wasn't rusty, just totally dented in and filled with bog.
Went through 2/3 coats of paint stripper then ended up having to use strip discs as 50% of the panel and the drivers door were totally layered in bog. Two strip discs and a dead grinder later i'm wondering if I just cut straight to sandblasting.....
-
I'd be keen on the front end headlight panels if they're straight? Facelift Headlight bezels?
Thats if shipping to NZ isn't going to cost the wordl......
-
Finally finished the Rotisserie - stands had bigger castors mounted & more supports added.
(also had to heighten them a bit more as I stuffed up my measurements)
A mate (and pro welder) came and cast his professional eye over my welds to put my noobie nerves at rest............all good!!
Just need a few of my mates to come over and I'll have the shell up on the spit!!


And after much "ummmming and ahhhhing" I have bought some paint stripper to save some $$ and get a bunch done myself first

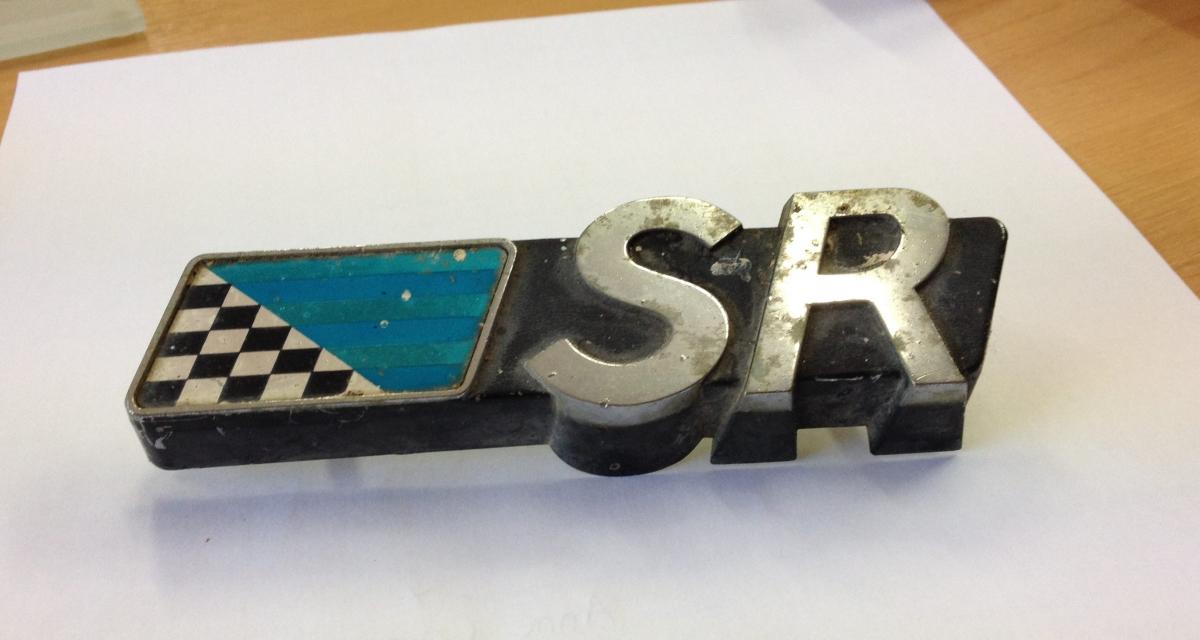
I picked up a few christmas pressies from Japan too.....
NOS kick plates/sill plates and some TE27 retractable seat belts (not available in nz
 )
)
Also found one of these......and my 3D prototypes have had a second run - a few more tweaks and they'll be ready for production

-
Don't forget to put the forward-facing diagonal struts in, the ones in your drawings but not on the stands yet.
Make a bolt-on hoizontal from one stand to the other, right under the car. That will take tremendous stress off the verticals of the stands when you move the car around. The thing that will collapse a stand and drop the car will hardly be seen. A little bit of gravel against a wheel, a hole in the concrete, a 10mm nut you didn't notice...
thanks for the tips, I need the help! :)
I have some more welding rods so will add the extra supports soon - I also have the steel to join the stands together too.
Do they really fall over that easy? collapse the stand? is that common without a joining bar between the stands?
That would be a pretty nasty thing to happen.
-
Between work and kids etc I finally got some shed time over the long weekend and made the other part of my rotisserie.

I've run out of sticks so once i pick up a few more and the new castors she'll be ready to go!
I had to modify it a little from my plans but nothing major. Looking forward to finishing it off this week hopefully.
-
My steel finally arrived this week and I was able to find a few hours here and there to get started on the rotisserie.


I finished the front mount. The car has had a slight prang on the passenger side so when I bolted up the arm to the bumper mounts it was sticking out on a funny angle......lucky I had a few big metal bars lying around to straighten it up.
-
Forgot to add......
The farmer who my dad sold my original KE25 to, found this in his shed.........
The last surviving part of my first car!!
the rest is down a tomo
-
Would love to see some plans of how you are building it if possible
here's my rough plans - attached to the front via the bumper mounts, and the rear through the rear leaf spring mount (still with bush).
I have to raise the stands approx 12cm to get clearance when the chassis is on it's side - not needed on the back but I have to do the same so that it's all spinning on the same axis.
I'll let you know if it all goes to plan when I finish it, hopefully this week :)


-
Small update:
My steel for the rotisserie wasn't ready on friday
I'm getting it dirt cheap and cut for free so I can't really complain.
So I did what I could with the engine stands, cutting off the front, welding up the joints and the castors, modifying the frame.
I'll cut the tops off, make them a bit taller and finish the mounting brackets this week hopefully.
Pretty pleased considering this is the first time i've done any welding. Good to be moving forward


-
Small update:
Borrowed some welding gear of my dad and had him show me how to use it.
Was hoping to pick up my steel for the rotisserie this weekend, but have to wait until monday, so I started modifying the stands.
Pretty stoked with how it's going considering this is the first time I have ever welded.......pics to come soon
-
so this made it's way into the garage today

also picked up a couple of engine stands i'm going to turn into a rotisserie
-
Hey Mate,
I'm no expert, but one of the things I've seen done and am looking into doing for my car is an first gen AW11 MR2 steering Rack (same as an ae86 quick rack I believe), mounted to existing crossmember, and KP Starlet universal joint and column internals (which match KE2X columns). I believe the outer arms were also KP Starlet but I am yet to look into that further.......hopefully that helps in for future research......
-
interesting..........oh well I know a guy.......
Thanks for the info
-
I realise MS85's don't exactly grow on trees, but neither do TE27's
I figured I'd just be able to buy a new generic plug when the time came to fit it all up.......??
-
Been a while, but stoked to finally have some progress....Stripped the last few bits off the shell.

This is the first time I've removed a diff, shocks, springs, steering etc to pretty stoked I got it all out with no broken parts :)

I also picked up my AE86 diff with 4.3 TRD LSD, a few spare lca's, a spare set of ke2x leaf spring mounts and.......a TE27 pedal box!! :)
AND regarding my 3d printed badges, I have finalised the prototypes and have found a way to get them completed with much better finish.......watch this space :)
-
Will do! The shell is going to be blasted soon, along with the struts and hubs etc so will update my build thread when I finally get some progress :)
-
Yes you need them, but unless you go coilover, there isn't enough room in the strut tower to pull them across.
Really? It's always the case on the net.....so many different opinions.....
I've read up about a few cars with out going coilover and no mention of positive camber - tally, ae25......
I'm a typical noobie looking for the easiest option ha ha. Well at least I know what parts I need now and can give it a go and if I have to convert my struts to coilover so be it. Thanks for the info :)


Ali's Ground Up Ke25 Rebuild
in Rollaclub Rides
Posted
Thanks Doogs.
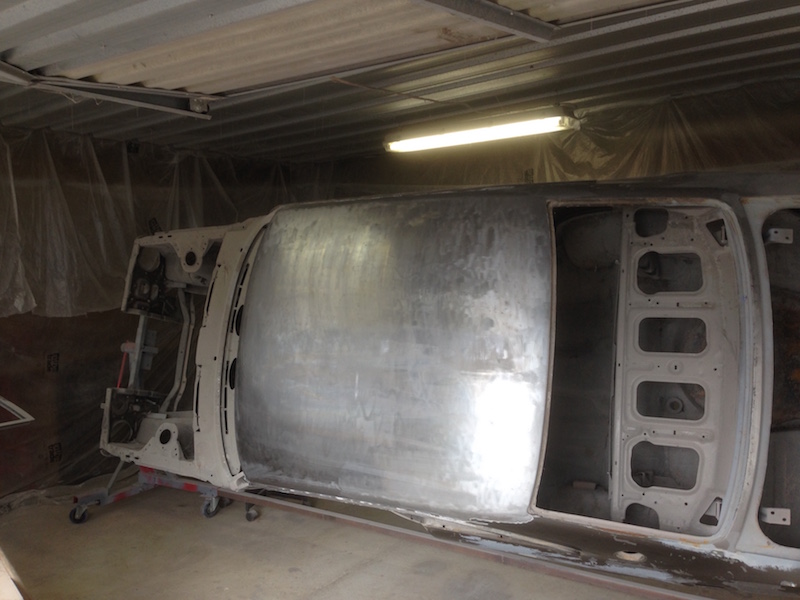
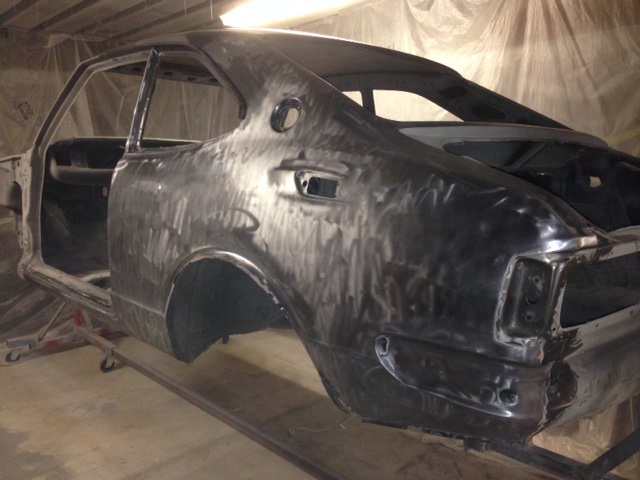
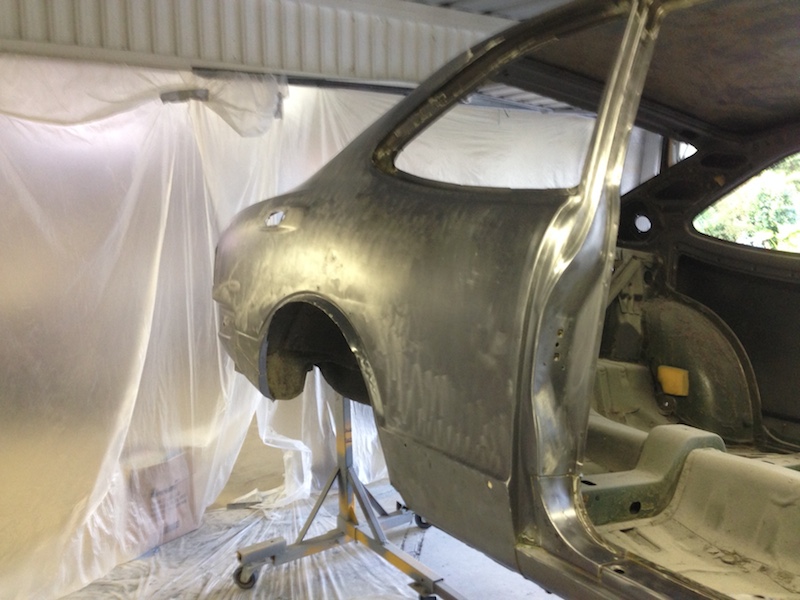
I've had enough paint/bog stripping to last a lifetime already. I did the passenger door today and it was even worse.....dented, rusted - probably gonna be best to reskin it.
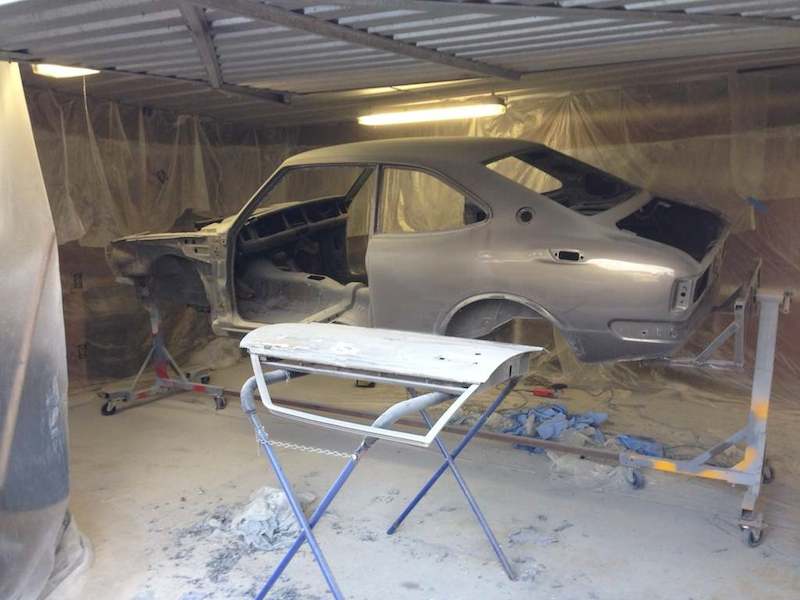
I sit back and look at all that needs to be done and it can get a bit overwhelming, so I have to take it in small steps. Next goal is to dry ice the sound deadening and get the rest of the shell/rust sand blasted and get everything treated and epoxy primed.