

Trufauru
-
Posts
71 -
Joined
-
Last visited
-
Days Won
8
Content Type
Profiles
Forums
Events
Gallery
Blogs
Posts posted by Trufauru
-
-
Sorry I had forgot about this
Thanks a lot Banjo for the kinds words, as you said it was a labor of love, and of need, because noboy wanted to fix this car hahaha.
Lets start tying some loose ends
One of the issues that had been left behind was finishing the steering column

So clearly, I started with the easy part of cleaning and painting everything.

I don't have pictures, but what I did was take the upper part of the steering column from the Corolla, the lower part of the steering column from the Starlet, and started cutting to see what I was working with, unbelievably it was much easier than I thought, since the internal axle is the same in both cases, so it was a matter of joining both pipes.
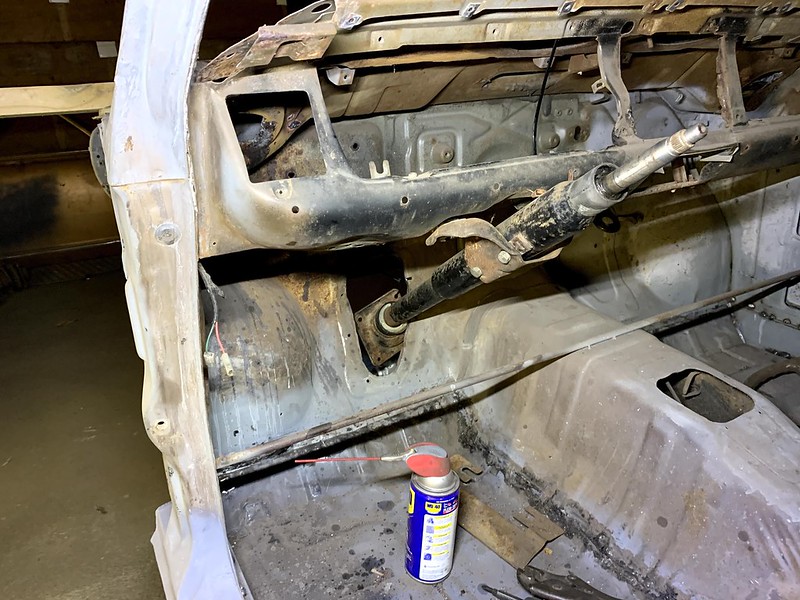
To match them, I had to open the lower tube of the Starlet a little bigger, and thus place a bearing between the tube and the steering axle that centers everything in the lower part. Then have a bushing turned that centers the lower pipe on the upper pipe and that's it. Unfortunately there are no photos of all this.
And that was it, I just had to fit the bottom bracket of the Starlet to the firewall, with the original part of the Corolla.

Since I was painting, I got excited and painted several things that were laying around.
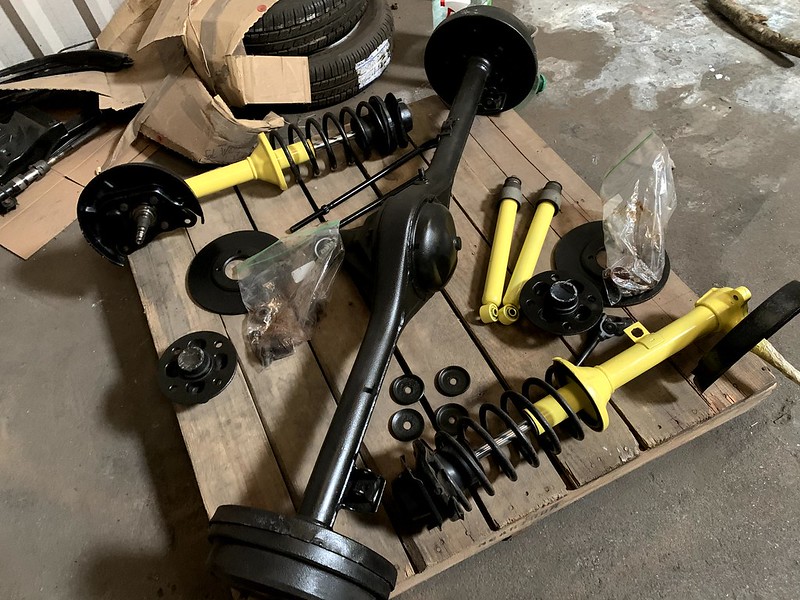
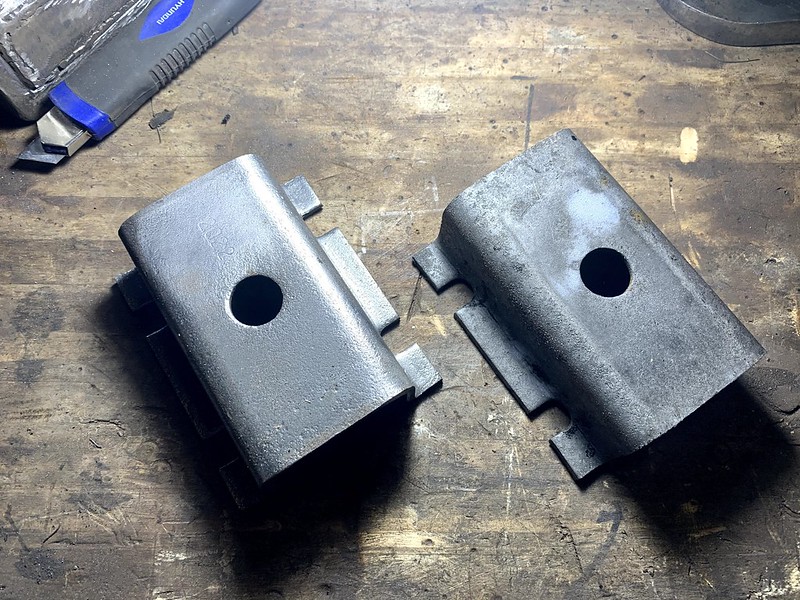
Since I was motivated it was the turn of the rear leaf springs.

I got the habit of cleaning parts by leaving them submerged in anti-rust acid.

They easily come out like new, there is no need to spend work and after washing them they are ready to paint
And remember I was painting everything.

With all this, we are between May 2020
-
What a lovely work you are doing right there Wenisman, hats off to you, lovely to see that level of skills being put at work.
Great to see a wagon being saved, that fuel door it's awesome.
-
 1
1
-
-
On 2/17/2023 at 8:55 PM, Banjo said:
Incredible work & perserverance Sebastion ! I've been looking forward for an update from You !
Keep it up, & keep the pictures coming. You are inspiring others.
Cheers Banjo
Thanks a lot Banjo, more pictures this way
First of all, we are going to settle what was pending, which was to shape the tip of the rear fender.

Now we are going to see if we finish the trunk, to make my work easier, again I ordered a piece to be folded with more or less the profile of the upper edge of the panel.

After a bit of cutting and adjusting to make the curve, I welded it to the main panel and the piece was rigid again.
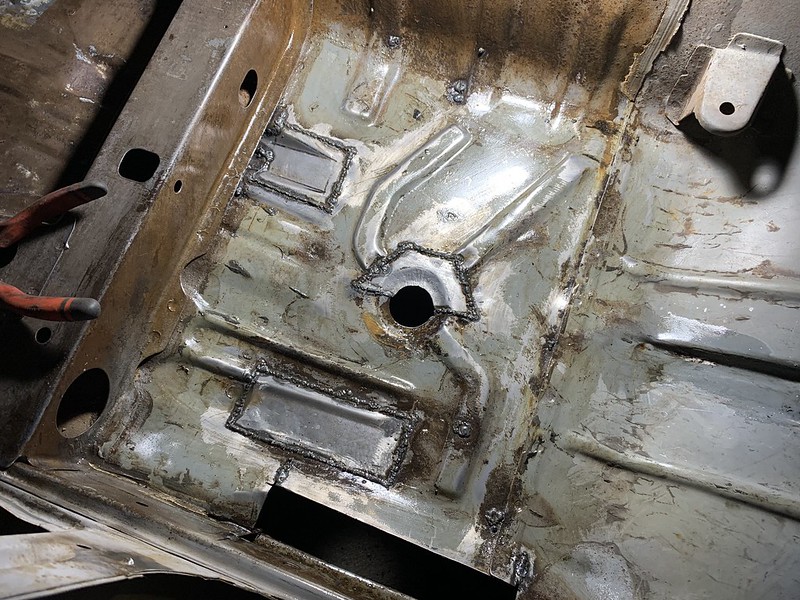
https://live.staticflickr.com/65535/49855784247_c4142ed473_c.jpgNow with that firmer panel, I proceeded to work inside the trunk (remember to rotate from work to work so as not to hate any more than the other) and start making a very simple piece.

Always using the holes as a reference for the new piece that had to be made, each piece is more or less complicated.
In this case, the floor had a rib, and I wanted to keep it to give it continuity. So to the shaping block, I welded a plate as a mold, and with the hammer and patience I hammered that mold to the piece that I was assembling.

The piece on the other side also had that strengthening rib, also some curves, it was all a matter of replicating all the turns.

As always, to replicate the pieces, you always have to remove and put the piece in the car a thousand times, verifying that the entire shape more or less matches.

And after we have the shape in place, it gets welded and it looks like nothing happened. Luckily I remembered to test the rear panel and check that it is in line with it.

On the other side, while trying to make the piece fit the right place, in one of the tests I realized that when hammering the material went where I didn't wanted and the piece no longer matches the width in some parts, but since the piece was 90% ready, so well... I wil welded and fixed it later.

Luckily with the mig, metal is easily added, and these types of gaps are easy to fill, it's more work afterwards to grind it, but with patience and paint, it's relatively neat.

As you can see, I was also working on the bottom of the trunk that I found some holes and on the side panels.

Here we have a small repair in the curve of the panel, and it is already marked for the cut of the next piece.

As always, it is a matter of cutting the problem into smaller parts and solving them one by one.

Here on the other side, also repairing small and not so small rust problems.

In this case I had to bring the tail lights to validate that they were fitting in place and that the whole piece was correct.

While we were at it, I took a photo with the whole panel in place. Things are changing, but as you remember, the panel has several holes.

So it was a matter of cutting, and then making all the necessary pieces, as we are used to..

To then place them all in place one by one.

And the rear panel is taking shape
Very crazy to think that everything that is painted is because it had a repair hahaha

With the back panel soon, I started with the repair of the edge that also had rust (incredible I know), in addition to the ugliest parts, I took advantage of and some small holes, I enlarged them and filled them to cure the problem

As always, repairing and checking that the panels that make up the piece, in the order that they make it up.

And to take advantage that I removed the rear panel, it was the ideal time to convert the VW Gol spare tire well into the Corolla well, so I roughly cut the piece and began to shape it with love and blows, but luckily the size was very similar. and the piece had extra material to work with.

A matter of welding and grinding until we are happy, then some paint and it is ready. A minor detail, I rescued the central screw from the original panel, and weld it to this hahaha.

Many years later once again it had a spare tire in the spare tire well like the first day.

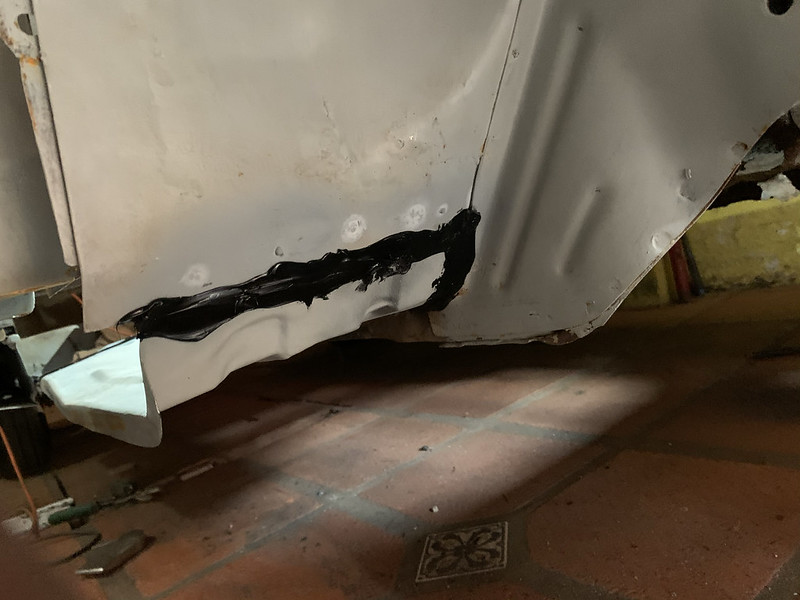
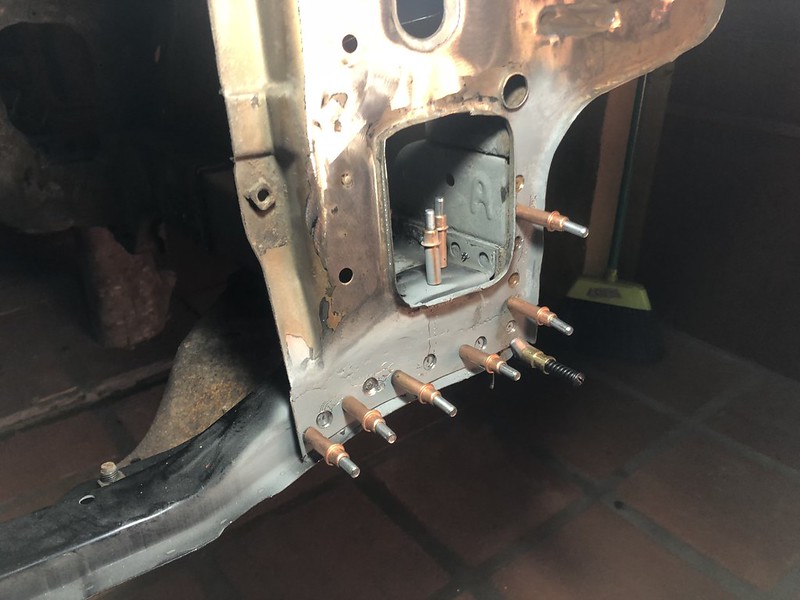
We're already winding this up, so a new level unlocked of hiding ugly welds with body sealer, almost seems like a half good job

Trying the trunk lid before calling it quits, and luckily everything clicks into place.
https://live.staticflickr.com/65535/51887829418_e1ac316525_c.jpgSo it was a matter of starting to weld, and taking out the cleco pins one by one and welding as we control the heat on the panel.

This process took April and May 2020
-
7 hours ago, parrot said:
Any updates to inspire us Sebastian?
of course
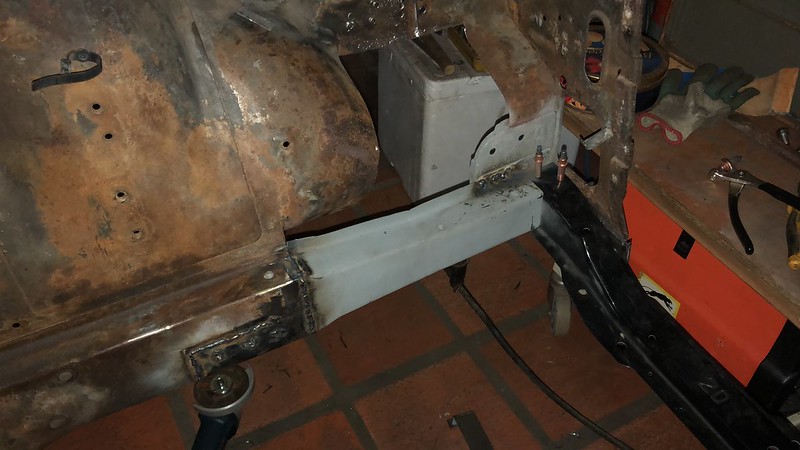
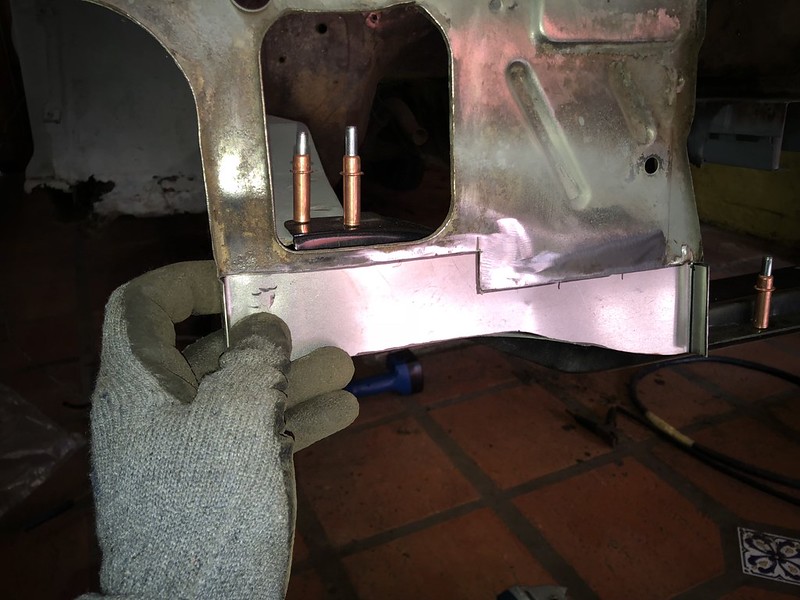
With all the rusted metal out of the way, I had to start building new parts, first the parts that are below and behind everything.

Making new parts it becoming a hobby


Then welding them in place, and painting for some protection.
Also this panel had a little dent, so I had to fixit before we keep adding new metal

And after a lot of cursing, it turned out good enough, not perfect, but a little of body filler will take care of the rest

Now with this pieces, and some measurements for the missing metal

We got this new piece

It is looking like a car again

-
 1
1
-
-
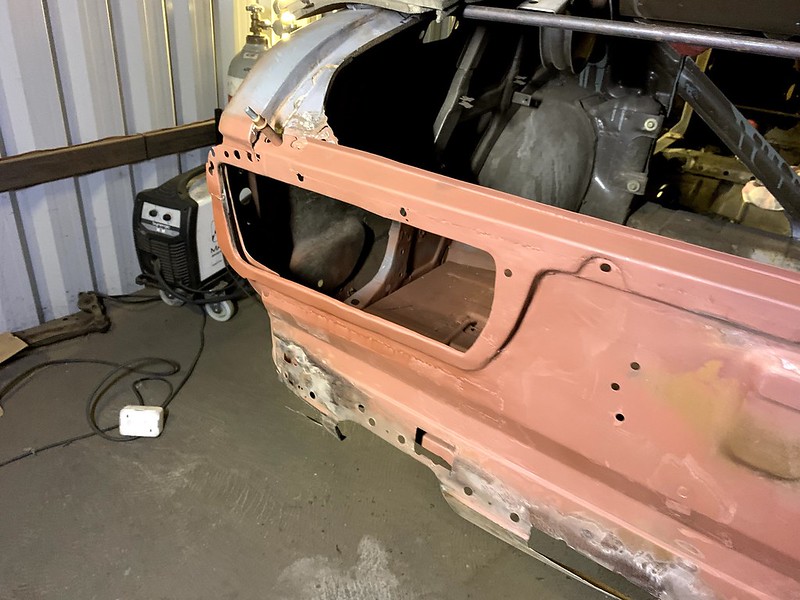
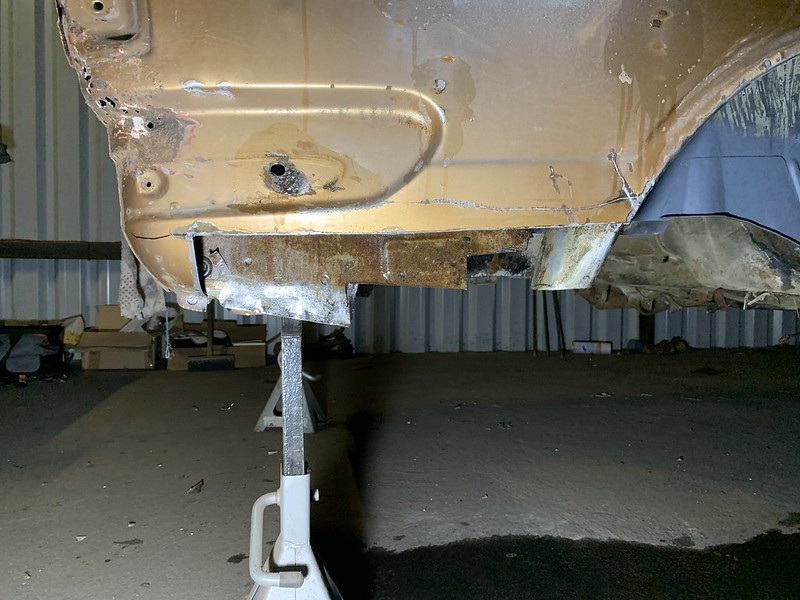
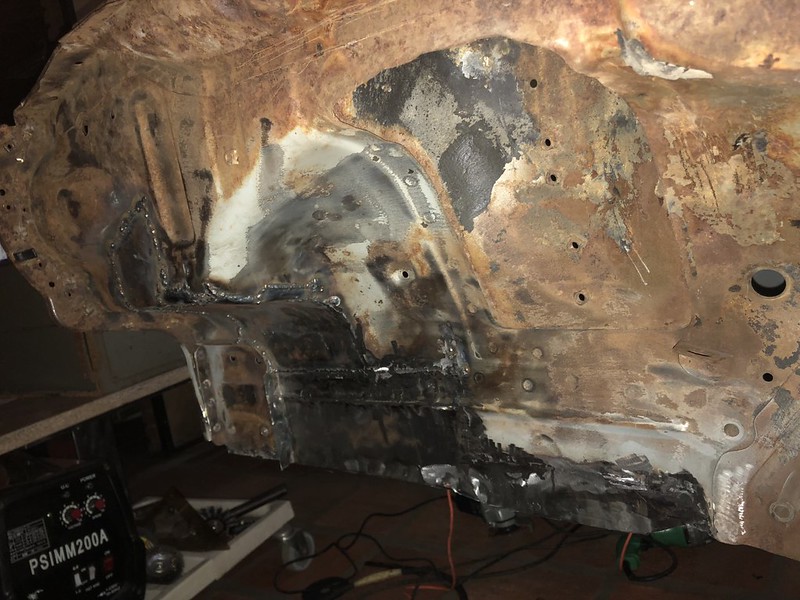
And let's keep up with this, and by this, now is time for the trunk that below the bumper reinforcements, it was very bad. So let’s start the grinder

Also the rear panel was rotten and with a lot of holes

After a lot of thought the best idea was to remove the rear panel to get better access, so I took a deep breath and started to remove all the spot welds, after a while it was something like this

El Corolla Camino any one? You can almost Imagine the dropped tailgate

And with more access, it was much easier to cut and remove the rusted metal. While I was nearby also started to cut the outside

On both sides it was horrible

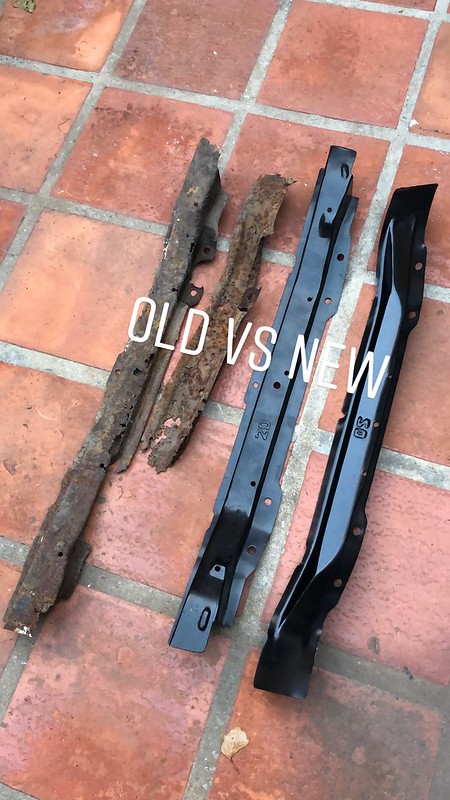
And the pile of rusted metal to create from scratch was getting bigger and bigger. Also, in the back you can see the reinforcements that were actually in great shape

-
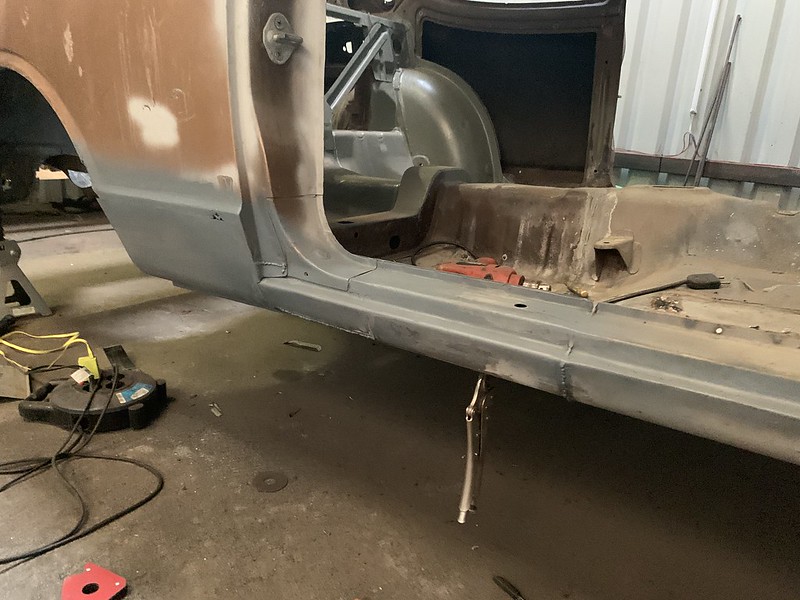
Then onwards the driver side, the rocker panel was done, but we needed to continue on the rear

Like before, first cut all the bad metal that we are going to fix

And with a ruler, a grinder, and a hammer you can make anything

I did the internal reinforcement, I didn’t go all out with the shape, but it's close enough.
Making all the little parts behind the corners that nobody will see.
Also little pieces like this in the floor, while I was in the area

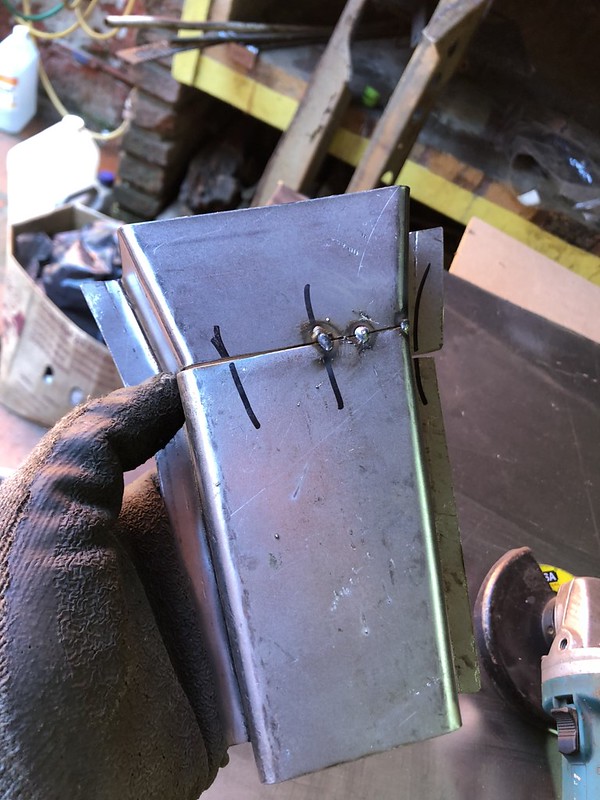
And then starting with the welding of the panel that I had bent to shape.

And again, weld everything, and paint everything to make this panel done (but I still need to bend and trim the end)

And we keep going -
On 4/28/2022 at 7:40 PM, Banjo said:
Simply Inspirational to all those that tackle long term projects; & for various reasons; never finish them.
That will certainly not happen to this project, as it's now 24 months later, & you are undoubtedly more advanced than these pictures indicate.
Cheers Banjo
Indeed it was a long term proyect, but ever since I rented the garage, the work took of and it got a lot of momentum and its getting closer and closer to the finish. Thanks a lot for the kind words, and as you say I have a lot of updates to post
 On 4/29/2022 at 7:13 AM, parrot said:
You may rest assured I am absolutely loving your feed. Please don’t stop. Impatiently waiting on completion of a pool which has meant no access to the garage for months, so I can get on with mine. Today yet another concrete pour and an apparent delay with delivery of the tiles…….. cars looking very forlorn jammed up next to each other
Well at least after a while you'll have a pool and a garage to have fun with hahaha, so the wait it's worthy
Now I have some short posts, but I tried to split the photos into diferent sections of the car while I was fixing them
And we start with the rear end of the passenger side. First of all let's cut all the rotten metal, and we end up with something like this
And then we have to make all this metal from scratch

Little by little, with a hammer and patience each of the parts for this puzzle come to life
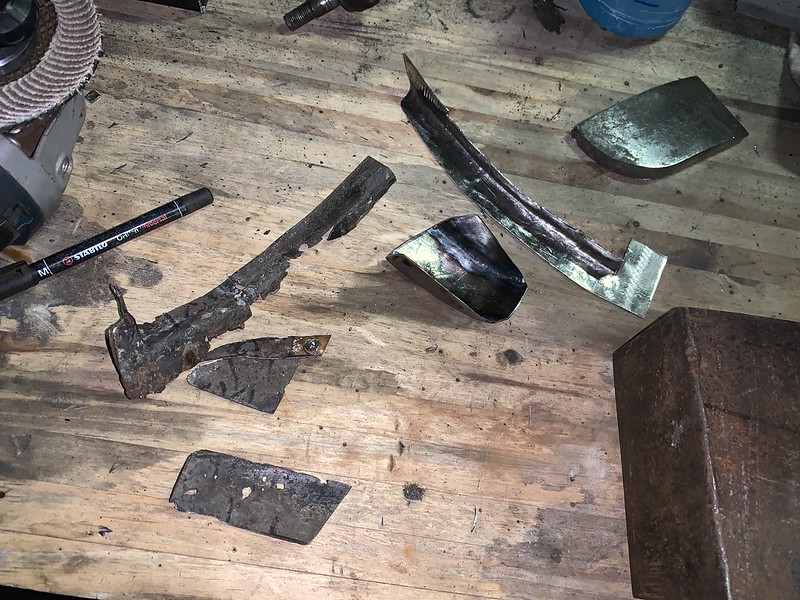
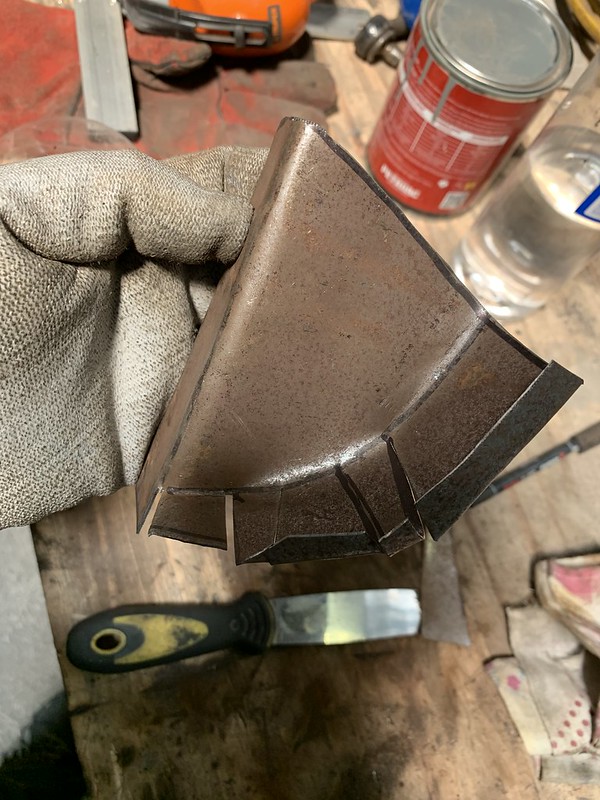
The process is simple and the same for every part, take some measurements, find a piece of metal with that size, cut, hammer and bend to shape, and fit and refit and test fit until the shape is right.

When you are happy with the fitment, and also checked with all the other parts in the vicinity, get the metal glue gun, and zapp all the parts together, then a little weld through primer and on to the next piece

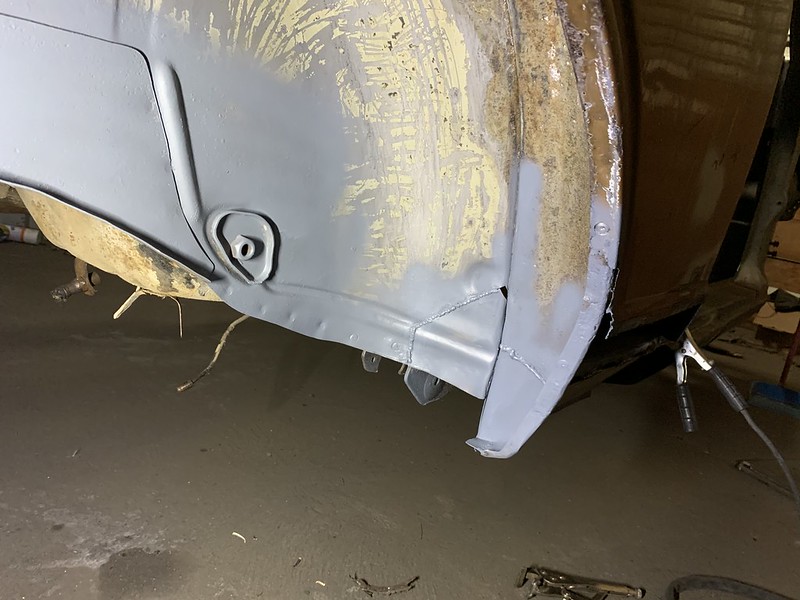
Test and check and weld

And with that we have all the corner looking like new

Onto the next part
-
2
-
-
On 4/26/2022 at 10:05 AM, Banjo said:
Thanks Sebastian,
i've been hanging out for the next episode in your Rolla journey for weeks ! (as I suspect others on here have also)
Keep up the good work ! You're an inspiration to all of us, that would not be game to tackle something this epic.
I guess once the floor is finished completely, you will be giving it a good coat of that black "mastic" tar like sealant, above & below; to prevent any further rust taking hold, in your good work ?
Cheers Banjo
I forgot about the reminder and nobody comented on it, but I'm back. Yes, you'll see some of that sealant, but mostly paint, and lots of paint in order to try to get everywhere, and get in crevices and tiny places
Off we go, ever since the Jetsons, we’ve all dreamed about the flying car, so I had to make my own flying car

Well actually I just removed the rear differential in order to work more comfortably on the rear underside of the car

Without it you have so much room for activities, and I got the car as high as I could safely do so

Once on the air, I got to cut the rear part of the rocker panel, and reveal all its nasty secrets

Also got around inside the wheel well, to get a better view of all the rust (after this, I decided to remove the rear axle)

Some cleanup and let start to cut some spot welds and pry stuff apart

A little better looking after a lot of wire wheel

And I had to fix a little piece on the side of the passenger floor

If you remember from the last post, I took another piece as a template for the side panel to the same place that had made the rocker panels, and again it was a great job

Remember to bag and tag everything you remove from the car

And back on working, as with other parts, you take the old rusted part, and with a bit of patience you make a new one in fresh new metal

Now I just need to weld all the seams and done
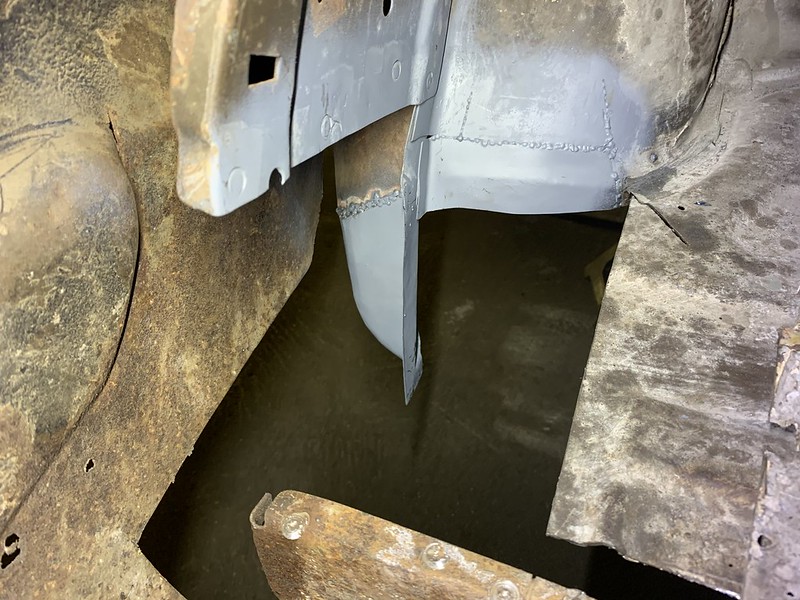
And then you well the piece in its new place (it is the end of the wheel well) I also made a new reinforcement for that area, but not as nice as the original

Then make and weld the new inner piece.

And a bit of paint on the inside and it’s done
With all the inner pieces done, remember to paint the back of every inside panel with weld through paint, and it is time to weld everything in place,

Also in between tasks time, I did some other things. Like, remove the paint to see that the roof was fitted with lead, they used to blend the joint between the roof panel and the quarter panel

Also took another shot at the trunk and remove this reinforcement

Only to find more rust than I was expecting

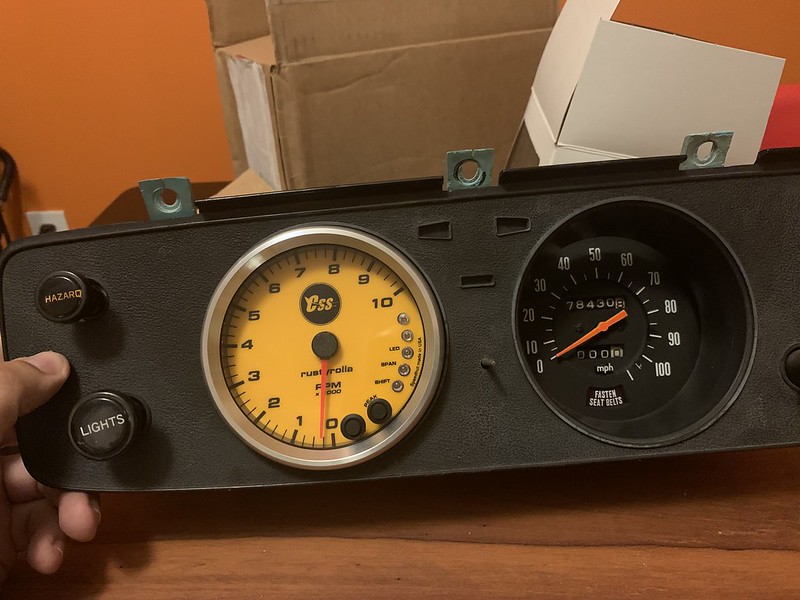
And some new parts, as you might know this is the original dash of the non sport TE27

So I contacted the guys at speedhut.com and have made a new tachometer that fits inside the original hole, and with an orange background, the name of the car “rustyrolla” and the logo of a group of friends
By now we are finishing march of 2020

-
Starting february, and starting with a new part of the car, a little grinder love and I got this new hole on the car, on the rear driver side.

Old metal laid on the bench, for measurement and finding new metal
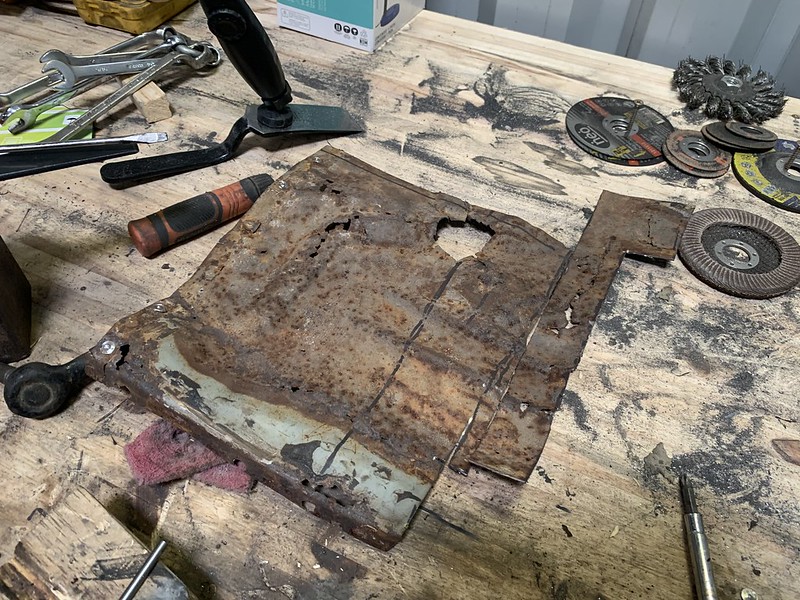
I had some of cuts from the front floors, so I was reusing them

With the old piece out, you take some time to find a new one and then you just swap them, and go from this…

To this…

And before you can realize, you got a whole new floor on the car
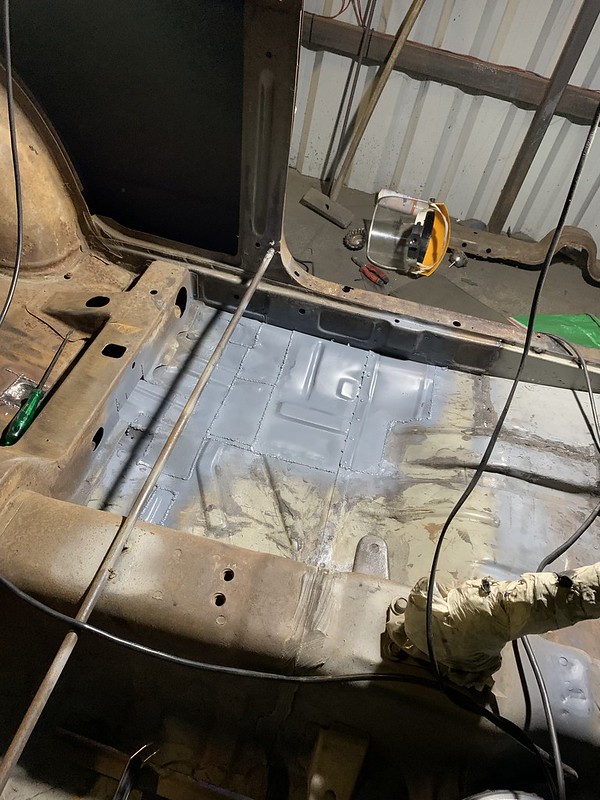
Then, since the passenger rear side was in better shape, I didn’t cut the whole floor, and just made some patches, and filled some holes
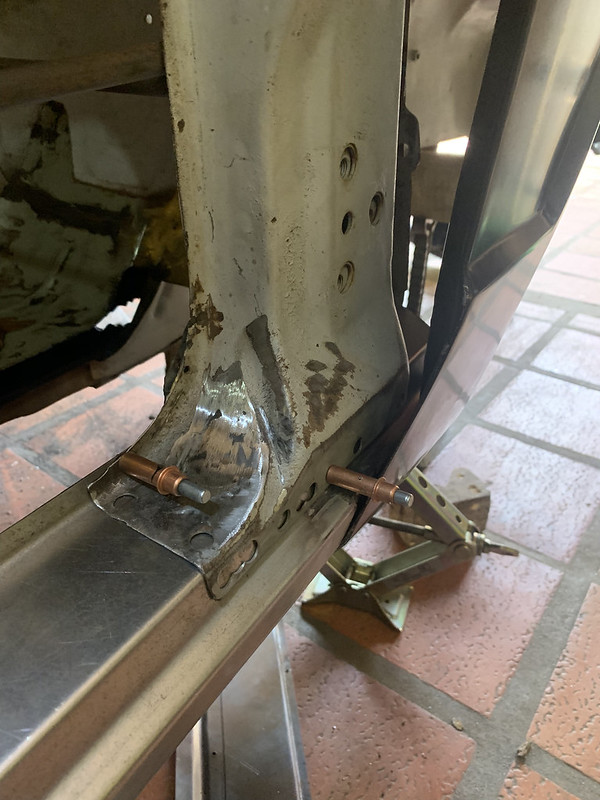
And given that I had welding gas, I got to finish the steering rack brackets and welded them in place.

By this we are February 9th.
-
Quite a story, and great to know that. I've checked on my car and it doesn't have any of that... but also I don't have the original keys, nor the original locks 🤪
I the US, Toyota still caries the original blank keys and they aren't that expensive https://www.toyotapartsdeal.com/oem/toyota~key~blank~90999-00066.html
-
On 2/27/2022 at 10:49 PM, parrot said:
I have to say this is absolutely inspiring as i need to do exactly the same thing on mine. Fantastic ideas.
You just need to start from some place, and do a thing at a time. As Simone Giertz says, split the job in smaller jobs that you have the confidence to tackle, and build your skillset to tackle new jobs
On 2/28/2022 at 5:35 PM, ke70dave said:yeah well done on these repairs, fantastic stuff. One day id like to do something similar. Bringing a car back to life essentially - very cool.
Indedd, by the time the car will be done, I don't think that there is a part of the car that wasn't touched in some way or another.
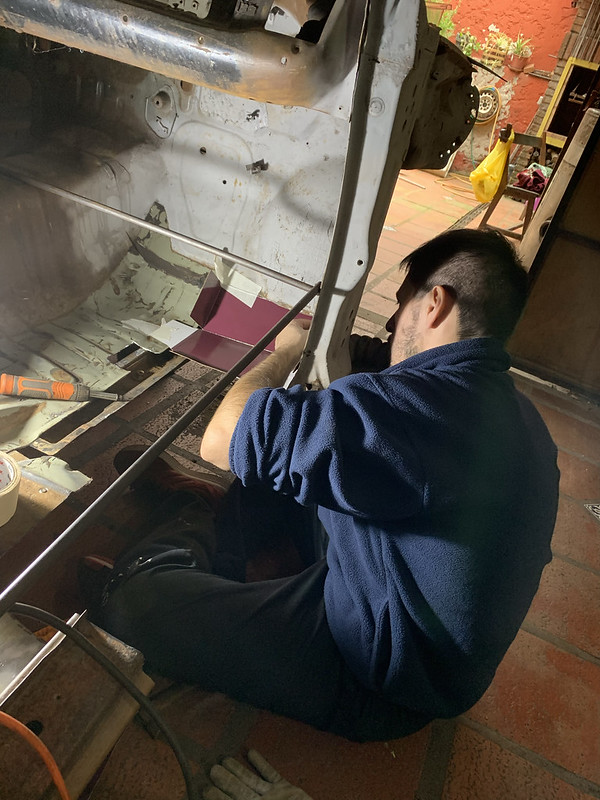
And lets keep up with this, while I was working on the drivers side floor and rocker panel, sometimes you get frustrated with some part, or it gets boring to test fit the same part 10 times, and you want to change what you are doing in order to not burn everything to the ground. So, while the driver side was being made and I got bored I was also working on these parts…
I got the hang on how to make the end of the rocker panel, so I made the passenger side again, and got to weld everything in place. To this day I don’t like how the end cap looks and fit, but it works


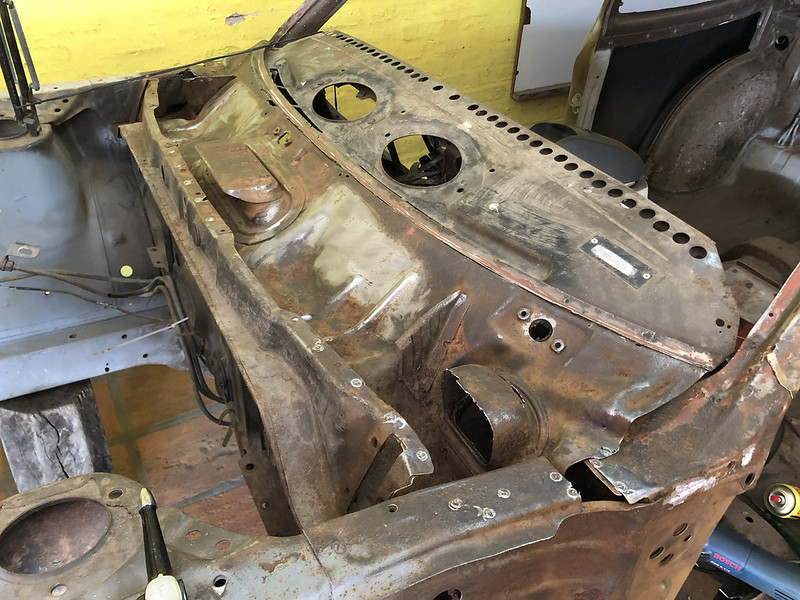
If you remember, I had removed the front windshield panel, and under that panel it wasn’t all fine. I had to remove the lower lip that when I removed the panel, I just cutted close to the edge as possible, but now I had to fix that
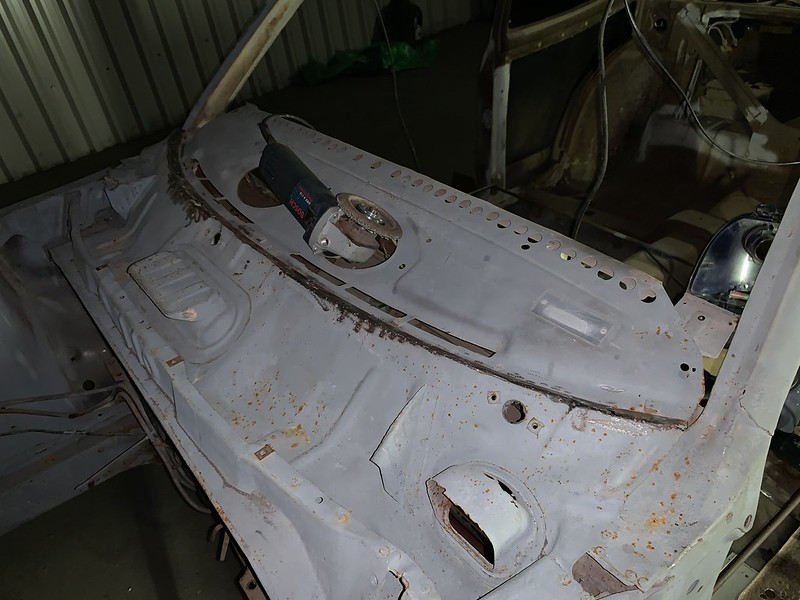
The worst offenders were the cowl intake vents, so I drill them out and someday I will fix them.

It leaves a nice hole, and some places to fix.

While poking some not so good looking metal, I also found a new hole that was right above the drivers feet... yay more work for me.

Walking around the car, I kept seeing that the spare tire well was very rusted, so I took the grinder and make a brand new hole on the car

But fear not! with the dimensions of the spare tire well, I went to a place that sells sheet metal parts for cars and after a lot of talking with the guy at the counter, I got the last spare tire well for a 94-08 Volkswagen Gol (a very popular car over there), but, lucky me, it was the last replacement panel available in the shop hahaha.

And to finish this post, a sneak peek of the next work ahead...

As with the last post we are on the end of January 2020
-
On 2/21/2022 at 9:30 PM, Banjo said:
When you got hold of your Starlet cross member; did you drop it into the chassis of your KE27, & see if the mounting holes lined up ?
I'm presuming, that the only reason, you cut the rack 7 pinion mounts from the Starlet cross member, was that the Starlet cross member, was not a drop-in option, in your TE27 ?
Cheers Banjo
Indeed they look like they are close enough, but never considered on using the Starlet frame, I just had read online that some people used the Starlet rack, so I went and got one, cut the rack supports, measure a little and attached to the TE27 subframe the best I could, there wasn't much more thought hahaha
And now we start this journey on December 17
It took a while, but I was able to find some gas for the welder, and since it was on the lighted side I started with the driver side floor and rocker panel. First step is to remove all the rusted metal, so lets turn on the grinder and let the spark fly.

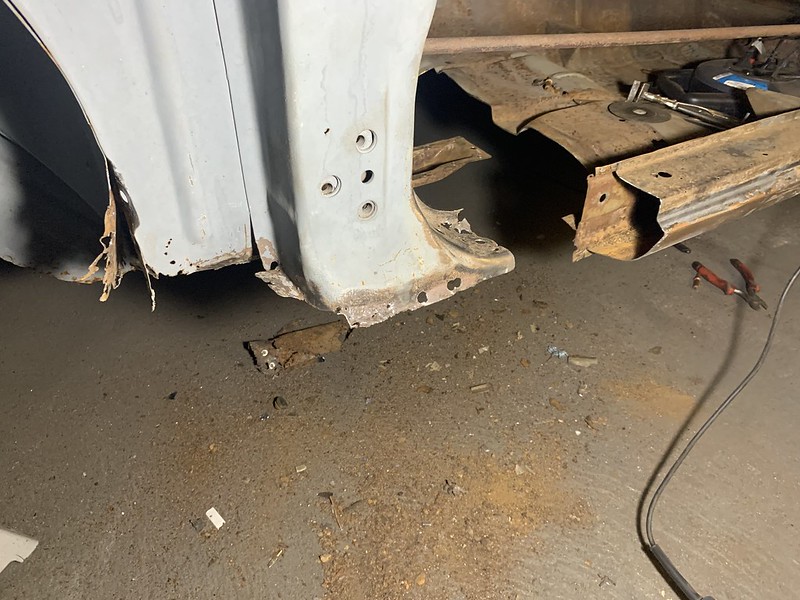

And after you get to the good metal, it is time to test fit the new pieces. If you look closely, I had to cut the panel in front of the driver floor, and the inner base of the A pillar.

This is just a rough test fit, to get an idea of how many parts this jigsaw needs and how all those pieces fit together.

Little pieces like this, that I’ll have to make from scratch, or cut from a bigger part. I could gather a patch from the rocker panel I had made.

The best way to do this is to make a wooden mold or buck, that will help to give the metal a new shape.

You can make it as simple or as complex as you want, as long as it the rough shape that you need, the more complex the more time and materials that you'll need, and as you can see I’m using some scraps of 2x4, it isn't very strong, but for a one off it helps a lot.
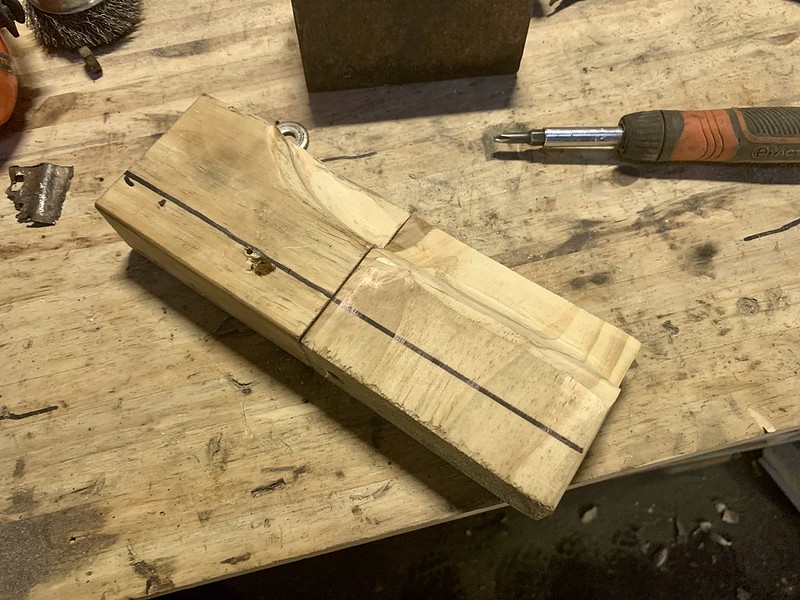
And after a lot of hammering and some cursing, you get a new piece

As usual, it takes a lot of trimming, test, trim, test, fit, trim, file, but it all pays out

Then you do the same for the other part
And again, after a lot of testing, you got what you want

Some action with the welder, and a lick of paint and it looks much better

With that done, the work on the floor can continue. It’s all a process of testing, hammering, and testing again until everything clicks in place
And once you are in peace with the fitment of the pieces, pour some liquid metal over the joints to make them become as one.

Meanwhile I was working on the floors, I also was working on the base of the A pillar, as a whole with the floors, also checking that the fitting was right.

Also checking that the door and the fender still bolted correctly, and everything landed on the right spot

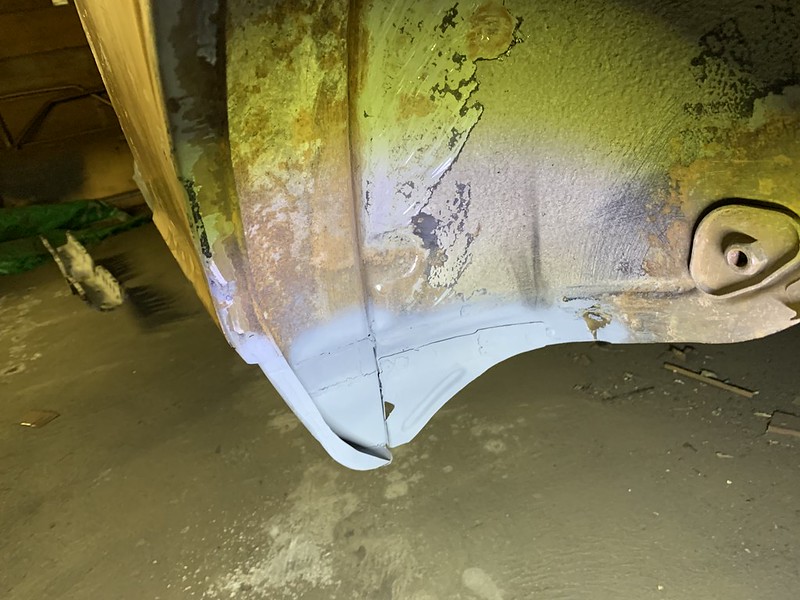
And again I had to make the indentation for the front fender to bolt correctly. But I had learned a lot since the last part, so I made it again and took a different approach to build it and this one came out much better.

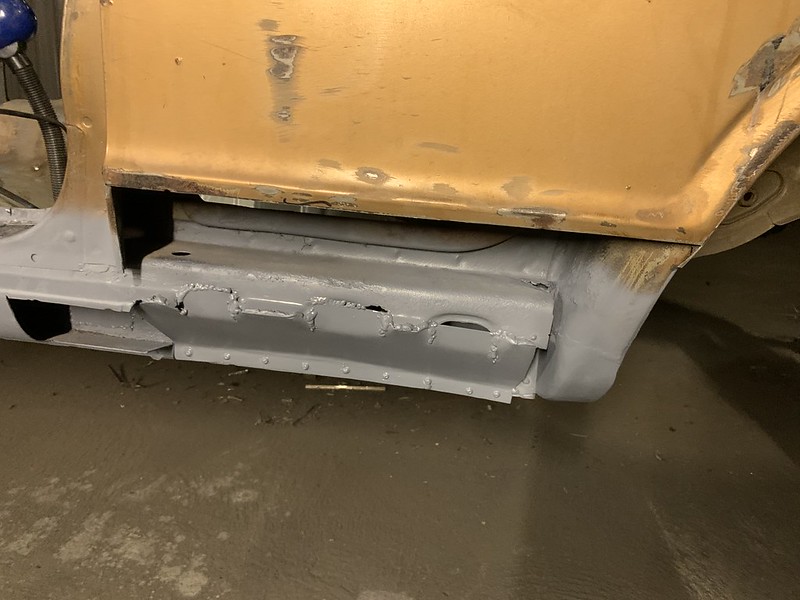
With the rocker panel in place, weld everything inside

And then seam seal all the interior and weld everything in the outside

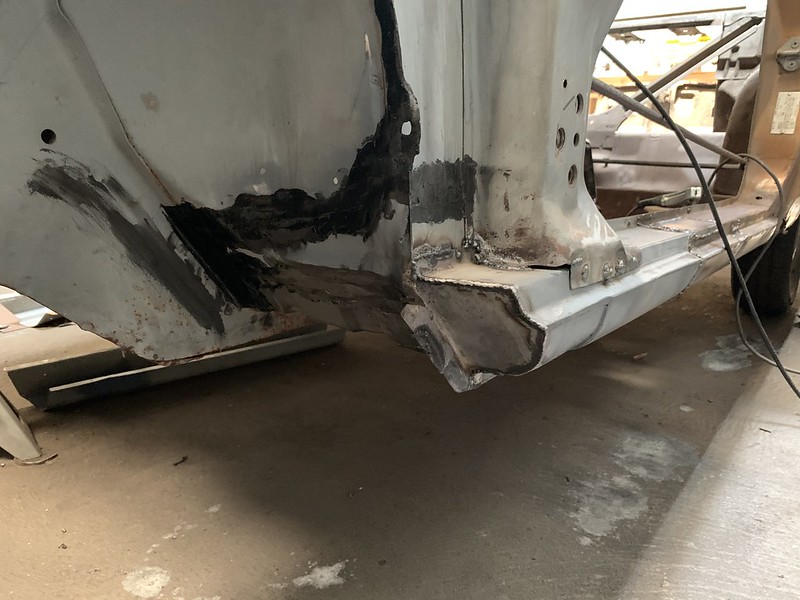
And done, with the seam sealer it almost looks good and that nothing ever happened.

With that done, lets go to the other side

And ended this part on January 26 and we are on the 2020
-
23 hours ago, Banjo said:
With it all jigged up there, on the bench, were you able to measure any steering geometry angles etc. ?
Steering geometry, & the ramifications of changing it, is a whole subject all by itself.
I did took a lot of measurements, and I think I'm close enough, but as you said, it is a whole subject. I used this site, https://www.racingaspirations.com/apps/suspension-geometry-calculator/ with all the measurements took from the TE27, and trying to be close as possible.
I just read online that they used KP6* starlet parts for the swap, and given that over here there are a lot of them and parts are cheap, I decided to do it.
34 minutes ago, Banjo said:Luckily, it still has the rack & pinion clamps in place. So from what I can measure, without removing the engine, the centre to centre distance between chassis mounting bolts for the front cross member is 75cm.
Could you measure this distance for me on your TE27, as it should be easy, with nothing in the engine bay at present.
I'd be very interested to find out if the Corolla various KE models & the Starlet, used the same mounting point dimensions. The other useful dimension would be the distance between the bolt holes on each side, of your Starlet front cross member.
Cheers Banjo
Sadly I never took those measurements, and I don't have the car nor the engine close to me to take those measurements that you need. But I have the factory body manual with a lot of measurements of the stock crossmember

-
The first job on the shop was to make a new workbench, so I went to homedepot, bought some wood, some 2x4’s and got this

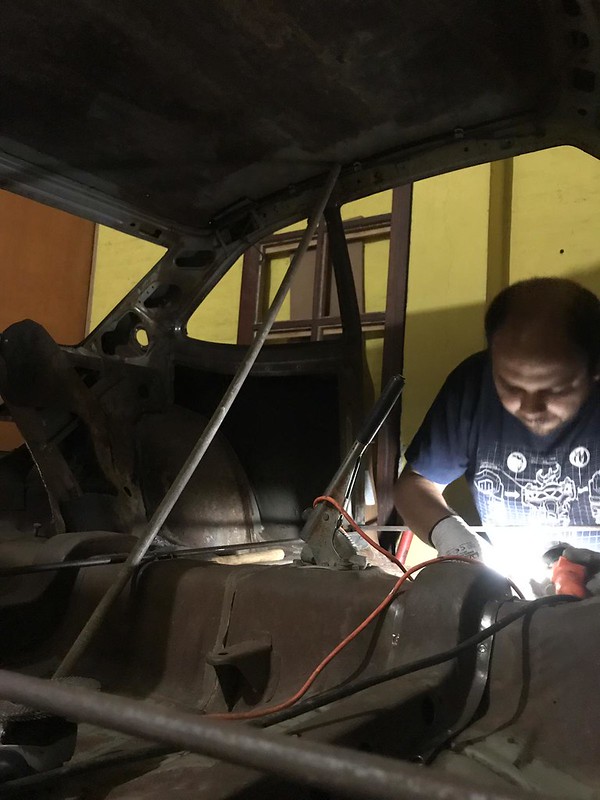
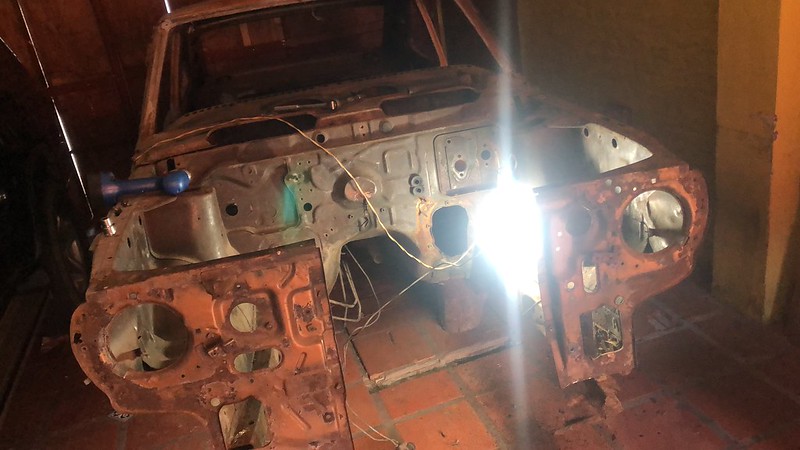
It has some great natural light by the day, but I was going to be working by night mostly
So I bought some lights, which were the second job in order to make the shop more usable.
The car was lovely lit from one side, and could be turned around easily to work on the other side.


Onto the real first job to the car while I was there, I wasn’t able to locate welding gas so I couldnt . The TE27 comes from factory with a steering box, it’s a big, heavy, and old tech, while I was reading on forums and groups, many people use the steering rack of a KP61 Starlet, and most ideas online use parts that are impossible to get over here, but luckily Starlets are everywhere and very cheap. So I got a starlet subframe, rack and column.
Why the subframe? You might ask

Just to get the steering rack mounts


Then I chopped the TE27 steering stops, and cleaned the subframe

And done

Well, not so easy, if you want to keep a good steering, there are a lot of measurements involved, I did my best to follow all of them. First of all I needed to find the centerline of the subframe, the steering rack, and the original steering bar

You want that the pivot point on the suspension arm, is as close to the pivot on the steering rack/steering bar as possible. As you can see, the pivot on the original steering is inwards, and with the starlet rack it moves outwards (always measuring from the centerline). As you can see the Starlet is longer.

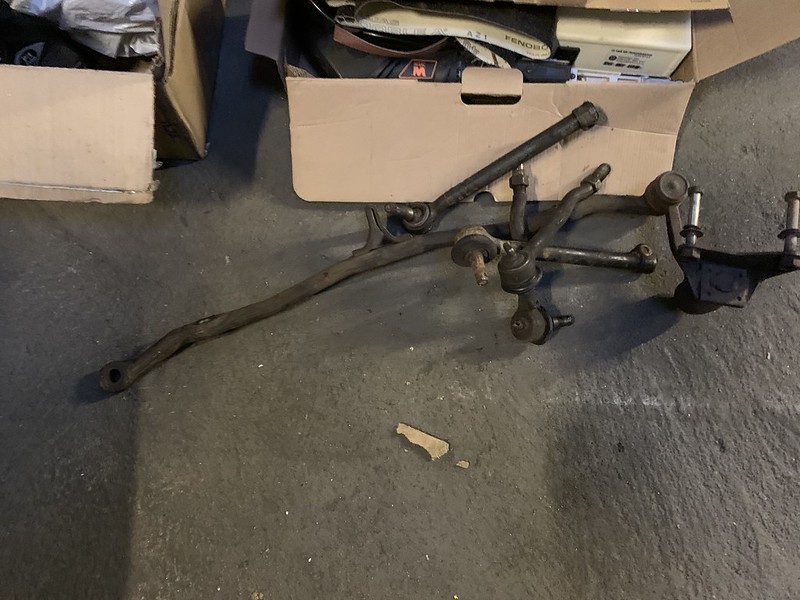
But luckily without much modifications everything fits just fine, I just had to use the starlet inner tie rod, and the corolla outer tie rod, they screw right on and allows for the “correct geometry”, time will tell if everything works

All the old parts, and missing from the photo is the steering box that must weigh like 20kg by itself.
A little video of everything working together
By now it is 10 of December 2019
-
1
-
-
On 2/11/2022 at 12:38 AM, ke70dave said:
wow i havent been in here for a while. fantastic work. well done.
I had many photos and always wanted to build a thread, I had forgotten that I had one started over here and now trying to get up to date.
On 2/11/2022 at 1:34 AM, Banjo said:Yeh Dave ! This is fantastic to follow. Can't get over the dedication. Most dedicated guy I've come across, when most of us on here, would not take on a project like that, with so much "cancer".
I take my hat off to him. I'll certainly be following this thread.
I must have been living under a rock, as I've never heard of using dry ice to lift sound deadening material in olde cars.
In my defence, I've never had to lift any, & never researched it. There a number of utube videos on the net, & it certainly works well, in floor wells, but a bit harder on vertical areas.
https://www.youtube.com/watch?v=4FqkxgcjRQQ
Cheers Banjo
Thanks for all the kinds words, but it's half dedication, and half maddness, since it was the only TE27 on the country I knew that being a Toyota fan I had to save it, and I always I'm up for a challange, as my grandfather used to say "If someone somewhere could do it, I can do it too" so I took the project. The funny thing was that I was restoring an old Audi 100, that my friends said that was very rusted, when the corolla arrived the Audi was almost in mint condition hahaha
I've always seen online that they used dry ice to remove the old sound deadening, so when I had the opportunity, I had to try it. And it worked flawlessly.
On 2/11/2022 at 10:38 PM, parrot said:Oh my. I have to come back to this and concentrate a bit later. Looks like some brilliant work
The posts are long, but mostly pictures, the good work haven't started yet
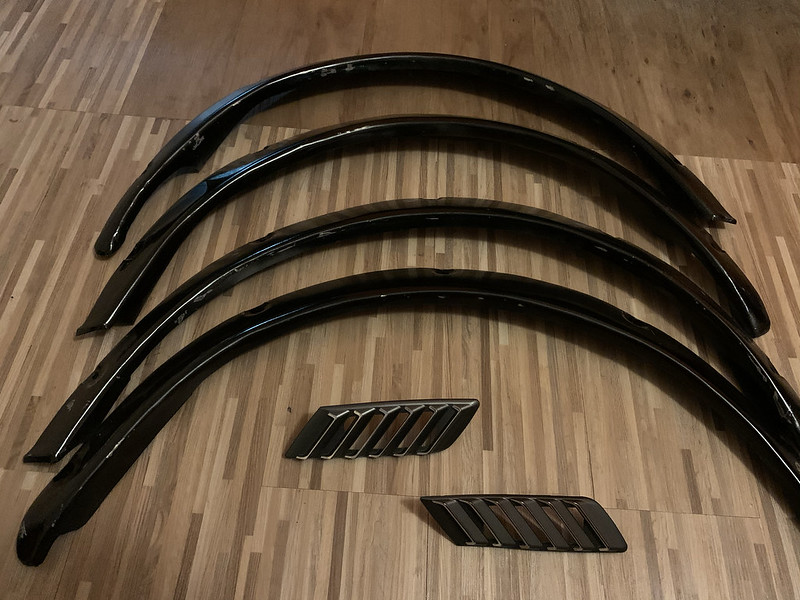
So lets keep upAfter all of this I kept my search for new parts, and was able to buy reproduction metal fender flares, and new cabin vents, those vents are for the trueno and they look much better that the ones that were on the car (and they were destroyed)
I also got myself a new mig welder, a “Telwin Maxima 160 Synergic” https://www.telwin.com/en/prodotti/?id=816085 , I was welding with a no name chinese “200A” mig welder that is more adequate for welding a thick metal fence than thin sheet metal, so I got a good welder with less power but enough power just for this job
Until this time, I was working on the car on some holidays or vacations. The car was in another city at my parents place or nearby in a friend's barn, but it is an hour and a half drive away, so it isn’t very convenient, but I was on the lookout for a place nearby…
And I was able to find a place of my own to work on the car, near my house, just 20min away, and I could make all the noise that I wanted, and work comfortably. But first I had to get the car to this new place, first step, and after a lot of hard work we got the car on the trailer

Then load all the parts and tools into the car and on the truck (of course you must tow a Toyota with a Toyota) and of we go, we had an hour and a half of journey to the new destination.
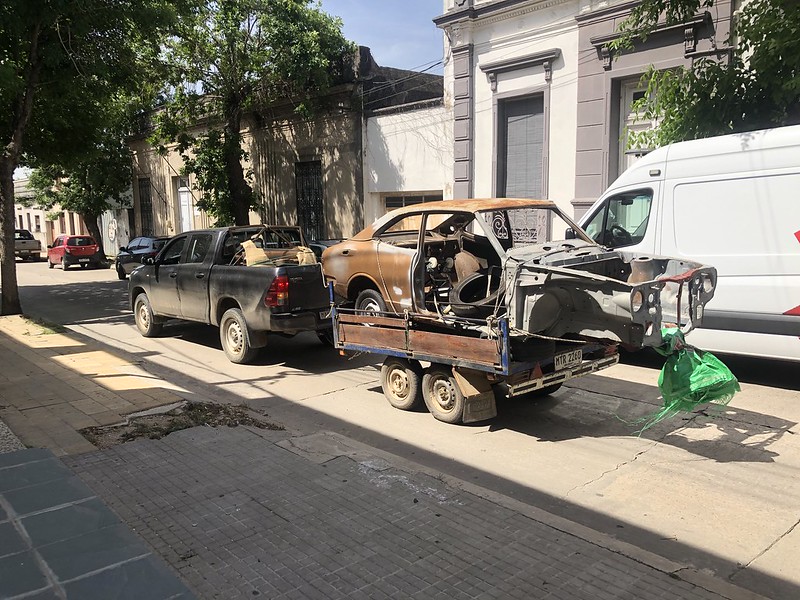
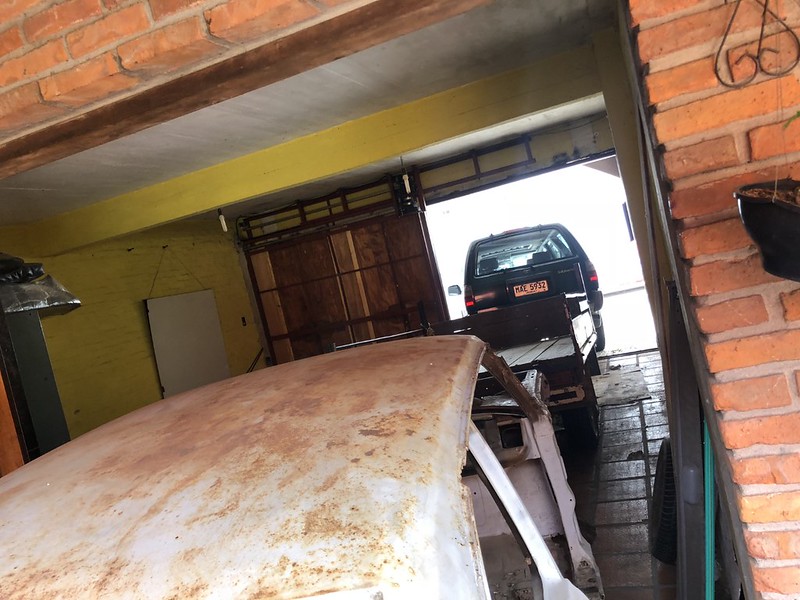
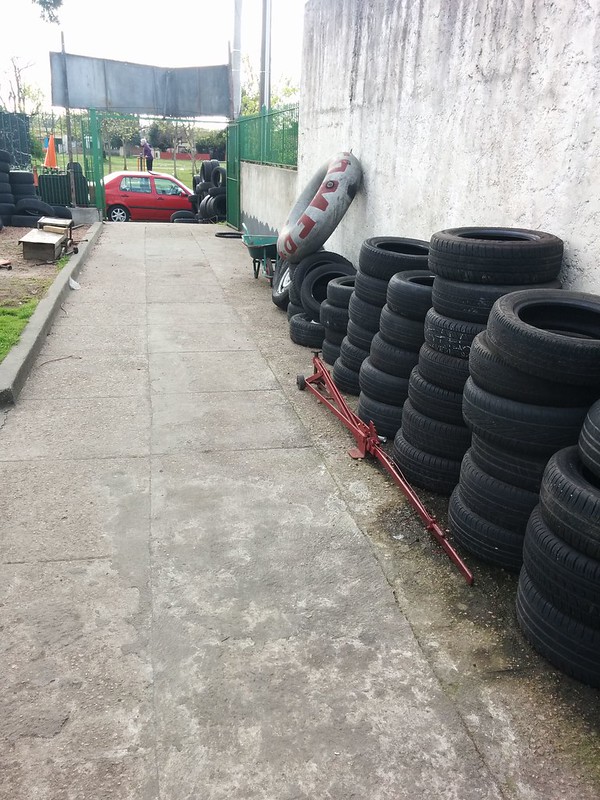
We arrived at the new place, it used to be an old tire factory, and now a piece of it it's my “workshop” that was at the end of a kinda narrow hallway, so I maneuvered the trailer the best I could and we pushed all the way to the back

Once we got the car into the shop, but we realized that we had to unload it first.

We had to get creative, and some sketchy things happened


But the car was unloaded “safely” as possible

I had made a new cart for the new welder and was already coming handy

It was great to have a place to work without disturbing anyone, and it was huge 7x7mts

And the trusty wagon loaded with more parts, all the small bits that didnt fit, or where to fragile.

The car on its new resting place with the documentation

By this is 30th of November of 2019, we are down to the days and months
-
On 2/8/2022 at 7:28 PM, Banjo said:
Only one word for this project resto. . . Incredible ! It does indeed look "handsome", even in it's current format. Where did you procure the carbon fibre hood/bonnet ?
How much did it cost ? Have you had a chance to measure the weight difference between the original steel hood & the carbon fibre one ? These olde Rollas were over built in those days, where there was no computer aided design. Their power to weight ratio, was abysmal, by todays standards. There are two ways of improving the power to weight ratio. Increase the power, & lower the weight. A bit of both, is a very good compromise. The balance would also be the relative cost of each method, of improving the power to weight ratio.
I'm in awe of your dedication. Good luck !
Cheers Banjo
I bought the hood from Restored, a company in japan which specializes in parts for old japanese cars https://restored.jp/parts/article/TE27レビン, it was like 800 dollars, and quite a lot more to bring it to my country. Sadly I didn't had a complete hood back then, it was very very rusted, and I just throw it away, I really didn't care bceause I knew of Restored that they could take care of the hood, I just had to save some months
And we are on the second page of this post
New years, and I’ve got a present for my birthday, an Ignition Models TE27, with the whole look of what I’m hoping for the car.


I’m getting ready for more work on the car, so I need some parts because I’m taking a few days off again to work on the car. A few months comes by and I get the new floors and front valance from https://www.autopartscomplex.com/ they are reproductions but close enough.

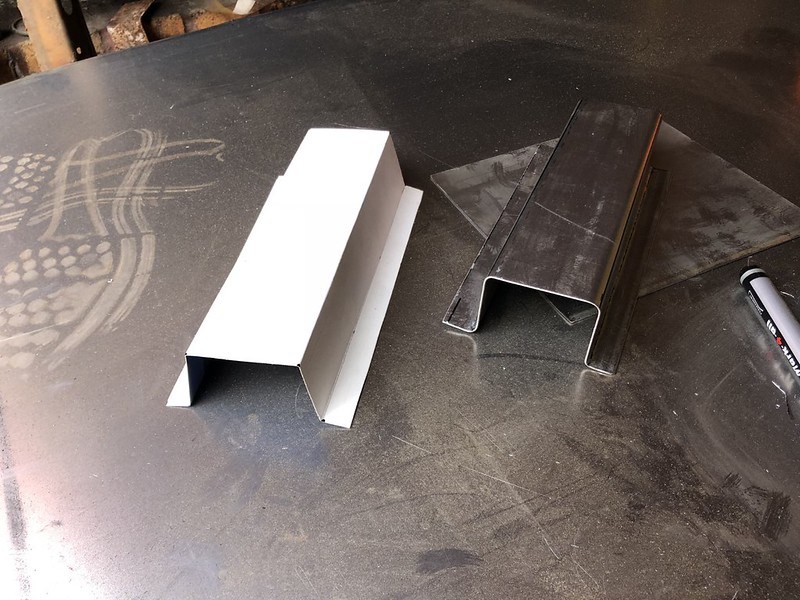
Do you remember the piece of rocker panel that I took in the previous post? Well I took that to a place nearby that does sheet metal work and was able to bend a whole piece from that shape.

I also was investigating, and there is an inner and outer rocker panel piece, so I had both made.

And in April 2019, I took some days off work, and the car was again in the garage, and ready to work on it.

First job on the agenda, remove the center cross brace, in order to remove the floor. So with the spot cutter and some patience I started to find and cut one by one.

I realized that maybe I was going to compromise the structure of the car, so I decided to weld some metal rods to tie the whole body

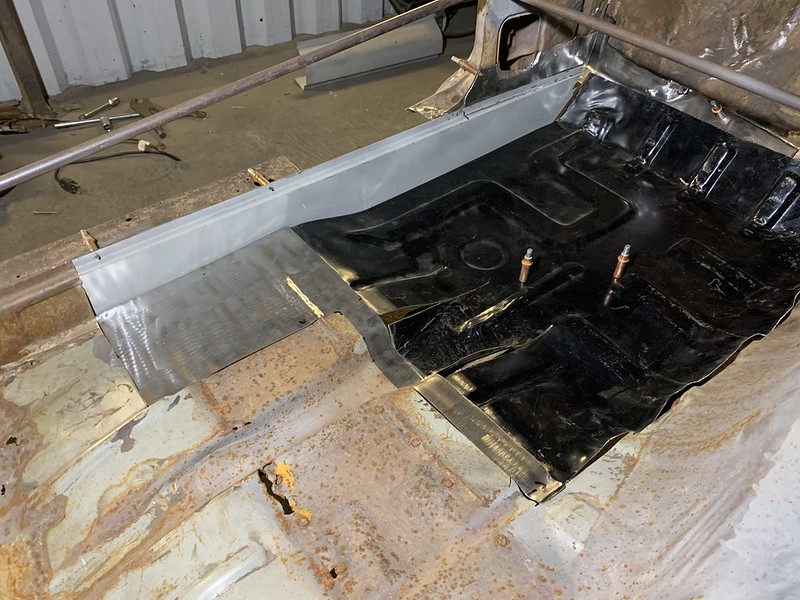
Some more work, and the center brace was removed, and the body had some reinforcements. There were some nasty surprises under that brace, but I will take care of them


You can see that the floor is quite clean, that's because the night before I used some dry ice on the old sound deadening and took it all out. Some parts of the floor were in amazing shape.
With the center brace out, and the body with the reinforcements, I took a deep breath and did this…


I cut the whole floor, and the rocker, I made sure that I got in the middle of the front under brace, and also with a lot of love cutting around the base of the A pillar of the car.

And in no time I did a quick test fit of the new pieces.

Next step is to make some cardboard templates for some small parts, I give that task to a friend
Cutting those small parts

And test fitting those parts with the new floor

Another part that plays a role in this jigsaw is the front fender, so I bolted it to the car for a test fit

It does look good

And how about in the inside of the car?

This picture doesn’t show all the work I went through in order to make this look good. But the fender bolts in a undercut on the rocker panel, and that undercut makes that the fender sit flush with the rocker, so I had to cut, bend, shape, weld, try, try again, weld some captive nuts, it took a while, but it came out good enough

Also the shape of the side isn’t constant, it gets a little bigger in the back, so I had to make some magic again

But trying to learn magic and all the trials and test fits meant that I had no more free time to keep working in the car, so I had to wrap it and leave.

A few months later I had some free days so I returned to the car and welded some more pieces

Well actually I welded the whole passenger floor because it was almost done, and painted it.

And cover all the welds with some seam sealer

All sealed from the top and from below
And with that we are Mid-2019
-
1
-
-
On 2/1/2022 at 10:43 PM, Banjo said:
Hi Sebestian,
When I read your comment, "Thanks for all the kind words, indeed it is a big project ahead", I couldn't help thinking this might be another project Binky. I'm really impressed with your determination to see this through, Mate !
For those reading this thread, who have never heard of a Cleco pin, below is a link that explains them well. https://www.youtube.com/watch?v=_DcNvt9_O3Q Plenty available on ebay, here in Australia.
Cleco also make a side clamp one for sheet metal & the like.

I will be watching this thread with interest. Good luck !
Cheers Banjo
Thanks for the comparison with Binky, but those guys are on another whole level.
I have those cleco side clamps, they were on a kit I bought, but they don't clamp a 10th of what the pins does, so I rarely used them.
Lets keep the thread rolling ever since I bought the car, I started a quest to find parts. I have several alerts on eBay and many groups on Facebook, so I'm saving money, and buying parts while they pop up
The first purchase I've made were the front vents, that one was missing, so I got a "new" set. They need a good cleanup and paint.

After a lot of waiting and searching I was able to find a "good" used set of JDM bumpers that didn't cost 2000 dollars

And after a lot of savings, a lot of waiting, and getting in touch with people in USA and in Japan, I got this (the joys of having a wagon), any idea of what is?
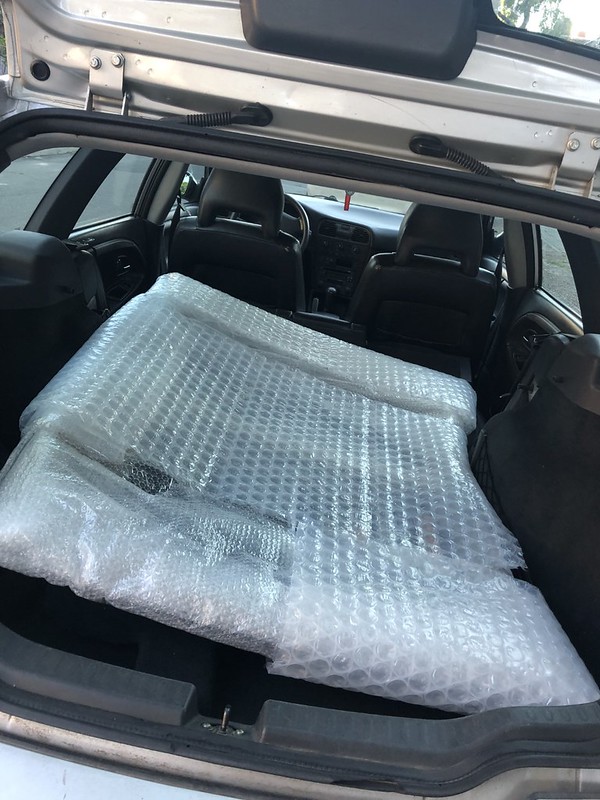
Any idea on what it is?

Carbon fiber hood (or bonet) from https://restored.jp/, it took like 6 months to be made and arrive in my country, but it was here.

And now into December 2018
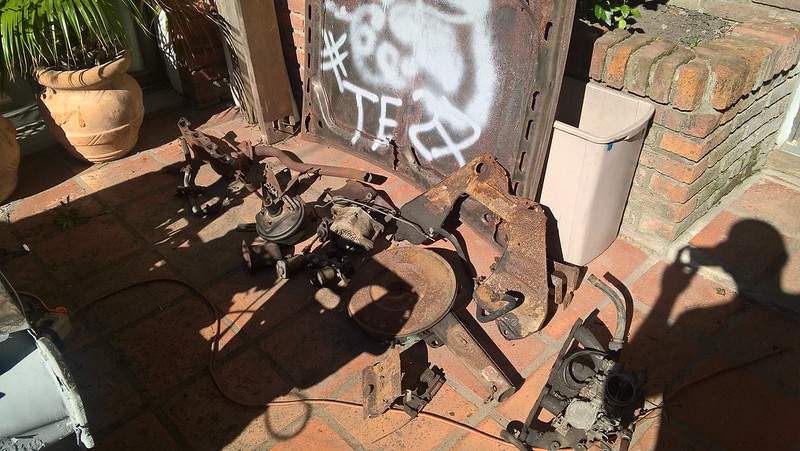
Remember the dismantled front subframe? I took many parts of it, and also the bumpers to be sandblasted and painted to prevent further corrosion (also there is a hint of a future proyect)

I took the spot welder cutter bit, and remove the piece in front of the windshield what was beyond repair, I'll try to find a new part because I thing this part it is beyond recover.

And give the whole metal under that panel a good wire brush, just to find more rust
And I couldn’t resist so I assembled the whole front end with zipties, the new hood, with both fenders, the grill and the bumper, it looks almost like a car, and quite a handsome one.

-
All of the three videos that Larry made of Big Mike TE27's are great
In case you haven't seen them, here they are. The sprinter restoration is quite amazing.
-
I think the spline count it's the same for almost all toyota products, I have an steering wheel hub that says it is for a AE86 on my TE27, and it fit just fine
-
indeed that windmill on the roof doesen't looks like its very safe over there. And the power it can generate, versus the increase in drag thus in power comsuption, I don't think is doing any good at all.
-
Over here we have an organization "Autolibre", that gives technical assistance and training in assembly of electric vehicles and lithium batteries, they have seminars and also bring the components to the country, and one of theirs flagship is this beautyfull KE70 liftback. It's almost all stock, it has an "AC50" engine that should give it 70hp, 108V 50 Kw for batteries that gives a top speed of 120 km/h and a range of 170 km

-
On 1/28/2022 at 11:56 PM, Banjo said:
Loving your build, & determination to get this Rolla running again.
Noticed that you have air conditioning, & you didn't even have to pay for it !
Cheers Banjo
Thanks for the kind words Banjo! it is all a process of love and determination indeed
------------------------------------------------------------------------------------------------------------
April/March 2018
Back to the friends house with the 4Runner to pickup the car
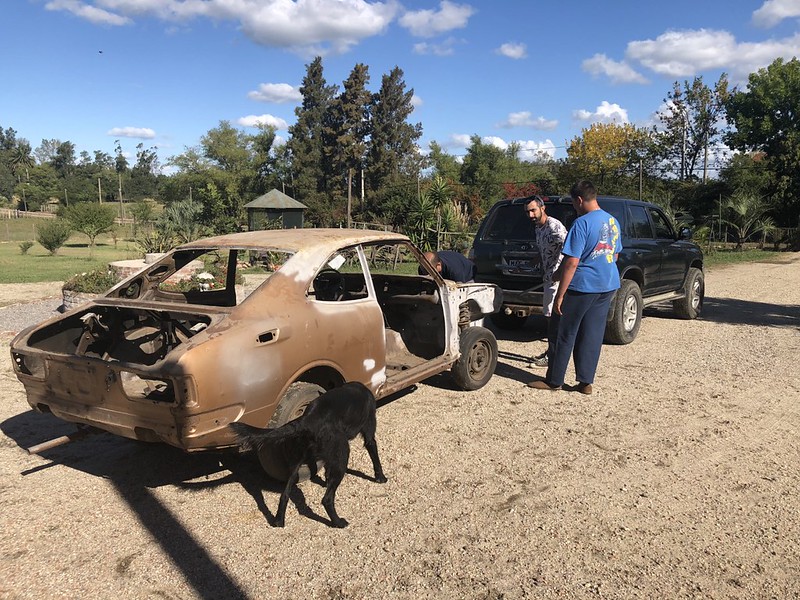
I was looking and find out the amount of rust, it was way worse than I had thought, but the car run great on the highway at 100km/h

Towed back at the house, and park it next to my friends 1990 Civic EF

and in no time all the front subframe was off the car

we put the car on "jackstands" and immediately, started working on the car, as you can see the lower radiator support is already missing

but first I had to learn how to weld, so I started to laying beds on some metal, and then I decided to build a sheet metal brake for bending steel. I didn't get it right on the first try (with welds on both sides of the hinge it cannot work :facepalm: )

some new welds, some modifications, and sometime later I had a working brake made all with scrap metal
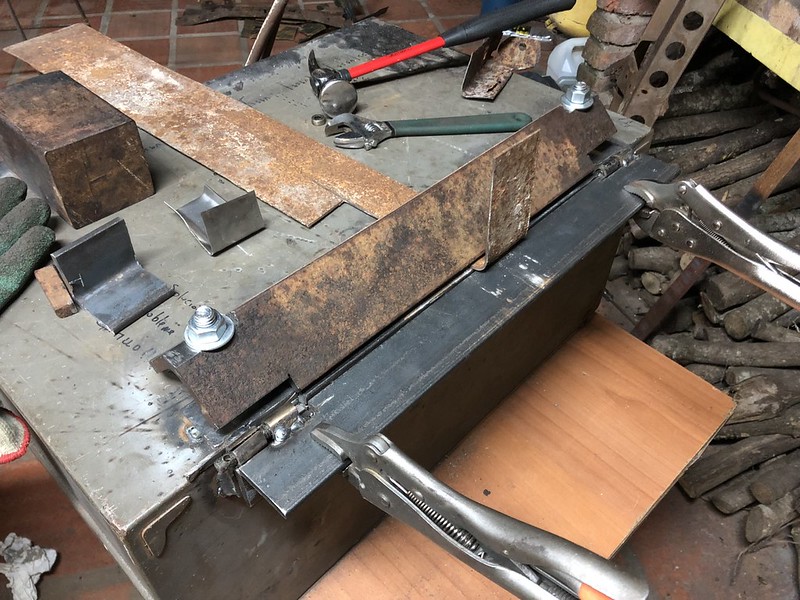
a lick of paint and it looks great

----------------------------------------------------------------------------------------------------
next day, and now back to the car
This is the before, look how rusted was the frame rail, it crumbled with just a few hits.
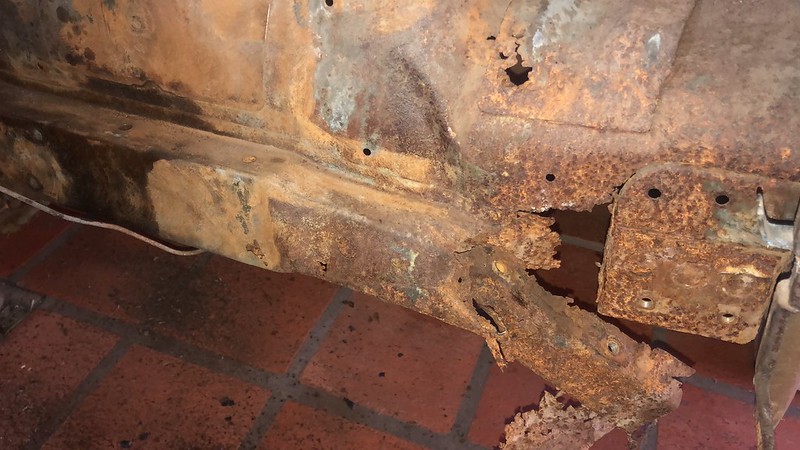
with a maniac aplication of the grinder, a lot of rusty metal was coming off the car

I was lucky to find new radiator support pieces, both upper and lower, as you can see there wasn't much left at all of the lower part, and both parts had many parts missing
started to cut and I stoped when I find mostly good metal, then with the flap disk I give it a little pass to remove the sufrace rust and sharp edges

First welded part, the inner reinforcement of the front subframe, later this will be covered by the "chasis" leg or frame rail
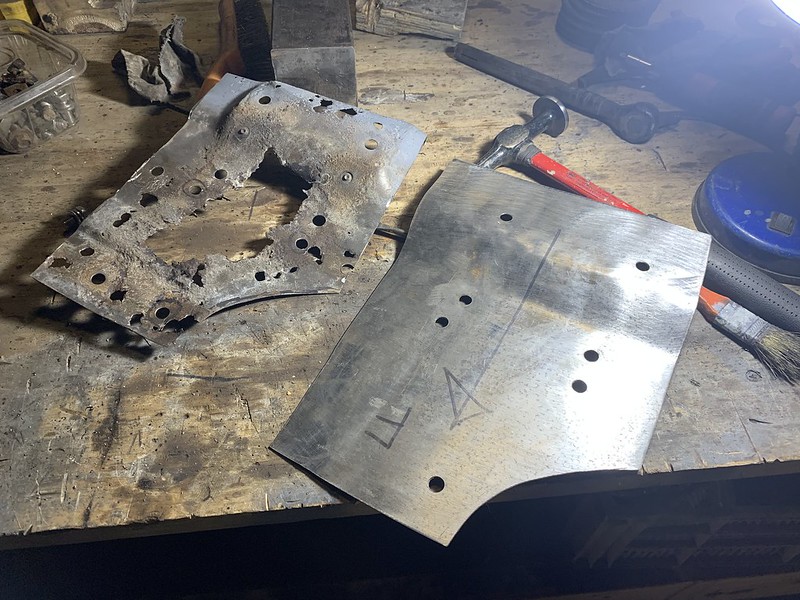
and how will it be covered if there isn't any "chasis" left you might ask? well, you first take some paper and take some measurements, and make a template from the side that is in better shape.

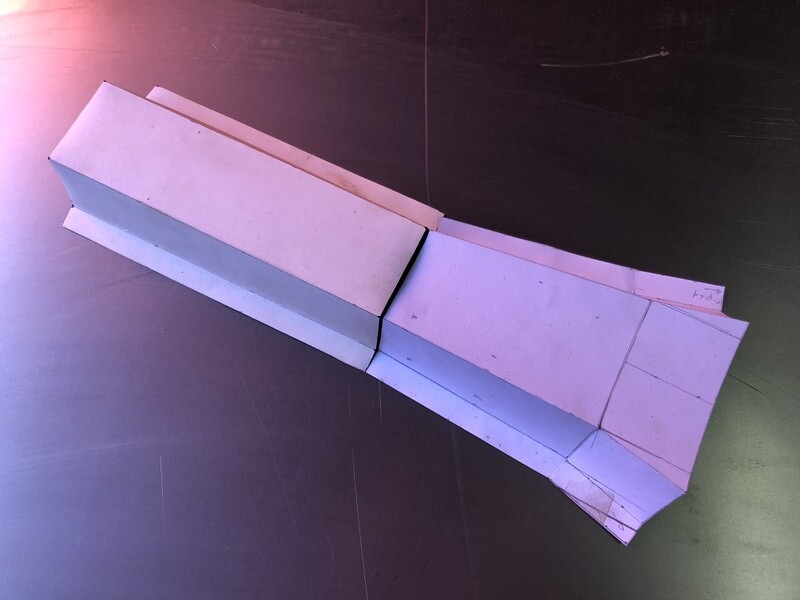
then with the measurements and the paper template, you transfer them to a piece of sheet metal
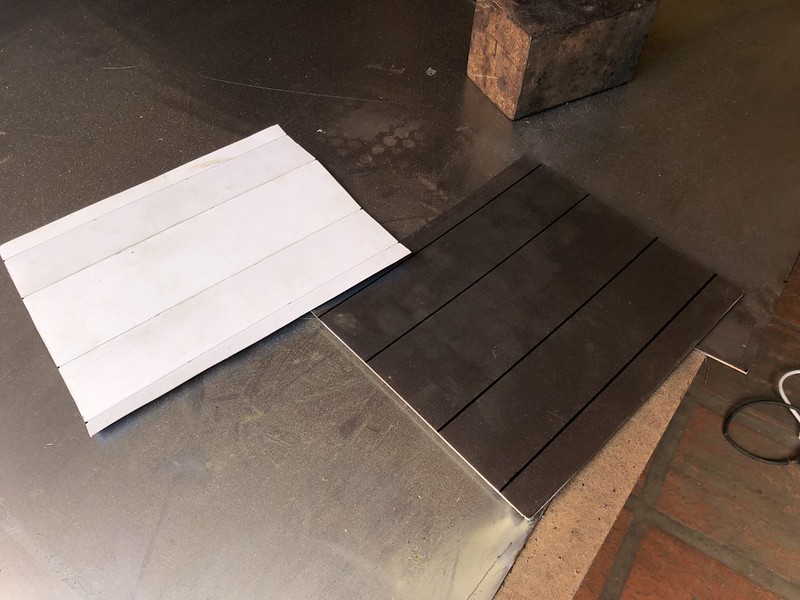
after that with a little love of the brake you just made, now you have something that resambles the shape you are looking for
and start to weld all the pieces, one by one
don't forget to make the necesaries holes, and also the holes for rosette or butt welds
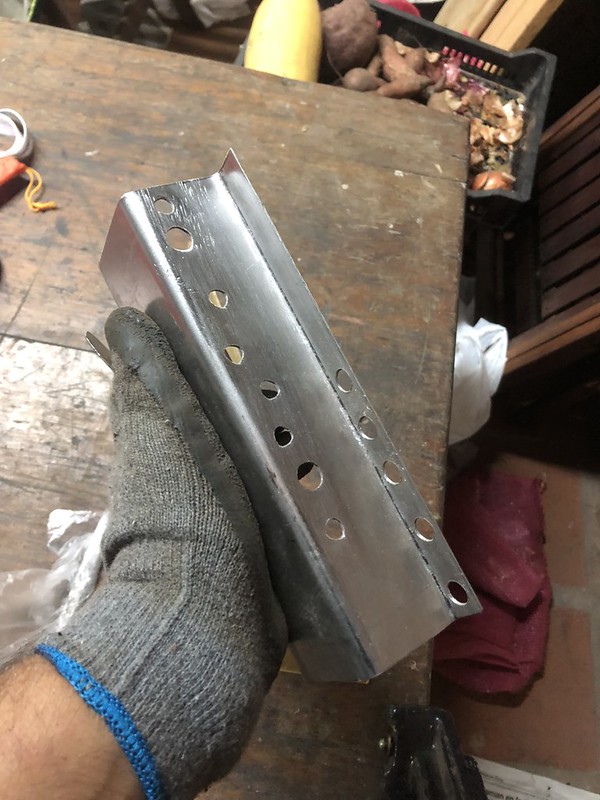
and also I made a reinforcement with some captive nuts that goes inside the frame rail for the bumper

here I've changed the little reinforcemnet strip to a bigger piece, and painted everything with weld trough primer

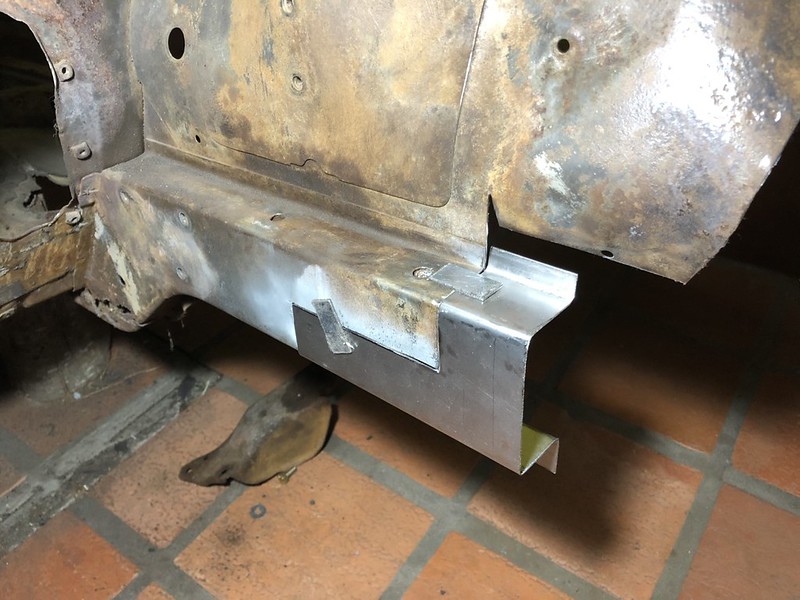
with all of that you have a new frame rail leg, I used the remanins of the original part for reference and to check which features I need to copy onto the new piece, but the diference is astonishing.

and to keep on with the pieces, the part that goes over the first part I welded, it took a lot of triming to get it to sit flush with the original part.
Set the welder, get comfortable, get some good light, measure that everything is on the correct place, check it again, and weld everything
After I had the frame rail done, I started to work on some piece on the passenger side. Same process, measure, make a paper template, make a metal piece, trim to fit, measure that everything is on the correct side, weld everything.
the best advice I can give to anyone is to invest on a set of cleco pins, they are like temporal rivets, and they make the work of setting the pieces and getting the measurements right a piece of cake
also remember to add any piece that bolts or interacts with the parts you are making to check that they fit and bolt correctly

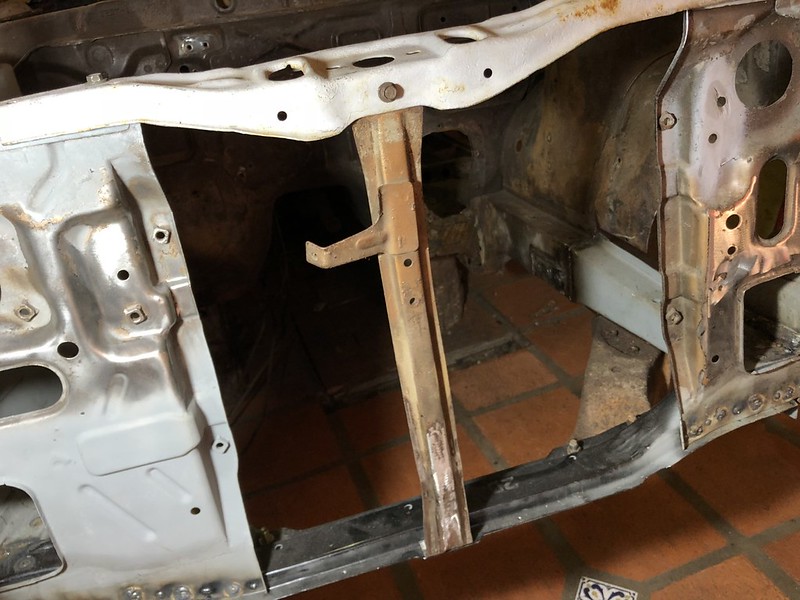
The middle radiator support was also rusted, so I cut the rusted part and used it as reference

then bend some metal and test fit it to the main piece

a little weld, a little bend, some hammering work and the new extension piece is done

Make the final bend and test fit it in place, like nothing ever happened
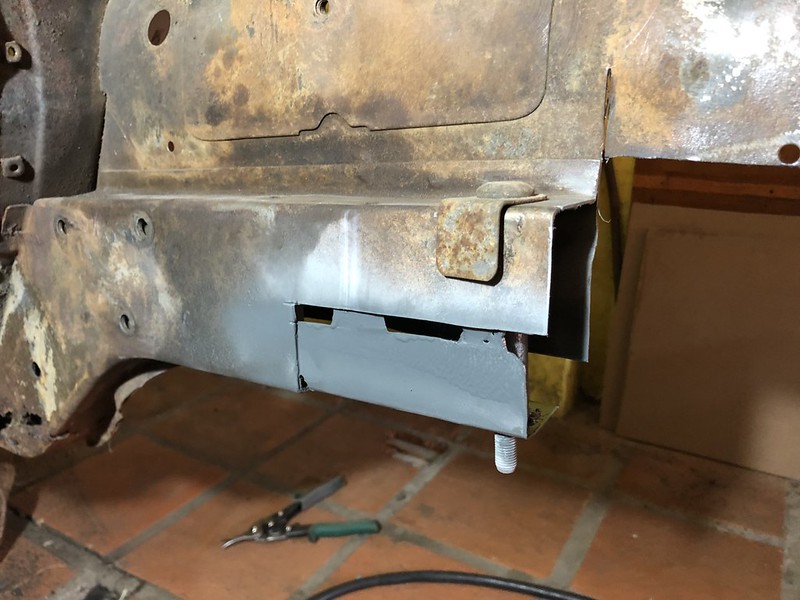
Onto the wheel well, I had to make a new piece that covered the backside of the frame rail, and also extends and follow the shape of the engine bay, it took a while, but it was done late in the night
with a little of paint, you can see the original rib that is on that part, that I had to replicate on my piece, you cannot belive how much strenght that little rib adds.

and from the top it looks great even without paint

with that my free week was over, it was time to take the car back to its resting place on the barn. But first I disassembled the front subframe, and send some parts to be sandblasted
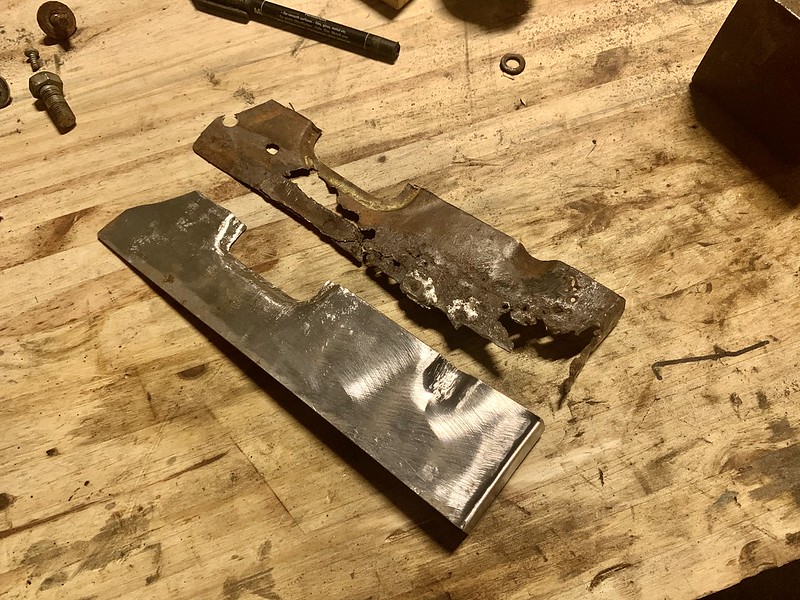
and I also cutted a piece from the rocker panel

with that profile I can have made some new pieces in order to make a new rocker panel

then it was time to load the car with no front subframe onto a trailer
with only a friend to help, it took us a while to get the car up on the trailer but luckly the bare shell isn't that heavy

of it went

------------------------------------------------------------------------------------------------------------
and with that we are on april of 2018
-
Oh I had forgotten about this, but the car wasn't still, I'll try to catch up again
------------------------------------------------------------------------------------------------------------
After we arrived, the disassembly process began, and quickly the car released its pieces

slowly and cafefully removing the rear glass

Parts where everywhere
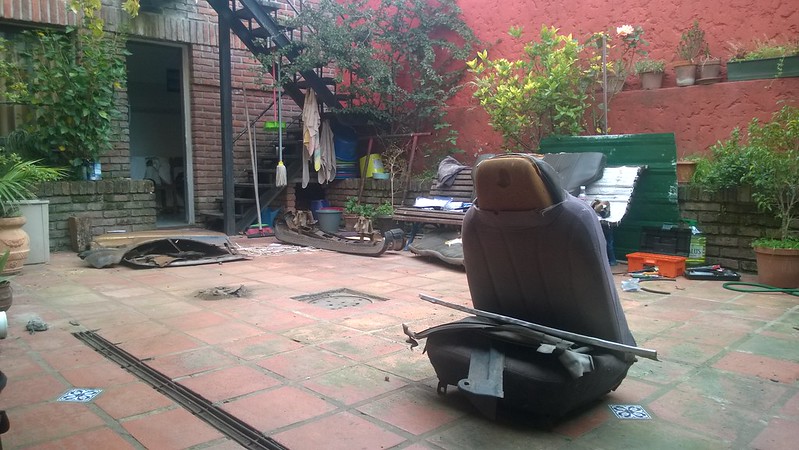


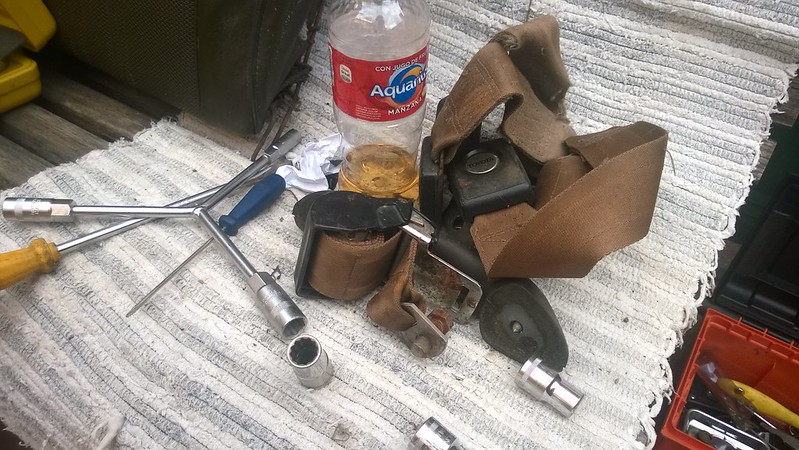
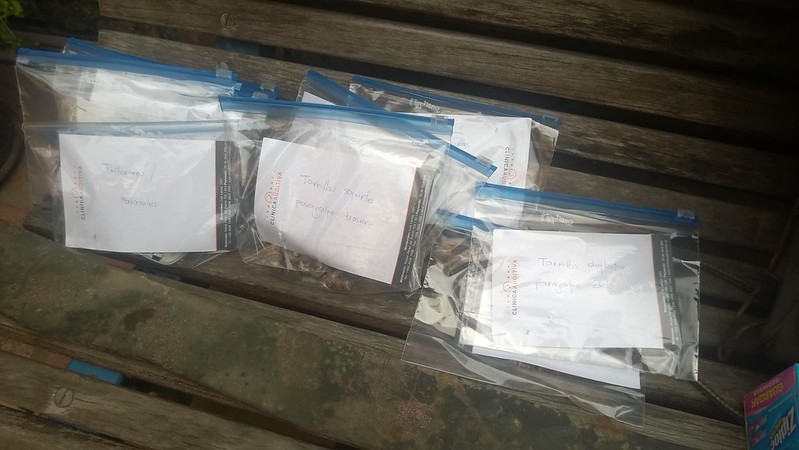
but I had bought a package of ziplocks and bagged and tagged almost everything that I took out the car, this is a must
some parts needed more persuation to be removed

but luckly almost everything came out great and it was time for a little cleanup
------------------------------------------------------------------------------------------------------------
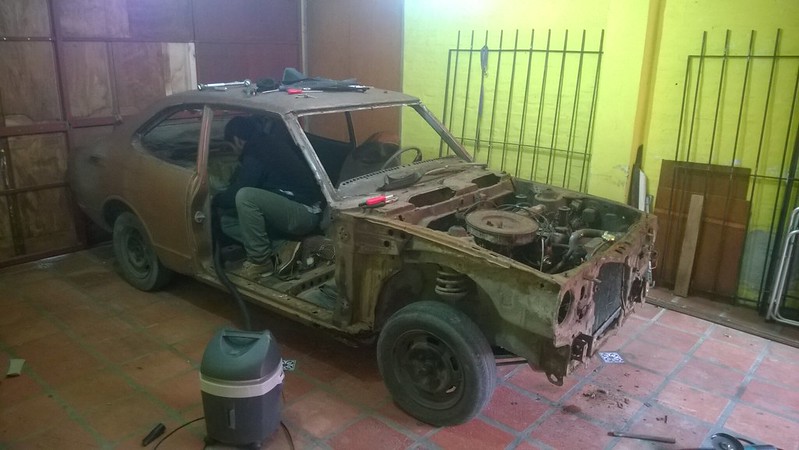
next day it was time to remove the engine in order to store the car at a friends barn, and take a closer look to the body that as you can see the closer you get the worse it gets


again on to remove the engine, clearing most parts from the engine bay

and then my friend that had the engine hoist told me that it wasn't available, so I had to improvise, and improvise I did. First I strengenth a beam

then with a lot of rope, a jack, some wood and a lot of ingenuity I started to raise the engine little by little
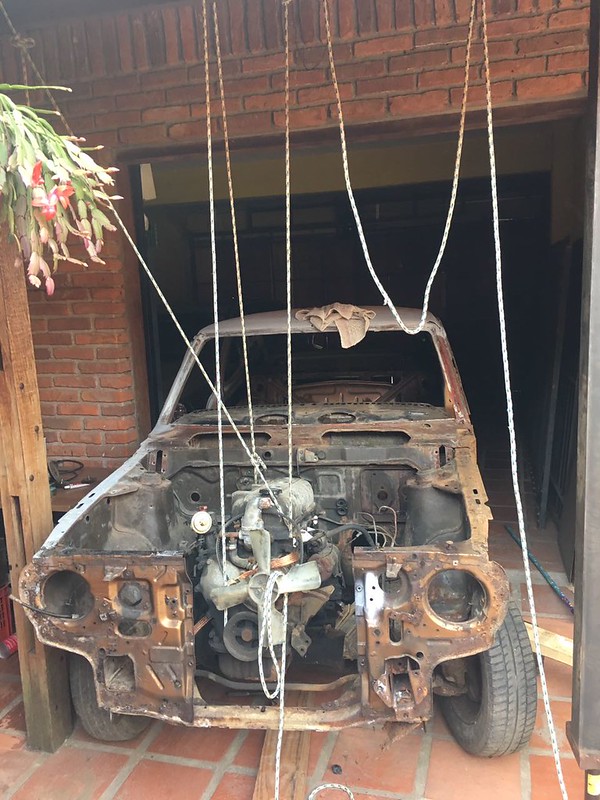

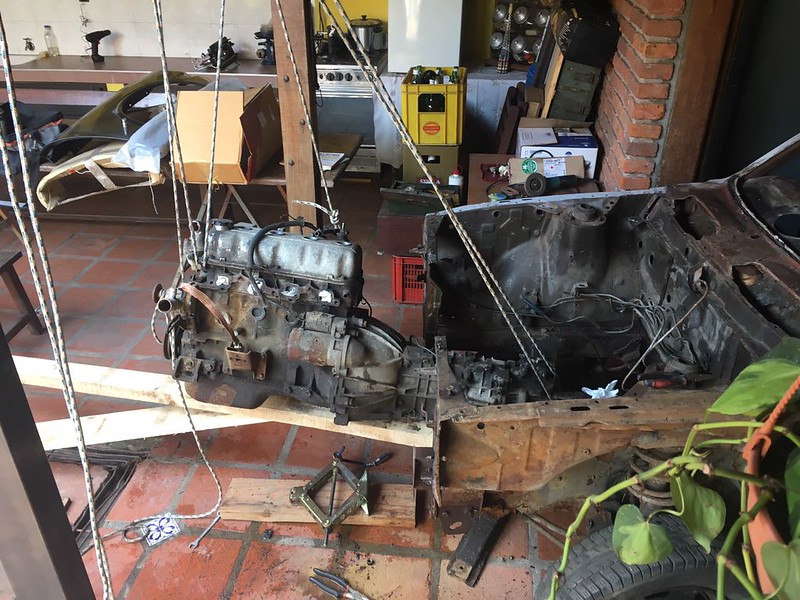
and once it was clear I removed the car from under it
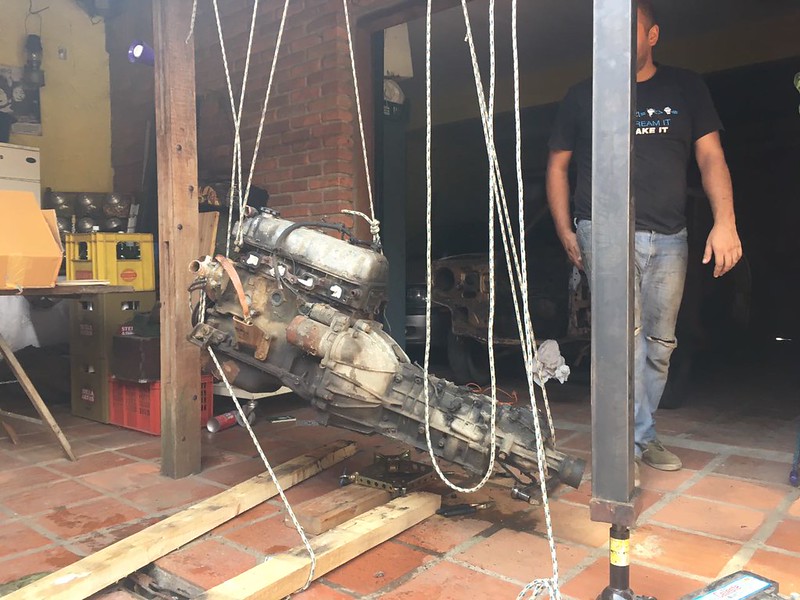
mandatory picture

and then I build a little frame for it to rest till next time

with the engine on its new bed, I test fitted the new fenders and grill, all looking great. The fenders are new from Portugal, and a used grill.
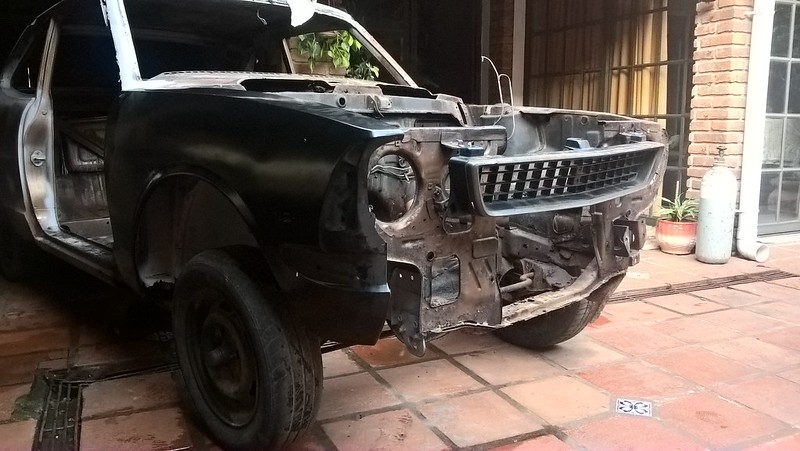
an empty and nasty engine bay


and after all that, it was time to store the car. I hooked to the trusty 4Runner and away it went

don't mind the fresh air

and on its final resting place for a while

Now at least my parents won’t have an rust bucket on their backyard, and I can keep gathering parts and trying to learn how to fix this mess
------------------------------------------------------------------------------------------------------------
And with that we are on October of 2017
-
On 9/19/2018 at 9:08 PM, boingk said:
Nice one! Love that you're rescuing it. The T-motor should give it a good amount of kick compared to the 3K's the rest of the series tended to get.
Indeed, after we got the timing right, and the carburetor good and clean, the car had quite a punch.
Well, after the "testing" stage was done, and the car didn't fall apart during the shake down, It was time for me to start the voyage to my parents house 92 kilometers away.
The day started early, checking everything from the night before

first stop, was take one of the wheels that was leaking to the tire shop to get it fixed.
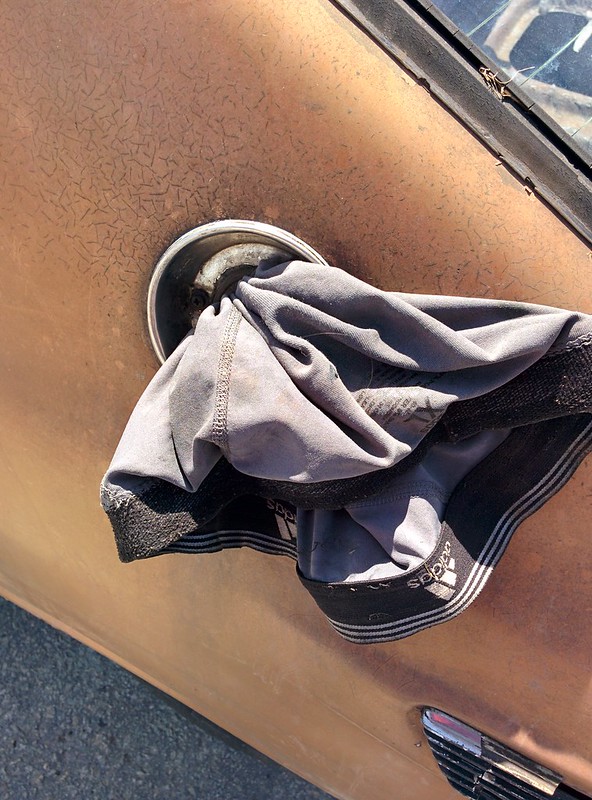
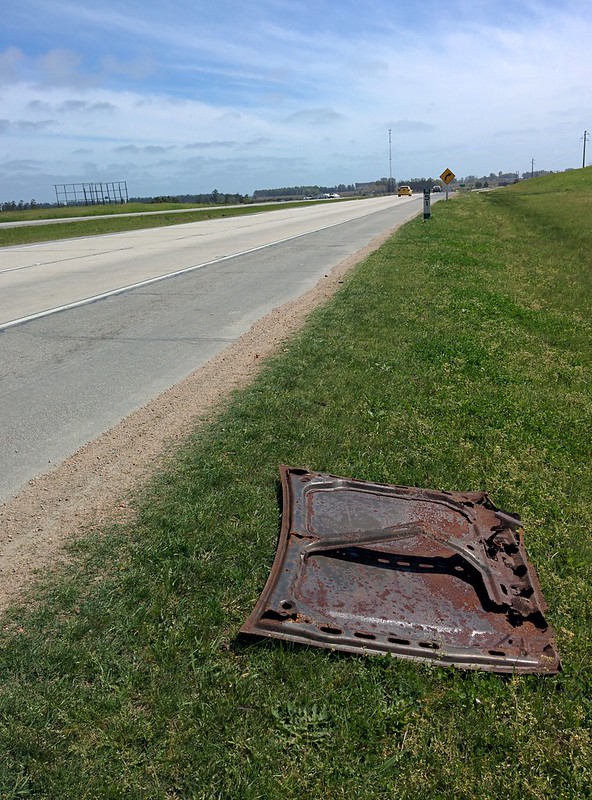
another quick fix in place for the fuel cap, I had to break the actual fuel cap since I didn't had the key to open it, and after I broke it, I had to made a plug with the first thing that I had in hand.
and we where ready to got!... well not quite, the car didn't wanted to start, so a quick jump and it was runing
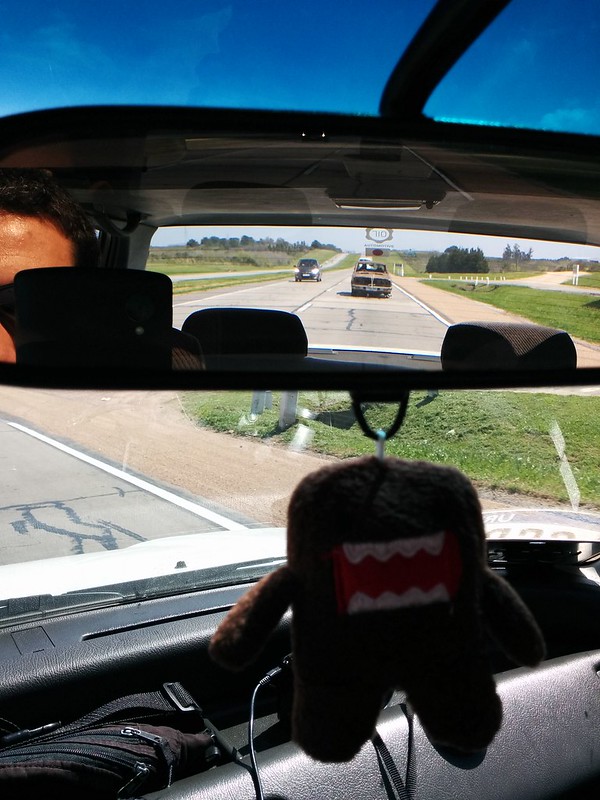
my view from my command center for the next hours

and off we go!

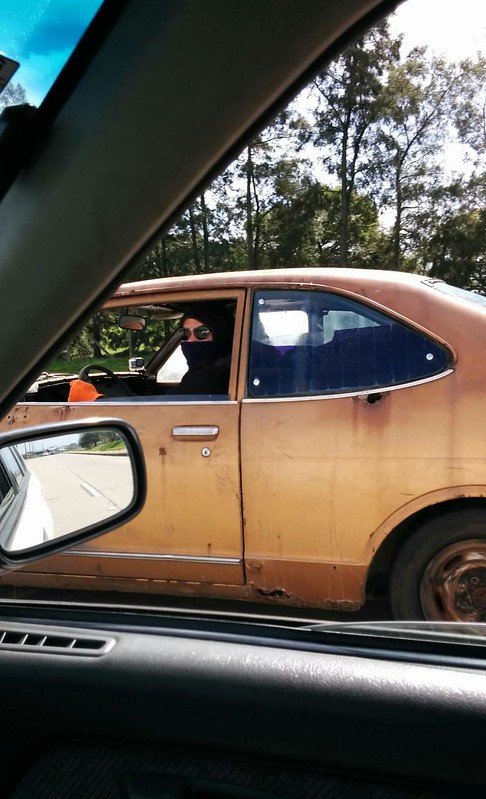
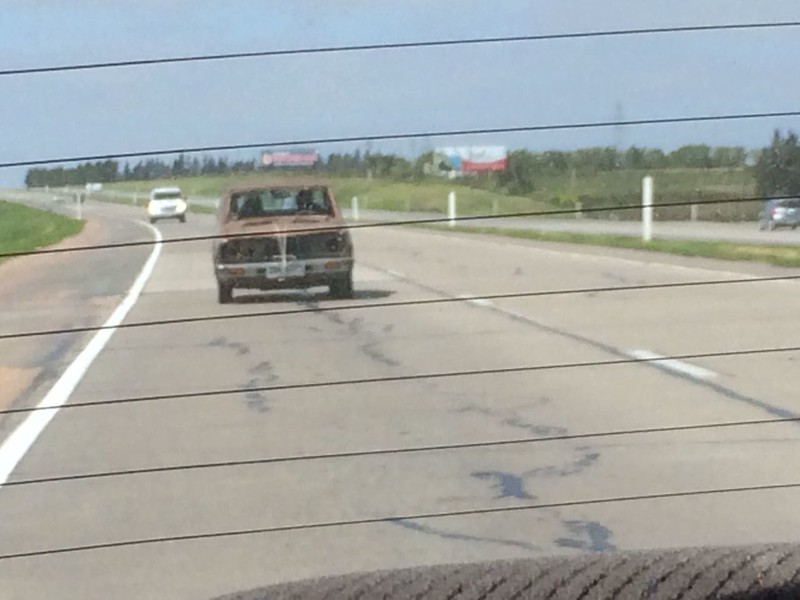
my look from another car, given that I didn't have any windshield I had to wear a lot of clothes due to the cold
first stop, fill the tank (you can also see my friends lovely Civic EF)
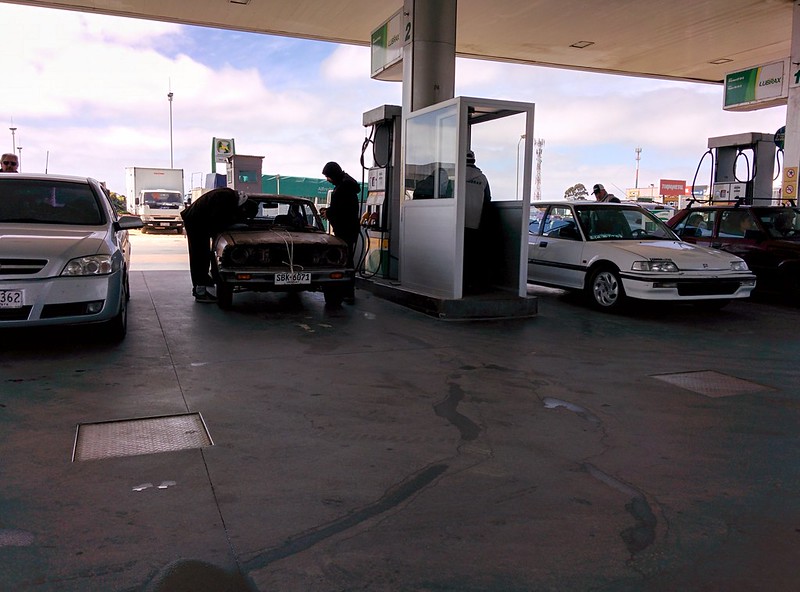
my friend in the civic was the backup/chase car (and the one in which we will return home)
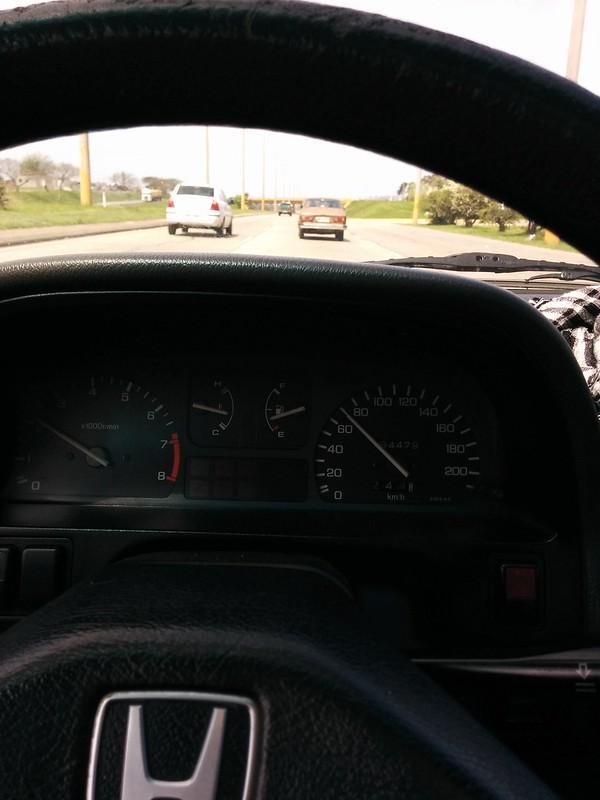
the car was working quite flawlessly through the trip, and we made a stop half way, to check the tires and everything else, all was good and while I checked the tire pressure found out that two of them had 51psi and another had 53psi! I lowered them to something more reasonable, and returned to the road... just to stop a few meters after with a non runing engine
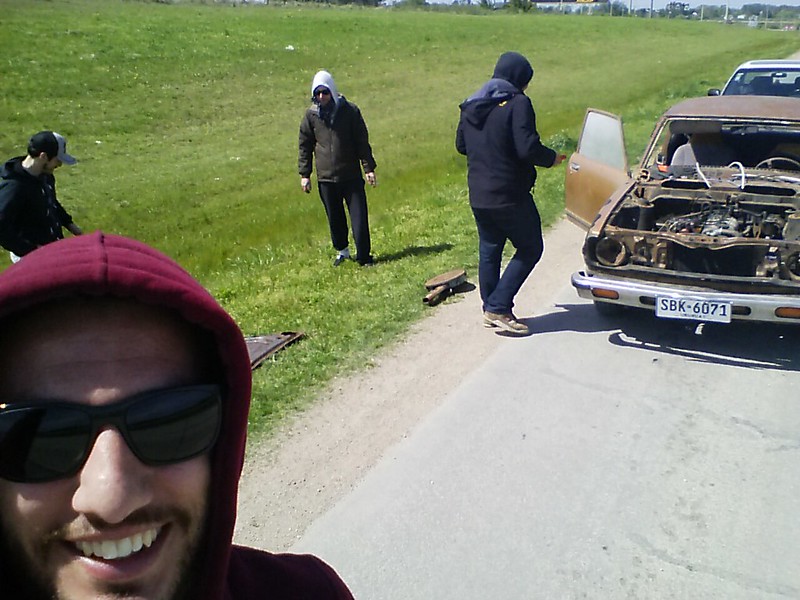
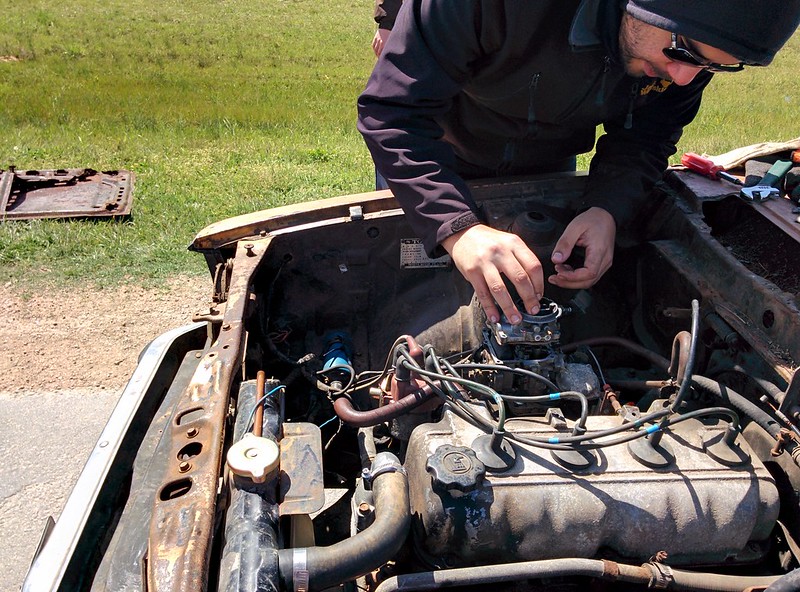
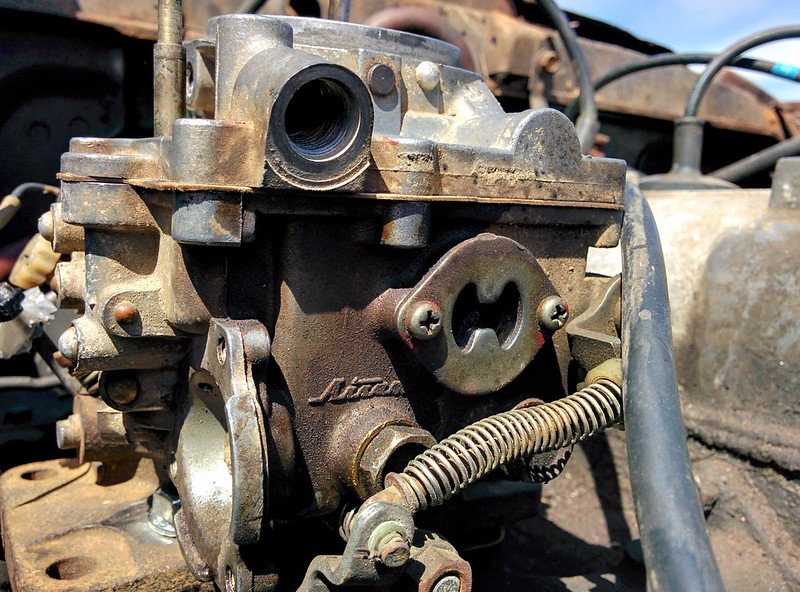
the issue turned out to be (again) the filter on the carburetor that got clogged and starved the carb. So I dismanteled the carb, cleaned the internal filter, and we continue with the trip
just eating miles
the second part of the trip was, without any other issue and we arrived to my parents house, where we parked the car and started to take it apart.

and another video with all the trip, enjoysee you next update.-
1
-


Electrical Driven Water Pump on a K Series Engine.
in KExx Corolla Discussion
Posted
love to see that people still tinkers with this old engines