

Burcoty
-
Posts
19 -
Joined
-
Last visited
Burcoty's Achievements
")


-
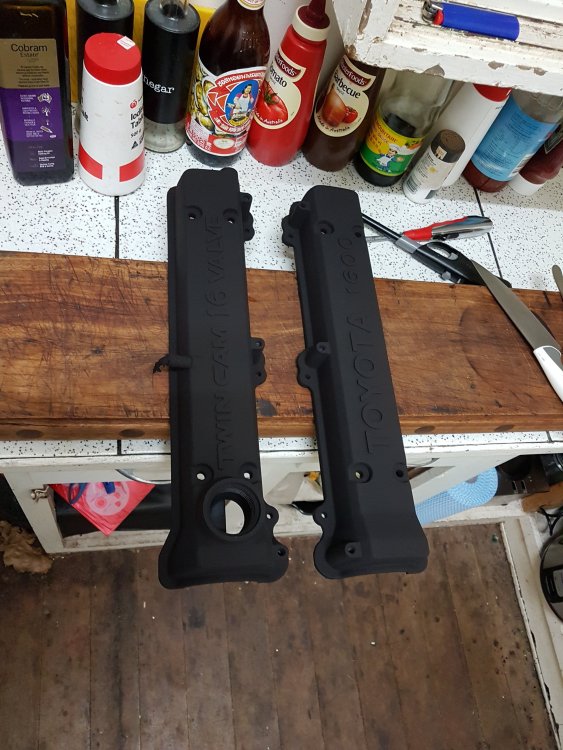
Yeah, I'm gonna clean back an respray the engine bay anyways so it'll get sorted then. If I'm feeling motivated, I might even weld a bit of plate over it to neaten it all up an make it less noticeable at the same time. Over the weekend I pulled the n.a exhaust and put the original back in, checked the link bushes (which seem in good shape) and installed the rear sway bar. Happened to forget that I need to scavenge the passenger support mount that it bolts up to from the wreckers or somethin because the old one sheared when the wombat ripped it out. Also pulled out the springs and shocks for a cleanup, looks like they've been cut and not the type shockworks supplies. They looked to have the same free height but when I removed them the adjustable seats were set to different heights and after re-installing everything level the passenger side is sitting a inch or so lower so I'm guessing that theres an issue there. Further, with the shocks wound all the way in, the springs are only barely captive at full droop so I'll be raising the seats a little more as well as offsetting them again to level the rear. Will order some rear springs from shockworks down the track and hopefully that'll fix the issues. I finally got around to painting my rocket covers today as well, not sure whether I'm going to paint the letters white or sand them back to the metal and then hit it with high temp clear. My housemates weren't overly impressed when I baked them either haha Here they are fresh outta the oven Finally, I removed the engine loom from the car today as well, romoved some other wiring which was attached hodgepodge and planning to re-route it so that it's not so close to the turbo. Noticed that some of it was a little crispy from the heat and needed some new fittings here an there. Hopefully the end result will be a much neater setup, if I don't manage to bugger somethin up in the meantime and result in it not working lol

-
Just another short update; Steering column is installed and hooked up. I've now got steering again! Oddly enough, it appears that the power steering racks use different length steering arms and or rack ends. So, It currently locks all the way left until the tie-rod ball joint contacts the control arm but racks out to the right with about 50mm clearance. I have some lock spacers so I'll install one of those and then adjust the steering arms as needed until either it contacts in both directions or racks out in both directions. Aside from that I've been fiddling with the battery mount, the previous owner cut it up to make way for the turbo gear I think so I've tidied it up an modified a clamp to work. I've also paint stripped some rocket covers I had hot washed a while back an have been prepping them for some fresh paint. Tomorrow I plan to remove the n.a exhaust I had installed, reinstall the original one I removed that suits the turbo, install the factory swaybar and change out all the link bushes if they need doing. 'Till then


-
 Burcoty changed their profile photo
 -
Looks and sounds amazing! A good read and quite the inspirational thread! Cheers for sharing!
-
Yeah, hoping so! Got the coilovers cleaned up and reinstalled today so she can be moved about again. With that I think the front suspension is complete until I can find myself a factory front sway bar or the T3 torsion bars cause issues come roadworthy. Everything has been returned to a neutral position ready for alignment and I think I did pretty well eyeballing it since the wheels look straight by sight. You can see just from the tyre wear that it was well out of alignment before. You can see below why I need to change the steering column, no chance of those lining up lol Also managed to pick this up from hard rubbish, needs some new pedals and pedal arms, maybe some new tyres but other than that in decent shape! Used to ride heaps so will be good to have a runabout again. So, next on the list is to get the steering column done then need to remove the n.a exhaust I had made up for the one I'm selling, install the standard rear swaybar I have and then will likely strip and repaint the engine bay for neatness sake. In the meantime the other one is due to be finished at the painters any day now, once that's back I'll be run off my feet finalizing that for sale. Anyways, 'till next time


-
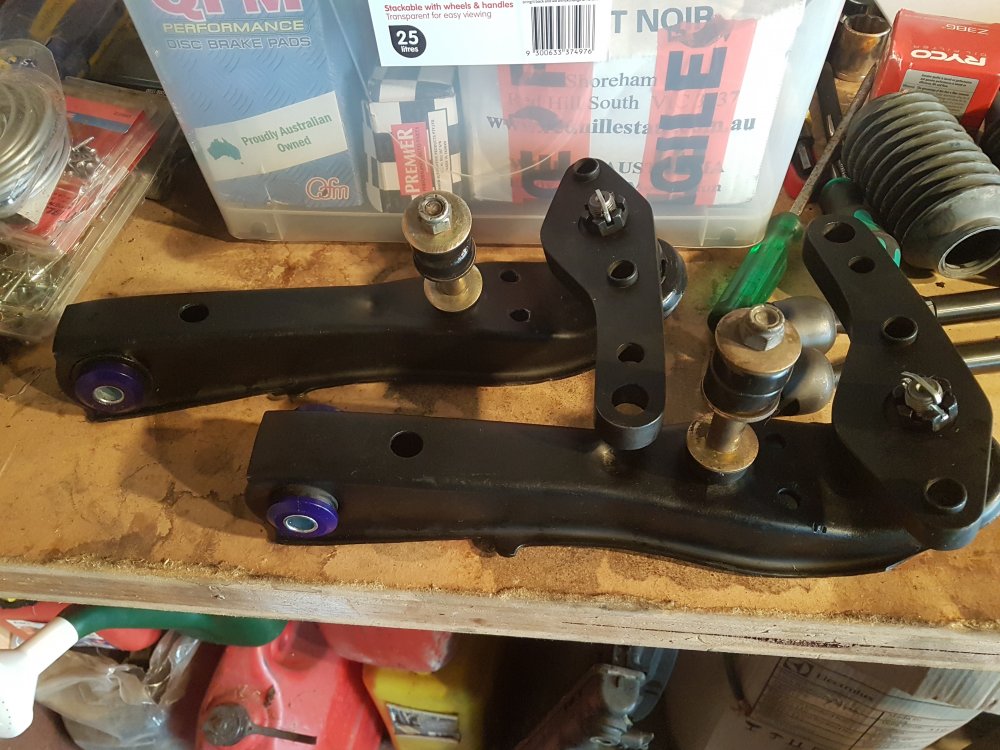
Well, for various reasons, I ended up with the day off yesterday and managed to spend most of it in the shed! So, at 8am in the morning I found myself on then end of a hammer tap tapping ball joints into place, I'm sure my neighbors were delighted lol what I would've done for a press! >_< after a bit of wrangling though I managed to get the bushes and ball joints fitted into the control arms. Hot tip for anyone thinkin about doing these bushes at home, you can use the bolt, washers and bushes from your sway bar to act as a makeshift press as shown below! Actually worked rather well ^_^ After that it was just a matter of mounting the T3 knuckles on, I decided not to use the T3 tierods at this stage because 1; they caused issues when I originally took it for a rwc check an 2; I'm not overly happy with the finish of the T3 stuff, it's rough as guts and a bit disappointing that they couldn't take the 60 seconds to run the parts over a linisher before painting them! Not sure if mechanic was just pedantic or what but had the others there so in they went instead. After that I went on to clean up the power steering, clean and spray the torsion/sway bar mount, install new rack ends, tie rods and boots and reassemble everything all pretty like :p Once all that was done I could finally remount the whole lot to the car. Unfortunately the torsion bars were wound in super tight and I don't have spanners that big so had to multigrip them *hangs head in shame* Finally got it neutral and bolted up though, along with some skinned knuckles and a little cursing. Pretty happy I've got to this point, 5 bolts and I can have the struts back in and rolling again shortly after. Hoping to be able to clean them up first but the other car takes precedence once the painter finishes with it. Next will be to change out the steering column so it all bolts up! 'Till then


-
Another small update. Spent the day in the shed, was hoping to acheive more than I did but such is life. Have done about as much as I can to the prep the 20v. Basically just gotta wait until I get the car back from the painter and transfer everything remaining over. After I finished playing with that I moved onto this one. Finished painting the rwd water stuff. Came up pretty nice if I do say so myself :p Managed to misplace the connecting pipe tho, don't ask me how, hopefully I don't have to replace it :/ Also started dismantling the front suspension parts, the ball joint were shot and needed replacing and same for the control arm bushes. Thankfully I have new spares of both! Those damn bushes had cemented themselves in. Had a hell of a time getting the bastards out! Also found some adjustable rack ends and boots amongst my box of stuff I bought from ajps a few years back, to go on once I've cleaned an prepped the steering rack, which I'm pretty happy about! That's about it for this week tho, was hoping I'd be close to having the car rolling again today but I'd say I probably have another day's work before reaching that point unfortunately. Still need to swap the column out as well so maybe longer. Hopefully will get some more time to spend on it early next week. 'Till then


-
That sounds cool, can ya show what they look like? Still trying to think of solutions for smaller odds n ends! Yeah, it's coming up alright! I actually like the white blocks, they don't stand out as much as ya might think and make it nice and easy to see and trace any leaks/issues!
-
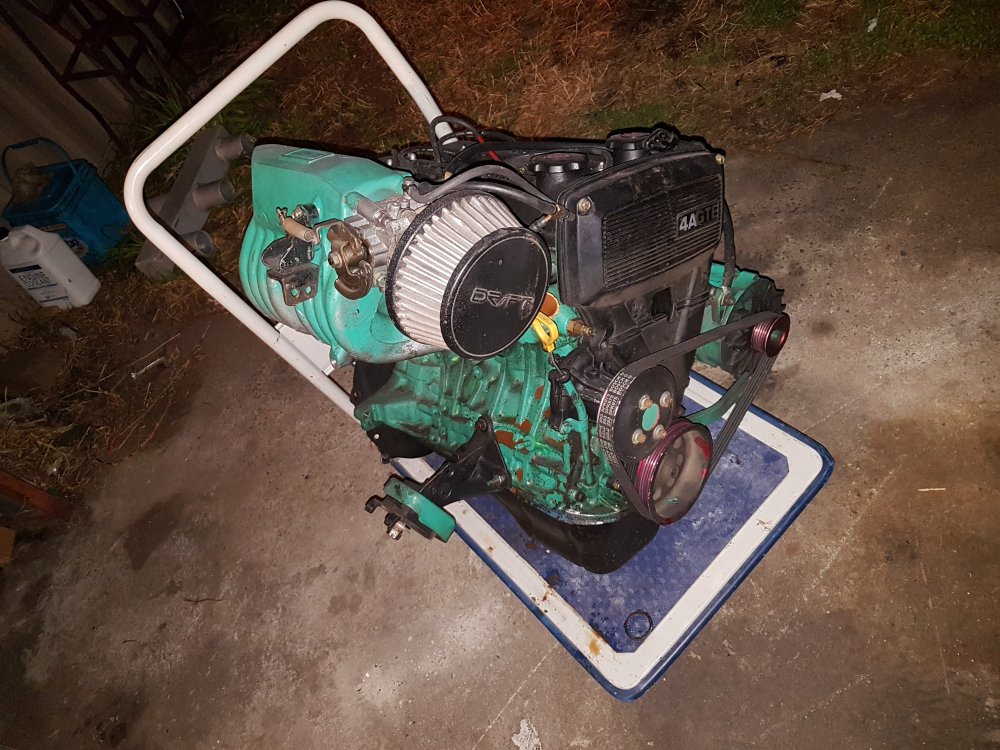
I'm not sure, I think it was advertised there but beyond that I don't know, at least I'm not aware of any build threads or the sort *shrugs* Yeah, been doing what I can, when I can, around Uni, work an family. Another small update tho: Engine is completely seperated now, sitting on a trolley for easy maneuverability. Have started stripping off the parts that I'll be replacing/changing. And prepping the parts that will be installed Not much progress really since I've mainly been doing what I can to prep my other 86 for sale which the painter tells me will be finished in the next week or so. Primarily, prepping the spare 20v that I have so I can swap it in once it comes back. Also picked up a couple of these for $20 off ebay, make for great storage options! Even managed to sqeeze the two of them in the back of the golf like they were made ta fit haha. That's pretty much it for now, will update more in the coming weeks.


-
So today I got around to doing some more work to the car, haven't worked with turbo engines much before so hoping I remember where everything goes lol Anyways, spent the morning removing the engine and front end, still have to pull out the steering column but ran out of time. Looks like there's a few oil leaks and some interesting piping which will get cleaned up while I'm at it. That's pretty much it for now, 'till next time.

-
Another small update: Have stripped out the dash, centre console and disconnected gauges etc. in preparation to tackle wiring, reinstall heating and swap out steering column! Just need to locate my soldering iron, solder and wire then stock up on heat wrap an I'll be ready to go. Also almost finished organizing my shed so that it's usable and not ridiculously cluttered, only a bit left to go and I'll be satisfied enough to get stuck into the car properly ^_^ Don't have any pics from before I started but you can see some of the progress from the pictures In my last post. Having storage really helps! Anyways, until next time!


-
Small Update Here's how the car sits at the moment. As you can see it has most of the trueno front end fitted, the rear fenders have also already been blended and repainted to match. I also picked up some Climair visors which I'm fairly happy with. Have also removed all the turbo setup, and started tackling the interior. Engine will be coming out in the next week or so so that I can install the power steering crossmember, rack and column. I'll also be reinstalling all the heater/fan stuff so that I can pass roadworthy and see out the windscreen plus not freeze my butt off during winter! On top of that I hope to be able to re-rout some of the wiring to neaten it up, depending on how much of a PITA it's gonna be.. Anyways, most of my time in recent days has been spent cleaning, sorting and paneling the walls in my shed so that I can actually use it again! Have way too much stuff >_< Thankfully have been able to pick up some industrial shelving so that should help with the organization and then, once I have it usable again, I'll get more stuck into the car.. hopefully Stay Tuned


-
Cheers! Yeah I like driving too much to make something like a show piece lol I have property and family out your way so with any luck we'll probably bump into each other at one of the events held over there once I've got her sorted an back on the road!
-
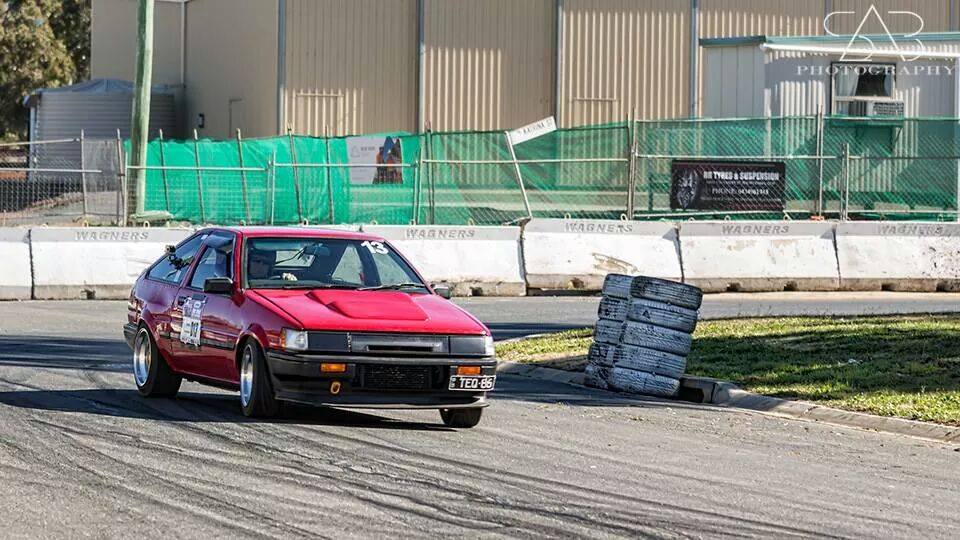
Hey all, Figured I'd throw up a build thread for this with the hopes it'll keep me motivated and on track (lol) Bought this back in Jul'15 and drove it back home from QLD. I'll be honest, it was a pretty scary drive! The suspension was set up for track use with oversized sway bars, strut & piller supports and the dampers set to the hardest setting. Thing was skittish a.f on the rural QLD roads, even at lower speeds, and I found myself bounced into the opposing lane several times and once into the path of a truck. Needless to say that, in conjunction with the miserable weather and poor visibility at the time, I found myself holding the wheel with a death grip and frayed nerves! Then I hit a bloody wombat! The fat little bastard tore out the rear sway bay on his way though, thankfully not damaging the mounts, and I found myself with the swaybar digging into the pavement. However, with a little bit of bush ingenuity and the handy help of the edge of the bitumen, I managed to bend it back up outta the way until I could remove it at the next service station. Funnily enough, removing the bar actually did wonders for the stability of the car and my peace of mind with the remaining 30hr drive being much less stressful! I'll Split this into 2 parts, how I got it and my plans ahead.. So here's a snapshot from when I picked it up: '84 ADM AE86 BODY - Letterbox Levin Front End - Carbon Fibre Bonnet - Front bar modified for the intercooler - Rolled front guards - Screwed on +40mm Rear Over Fenders - Beatrush Undertray - Beatrush Rad Cover DRIVETRAIN - 4AGTE - Deburred and polished 4AGZE Block - ARP Main Studs & Head Bolts - ARP Rod Bolts - Cometic Head Gasket - Motec ECU - High Mount Turbo - Front Mount Intercooler - Oil Filter Relocation Kit - Dual Coilpacks - T50 gearbox - T-Series disk 1.5way Kaaz LSD - Running ~18psi Boost SUSPENSION - Shockworks Coilovers - Front Strut Brace - Front Fender Brace - Rear Strut Brace - TTT Oversized Rear Swaybar - TTT Oversized Front Swaybar - Adjustable Panhard Rod - Modified cross member to include camber adjustment - Upgraded steering components and urethane bushes - TTT Adjustable tie rods - TTT Steering Knuckle - TTT Tension Control Rods BRAKES - Disk rear end - braided front brake lines - Wilwood oversized calipers - Drilled and slotted rotors INTERIOR - Recaro Bucket Seat - Complete Plastics (Brown) - Battery Relocated to Boot - Standard cracked dash with mat - Electronic Gauges WHEELS - Rota 15x8 0 Front - Rota 15x9 -20 Rear - Spare pair Rota 15x9 -10 Here's some pictures from the previous owner: And this is the day I picked her up As for Current/Future Plans: BODY - Zenki Trueno Front End - Shaved boot lock - Shaved antenna hole - Blended +40mm Rear Over Fenders DRIVETRAIN - Tidy up the engine bay, change out and re-path some of the hoses/ Wiring - W55 Gearbox & short Shifter - Soft Button Clutch to suit SUSPENSION - Shockworks Coilovers - Standard Rear Swaybar - Standard Front Swaybar - Replace Cross Member, Steering rack and Steering column with components for power steering conversion. - Replace any worn bushes/ components as needed INTERIOR - New Carpet - Replace the Dash - Rewire and Re position Electronic Gauges Will Upload some current pics in the near future, stay tuned!


-
I'm wiring up a st20v 4age into an ae82.
-
ok basically i'm puttin a 20v in my 82 and need to know if this will work... whats the difference between the 16v and 20v coils? cause this is what i want to do with the coil.. will it work? the reason i want to do this is because the coil lead is different between the two and i'm trying to retain the 16v coil wiring due to the 20v wiring being up shit creek. i know basics like pos goes to pos etc :P but I'm worried about the shiny part underneath the 20v coil... looks like it needs to be earthed but the 16v one didn't? cheers for the help Tyrone


