

oh what a nissan feeling!
-
Posts
2154 -
Joined
-
Last visited
-
Days Won
26
Content Type
Profiles
Forums
Events
Gallery
Blogs
Posts posted by oh what a nissan feeling!
-
-
Thanks mate i will try that, hopefully get to read some updates.
-
Hi, on my mobile i am no longer able to skip to the end of long threads by pushing the arrow Button, it takes me to the first page.
Not sure if this is a forum problem but thought i would ask.
-
Very nice car!
They are available on ebay as a reproduction, search "ke30 door pulls"
-
 1
1
-
-
Use the haltech forums alot, there is a huge amount of info on there. To save time figuring out how to connect your sensors, type into the search function things like " 4ag cas wiring" or "4ag tps wiring", you should be able to download a start up map from there as well if it's not on your ecu from factory.
-
What is the ecu? A sport, elite, sprint?
-
Excellent. I will mate!
-
Yep modern ecus can do some cool things that's for sure. You might have to run the water meth triggering off boost as running it off intake temps would be a bit hard to tune a map for. The wolf is a bit of an oddball ecu, if you have someone in mind that you want to tune it go for it, if not there aren't many tuners who like them, or are willing to tune them. Have a look over the new haltech elite stuff or even adaptronic if you're not completely sold on the wolf. I look forward to you bolting the charger on, man you will have some fun then!
-
Lol snowballed is am understatement! Let us know what you're up to when you get the chance.
-
Water meth is a good thing for cooling and power that's for sure. the problem is with the reliability of the system long term, and the degree of failure that results from something as simple as a poor nozzle spray. At some point there always seems to be a lean out, closely followed by a dead engine. A few years ago i followed a very reputable workshop really get into the whole water meth thing with awesome results, but within a year admitted it was a mistake and no longer uses water meth.
Diesels are another matter though as a lean out on a diesel is not a bad thing.
-
Interesting. Show us some more pics mate!
-
Awesome, i thought you might have something like that up your sleeve. It's a full forged engine, initially he had the 1uz harrop on it running over 20 psi but it wasn't able to reach his goal so he has gone to the larger one designed for the ls1s. It's on 98 fuel and Heat soak had been a major issue, he has their best water to air heat exchanger on it but after one lap at queensland raceway it literally losses half of its power. We think e85 is the solution to the problem, it should stay cooler and even when it gets hot we will need to pull way less timing out. but he is yet to change it over. His plates are pwr95 but i can't seem to find anything current on the Internets.
-
Awesome build, love it
-
Nice update, good move with the trans i bet you were getting sick of pulling them out! he seems to be able to build them really strong these days, some cars out there running 9s on his trans without breaking them. A mate of mine has one behind his 1uz supercharged supra running 20 psi and is never missed a beat.
-
Hey man i was reading this yesterday, was written by a guy who does it for a living. Thought of it now seeing your thread. Maybe some small tips in there to help at all.
1) I made a cardboard model to estimate location, size and shape. I then transfered this to a block of foam. Use styrofoam as it is cheap, easy to shape but most importantly you can disolve it when the fibreglass has cured.
2) I just used a horse file to remove the majority of foam and some 40 grit sandpaper until the basic shape was formed
3) use some finer sandpaper to smooth out the foam and refine the shape, checking against the car and the cardboard template to get the dimensions close. I also made a cardboard template of the filter based on the online dimensions so that I could make it fit correctly.
4) Theres is two ways you can do the next step, either use epoxy resin to laminate 2 layers of 150g/m fibreglass cloth over the foam or you can coat it in PVA or similar that will create a barrier between the polyester resin and the foam. The styrene in the polyester resin will eat the foam and you will loose the shape you have formed. When this has set sand the fibreglass smooth, apply filler and get it fairly straight while the foam is still in place as it will be stiffer and easier to work with.
5) when you are happy that there is enough stiffness in the fibreglass and its smooth enough cut a hole where you need one and sprinkle/spray/drip acetone onto the foam. It will disolve fairly quickly but you will need to scrap it out (it turns into something that grossly resembles sprog)
6) then you can trim edges, cut holes etc and apply paint etc. I used a layer of white gelcoat over the epoxy to make sure the niki/pink/body filler bog would stick to the surface. Polyester resin and fillers will not stick to epoxy resin but gel coat or vinyl ester will. By putting the layer of gel coat on I could sand it smooth and then fill with bog wherer required.
7) I used Marine King Star board as the mounting panel on the throttles(a plastic product used widely on boats that is used a bit like plywood, fibreglass wont stick to it). I just sat the part on the kingboard and applied some Fibreglass where I needed the flange, let it cure and then pulled it off when the glass had cured. This way it had perfect shape and fit against the mounting panel.
Notes: I nearly ran in to trouble because I didnt have enough glass on the flat surface when i dissolved the foam. It sagged a bit and the trumpets nearly didnt fit. This also ment that I needed to add a fair bit of filler/bog to get it flat. I also painted a full coat of epoxy on the inside of the product when i had finished giving the inside a sand and smooth out so that no loose particles will get sucked into the engine. The small fairing that hold the filter on the front was also made from foam but I left the foam in it because it didnt need to be hollow. I had a few pin holes in the resin though and the fillers/primers started eating the foam. It also took a fair bit of iller to fill these soft spots. The hole things is probably 2-3kgs but could of been half that if i hadnt used all the filler/bog. I wasnt worried though because I wasnt sure it was going to work.
Hopefully that explains it a little but let me know if you need more
-
Spread it thick and then cover it in gladwrap once it's spread. The gladwrap will keep it moist for longer so it does more work.
-
They will fit fine on the rear. On the front I think they will touch the strut by a couple of millimeters.
The 15x8 et0 will fit for the rear as well just pretty flush. But on the front they will stick out a fair bit.
-
My ke30 has 15x7 +13 offset front and rear. 195/50/15 tyres. They fit easily and are inside the guards. If you want a more aggressive look then you will want a more negetive offset with a stretched tyre.
-
Cheers reed.
You're welcome to have the old caltracs, it would just be the arms, the triangles and maybe a few bolts and crush tubes. So you would be missing the spring plates that your u bolts go through. This has the bracket welded to it for the diff end of the setup, this would need to be setup and welded on your car anyway as the arms are not adjustable.
-
Excellent, that shape crown is my favorite of the bunch for sure. Are you sure its not worth chasing down a better starting point? Will definately be following with interest!
-
Cheers men, yep still rego i will be getting this mod plated, tubs are fine under ncop. i may need a seat belt mounting code as well because the seat belts mount to the wheel tub, really hopeing to aviod that but will see how i go.
-

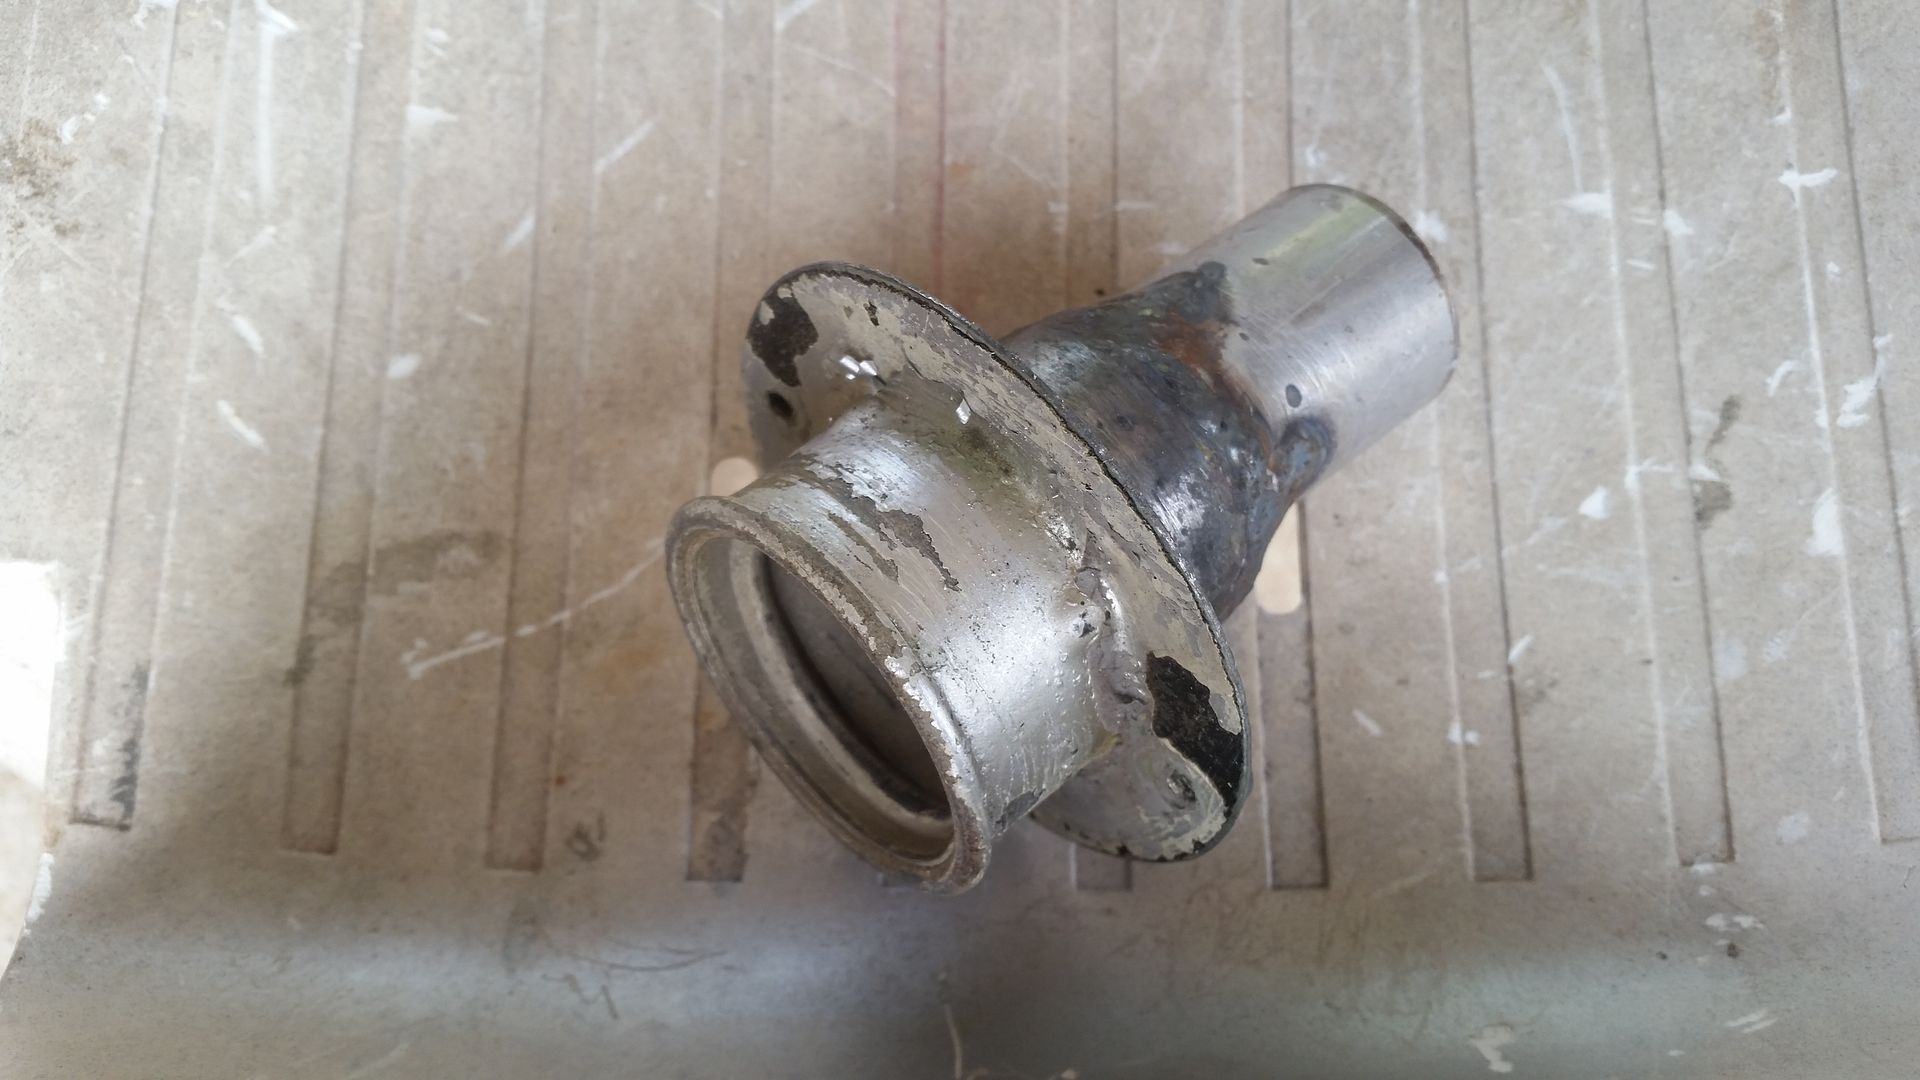
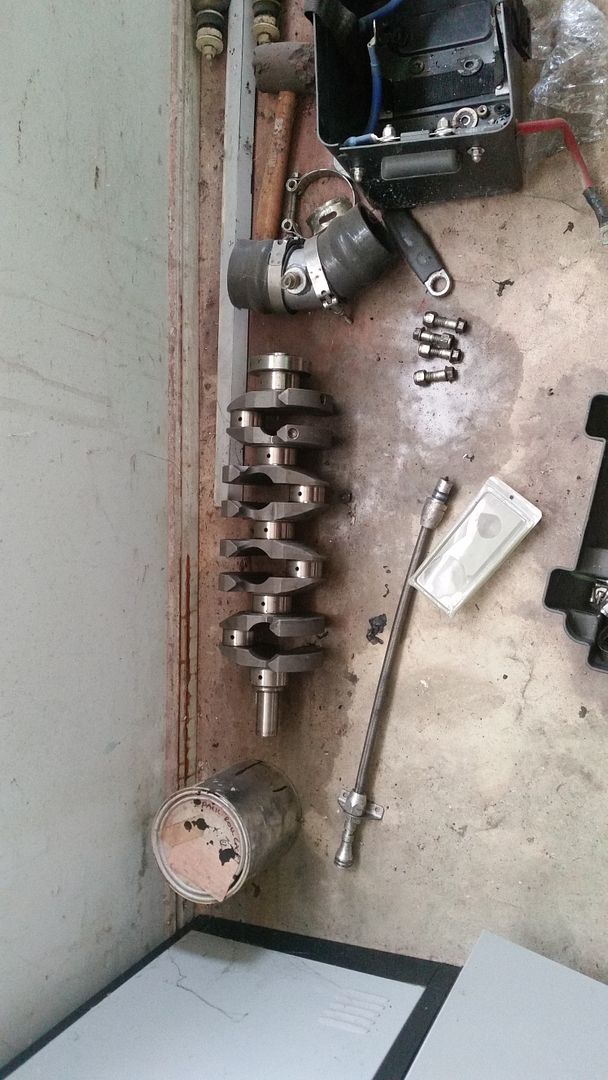
2.2 crank
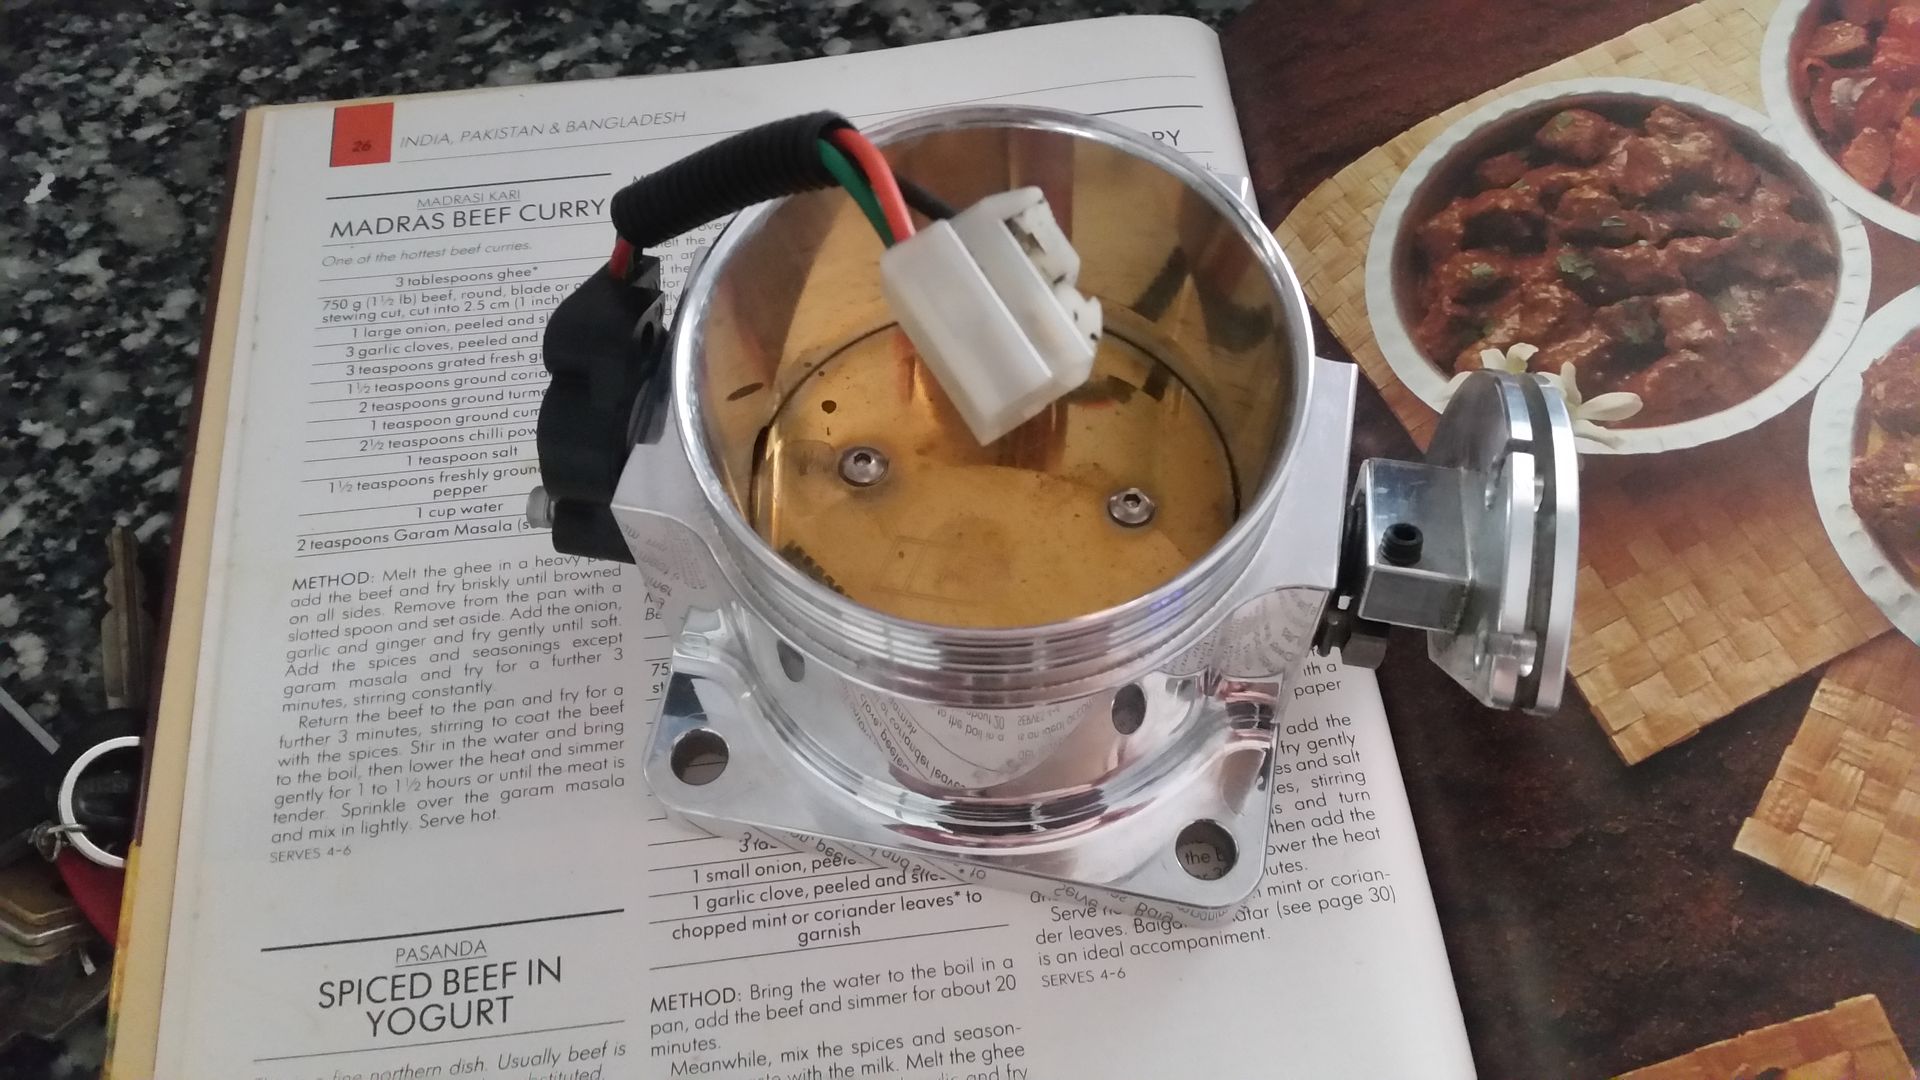
really tidy 80mm tb i got off gumtree for a good price, for when the quads go.
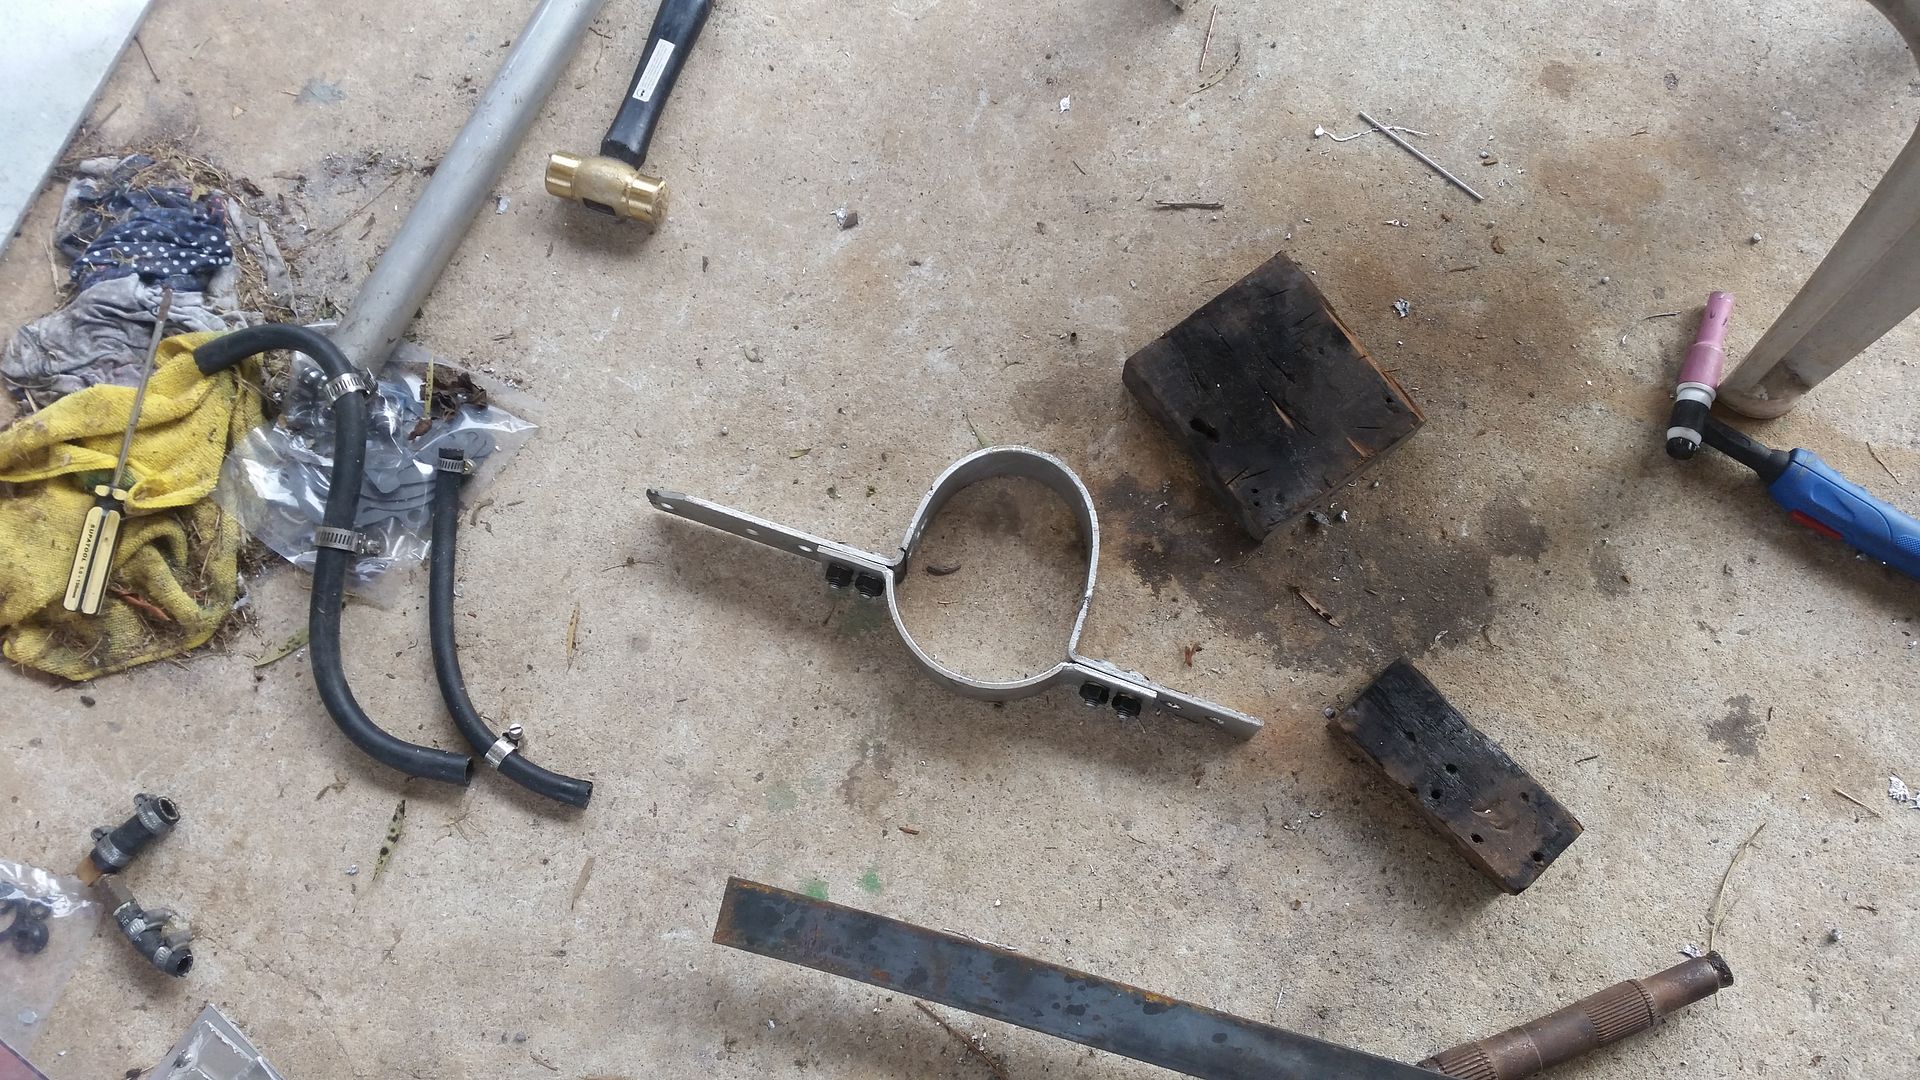
tailshaft loop modification
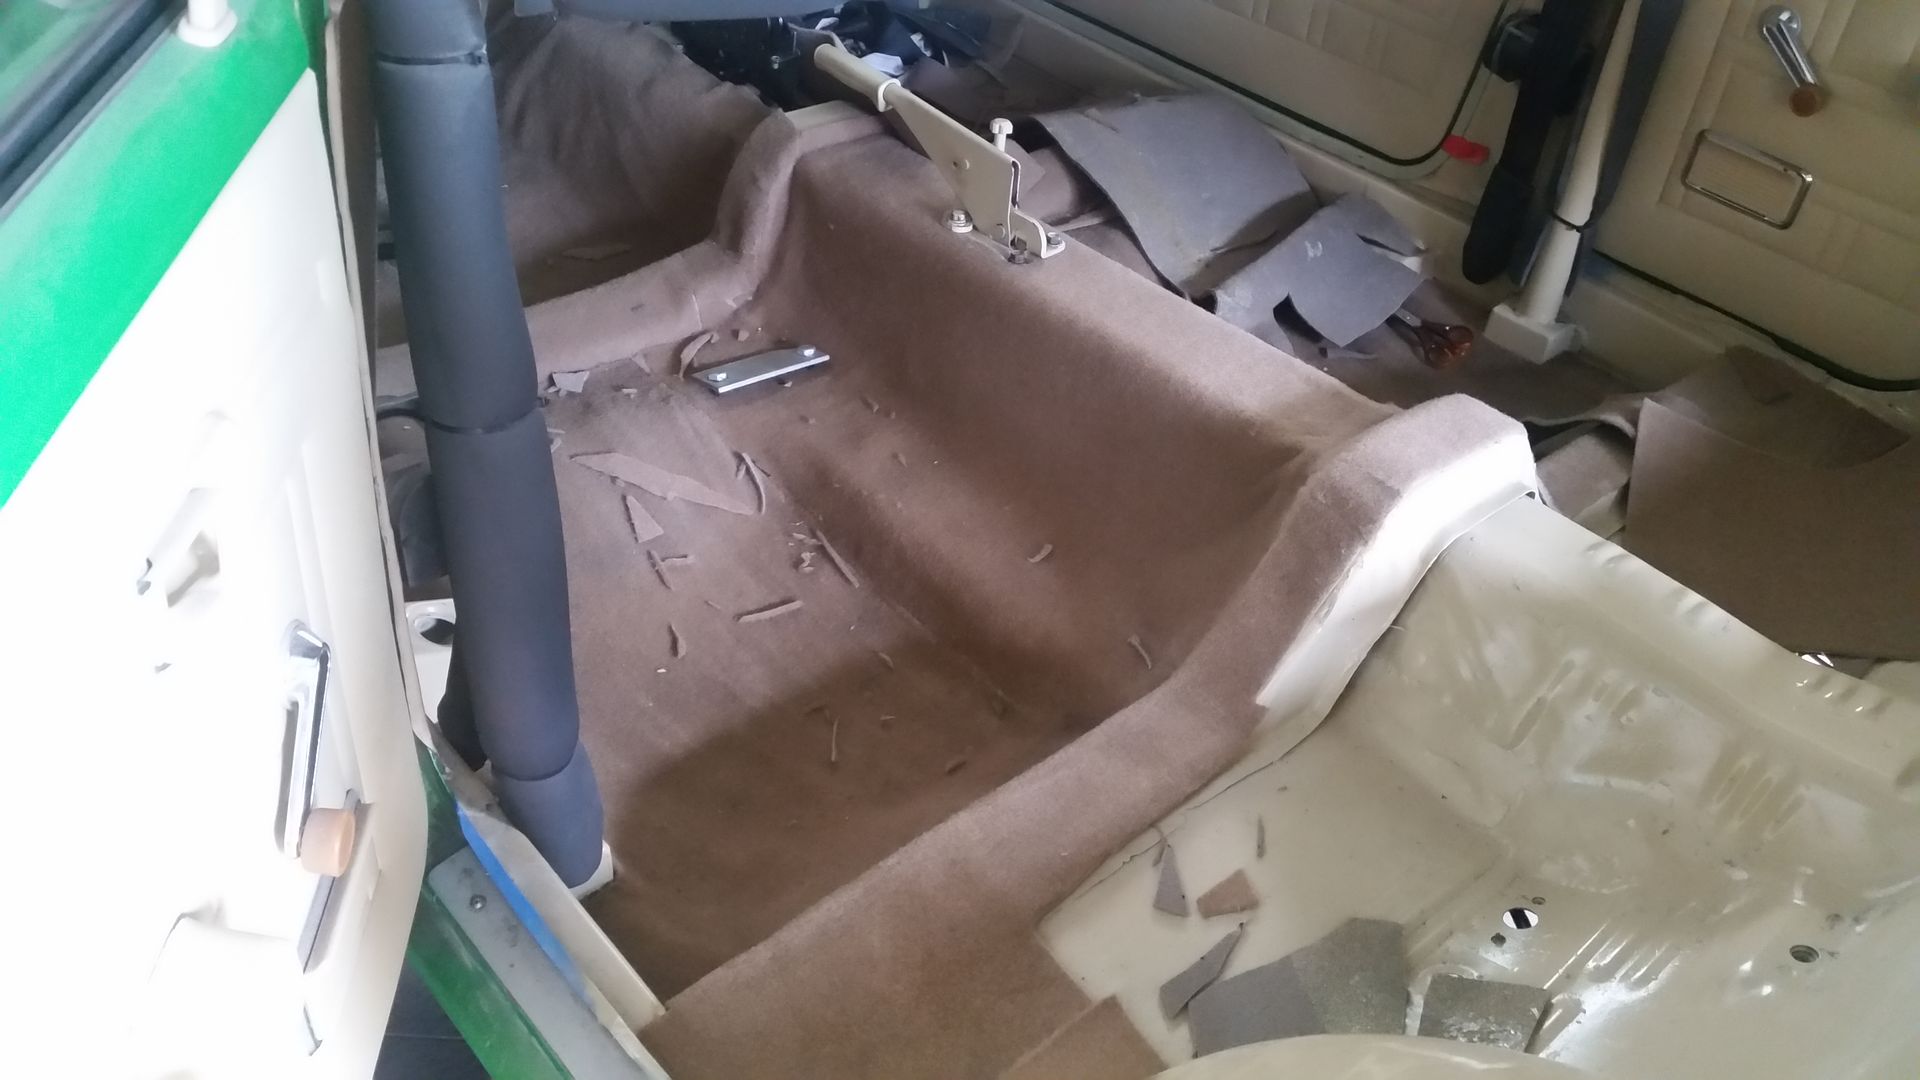
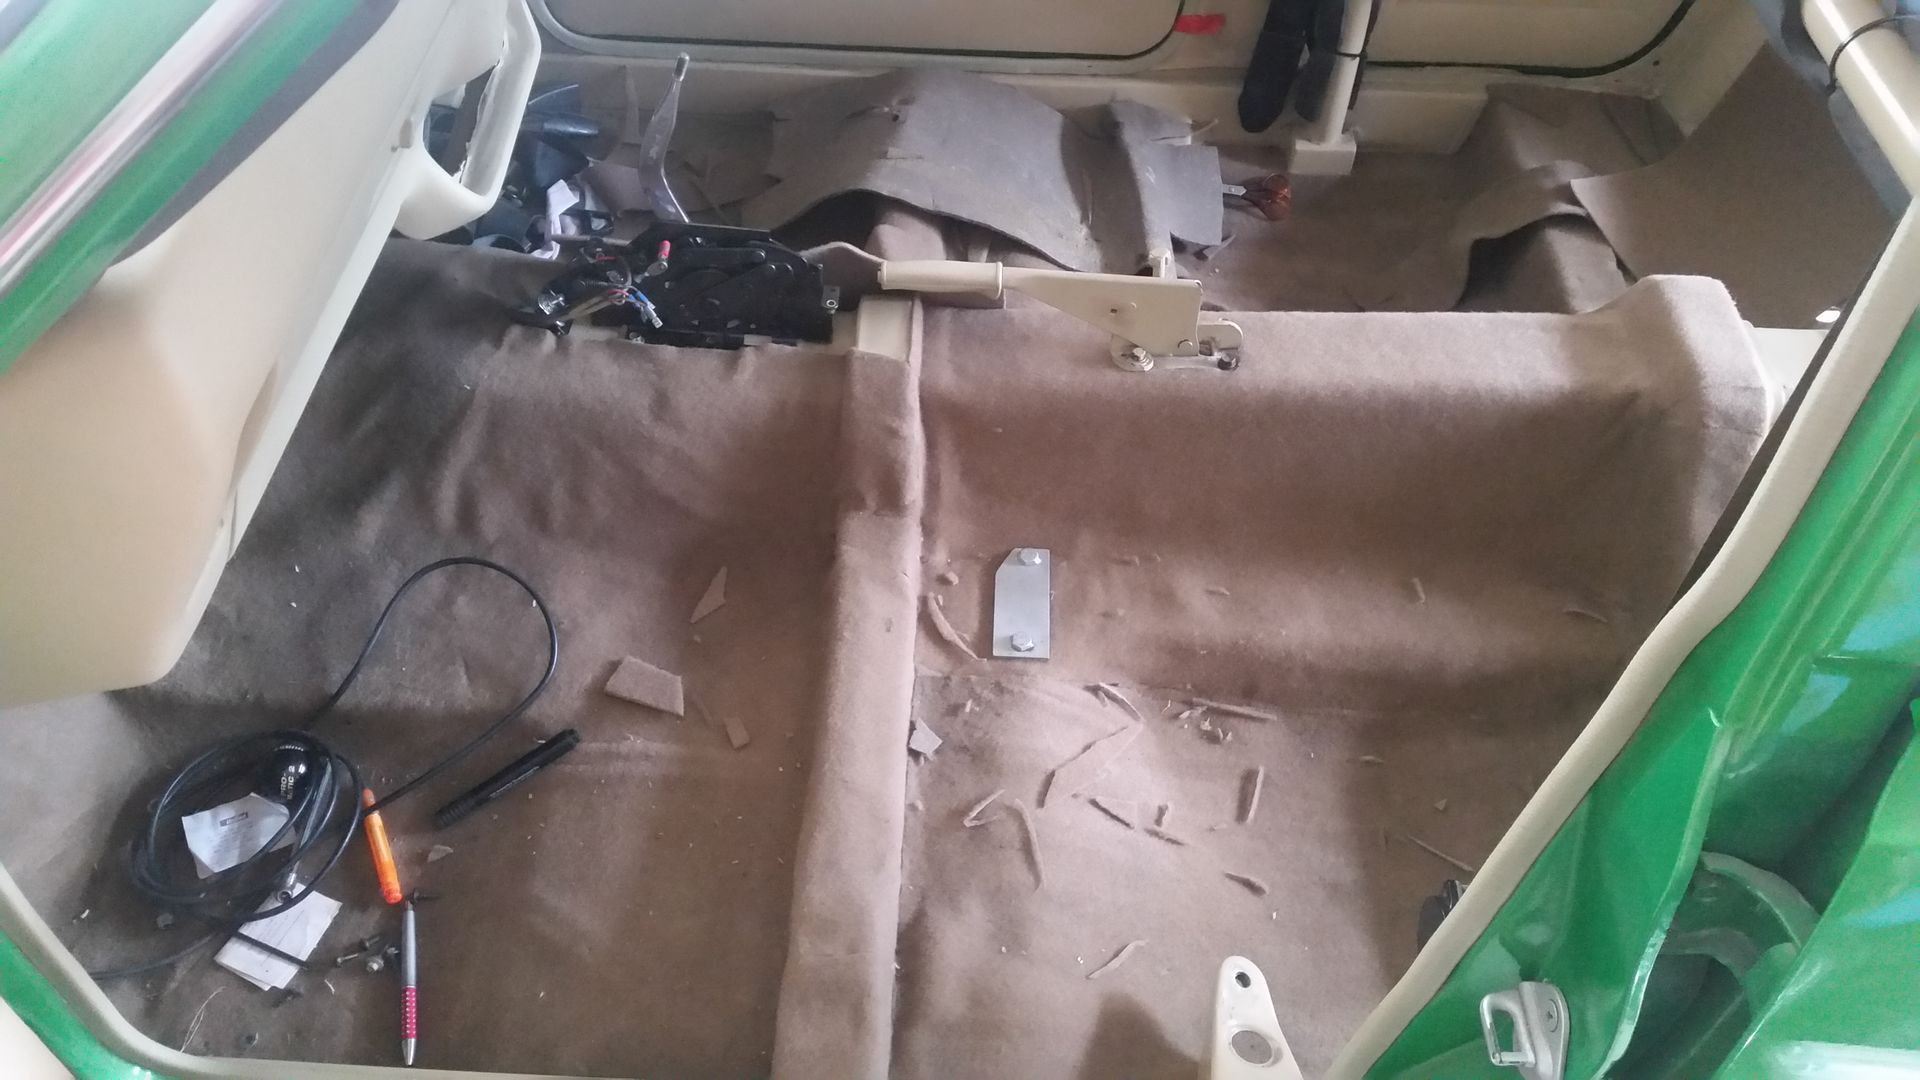
carpet nearly done
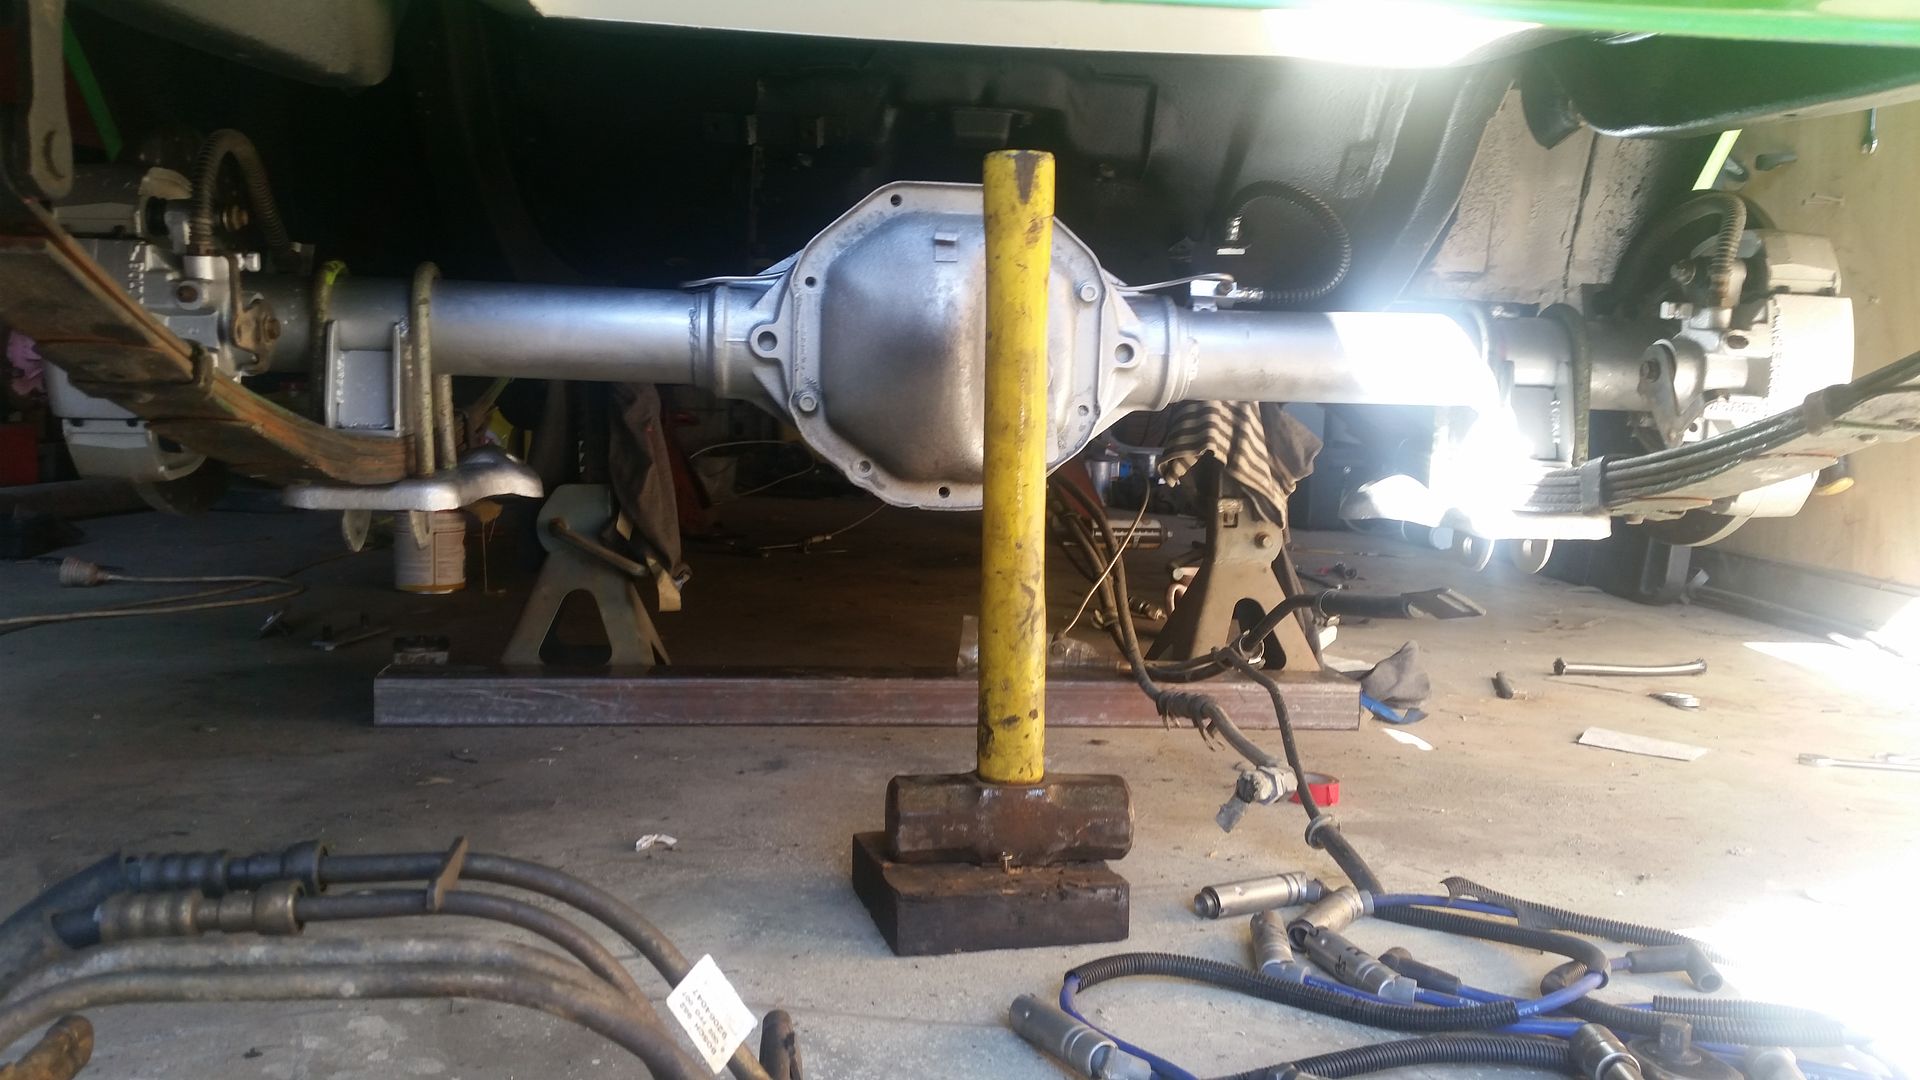
diff mounted
-
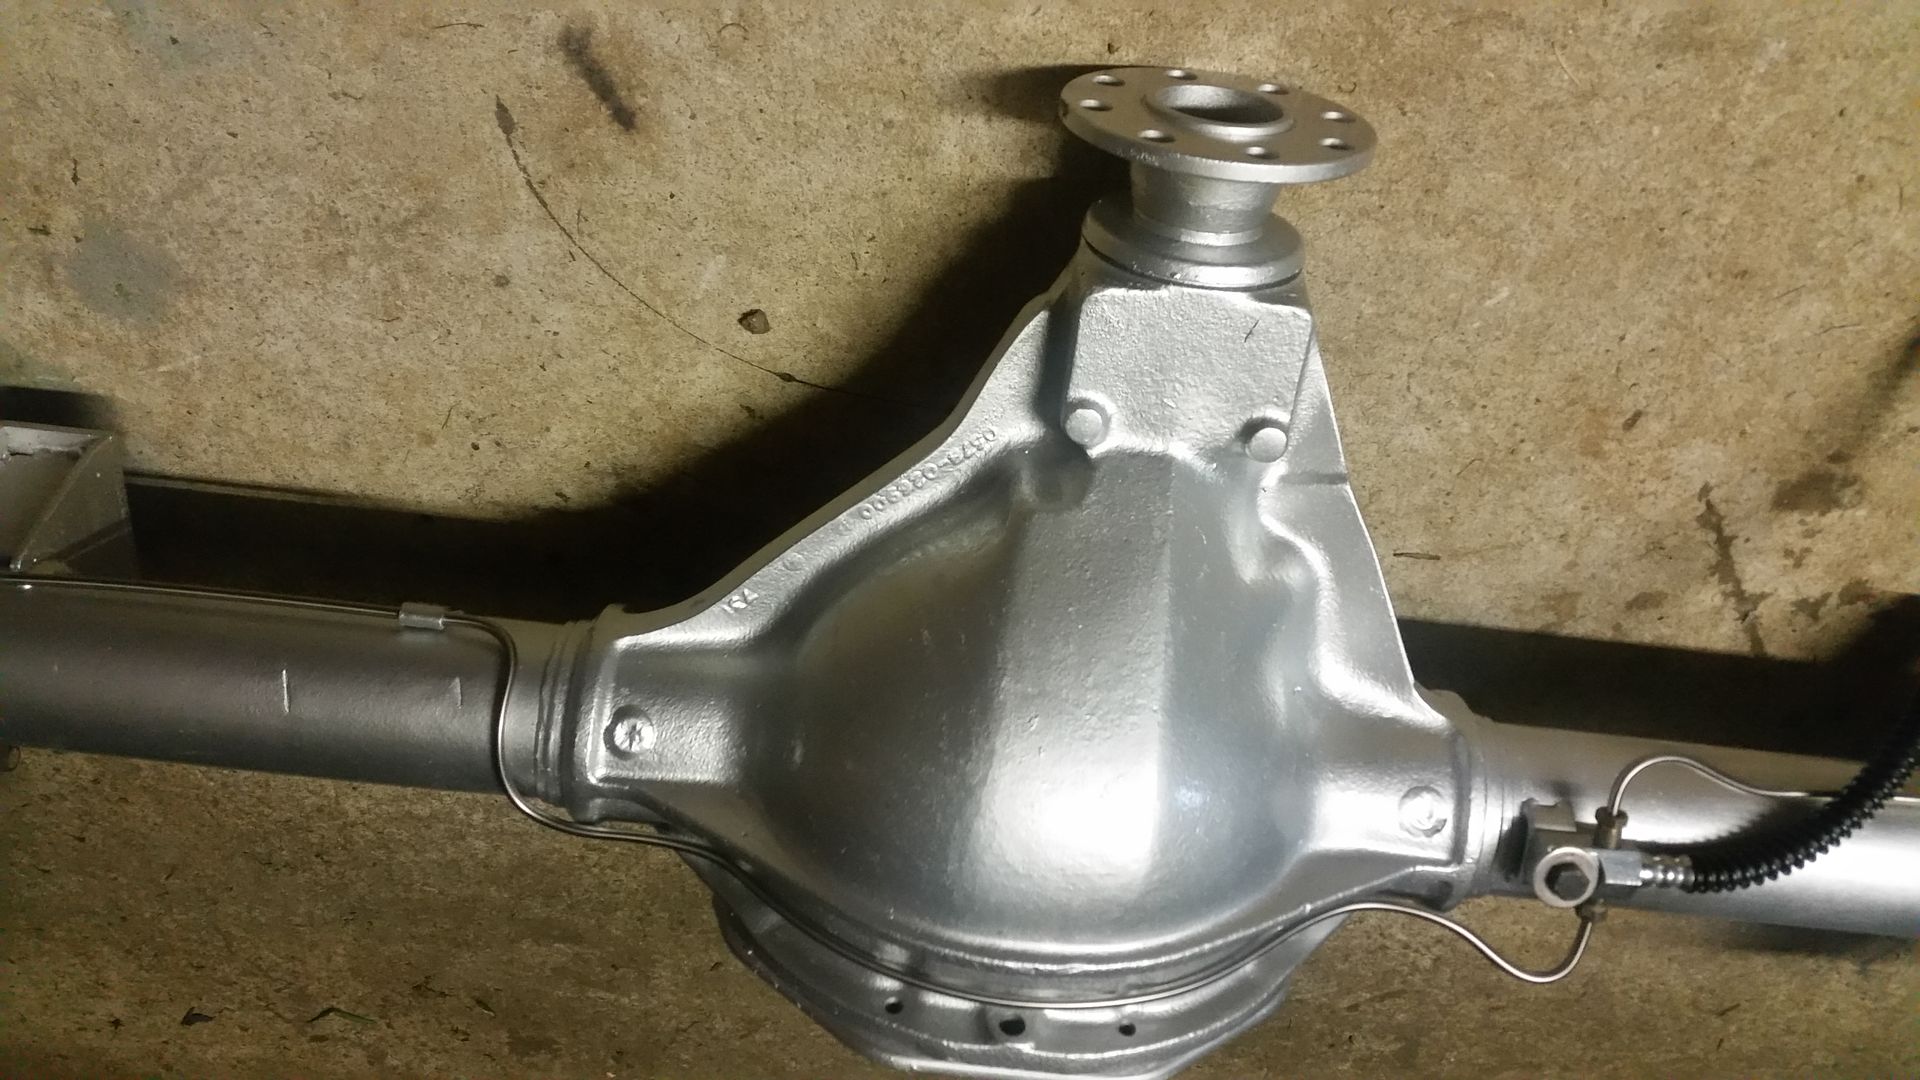
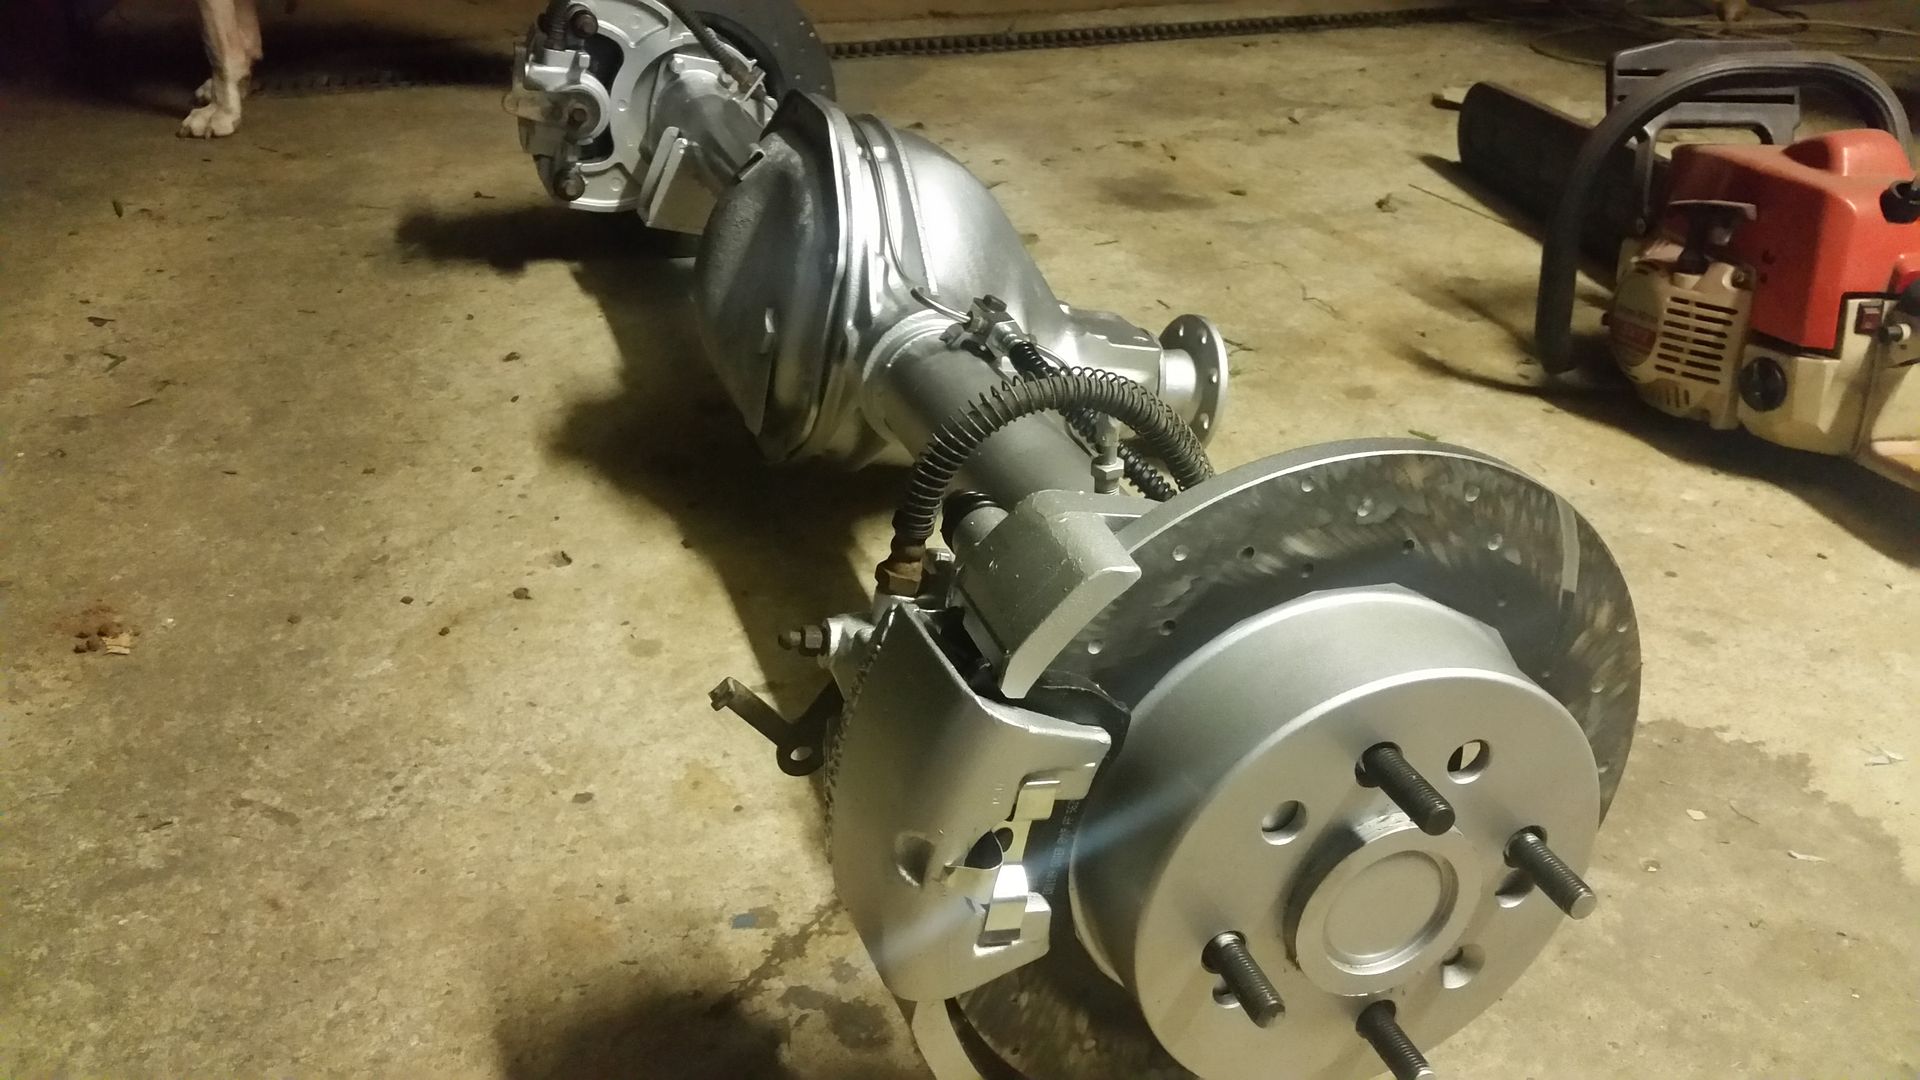
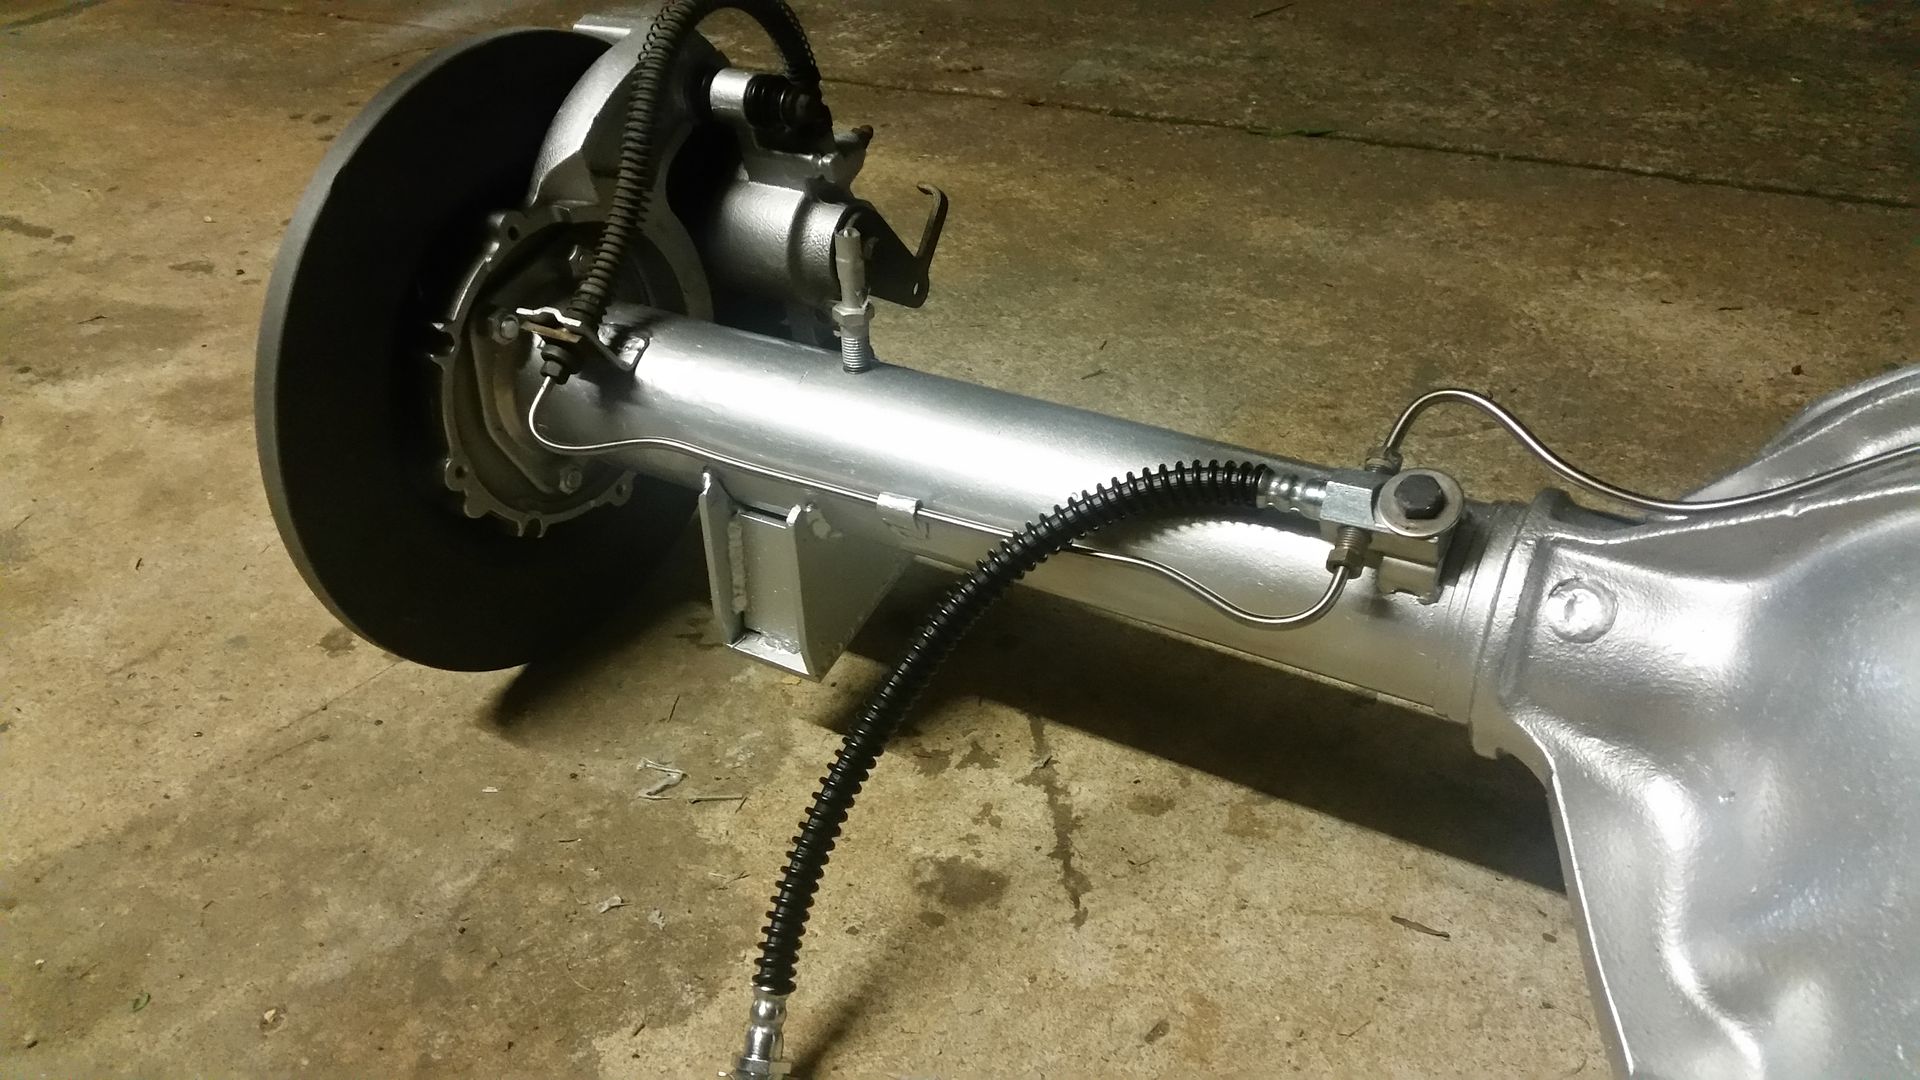
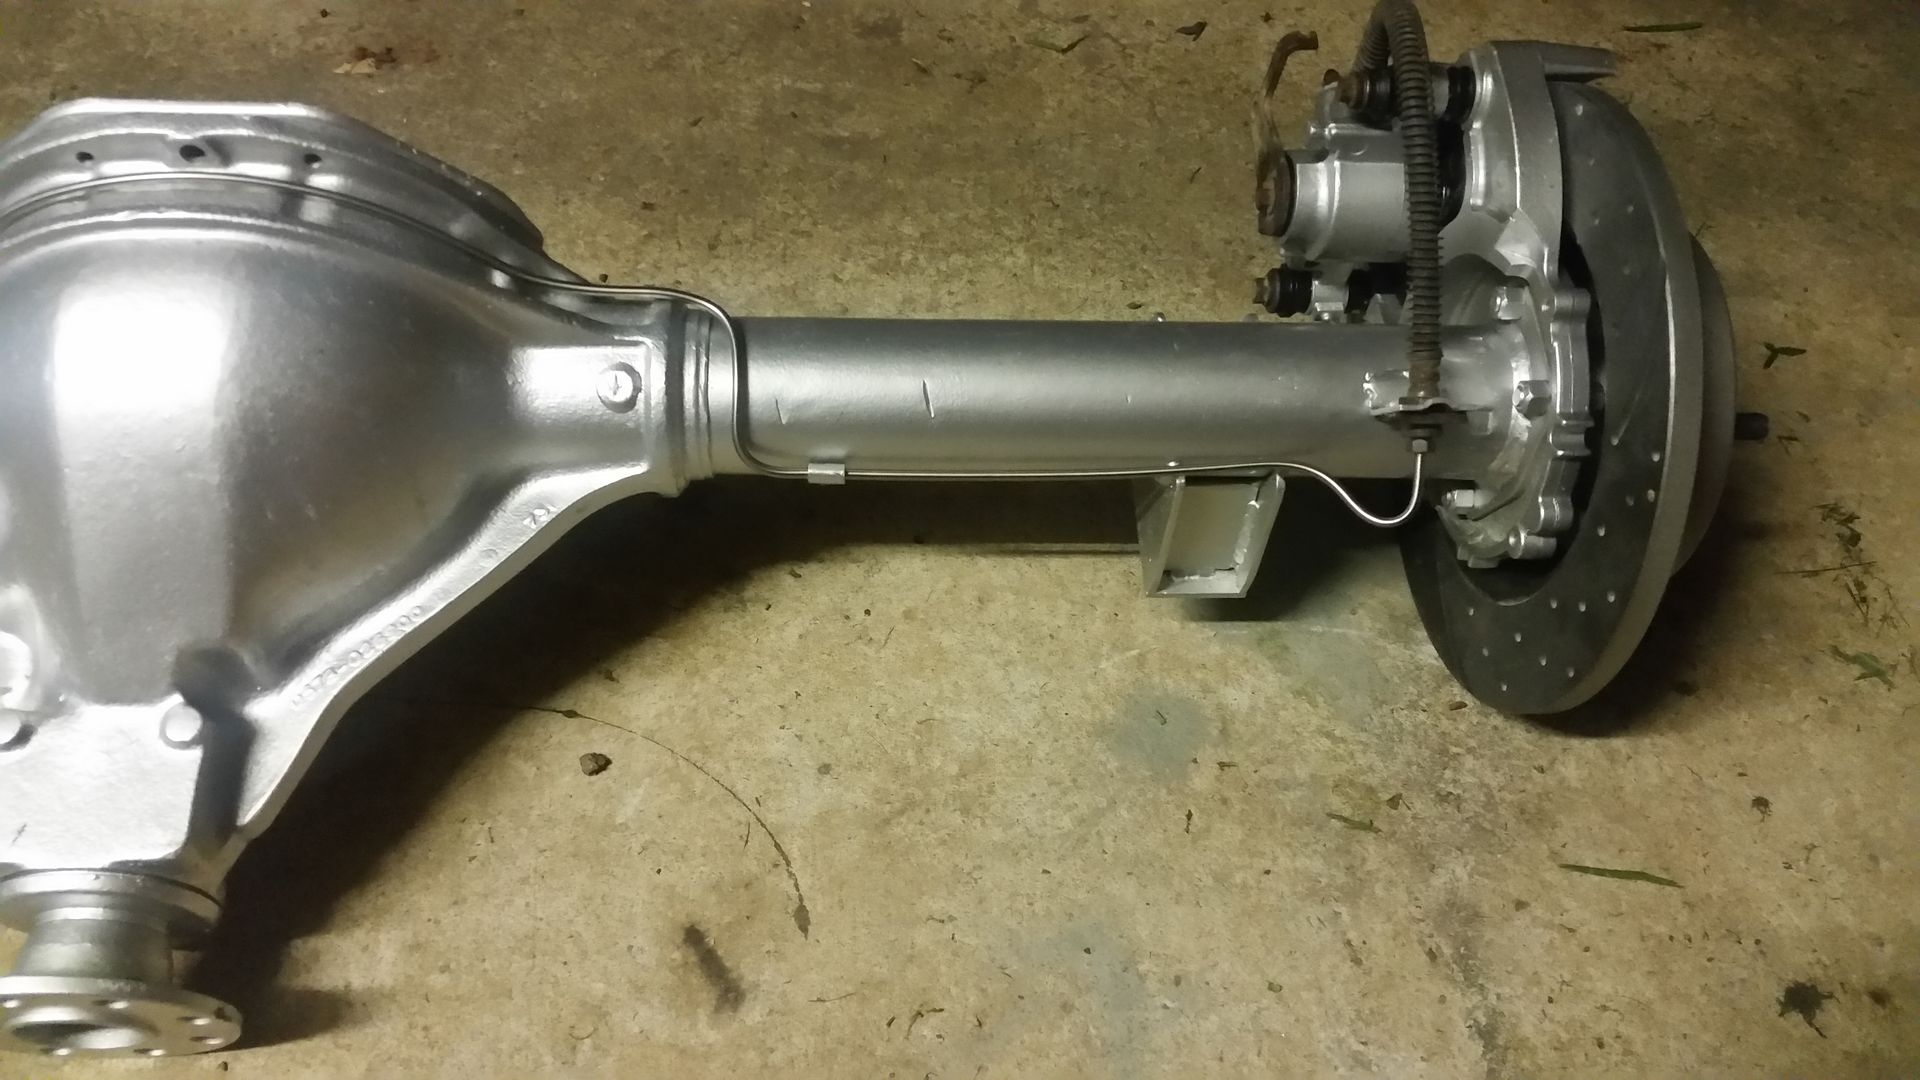
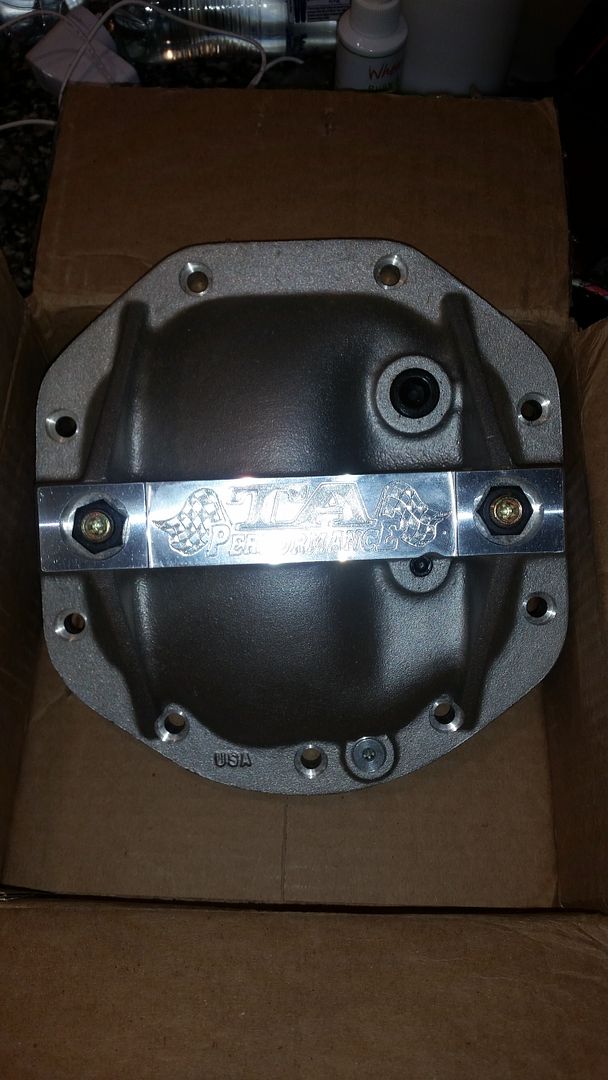
diff is painted, new stainless lines, new rear cover brace thing. all in the car bolted up.
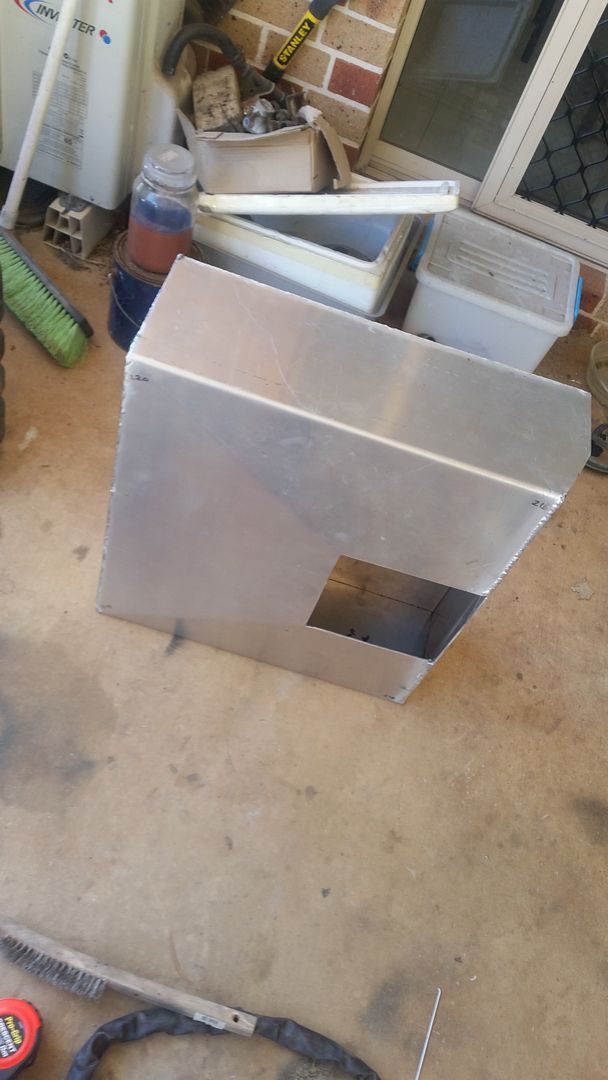
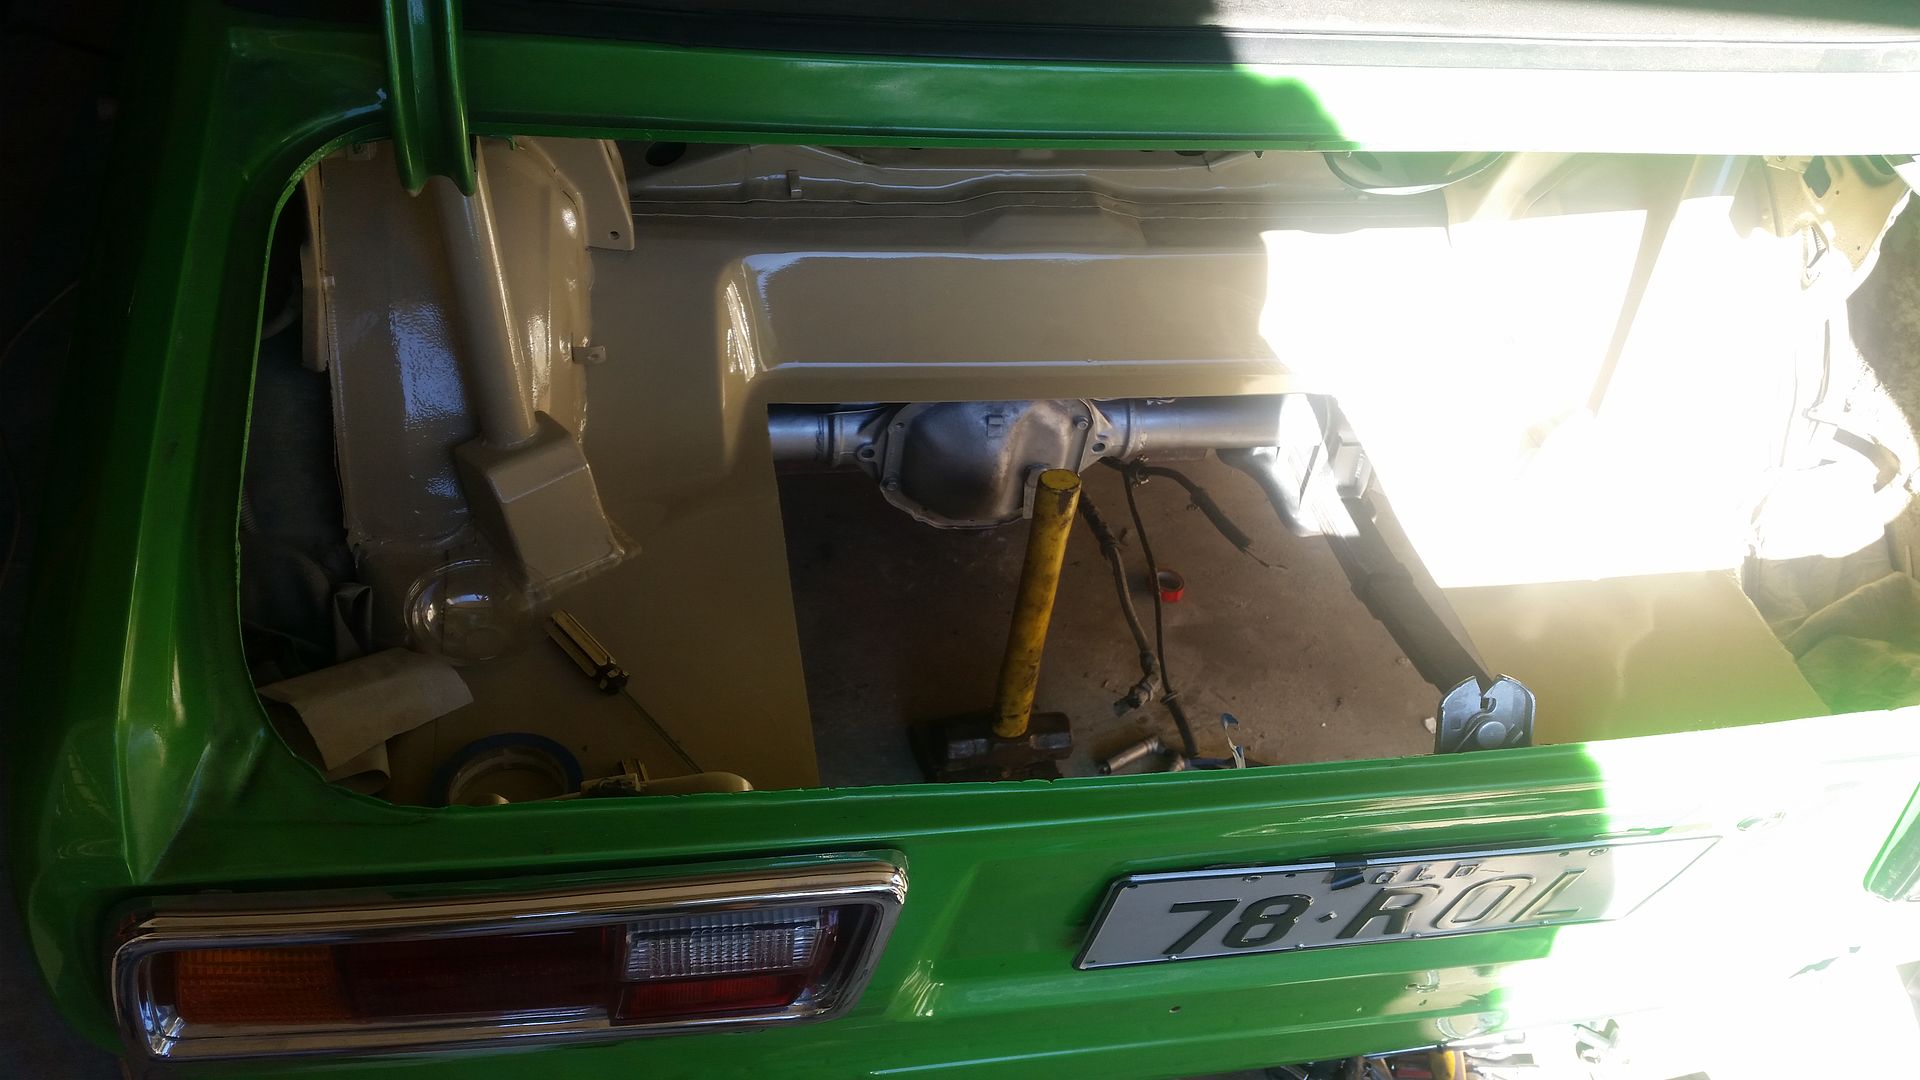
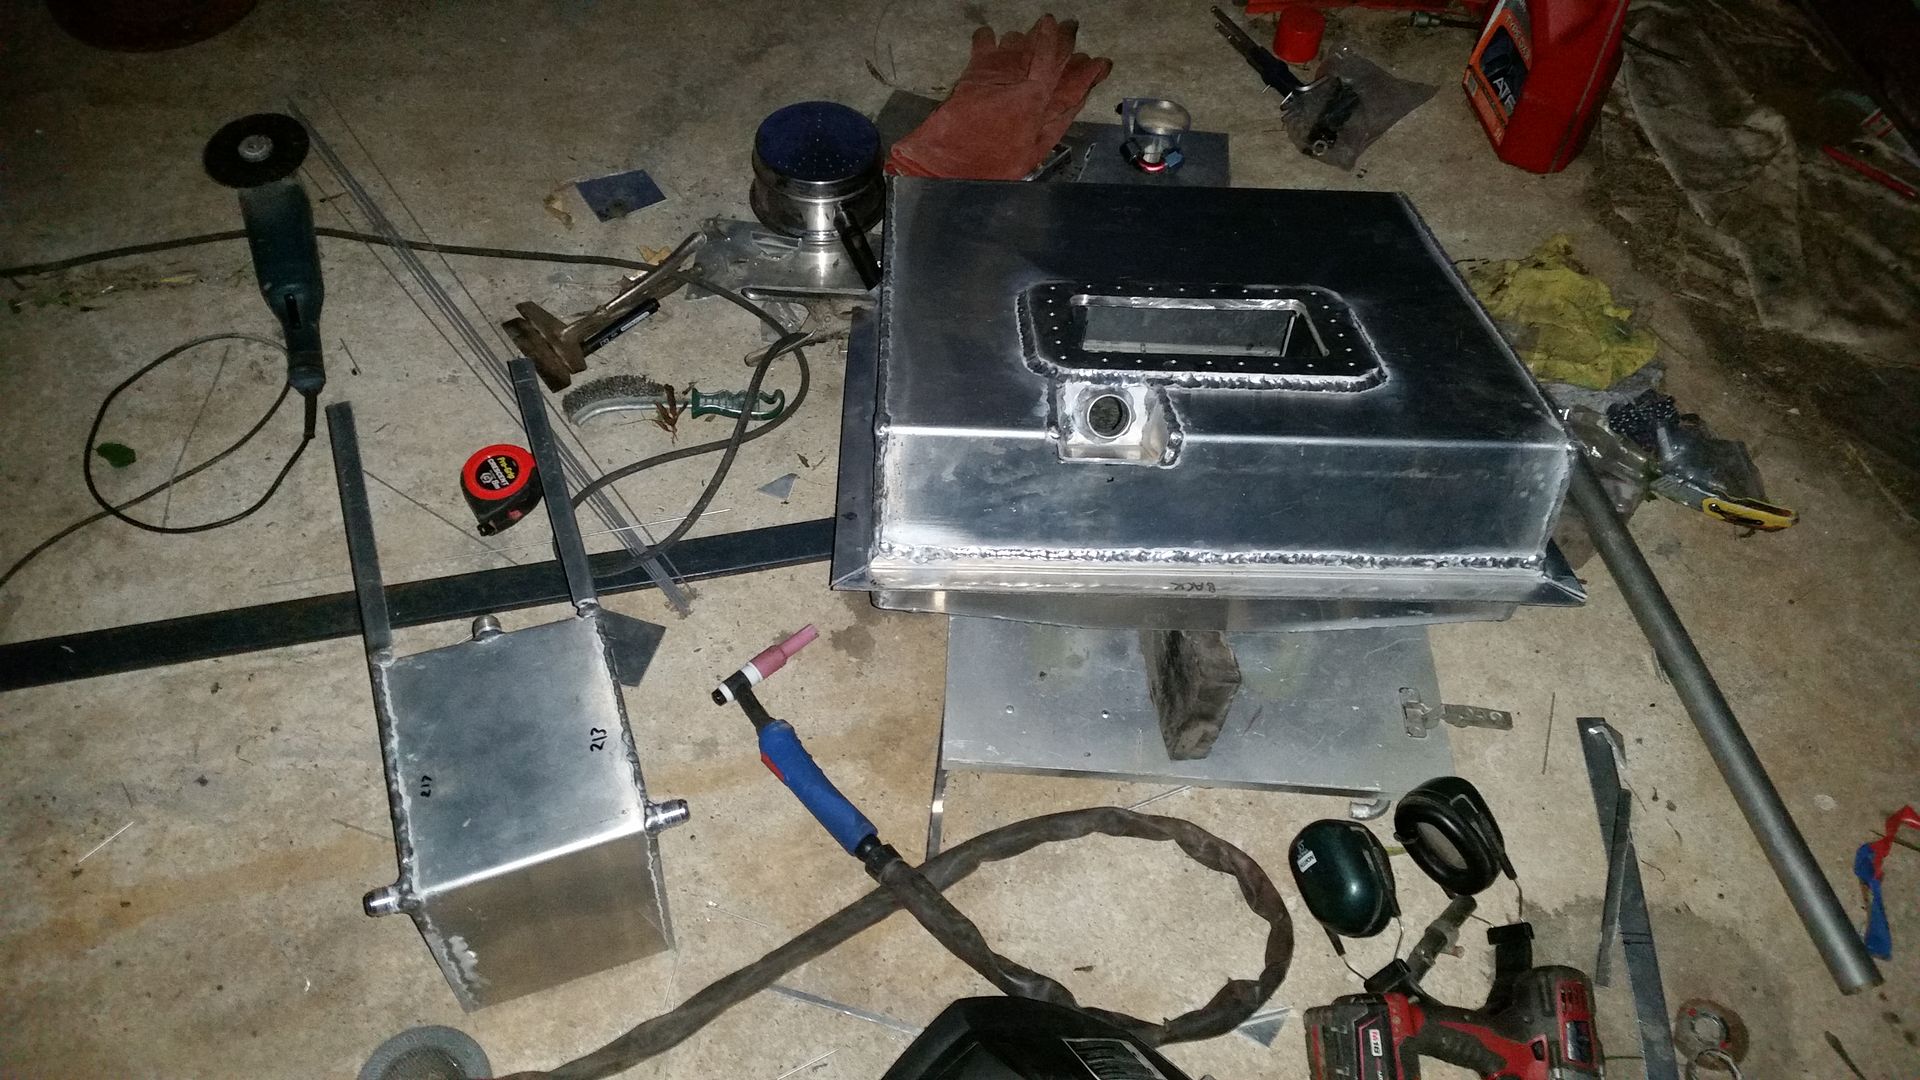
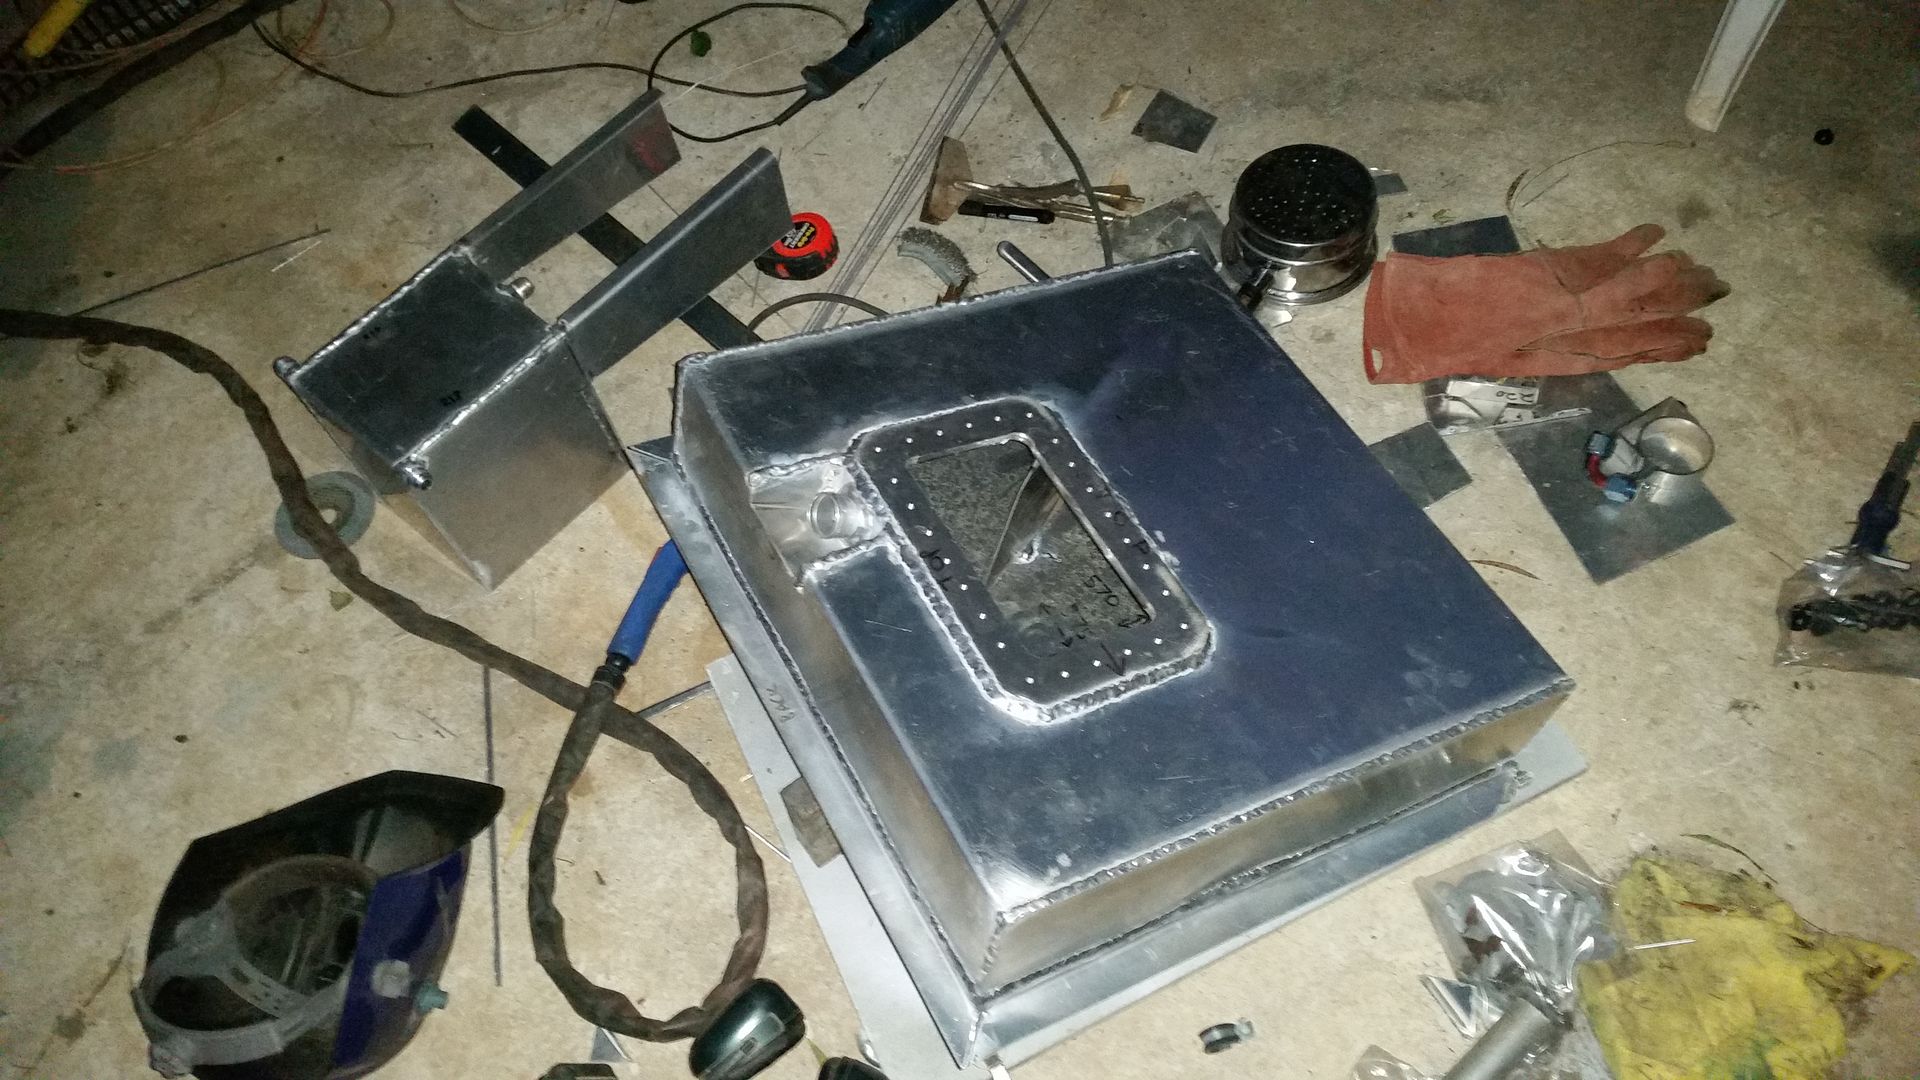
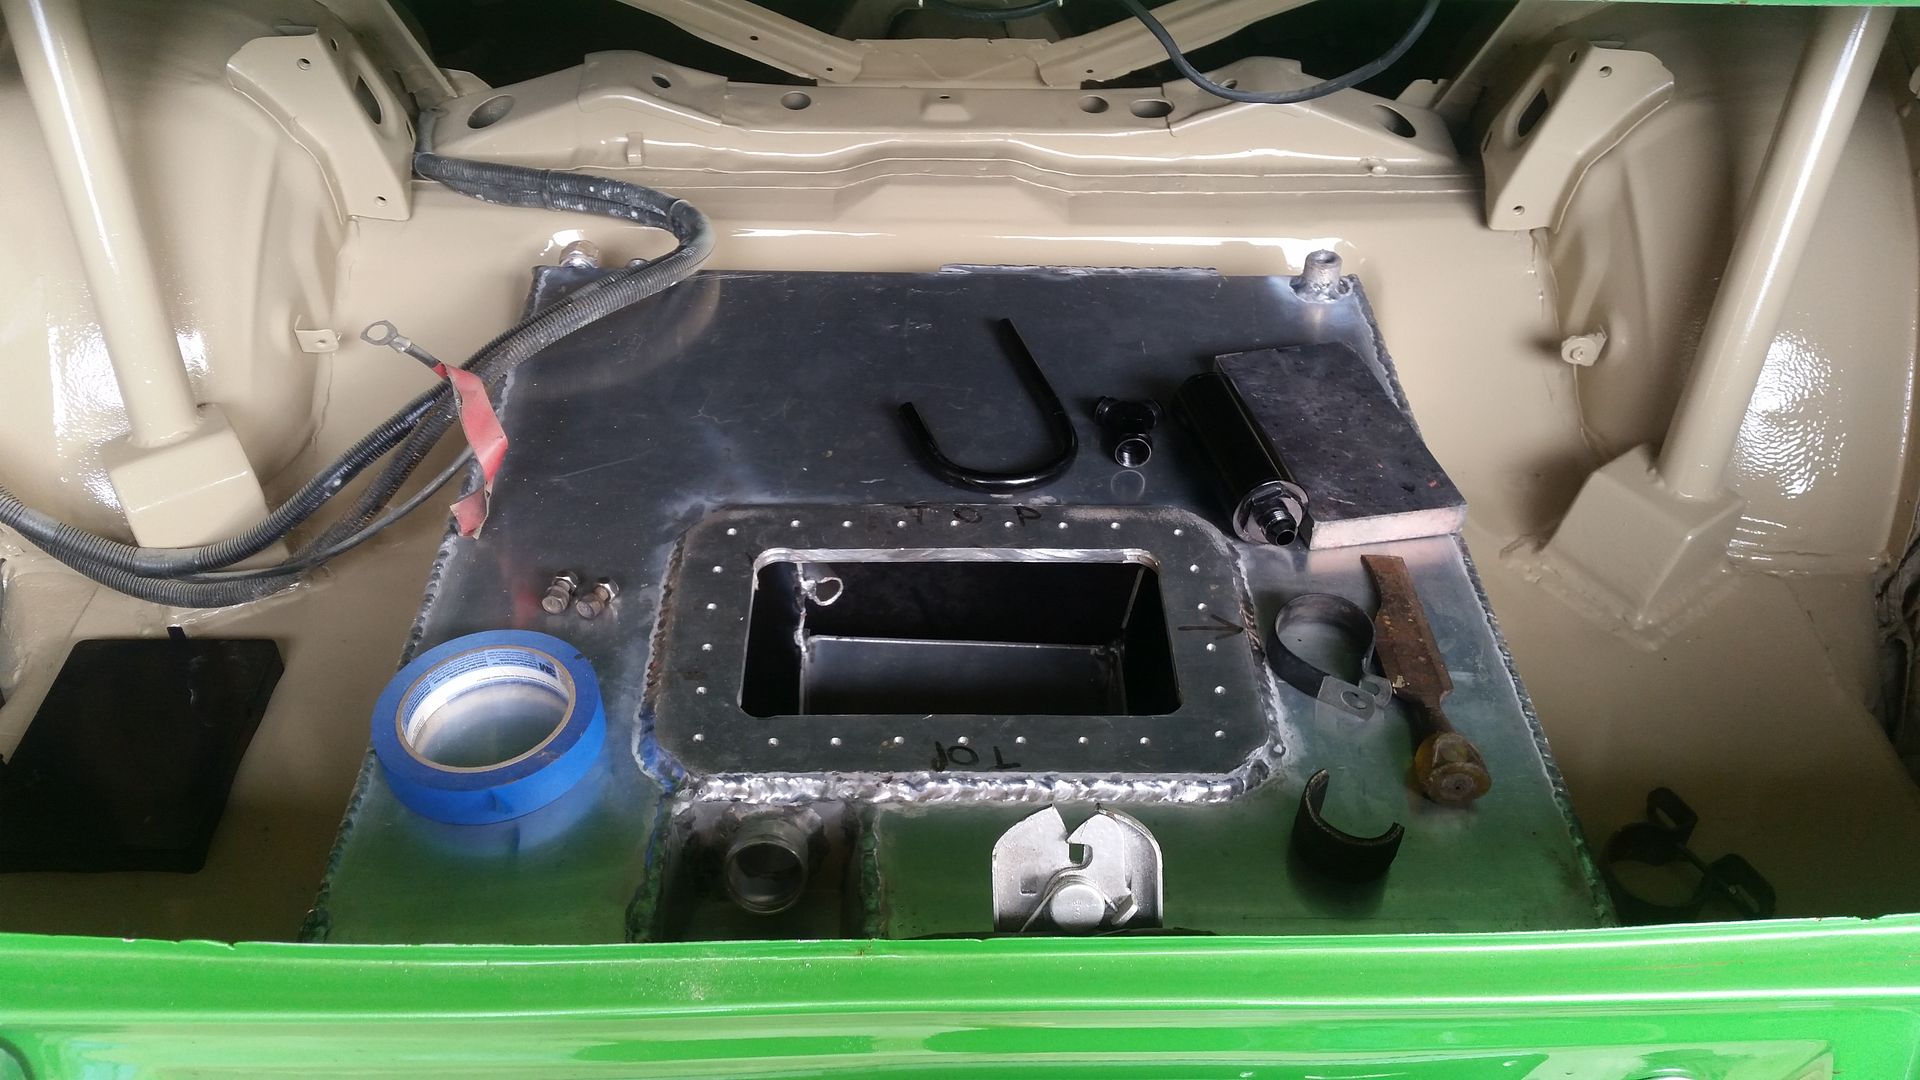
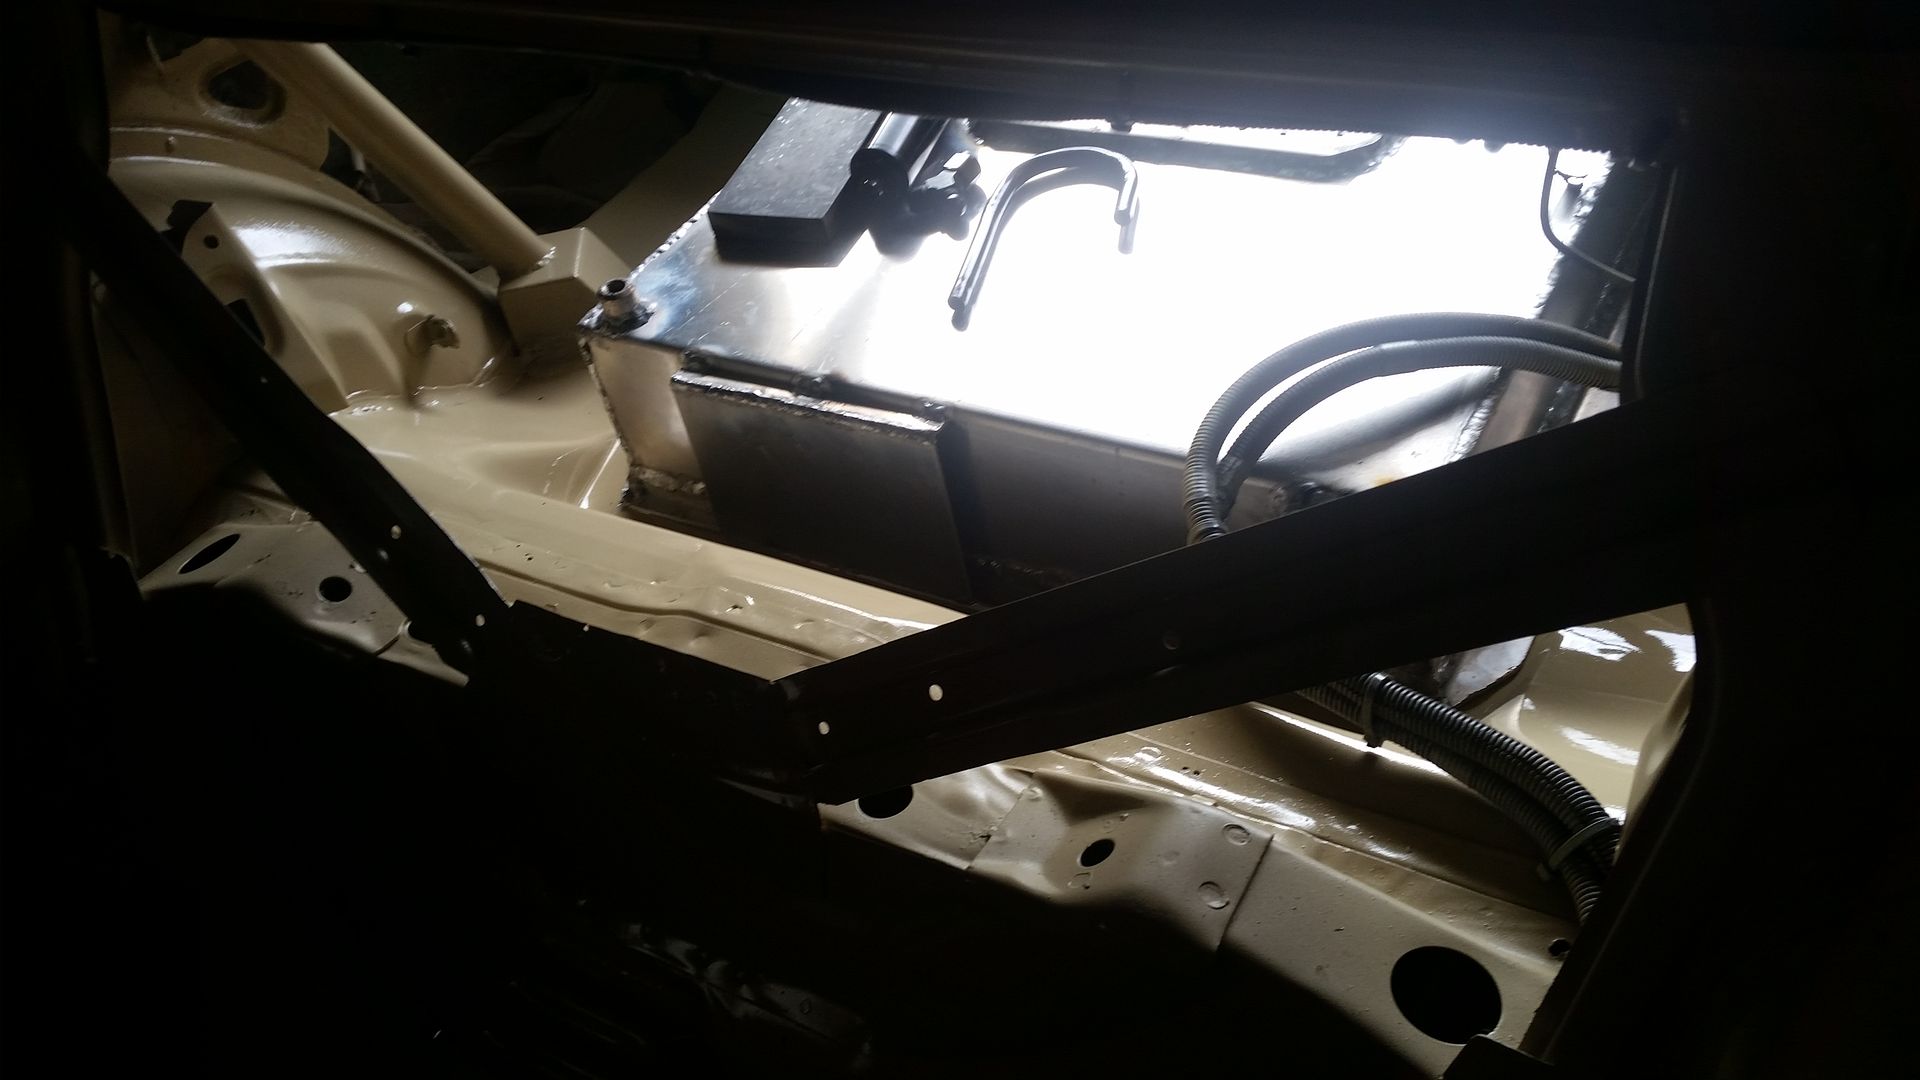
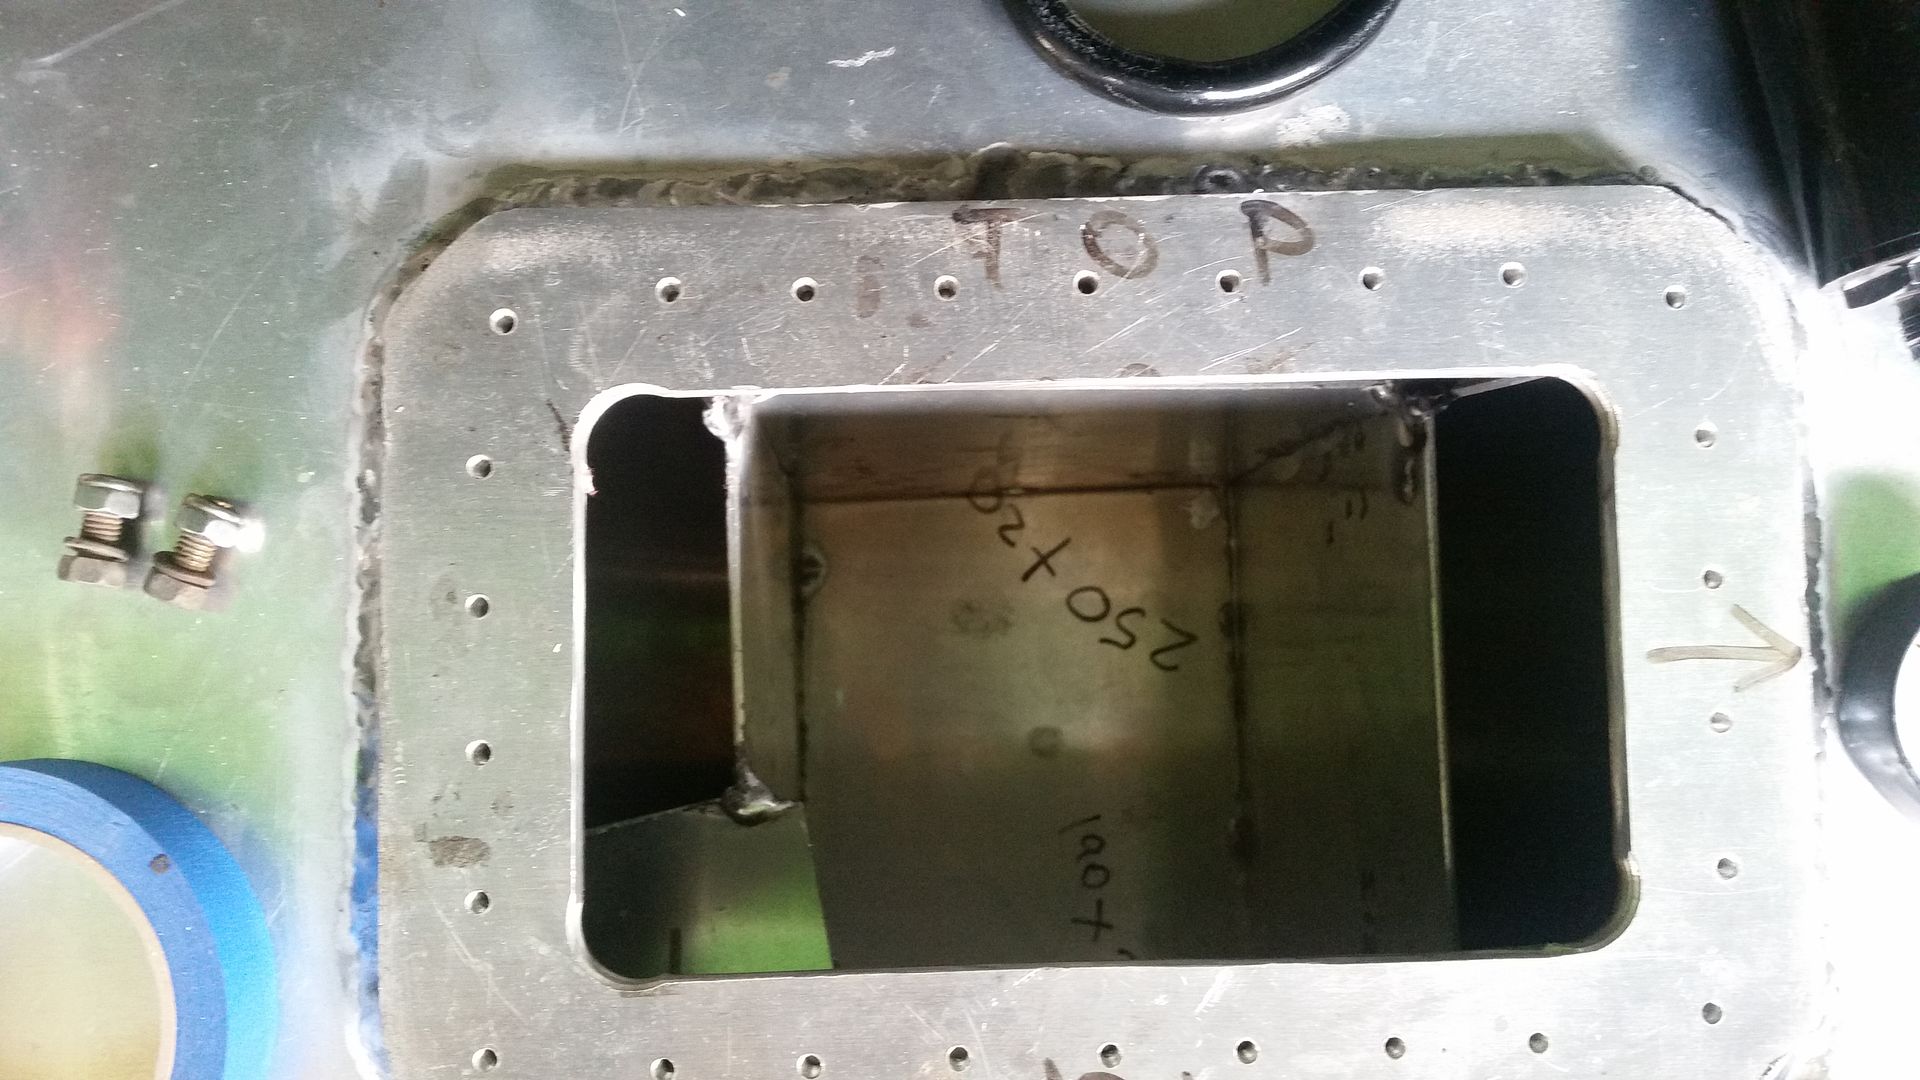
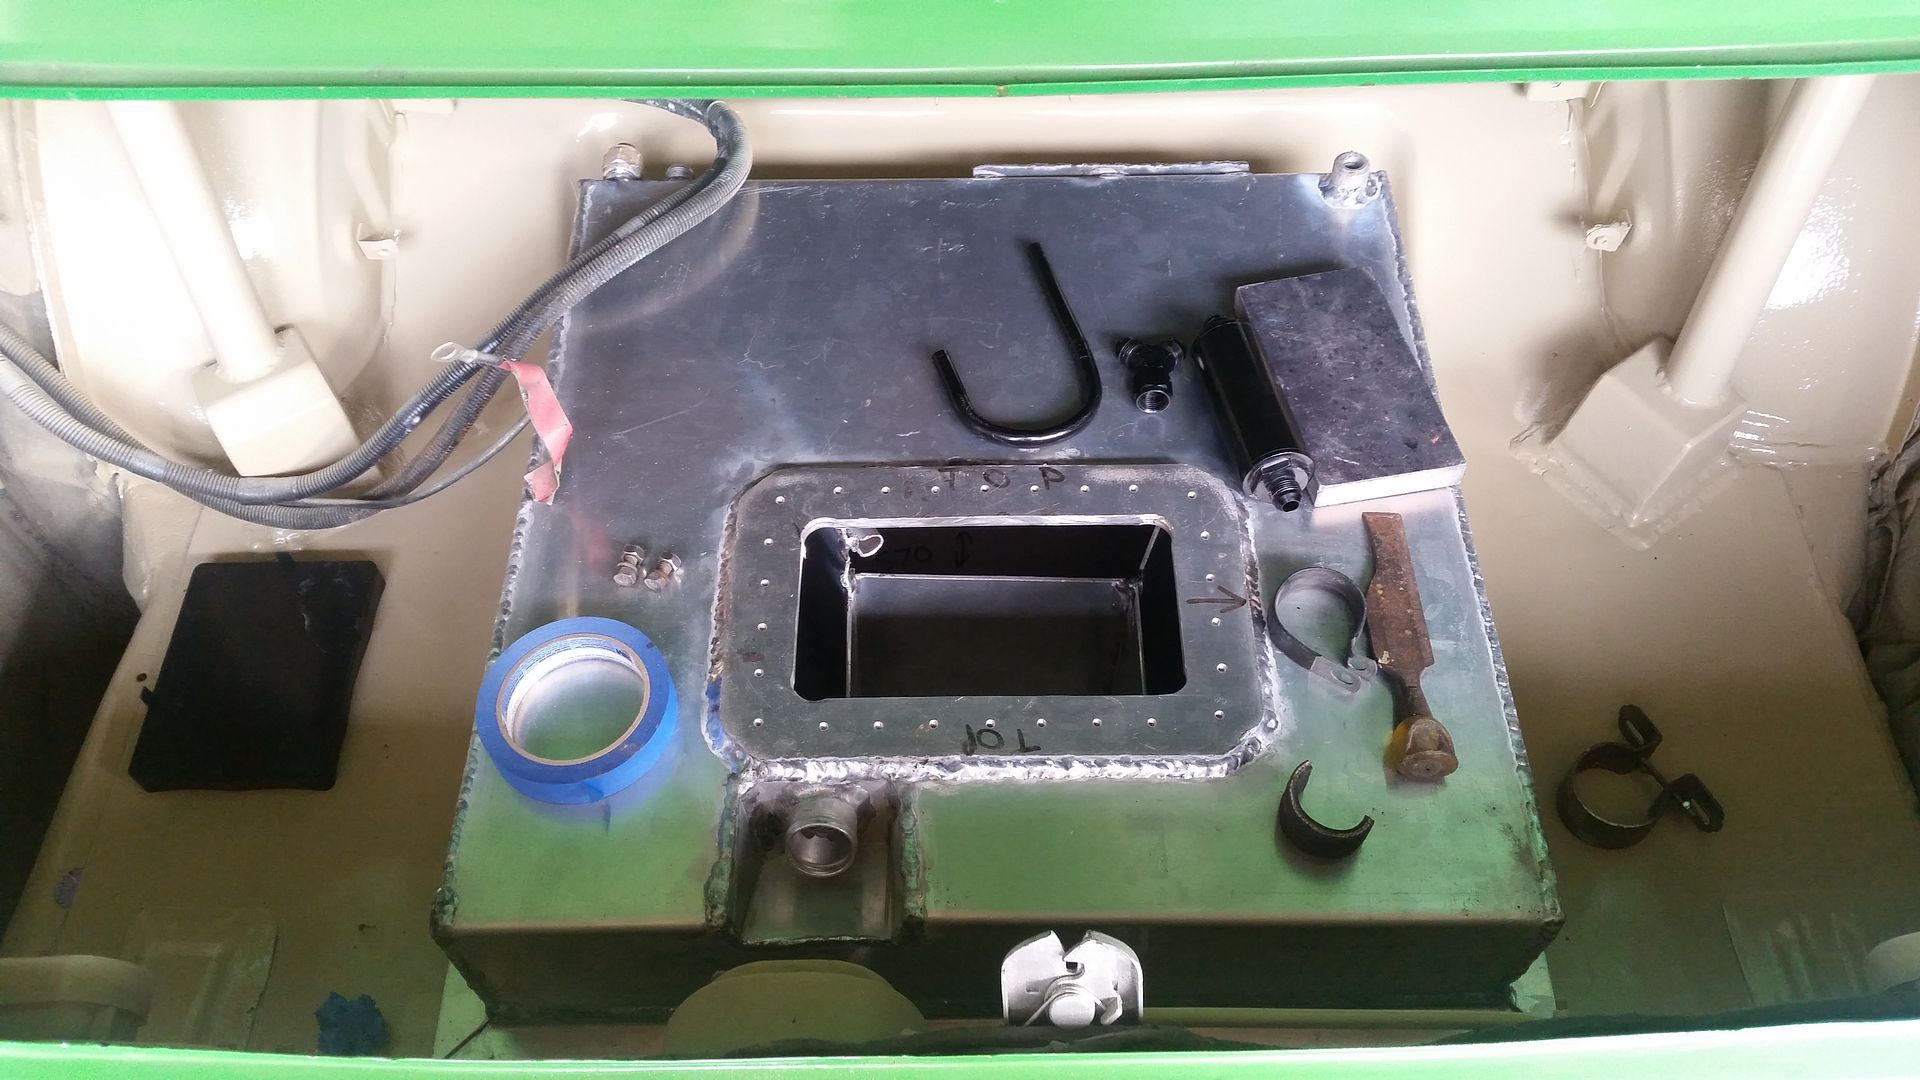
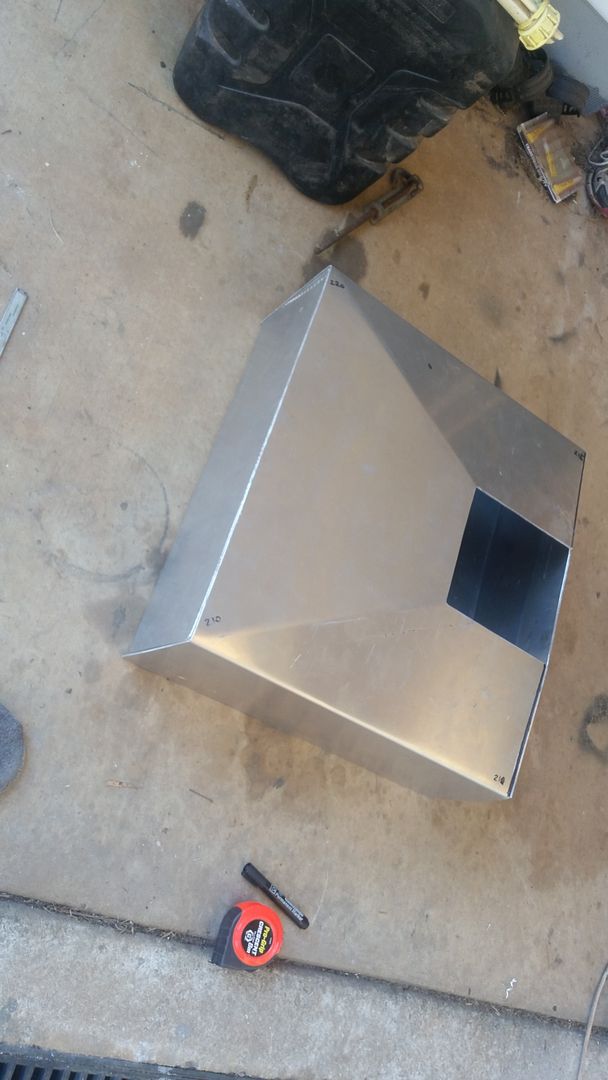
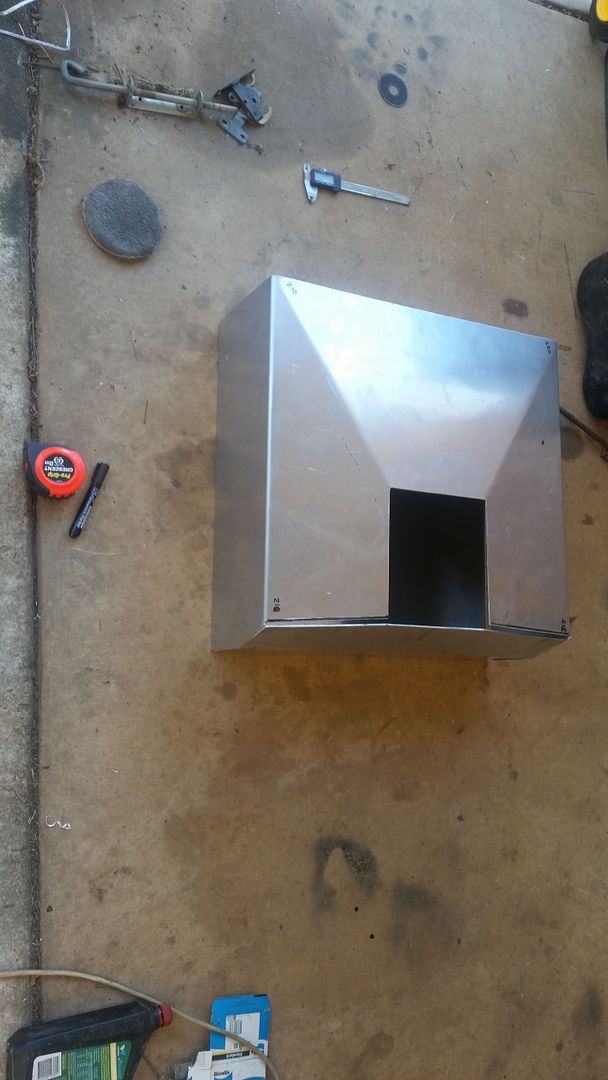
fuel tank build. I'm no longer running a surge tank, instead i have decided to build a surge type setup into the new fuel tank. The fuel tank will now protrude into the boot a fair bit to get the litres i want, a 90mm dropper thats 200 x 200 will hang under the tank as a surge device. plenty of baffles inside, was going to run foam but after some research it seems like it may break down over time.
-
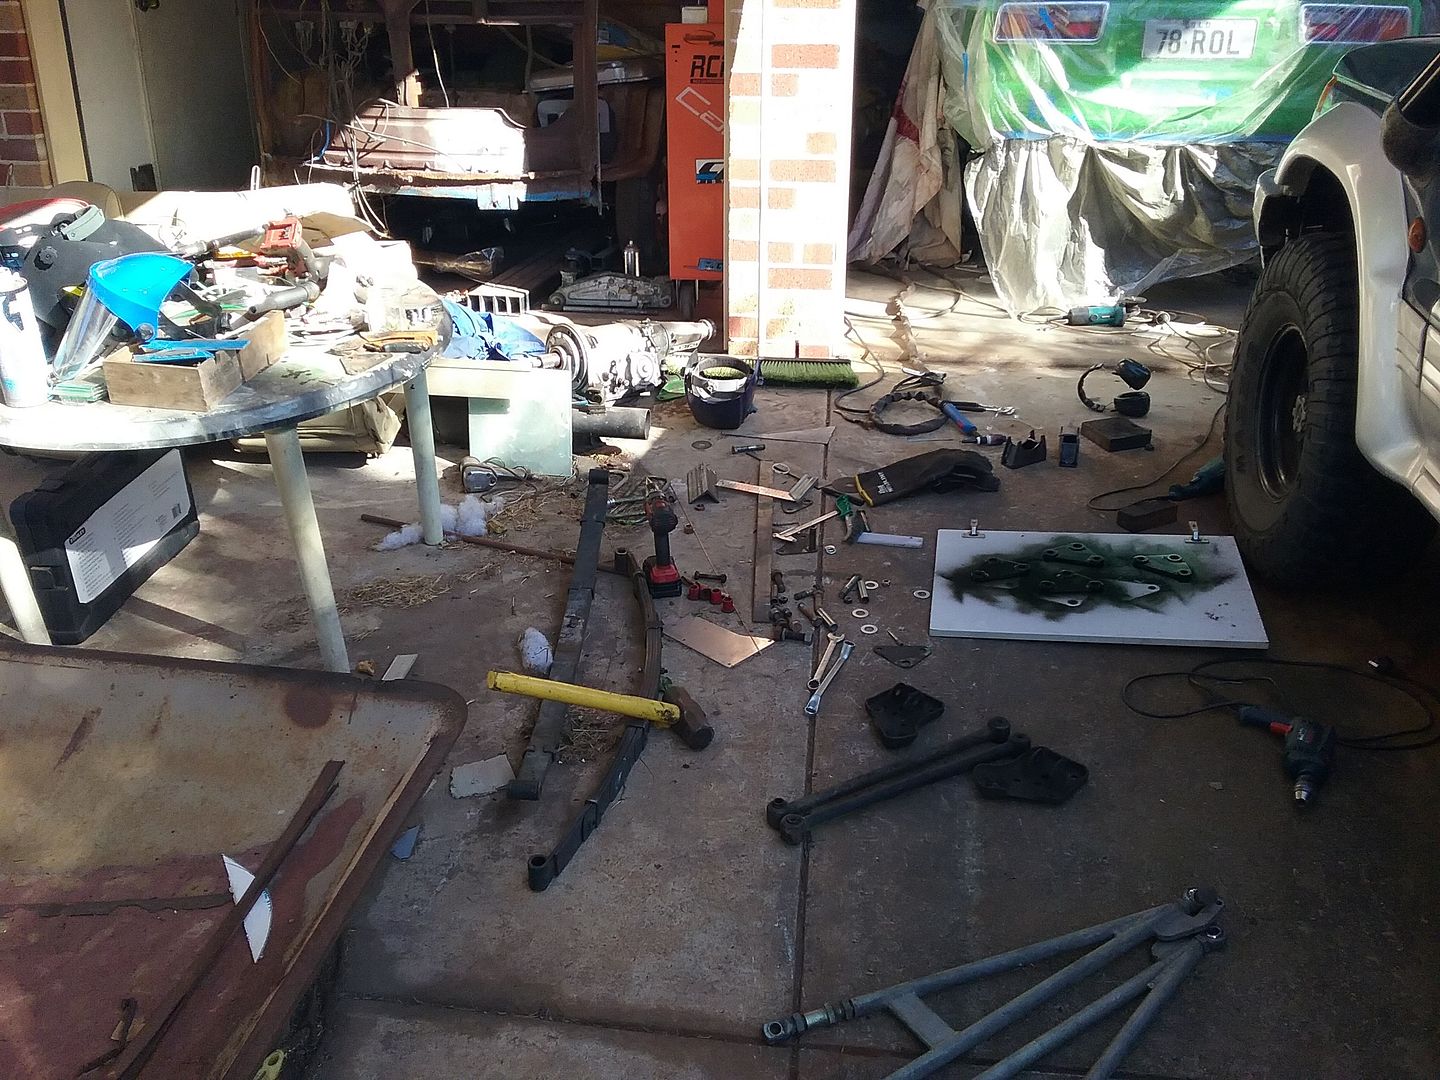
got a lil bit done on the weekend.
finished the diff mounts
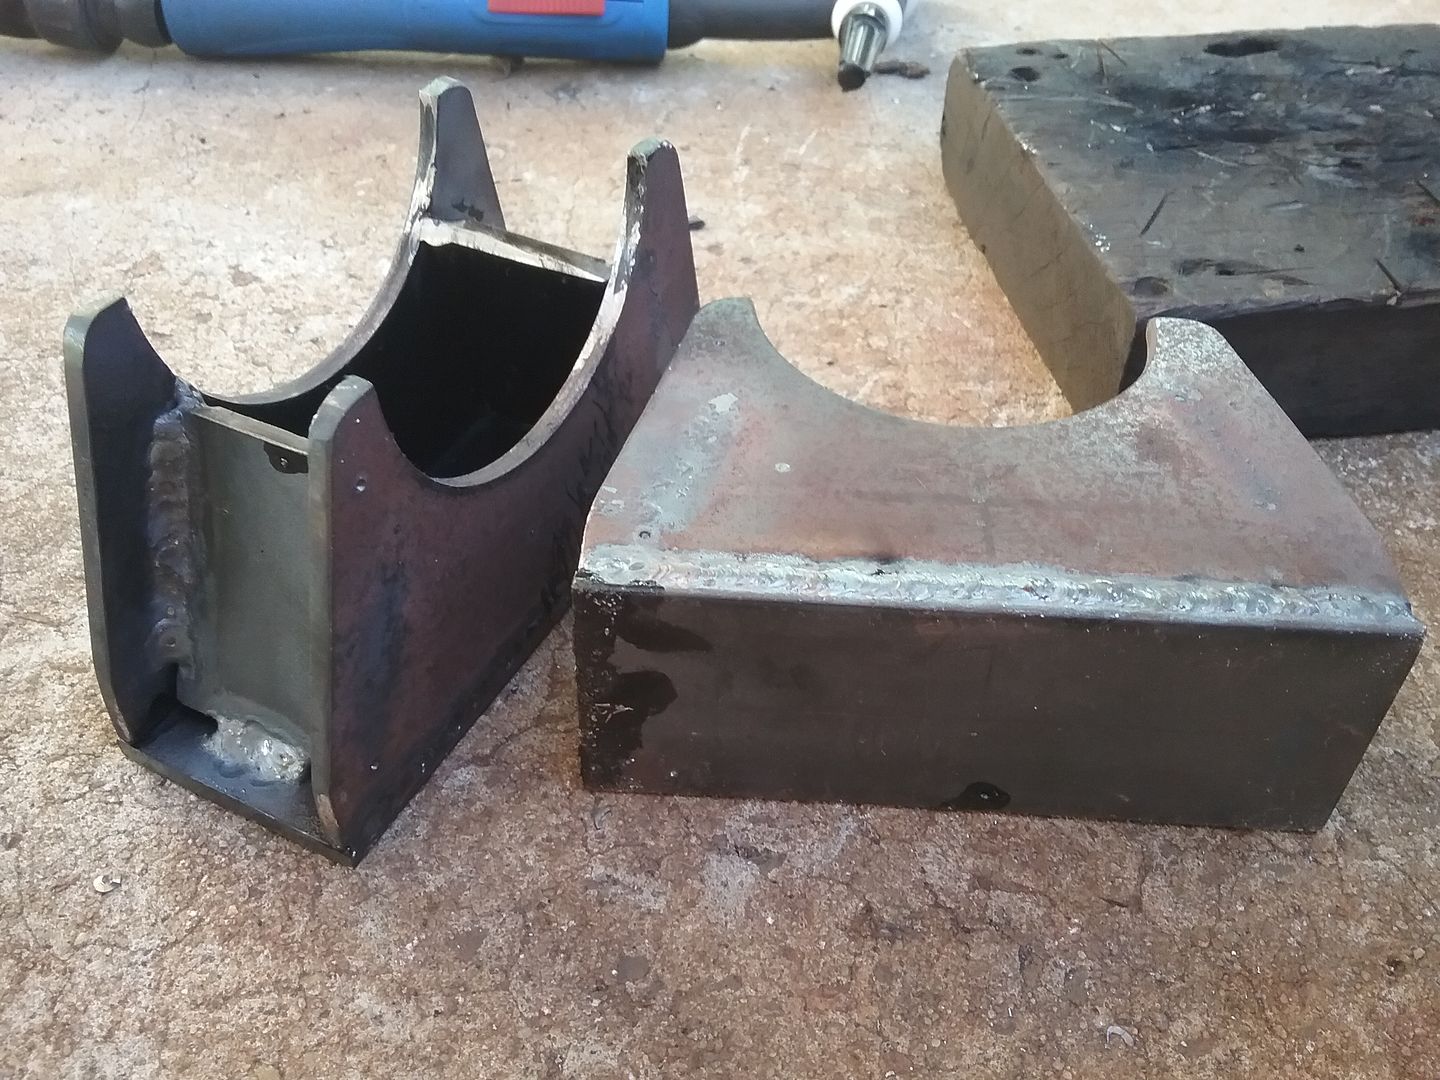
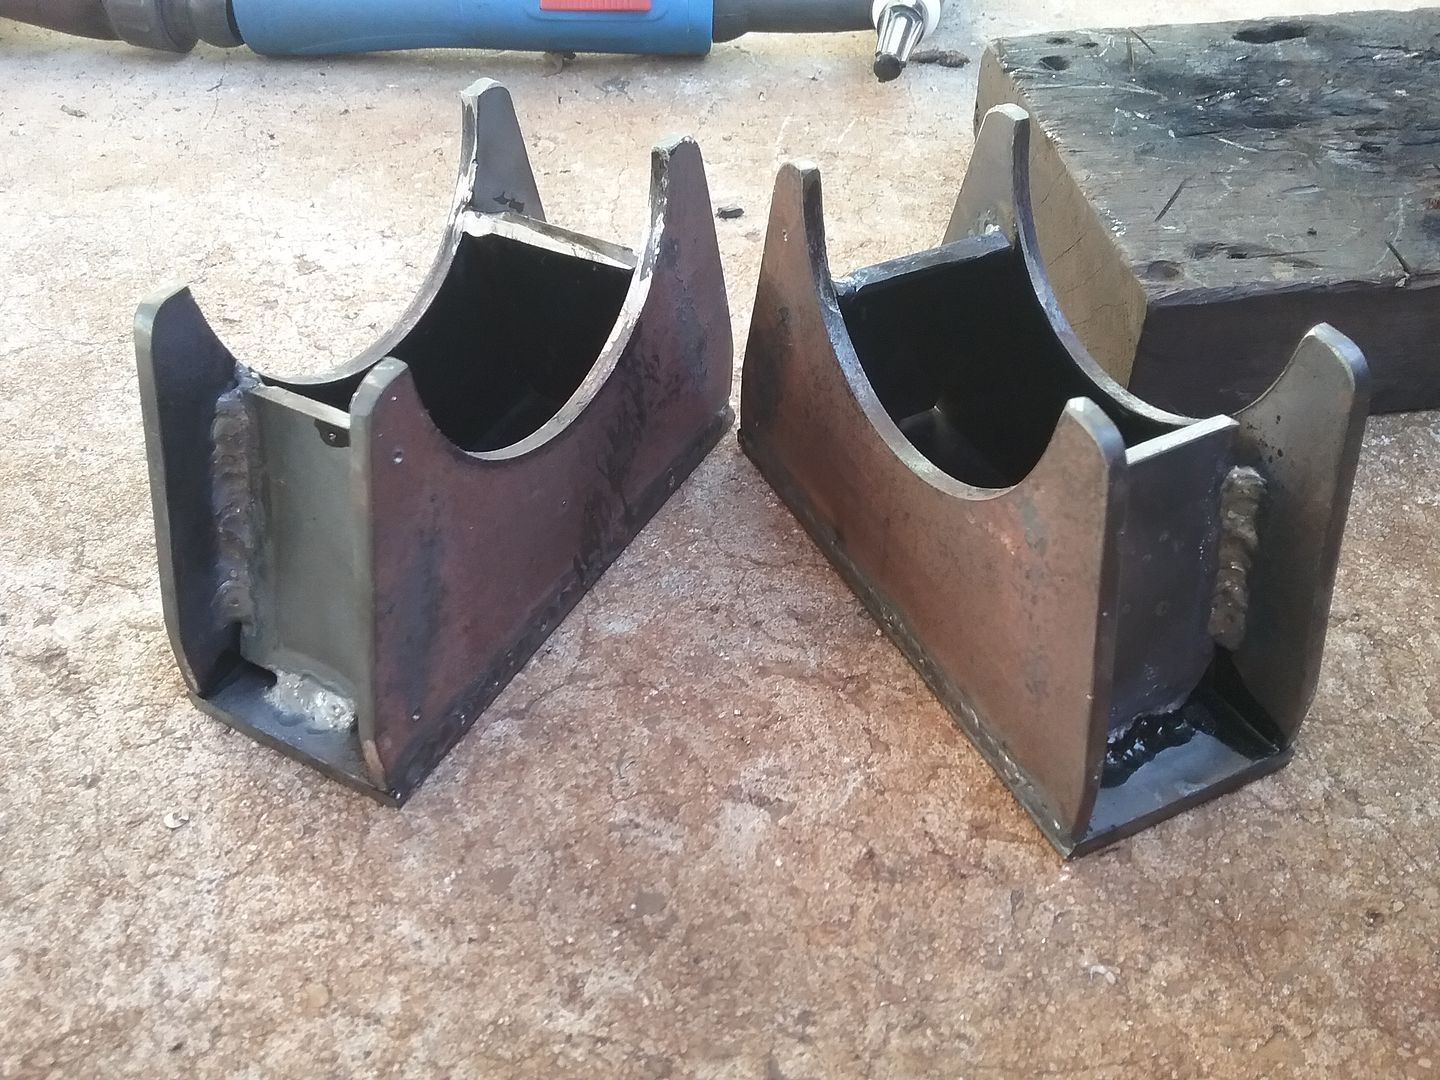
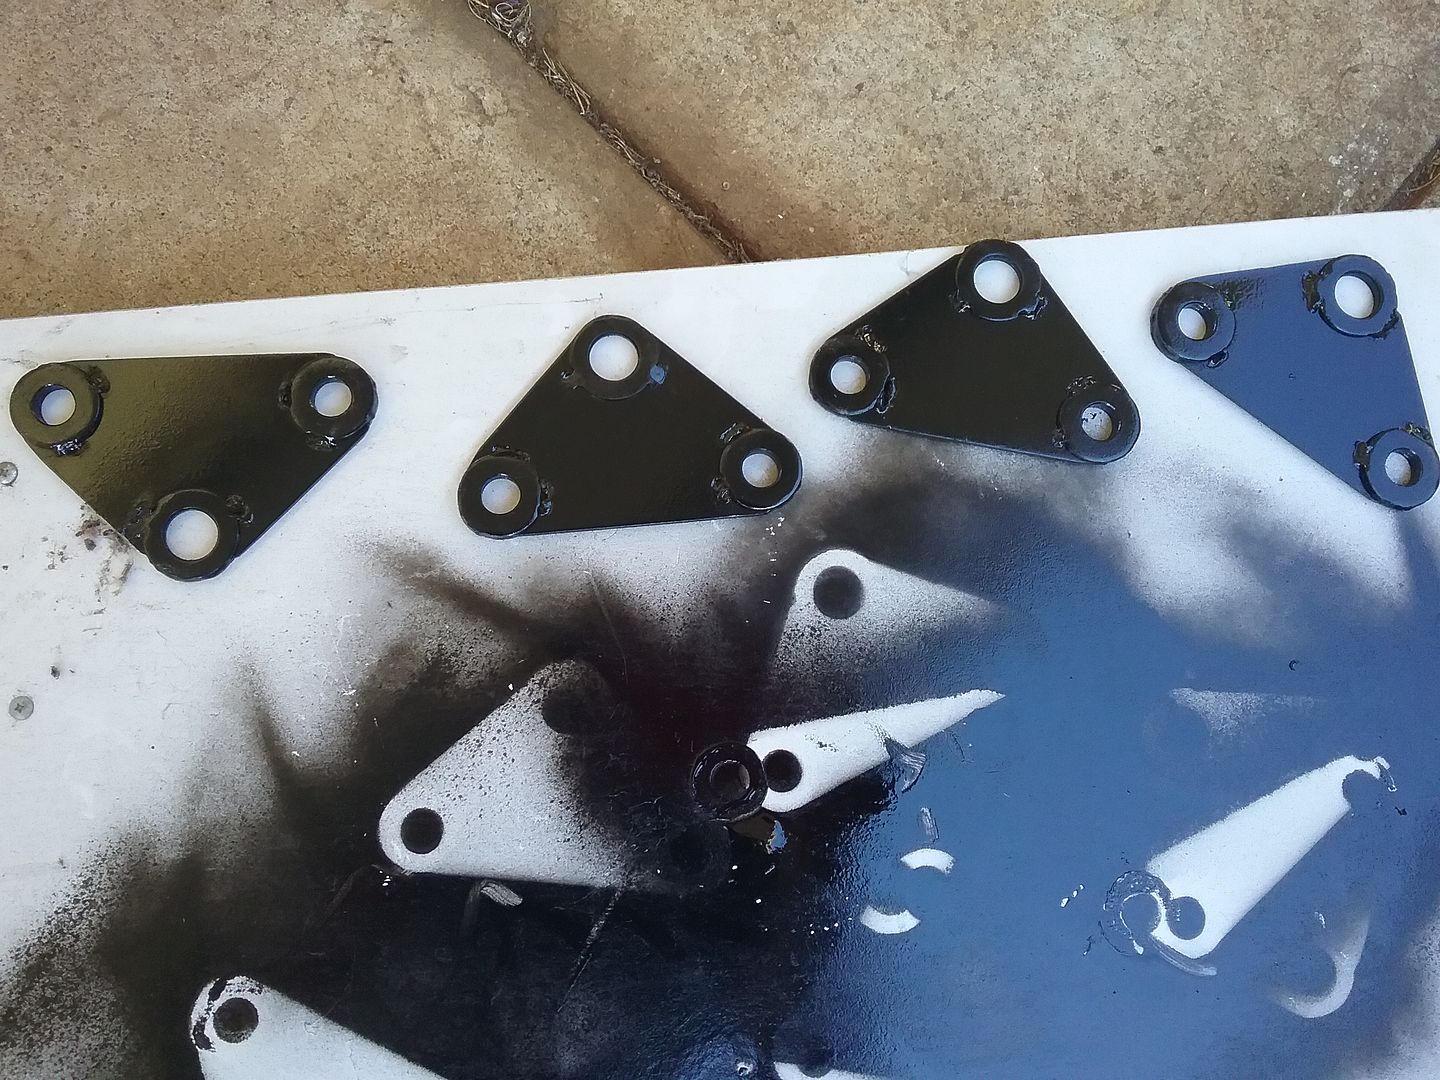
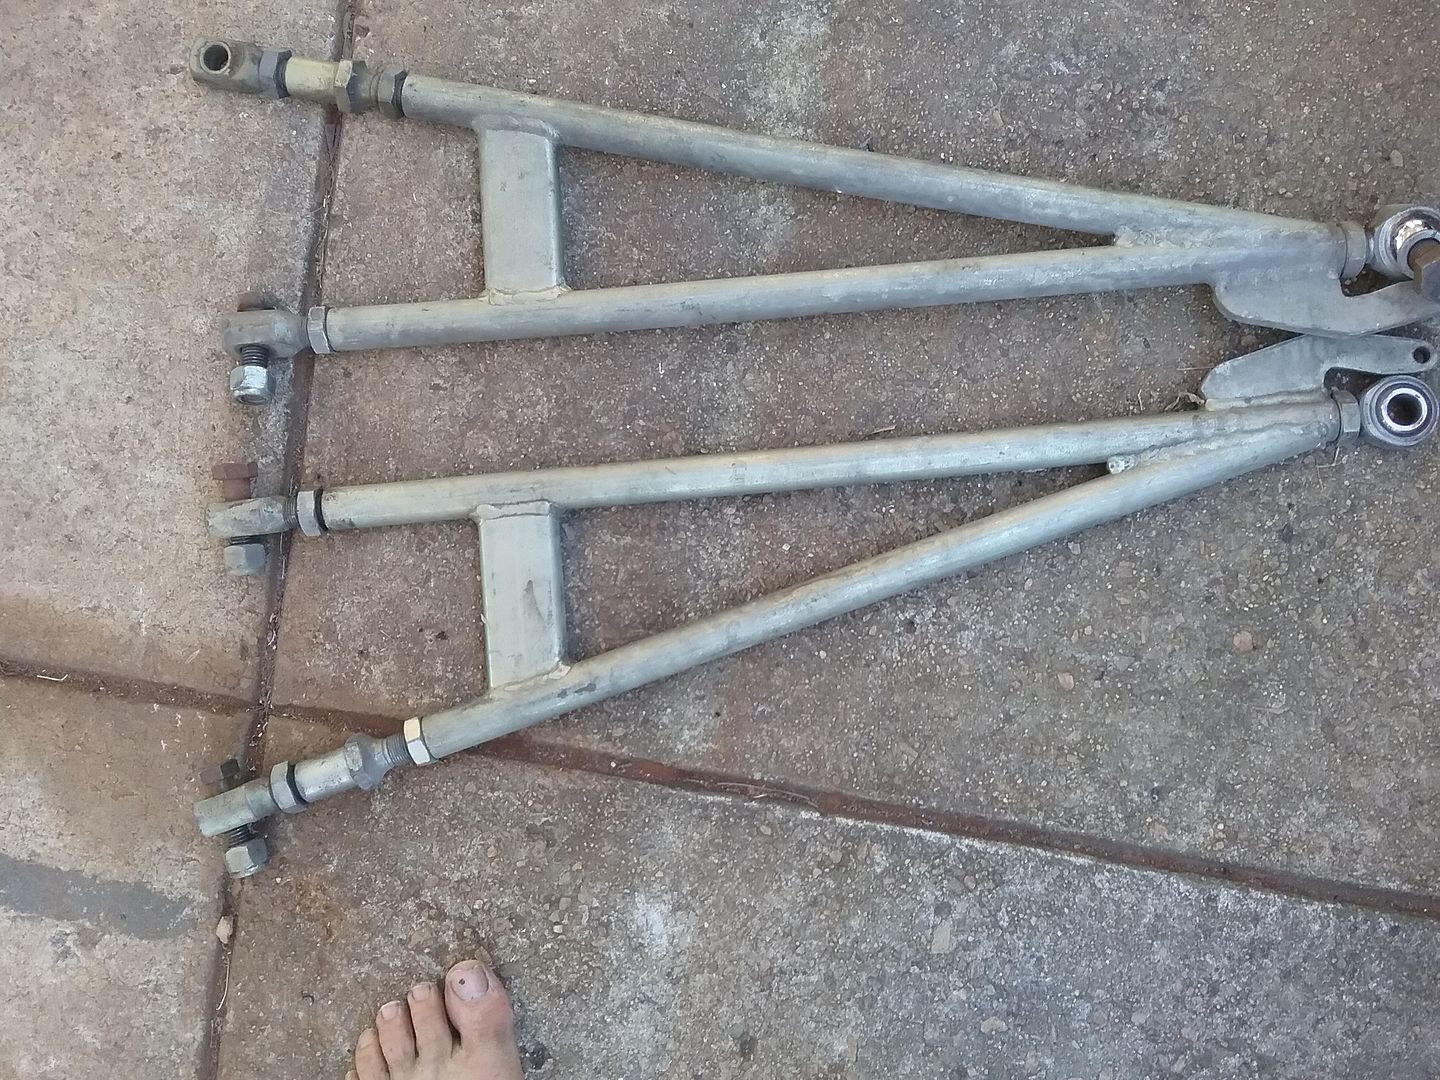
made the new caltrac triangles, old ones were less strong and smaller bolts.
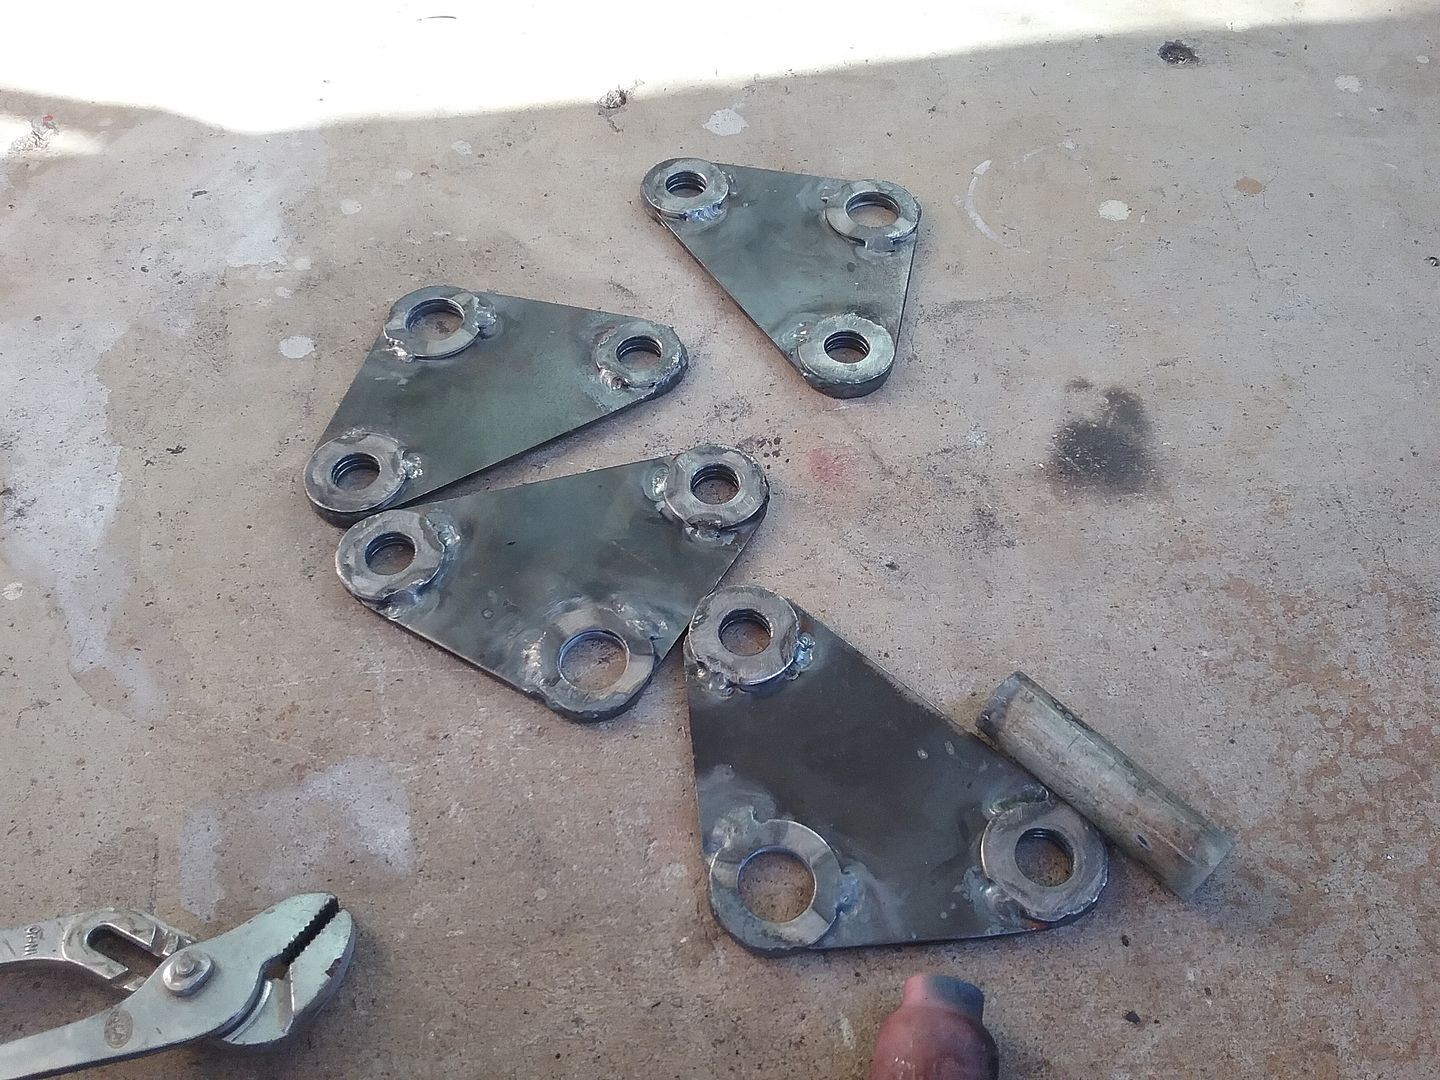
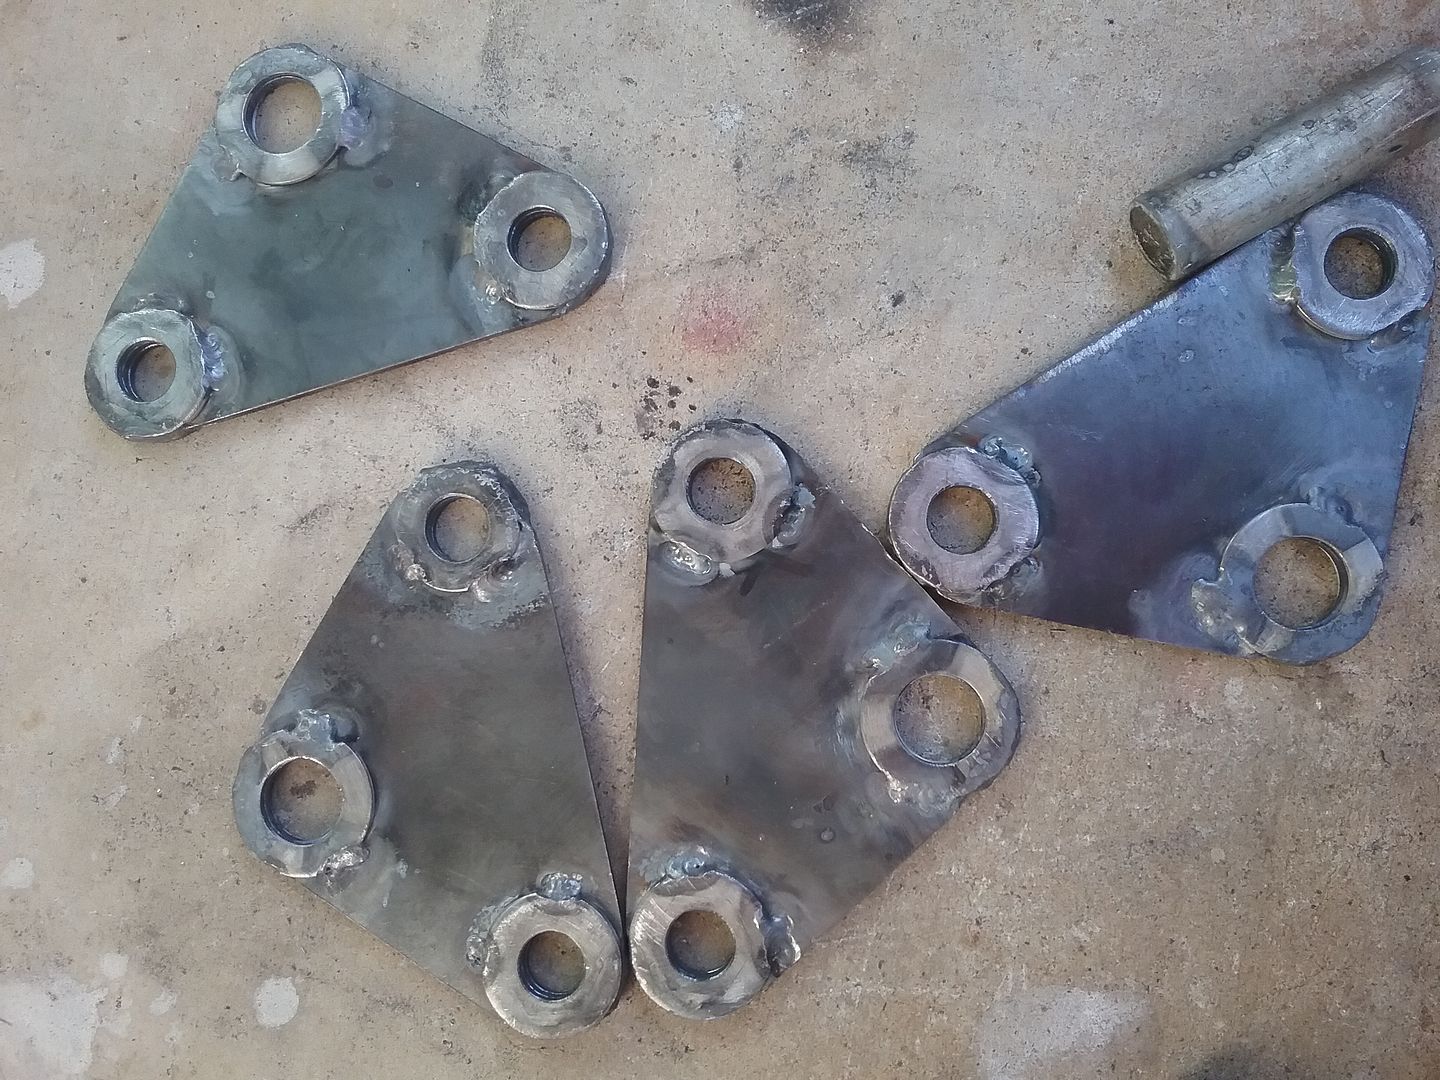
painted
old caltrac arms were made out of commodore panhard rods.
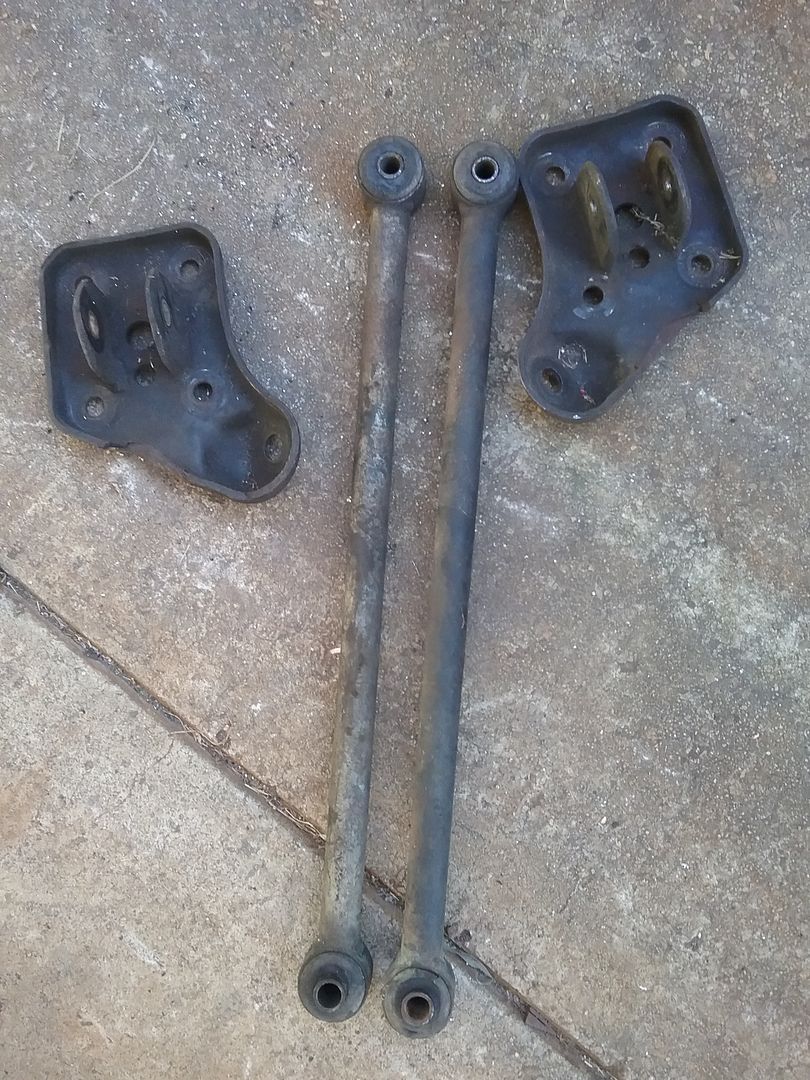
new ones will be made out of these ladder bars I bought at a swapmeet for $80
I removed the car from the frame it was sitting on. and made a new bar that sits under the leafs so i can set pinion angle and centre the diff properly.
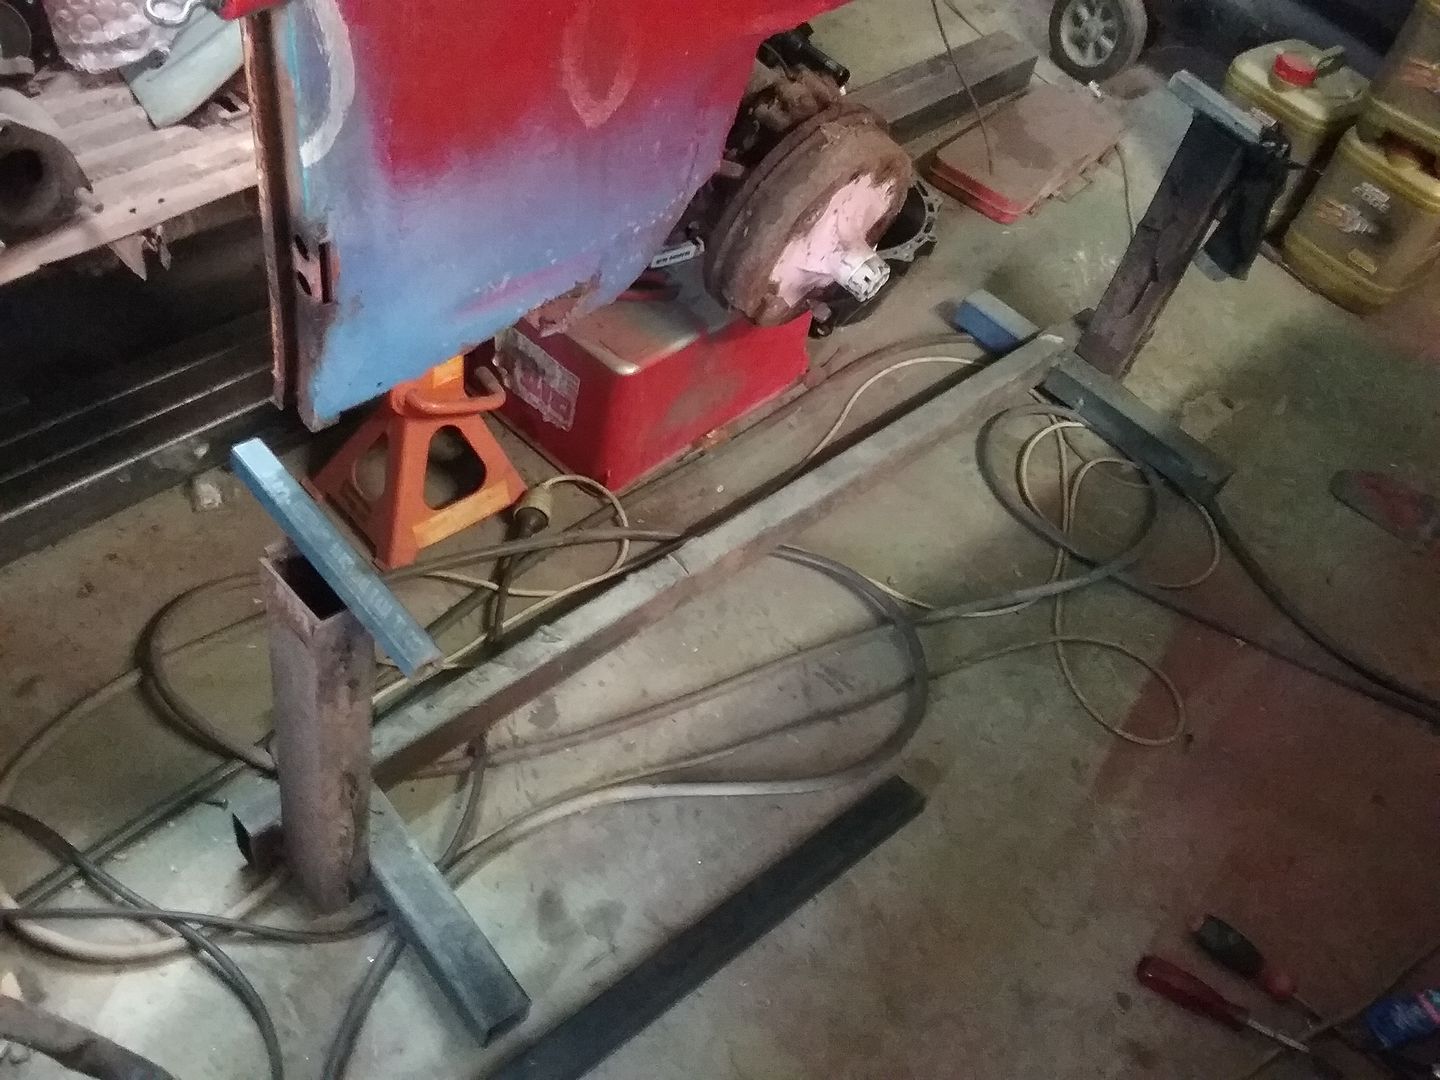
I put a set of wheels on to help measure off.
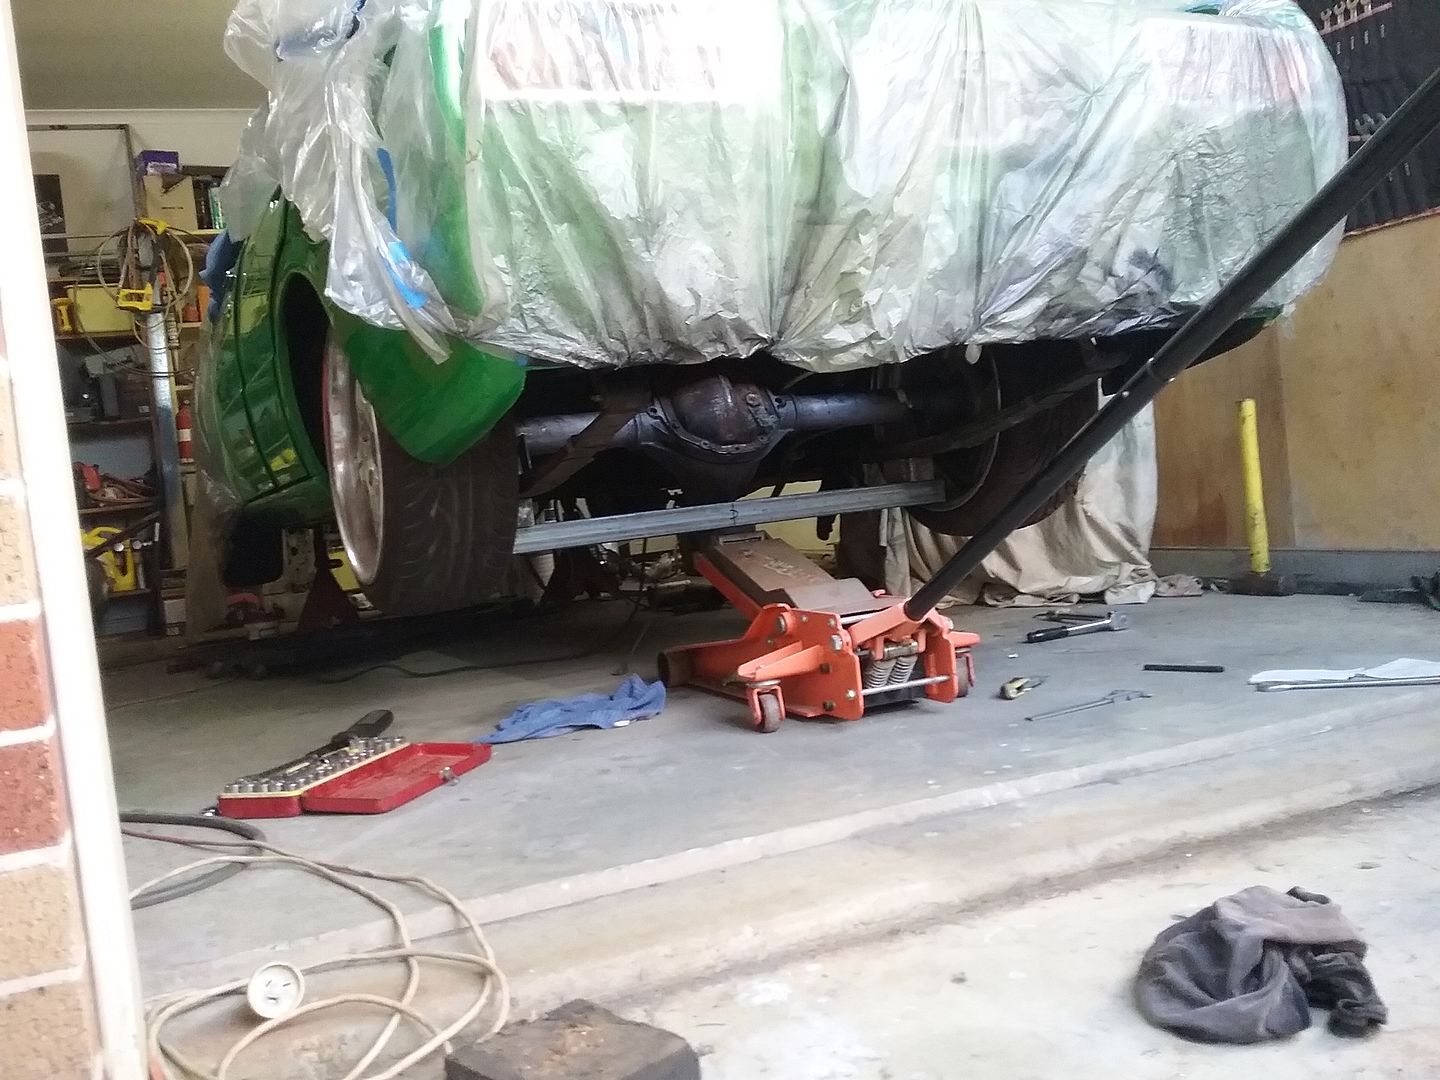
So i got the pinion angle set, diff is mm perfect dead centre so scrubbage should be same both sides, is tacked in place and sitting ready to finish weld.
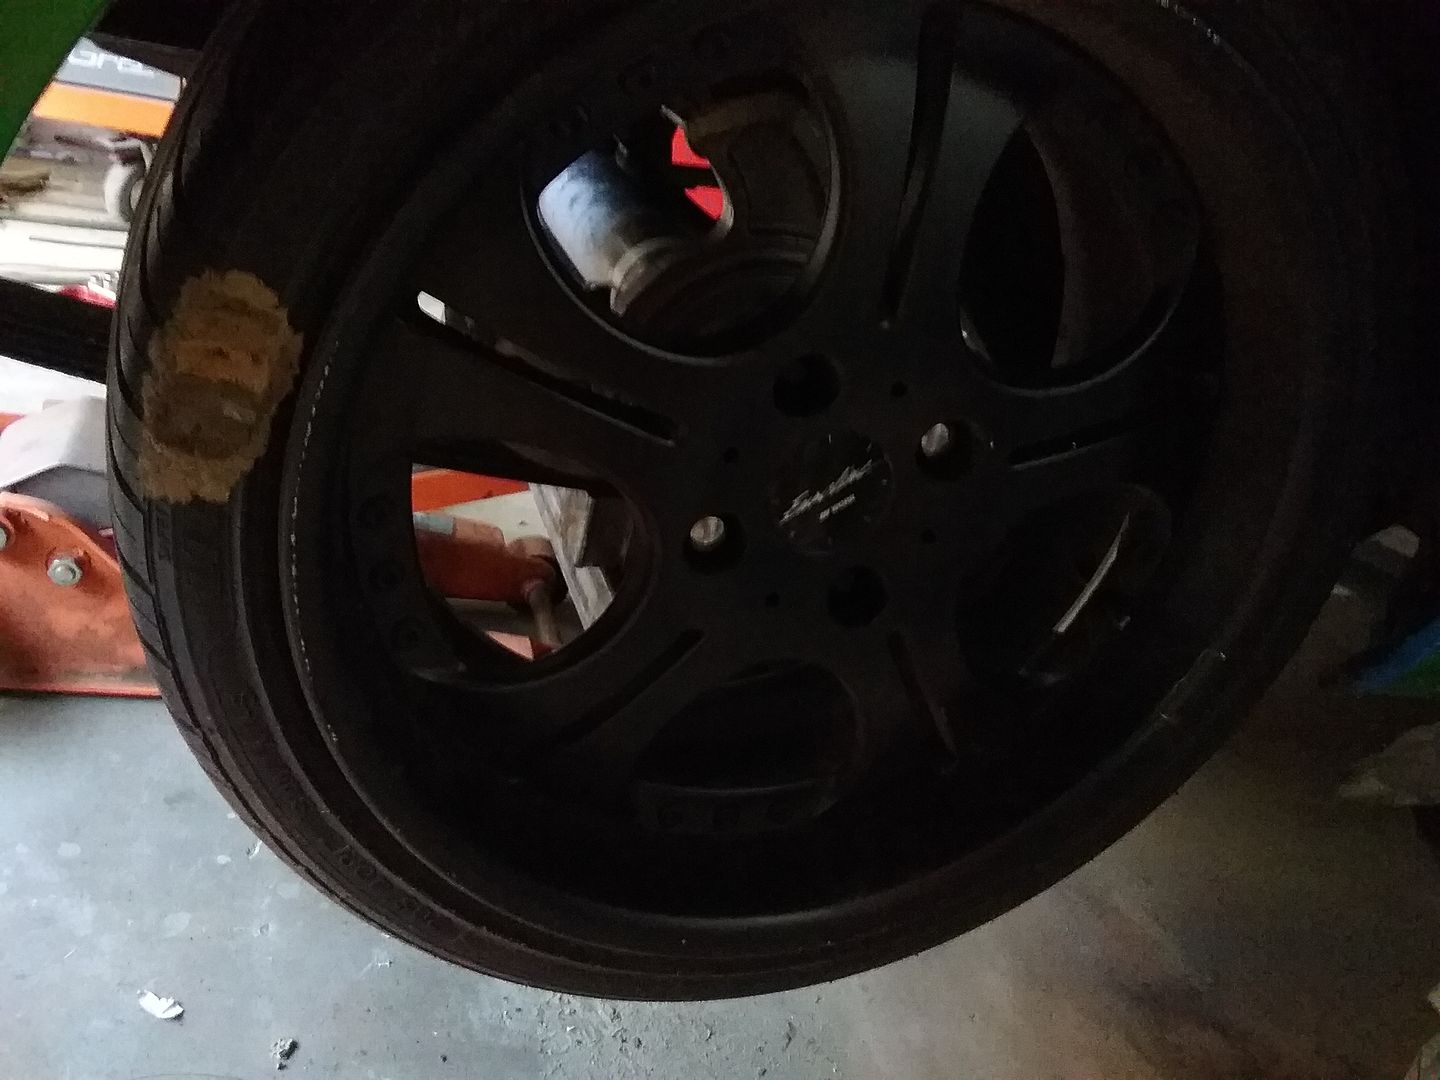
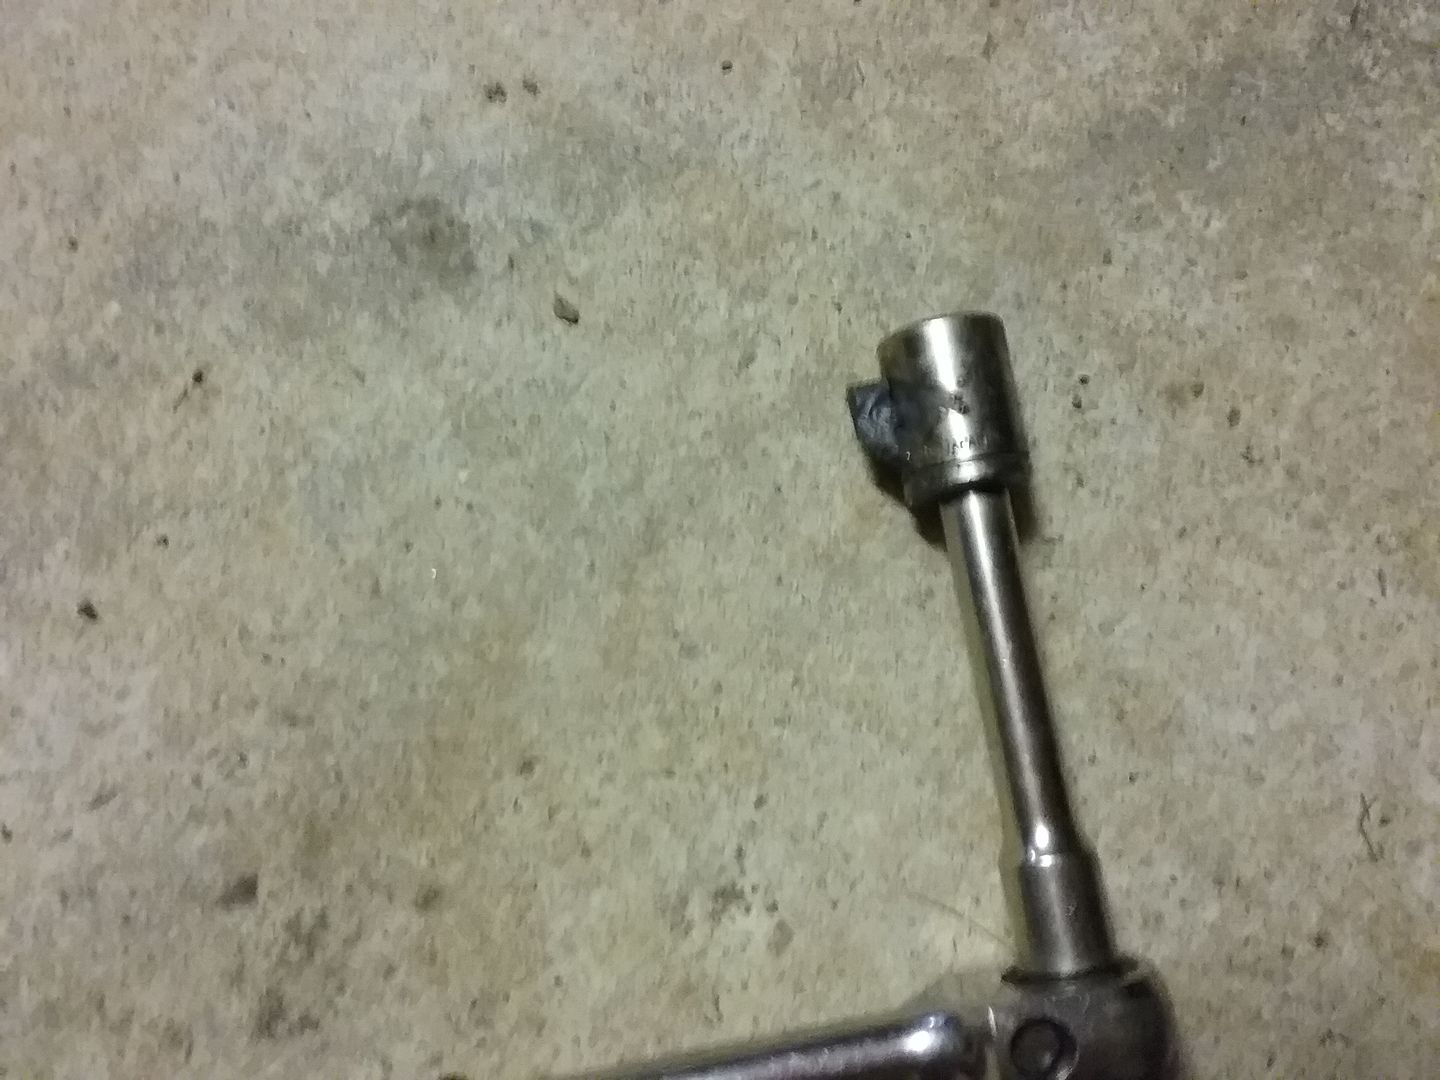
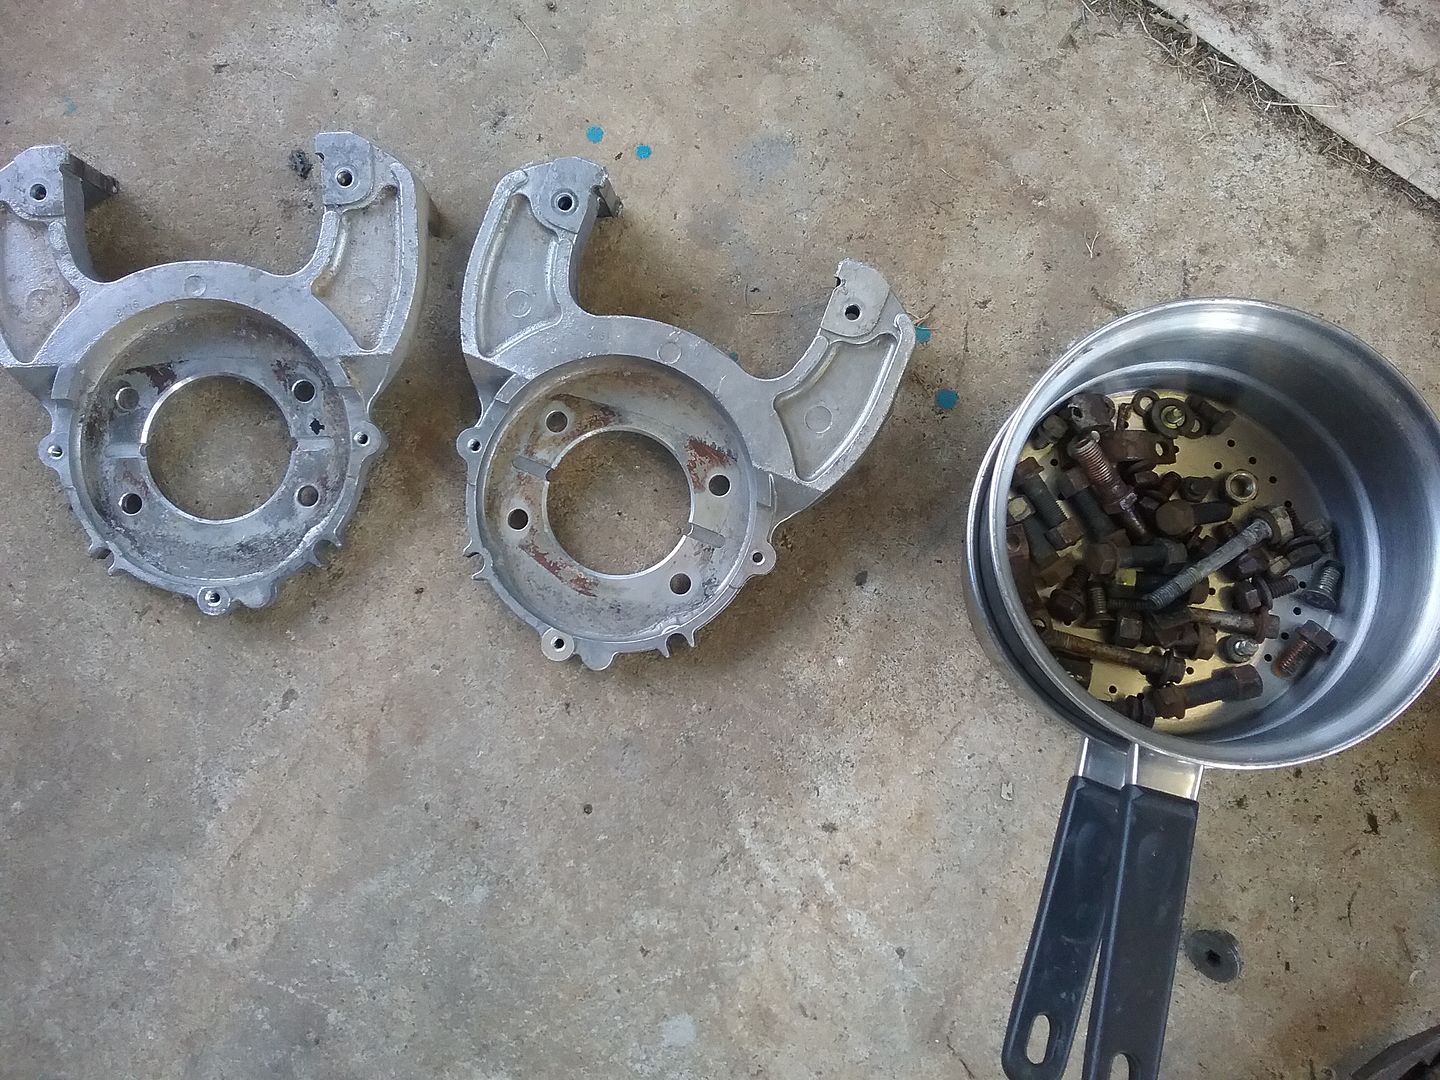
Last night I pulled down the rear callipers, I sold my last diff so these are an unknown. Everyone says these are a real pita to pull apart because of internal handbrake, so i knocked up this little tool, just welded a notch off the side of the socket, that made things real easy to undo.
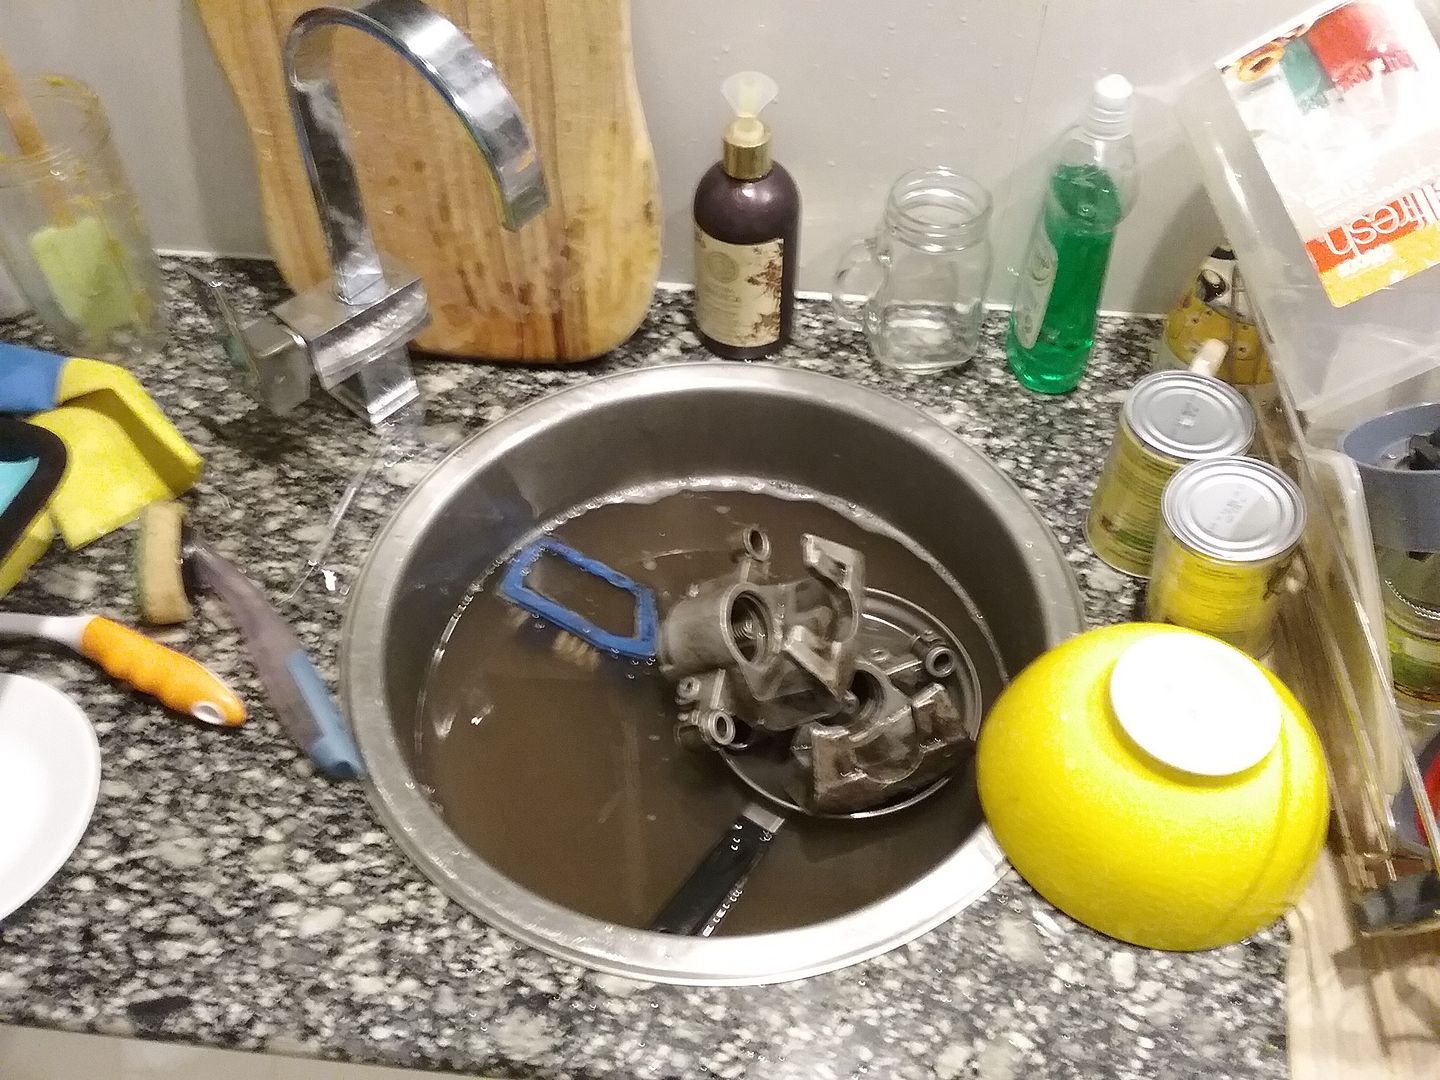
all dry now ready to be reassembled.
-
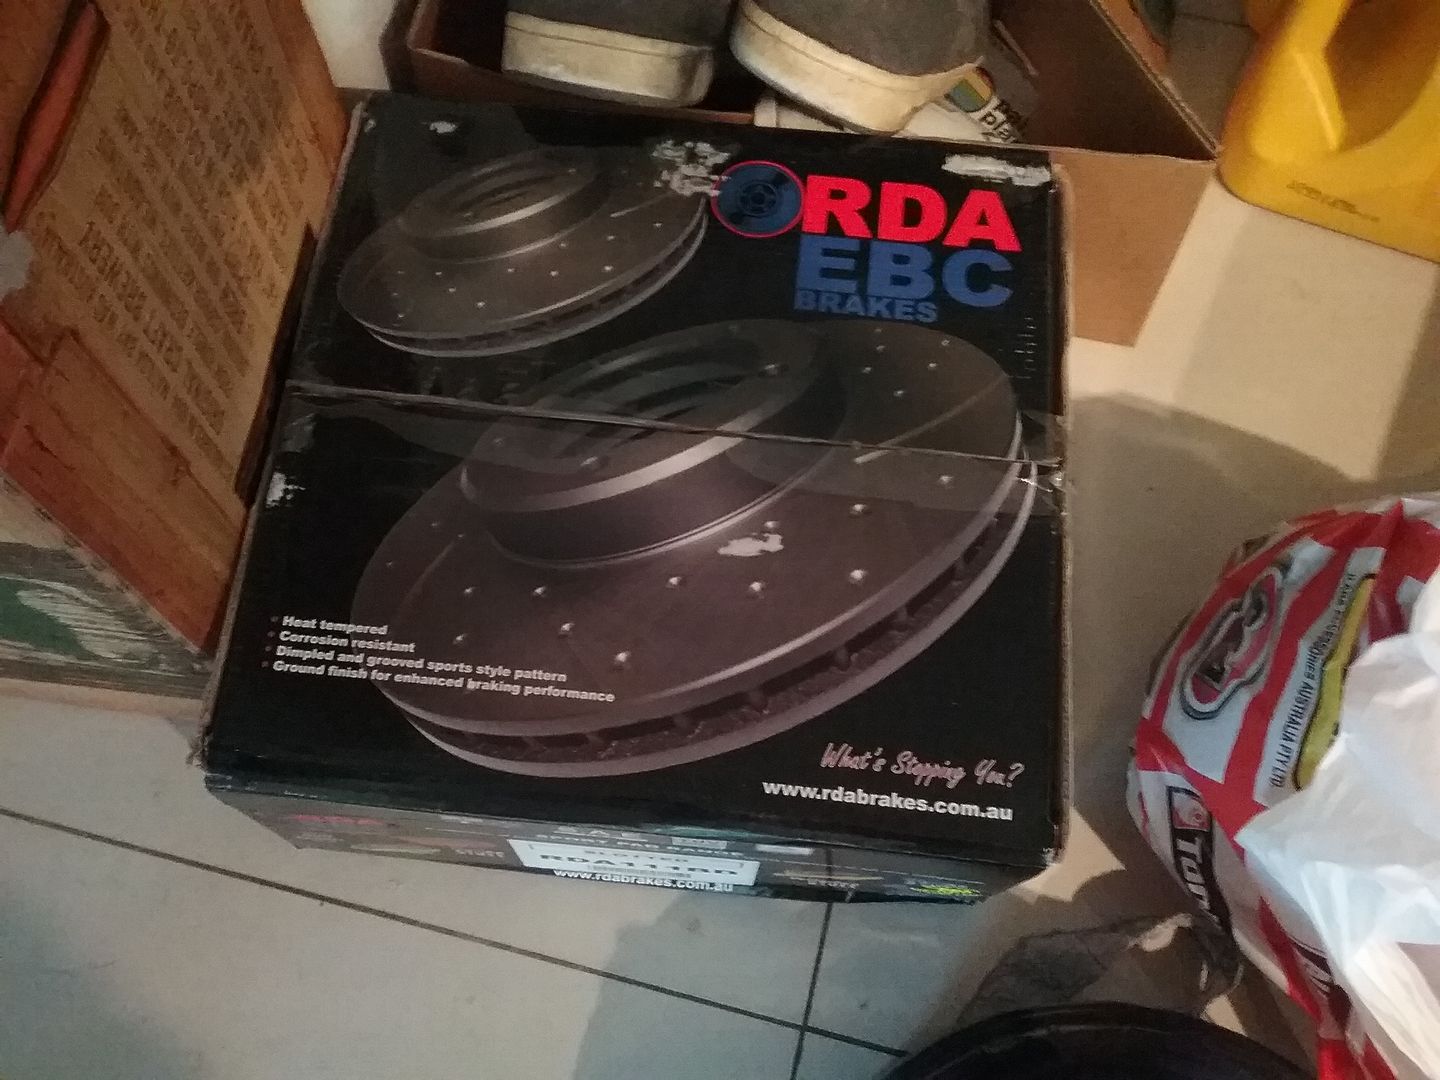
new rear falcon rotors now at the machine shop to go to 4 x 114.3
cleaned up some diff stuff ready for paint
the results of e85 on an old school fuel level sender

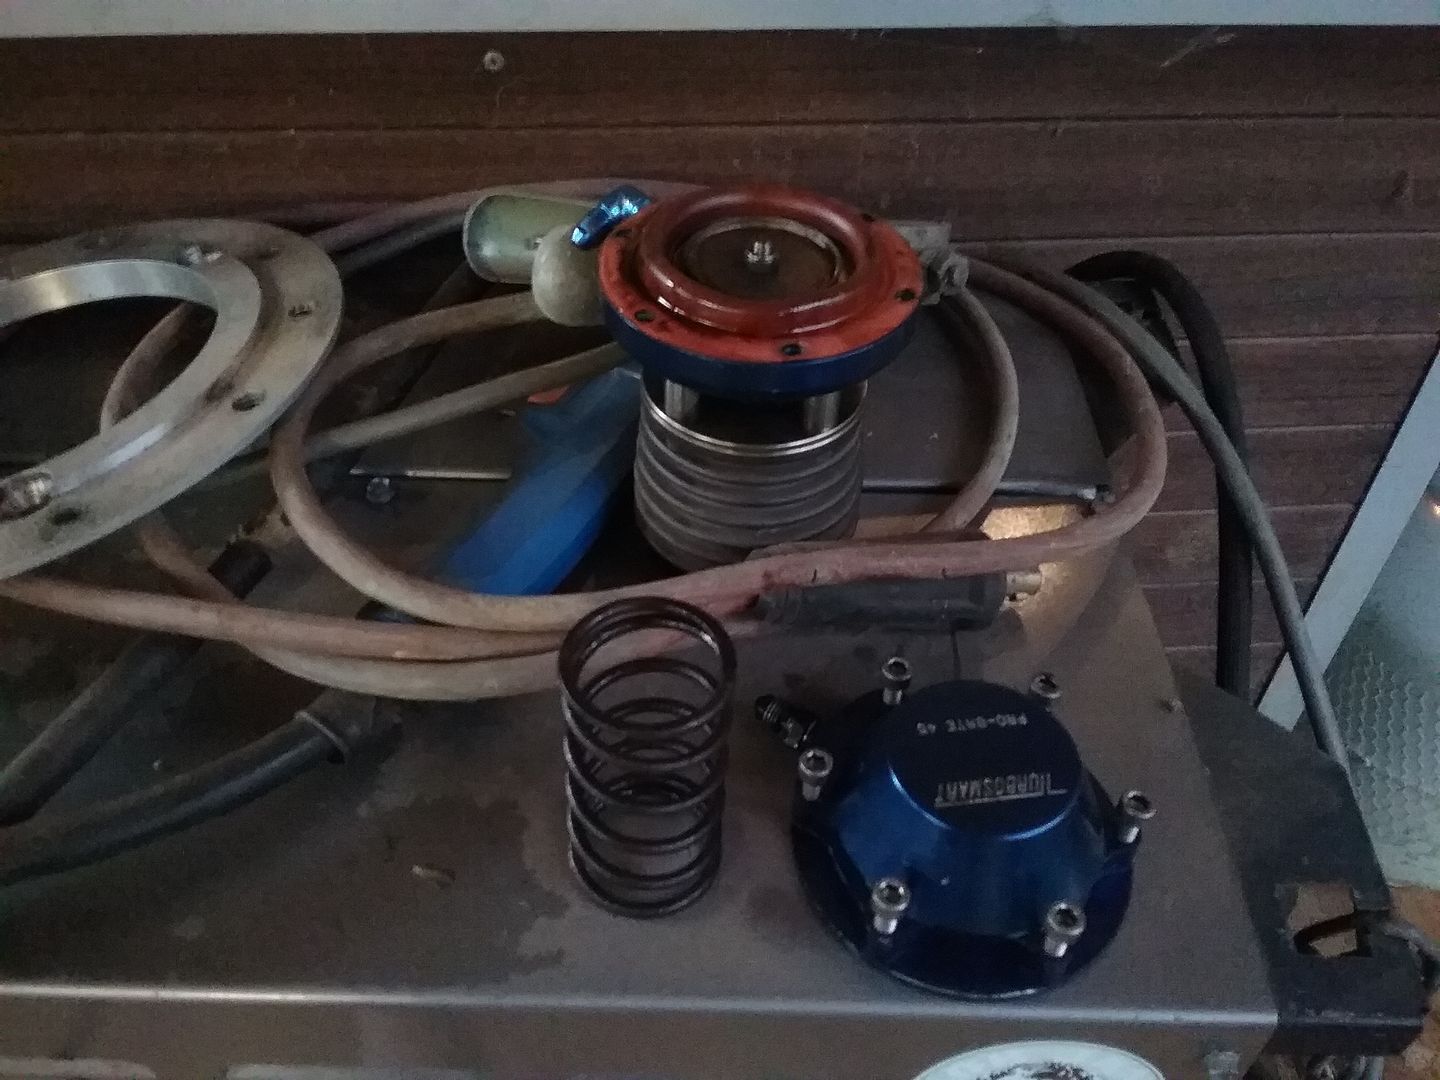
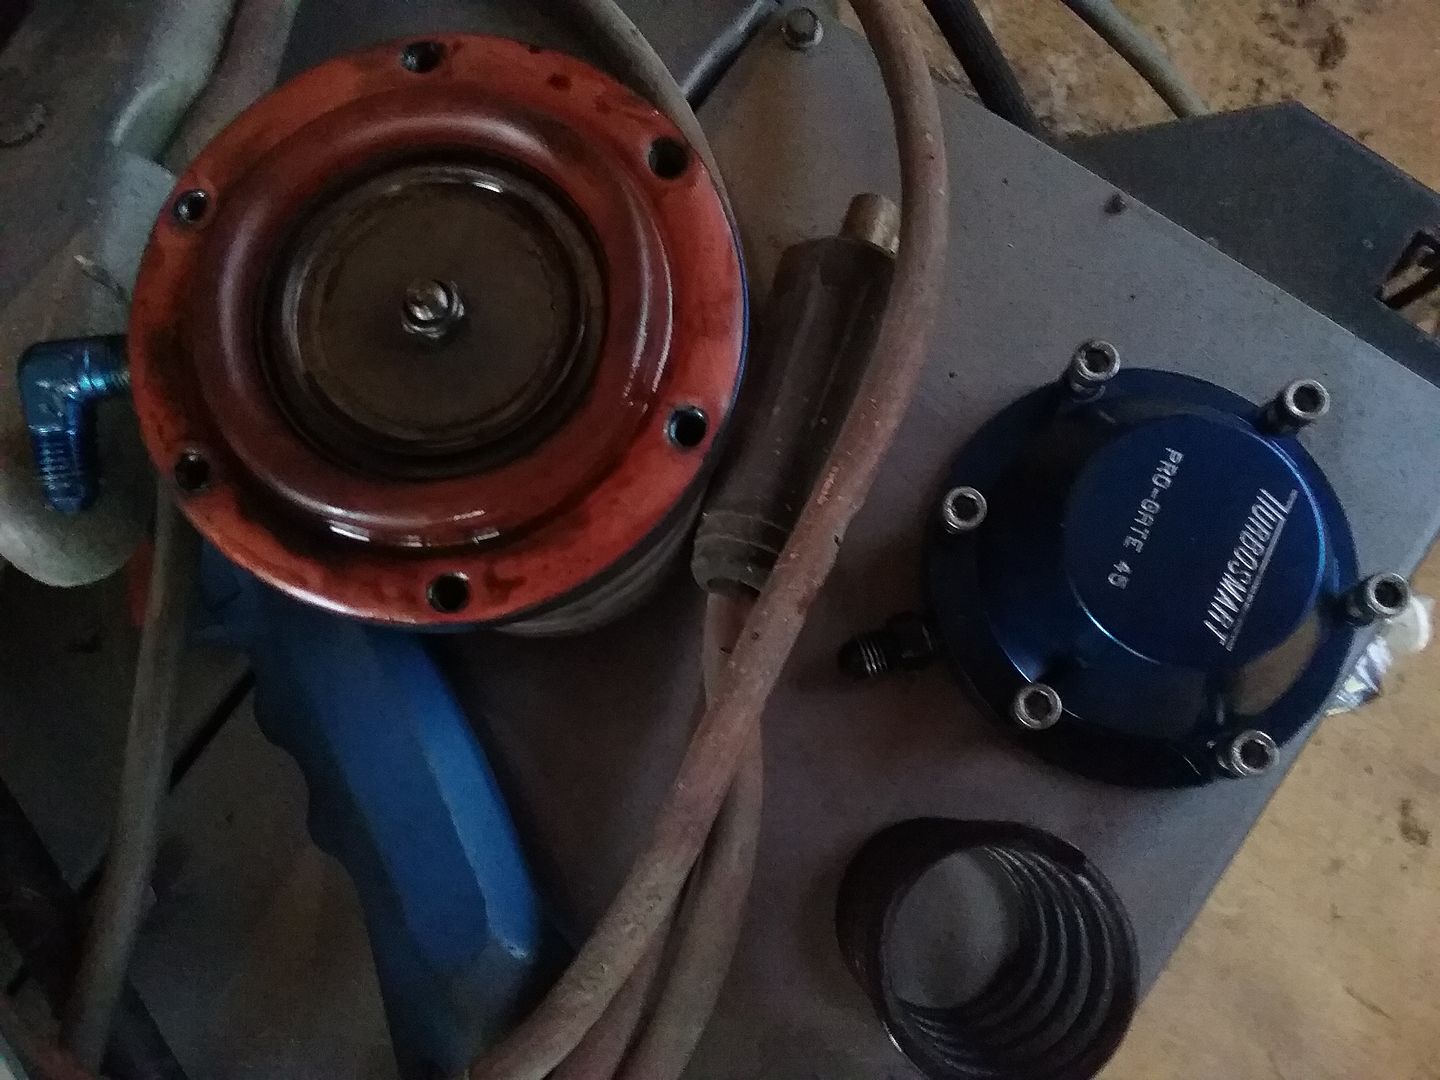
pulled my wastegate off the car, and pulled the lid to check out the diaphram, still having issues with boost level being too low, so just thought i would check it. all good, going back on again.


Matts Ke30......sr20det
in Rollaclub Rides
Posted