

chestikoph1
-
Posts
296 -
Joined
-
Last visited
-
Days Won
14
Content Type
Profiles
Forums
Events
Gallery
Blogs
Everything posted by chestikoph1
-
Thanks mate Fitted up the rad just to make sure it fits with the cooler pipes. Still have to get some decent cooler hoses as well. Coming together quickly now, made a start on the wiring. What a nightmare trying to decipher all these wires, none of the colors match up to the factory corolla manual :D :( ??? Any way here are some pics of the rad and engine bay as it stands.


-
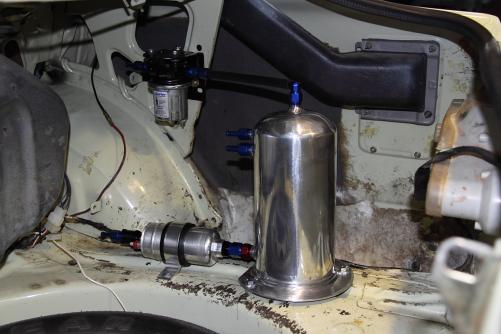
Just got this in the mail, now to go see how it fits. Also a pic of the remote oil filter, so much easier to change filters this way.


-
Yes it does sit off center, i want to flow as much air as possible to the radiator which is still in the factory position. Just running an upgraded 55mm twin core alloy rad in the same spot.
-
Starting to put the intercooler on, fits well. The way i have mounted it leaves the radiator mounts still standard, hopefully get the rad the next day or so. Not sure if i want to black it out or leave it silver, i will decide once its all together if its still noticeable i will paint it black.


-
Looks good Ryan, that shit aint goin no where if it breaks!!
-
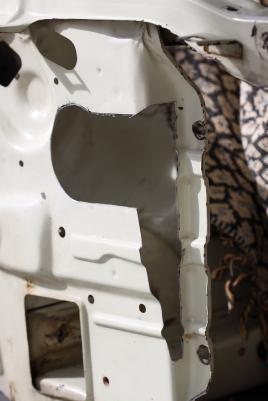
No it hasn't made it too flimsy, but just incase there will be some bracing added to the front panel to it keep rigid. The front panel isn't a structural part of the car. The strength is in the top rad support and bottom cross beam. Here it is all painted, i reckon it looks pretty factory. Before And After


-
Hi mate, Mounting the engine is probably the easiest part of any engine conversion, so don't limit your choice because you think it might be hard to put in something else that may require custom mounts. Its all the other things that come with doing an engine conversion that will give you the shits. But its all fun :hmm:
-
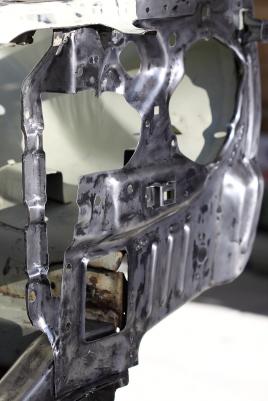
Hours later. Stripped to bare metal and treated for any rust. Managed to get it in etch primer today as well, hopefully get some colour on tomorrow.


-
Hi, It's been ages since the last update but things have been happening, albeit slowly. The car is out of the work shop and at home now, so i can work on it at my own time now and not just one day a week. So hopefully get things done a bit quicker. Since the last update i have started to fit the intercooler, it bolts up sweet with some custom brackets. I have cut away some of the front panel, so it fits with out having to chop the grille and have it stick out like dogs balls. I am in the process of stripping back the front panel and painting it black. Will update with pics soon.


-
Hi, With that listing, i don't think you will get the slotted/vented rotors. In small print is states that if your car had solid rotors you will get solid rotors. Its not an upgrade. They use a generic photo. Just make sure, before you get them.
-
Some more goodies came in the mail, i am thinking of mounting the boost gauge to one side of the ash tray (will get rid of the switches that already there). And i have also ordered a wide band air/fuel ratio for the other side. I have a whole week off next week so i should be able to get stuck into it and get heaps done. I still need to get the intercooler mounted and decide what i am going to do with the radiator. I don't know if to get a radiator made up or to use the s14 one? Any suggestions?

-
Hi guys, What do you reckon? Should look better when its all painted black.

-
One small step closer to start up. Starter motor and alternator wired up

-
Looks great Tally, You must be hangin to put her back together. Keep the pics coming
-
Thanks Mate, it wasn't cheap but definantly looks like an improvement over the stock one. It's almost identical to the factory one in size, the flange sits just to the side of the bottom of the idler arm about 10-15mm gap. The only thing is the angle of the bottom flange isn't the best, wont know until i bolt up the secondary to see if the secondary pipe hits. Take some better pics on the car when i get a chance if you want?
-
Got this from japan in the mail the other day. 3" Tomei stainless dump pipe Neatest bit of welding i have ever seen, must have been done by a machine.


-
More progress lately, got the surge tank nearly finished. Just waiting on some efi fuel clamps to finish it off. Also the dash is coming along nicely. Going to get rid of the ash tray and put in another couple gauges, boost gauge ( one that reads more than 7psi :jamie: ) and air/fuel ratio gauge. I don't get why more people don't run air/fuel ratio gauges, often your first warning that your starting to run lean especially when running higher boost and factory tune. Noisy exhaust, loud stereo and your not going to hear pinging.


-
Hey guys, In the middle of wiring in the sr20 electrics and dash into the ke55. I am using the Gregorys manual to find the right feeds, but none of the colors match up to the ones in the car. Even the plugs that i know don't even match the colors in the manual. Not even close!! Is there different wiring colors for cars built in aus/jap or years of manufacture? Any help would be appreciated.
-
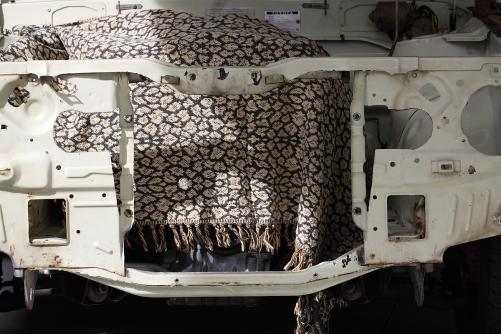
Have made a start on the inside of the car, ripped out the old sound deadening off the inside of the firewall and stuck on some dynamat. I want the cabin to be nice and quiet. This stuff is great, easy to apply and it moulds well into all the undulations.


-
Their meant to be great speakers, looks good. Did you try to mount the x overs inside the door cavity? If that doesnt work try the kick panels.
-

What Offset Can I Go To For A Ke55 For Rims?
chestikoph1 replied to Twitch's topic in KExx Corolla Discussion
Your offset, put simply is the amount of rim, to either the outside side or the inside of the center of the rim. So if you are running a 7 inch wide rim with a 0 offset, you would have 3 1/2 inches of rim towards the arch, and 3 1/2 inches of rim towards the diff. Hope that helps. By the way, i run 15 x 7.5 with 0 offset and they fit great with a little bit of dish. -
Thinking of getting a Greddy ProfecB II to control boost on the SR. What have you guys used, and how well did it work? Was it easy to set up? How much was it? Cheers
-
Well another week passes and some more work done. I got the crossmember and gearbox mount back from the powder coaters today. Covers up my ugly welding well. Put the engine back in the car for the third time now!! Hopefully for the last time, although i have feeling it may need to come out one more time, i may need to massage the tunnel slightly towards the back of the box. Also started to connect the heater hoses, what a pain in the ass it has turned out to be. The outlets on the SR are 3/4 inch, and the outlet on the heater are only 1/2 inch and are right behind the head, bloody awkward. So i cut the outlets off and reversed them so they point down, and i will have to get a couple of reducers. Gave the engine bay a bit of a clean before i put it in. :)


-
I still have the standard ke55 one for the moment, it drove ok with that on. But the brake pedal was a bit sensitive, i was going to wait and see what the felt like after the rear disks are on, but most probably go up to a 1 inch master cylinder. I think there is 15/16 commodore one that will fit, or i might get my one bored out. Hope that helps.
-
yeah i know i know >| At least their shiny and blue, and have Speedflow stamped on them. The screw on ones would have cost a fortune for the fuel system. And i couldnt be bothered getting fittings welded on to the bundy tube off of the tank and under the car.


