charl
-
Posts
230 -
Joined
-
Last visited
Content Type
Profiles
Forums
Events
Gallery
Blogs
Everything posted by charl
-
not sure about the price on a centre console, but ill let you know a little later on today. I'm going to upullit straight after the exhaust place.
-
hey i just wanted to say thanks again for your help today Ryan. if it wasnt for that id still be in the dark!! yeah the headlights are still working really perfectly. as for the horn the fuse blew so i will have to try again tomorrow. now ive gotta get the exhaust sorted tomorrow and hopefully get my centre console too. ill be sure to put some updates up as soon as i can. cheers charl List of things to do this weekend: - get exhaust fixed - get paseo centre console - install console - install stereo - start designing custom dash
-
yeah thanks for that! it will be most useful to me.....
-
WOW, thats nuts!! congrats on your success mate i hope she serves you well.
-
so the little black rolla had its debut drive today, first time since i got it about 3 months ago. i went and regoed it today and now its officially mine! funny thing though, rego dept said its registered as a 1970 model according to their paperwork, can this be true? i thought it was a 72 model.... but it doesnt matter anyway because this opens a world of possibilities because its pre 72. correct me if I'm wrong. also if you guys would be so kind as to point me in the direction of what is legal on such an "old" car i would be most appreciative. anyway, back to the drive. my exhaust doesnt bolt up quite flush to the extractors so there is a MAJOR leak right there and needless to say this makes it sound like poo. this will be fixed on saturday though. but apart from sounding crappy, the car was feeling like it was missfiring a fair bit. could this be due to the exhaust problem? i hope so cause then it should go away saturday. i suppose i should change the oil, filter, fuel filter, leads, sparkplugs, and maybe points as well? it ran under half temp all the way from my place to bunnings munno para and back and a bit of side street action along the way, idles like a dream. I'm so happy that RAGIN' is on the road at last! but not near finished unfortunately. but driving it will inspire me to do things even more quickly!!! already had quite a few comments about the car and i was very happy about it! anyway, i think ill go take a bit of a siesta for a while as I'm heaps tired. cheers charl
-
just a walkaround of my RAGIN 20 as it sits at the moment, heaps dirty from the rain!! i wanted to put my new wheel on but guess what, it doesnt fit on my bosskit! :rocknroll: so the one thats on there will have to do for a while longer i guess! and heres a tip for when you want to paint bolts, put them in cardboard like this and you wont get paint all over your hands!!


-
oh, look what rocked up in the mail the other day.... I'm thinking that if enough people are inerested ill use it to make fibreglass ones and put them up for sale!

-
my "wicked" engine bay with its "custom" wiring. and remote brake booster this is the relay that i am talking about in previous posts. the headlight wires go straight into it and there are three wires coming out from underneath it. its this middle one that doesnt go anywhere and i want to know where it is supposed to be connected to.


-
dash is next on my list of things to do, oh and the headlight ring just rocked up, thanks scott!!


-
door trim update....


-
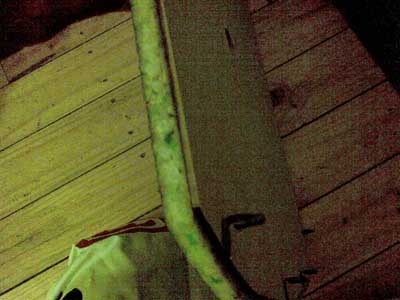
Time to do the parcel shelf, Safety first!! first we made a dummy template out of cardboard and slightly adjusted the size and trial fitted it until we were happy with the way it sat in the parcel shelf. then we marked the cardboard out on some mdf and i cut it out with a jigsaw. included some holes for my fusion 6 x 9's then we glued the mdf to the fabric, same as doortrims. cut the holes for the speakers, also left heaps of extra fabric on the edges because the parcel shelf sits flat and leaves some metal exposed so i wanted to tuck the fabric in under the window seal. i glued it into place. couple of shots of the shelf sitting there, while i contemplated how to do the "tucking" i started to tuck it in and was very happy with the results!! i screws the parcel shelf down by using self tapping screws from underneath through some existing holes in the shelf support. and here we have the final product, looks excellent i think!! now ive gotta get my venetian in there!!! which by the way is out of an old mazda 929 and I'm just gonna cut it to fit. if you havent figured it out yet i like doing things myself as cheeply as possible!!!


-
Ryan that sounds like a great idea!! let me know when is convenient for you and we can organise it. tonight i am home till about 6 then going to go look at a ke55, as for tomorrow, i am home all afternoon after 4pm. fridays free and as for the weekend, you name a time and ill make sure I'm here. thanks heaps for your help charl ...........and now to go take some photos for you all to peruse.............
-
HELP!! i am at my wits end with my headlights, i have looked at the diagram and it doesnt match up with my wiring. i think someone has done their own wiring under my bonnet. :lolcry: i know an auto electrician is gonna be expensive, and i don't really have the money for that either. there is a relay thing in the front of the car that the headlight wires go into and at the bottom of it there are 3 wires coming out of it. the middle one of these is not connected to anything, but is taped up so i figure this needs to be connected, can anyone enlighten me as to where this wire needs to go? please reply soon, i need headlights to drive and i want to have it regoed by the weekend if i can!! thanks Charl
-
would a pair of Stromberg CD150 carburettors with linkages from Triumph 2500 be any good on a 5k?
-
well it certainly looks like you have yourself an awesome starting point for your project!! looking forward to seeing the progress in a thread here soon. cheers Charl
-
hey tally, your project is coming along quite nicely! i can't wait to see it finished, then we should catch up for a bit of a cruise!! cheers Charl
-
spent most of today putting the car back together again to make it "drivable" as this rainy weather and extreme cold at 5 in the morning is making me not want to ride my pushbike to work anymore!! ill post some pics tomorrow if i can get my hands on a camera. ive still got a long way to go but at least its coming together nicely. ill show you my trims tomorrow. cheerio charl
-
and now for my next question.... ive been reading up on the forum about what to do to a 5k to get some decent power out of it. now i want to stay "legal" if i can but I'm after a recipe for success with my 5k and havent found anything like that on here. many people have different opinions and what i would like in this thread is for each person who has done a 5k to put down what theyve done to the internals etc, and what the results were. that way we can all use this as a reference for newbies to compare the options to see whats best suited to them individually and approximately how much it will cost them. i hope this hasnt been done before, if it has i have not had any luck finding it so please point me in the right direction. looking forward to some inspiration. charl
-
oh, ok. thanks for the quick reply!! i guess ill try to sell it! cheers charl
-
hi everyone, today i got given a weber carby for nothing, i know nothing about carbies so i have no idea if i can even use this thing on my 5k motor. i have written down all the numbers i can find on the thing. there is a little tag on one of the bolts that has the following written on it: Weber 86 DA UD A 6 G 15 (the 5 looks like an upside down 2) on the side of the thing there is what appears to be a serial number imprinted: 34 ADMOC 007791 i was told it was out of a 2lt toyota motor from a camry or something. i know its a bit vague, but if anyone can tell me what this is and wether or not it will be useful to me i would greatly appreciate it! thanks all Charl
-
dude, those trims look wicked!! very Retro! i reckon you did an awesome job, and now you know as i do that its not really all that difficult to do yourself. keep it up. you gonna do the front trims too? cheers Charl
-
yeah i know that already, but i think i can get around that for the time being with some upholstry glue and a flat head screw driver.... i think ill just try to "tuck it in" behind the rubber with a bit of glue for good measure. i plan on replacing all the rubbers with brand new stuff later on anyway and then ill redo it properly. but so far all of my ideas have been working so i feel pretty confident! i got heaps done today, got the new carpet in, (thanks Scott!) installed ke55 seatbelts, photos tomorrow... made custom parcel shelf, waiting for it to be upholstered... (comeon honey!) started installing the door trims. ive got the day off of work tomorrow so i think ill end up finishing the interior to the point of being able to drive the car!!!! i can't wait. the dash still need alot of tlc but i will be taking my time with the rest of the stuff because its not imperitive to the drivability of the car. anyway more updates tomorrow. cheers Charl
-
i can do mate!! just let me know what fabric you want and i will work out how much itll cost all up for the job then you can decide if you want me to go ahead with it. by the way, is the 20 and the 25 roof lining the same?
-
thanks everyone! I'm thinking about starting making trims for ke20's if people are interested? as you can see its easy enough to do yourself but if enough people can't be arsed and want new trims ill start making them to sell. prolly wont be much more expensive to you as the cost of materials and a little bit ontop! anyway back to the bbq. cheers charl ps: could probably do other models as well if you provide your original trims for me to use as a template.
-
i decided to put a bit of padding into the front trims hence the upholstry foam stuck to the front of these... closeup to see how thick it is laying the trim to cut the fabric hot glue gun marks to cut where the door handle and lock goes spray adhesive, upholstries best friend!! sticking the excess to the back of the trim, be careful not to leave wrinkles in the other side!! the finished product, better photos tomorrow when there is more light. and thats it for today, now my partner and i go relax with a beer and a dvd!!