altezzaclub
-
Posts
6825 -
Joined
-
Last visited
-
Days Won
134
Content Type
Profiles
Forums
Events
Gallery
Blogs
Everything posted by altezzaclub
-
' I think the first volume overhead cam engine cam with the pinto? " That was 1970, long after Datsun's L-series OHC, which they copied of Mercedes.. Maybe the belt instead of a chain was new.
-
So, one of my two tack-welds that temporarily held on the tailpipe broke from the vibration after many months of being temporary. Seeing I was at home I just put a screw through the side of both pipes. Last week I had it on the hoist changing oil at the workshop and Josh volunteered to 'fix the tail pipe'. So it received a larger diameter stainless piece of pipe... and its noisier again! Somehow it vibrates through the car at low rpm, so around town everywhere. This is why car companies pay engineers so much!
-
Yes, the stock ECU method of setting up the TPS is to have the throttle plate at idle with a set of feeler gauge under the stop and then rotate the TPS until just before it give a reading on a multimeter. That way the stock ECU has the 4th wire idle switch to tell it the motor is idling, and the moving TPS starts reading as soon as the plate turns. The Haltech only needs 3 wires, they don't measure the idle position separately, so you just enter a voltage that it treats as idle. Like you say, I've tried setting the 'idle' voltage higher and lower than it reads at idle, usually about 0.06volts.
-
Well, time zips by... This last Xmas bought new wheels and road tyres, those borrowed rims were out of straight and while the Nankangs were brilliant for grip with a treadwear of 80, the ride was harsh! A trip up to Brisbane and I met the man behind Old School Wheels- My daily 40km run to Blaney has been substituted with a similar one to Blaney while I work on a house for a couple who have just bought it. 299000 coming up, I must remember to photograph the 300000 turnover! The dead spot is still there a year later, and three different TPS sensors, one brand new. It makes the car jerk and gives the transmission a hard time just as the throttle is touched. I'm thinking about the ITBs sitting in the shed, the one item I was not keen on fitting... Otherwise, its great.
-

Anyone Watch K-Movies Here?
altezzaclub replied to Ikeshields's topic in Rollaclub Social (Off-Topic)
I don't have the time left in my life to watch movies, but I skim Korean comics over a beer in the evening. The Korean Govt created the whole entertainment industry in the late 1990s and it has really taken off in the last 20years. Try these- https://www.webtoons.com/en/drama/reborn-rich/episode-1/viewer?title_no=4956&episode_no=1 https://www.webtoons.com/en/historical/dr-kim-of-london/ep-1-back-to-the-19th-century/viewer?title_no=7913&episode_no=1 https://www.webtoons.com/en/romance/a-child-who-looks-like-me/episode-1/viewer?title_no=6649&episode_no=1 Its an interesting view into their society. -
What's going on around here?
altezzaclub replied to B.L.Z.BUB's topic in Rollaclub Social (Off-Topic)
"Witnesses told Hawke’s Bay Today they saw the men inside the jewellers smashing cabinets and taking items." When I was young that jeweller would have whipped a shotgun or a revolver from under the counter and sorted those clowns out! -
Do it up with a light spanner, only a couple of ft.lbs, then undo it one flat on the nut. There should just be the faintest movement at 12 and 6, although I often run mine with slightly more. The split-pin may let it off a bit before it holds it, probably why mine always seem looser after a month than when I did them up.
-
Celicas run a T-series Jap diff that would be a little wider, like the AE86, but not worth shortening. I'd say find the lightest one, on a small car you want the minimum weight pounding up and down in the back, its all unsprung weight. Hilux is probably the heaviest. Small vans too, any Toyota banjo diff will likely take an LSD unit, its just Aussie-made Borge-warners that don't, as far as I know. They will all be 30-40 year old and likely need a re-build. Here's what I found with the KE70's Celica conversion, you'd have to cut the arm mounts off and put little leaf-spring mounts on. https://www.rollaclub.com/board/topic/65709-how-to-fit-a-celica-diff-to-a-ke70/ ...and here is some stuff I saved in another post about diffs when I was hunting for one. "can bolt an ae86/te71 T series 6.7" in a ke70 for instance for upgrade. tho bigger diff head needs shorter driveshaft etc http://www.ke70.com/...x.php?t325.html There are four different models of Toyota that are readily available that came with a t-series corona rt104 1974-1982 corona rt132 1978-1982 celica ra40 1978-1981 celica ra60 (same as ra40 diff,however it has sway bar mounts)1982-1985 te71 disk diff measured 1400mm. -Automatic aus-spec MA61's came with 4.1 LSD (F293) Read the Axle Code from the vehicle indentification plate. http://forums.toymod...?t=msg&th=33561 first digit: ring gear diameter A 138mm B 145mm C 6.25" D 6.62" E 7.1" Second, third digits: gear ratio Fourth digit: no of pinions, ltd slip-yes/no Code pinions ls 2 2 no 3 2 yes 4 4 no 5 4 yes
-
Toby's 1984 Olympic Edition Ke70 Corolla
altezzaclub replied to tcollogan's topic in Rollaclub Rides
That's an impressive project, just finding out what fits and getting it all together is big enough! Do you reckon the ZZ is any heavier than a 4AGE? -
Pull the castor rods forward as much as you can and see if the tyres hit the guards when you turn the steering. That's often a limit, otherwise more castor makes the steering heavier and gives instant camber as you turn, so more bite on the outside tyre. Its something you will have to play with when its running, there's no point in having lots of camber if the tyre ends up running on the inside edge of the tread and wasting the rest of it. On tarmac the G-force built up rolls the tyre under the rim and puts that camber flat on the ground, but on gravel you never build up the G-force and the sidewalls of rally tyres are stiffer, so too much camber is a negative. This ties into not having a swaybar so the nose rolls over onto that outside tyre and jams the whole tread onto the dirt. 10mm in the LCA probably takes out the factory positive camber and leaves the wheels vertical, easy enough to check with a spirit level when you're organised. The cambertops can give you 0.5-1deg negative camber, all you'll ever need. Those 14" rims are a score, I've only seen 13" ones on all the top-line KE70s. Keep hobbling..!
-
Repalcement hardware and sourcing engines
altezzaclub replied to bfhoovey's topic in KExx Corolla Discussion
Your local wrecker... if they still allow you into the yard. Every bolt that gets taken off a Toyota gets hoovered up when I go through, people leave them lying around when they strip parts. The wrecker actually has 20L bins full of mixed bolts, but they never sold. You will need a collection of all sorts if you're going to keep the car. While the Gen5 Altezza 3SGE revs better, the Gen 4 from a Celica not as tall and should be an easier fit. Its down 10KW and 10N.M, not noticeable really. Any bolt stamped 8.8 should be replaced by the same. There are higher tensile strengths than that, but I don't remember them on a car. Just don't buy bolts from a hardware shop. -
Well, that's a good buy! Suspension is number one in rallying. Yes, AE86 are very soft in rear spring rates. You'll have 6kg and 4.5kg won't you, same as my original VA series? I bought them with 5kg fronts, which I'm not using, I've gone softer again. Steve can measure the Kings he had on the Big Girl as a comparison for you. Are those cambertops? Mine were red-anodised, something else I'm not using. Well, are you going to drill out the engine mounts before you start, or wait until they break?
-
I've never used them, but it looks like a modern version of an SU. Are they quite economical to run? Do they have a pump jet or a tiny hesitation when you boot it like SUs do? Of course there is always quad Mikunis off a GSXR Suzuki...
-
Those compressions are good, lots of life still in that motor. I usually get a syringe without a needle and hose petrol through all the little drillings in the carb after its soaked for a while. Once stuff dries out in there its very hard to get out with compressed air.
-
Great that you found it- I'd just seal it until the next time you're doing a big strip and rebuild, but I'm a real bush mechanic. Other's would strip it all now. How did you end up with a Charmant? Is it a 2-door? I only ever see them in SE Asia.
-
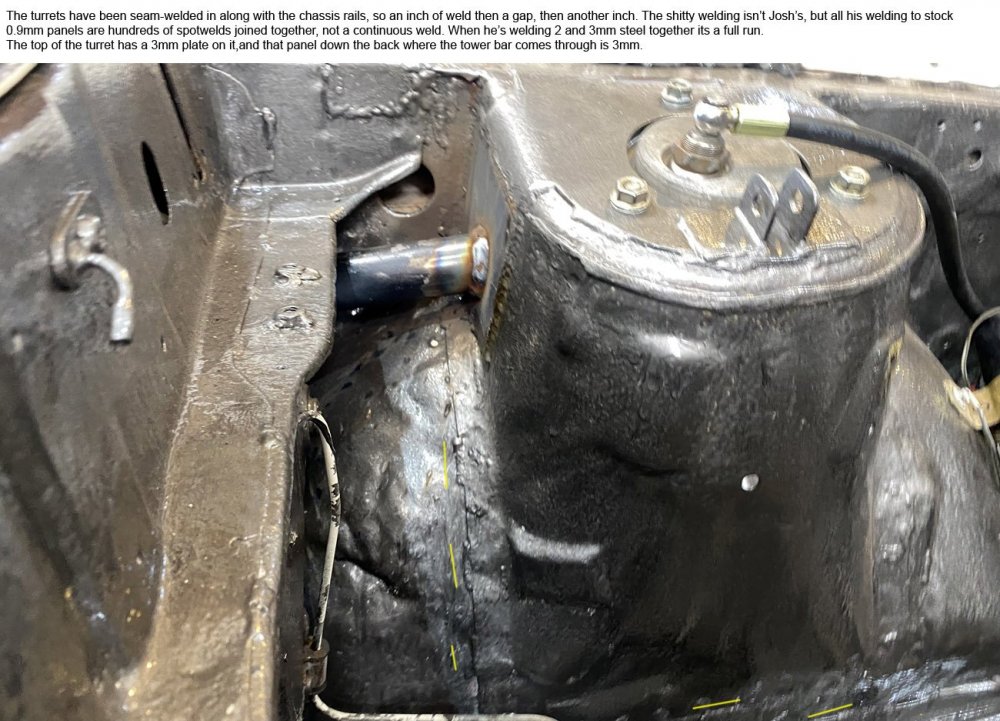
Yeah, I remember telling Adam what to do about the intake manifold not sealing, but I can't remember what I told him now! Stick some photos up when you start on it and I'll remember. I figure you'll be a lounge lizard for a while, that bone didn't look good. You can see the dizzy on the motor as we were about to cut it out of the Celica in the photo above, so that became the 'back' of the engine when in the Corona. Either the dizzy sticks through the firewall or you have to relocate them to the front, as you said. That mounting will have to be quite accurate and very stable, as Banjo well knows...
-
Well, are you hobbling around the shed pulling bits off the RA40? How's it all going?
-
Those Toyota TPS have an idle wire that you could use for waste spark activation if the ECU can handle it. Have it go onto waste spark when the idle wire is live and sequential as soon as you move the throttle. You'd need a piggy-back board I expect as the ECU I've seen have you pick one or the other in a menu.
-
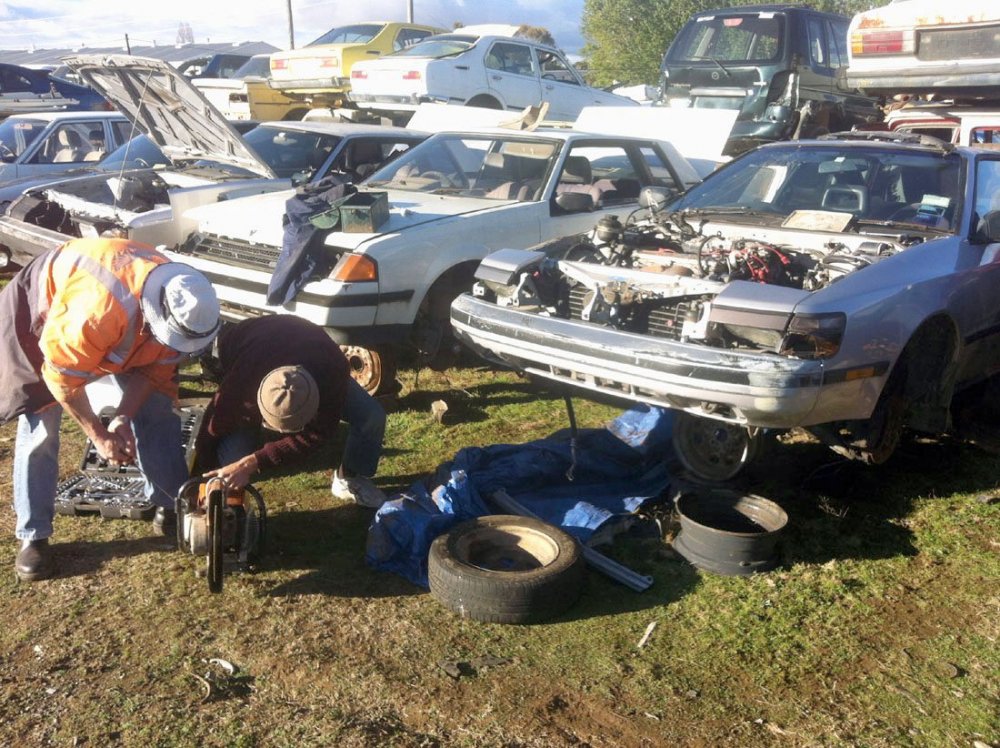
Many moons ago Steve and Pete were down for the Orange Rally so we hit the wreckers late one afternoon & borrowed a petrol-driven grinder... Yes, that very one you are sorting out now!
-
I see you've been introduced to the fine wine and dining at the local Michelin restaurant! Hmm... there was the odd 18RC in shopping trolleys at the old woolshed, they'd be handy for a young man likely to blow one up! Well, while you're on the couch you should continue reading up about the mighty 18RC.. https://www.toymods.org.au/forums/threads/14343-up-the-power-on-the-18r Somewhere along the way pull the head off and measure the combustion chamber volume then work out how much to skim off to get about 10:1 compression, maybe even 10.5 See what you can find for carbs that give one throat per cyl, so twin side-draft Webers, Dellortos or Mikuni bike carbs etc. Then start hunting a set down. or steal that 3SG out of the Corona and build that! Its going to take a while for your toe to heal! If you're going up to Walcha for a while let me know & I can come up.
-
" counter gear shaft bearing seating surface was pitted," ..and the roller bearings are completely unobtainable as far as I can find. You can have the shaft built up and ground back, but those bearings were a Toyota in-house. This is what will kill the 4Ks in the end. The T50s will go the same way eventually, I couldn't find all the bearings when I rebuilt mine earlier this year..
-
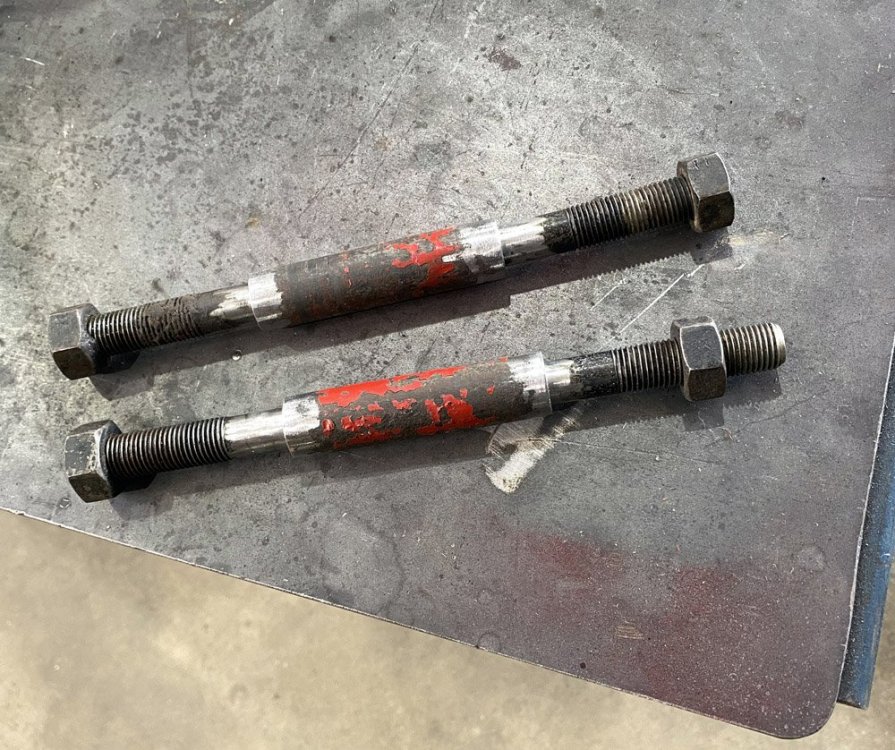
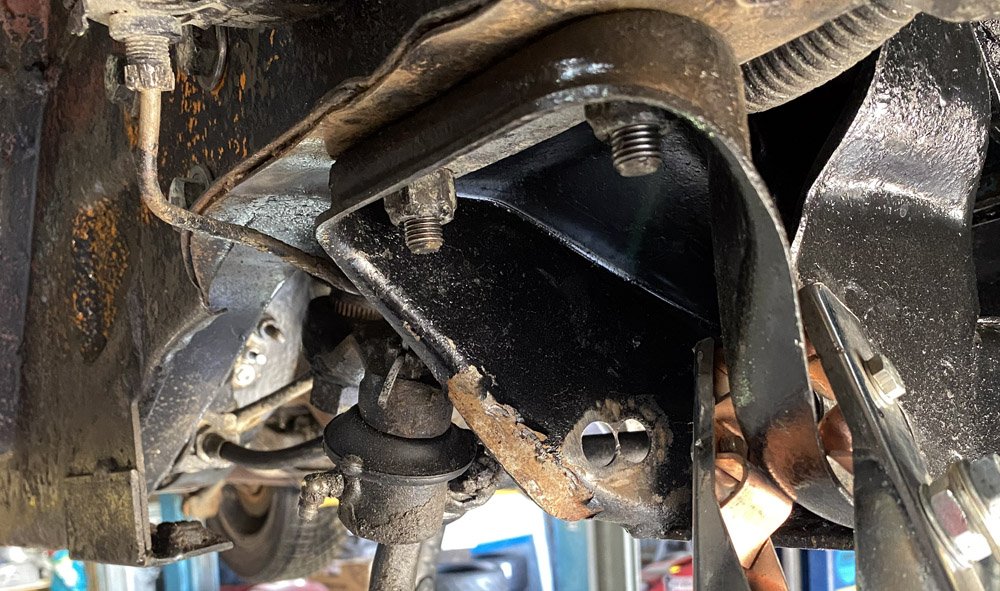
Are you SURE you want to get involved in this sort of circus?.. I dragged myself up at 5am to drive the 4hrs down there as I thought I'd better see how it goes. I actually saw it in action on stage 2, then back for service. Both engine mounts had sheared off and the only thing stopping the engine from jumping out was the cross-strut bar! We removed them, cut the studs off both metal plates then drilled a 13mm hole through plates and rubber blocks. Fought the drill through the mounts on the chassis and motor too, and put it back together with long hex-bolts through them! Squished the rubber down tight and put locknuts on. All four bolts on the diff end of the suspension arms were loose. Tightened them up. After two more stages at the next service they were loose again! Josh wound the window down and it fell off the bottom of the mechanism... The car filled up with dust so the nav wound his window down too, then the car REALLY filled up with dust. We stripped the door and siliconed the glass back into its frame, with some race tape to help. No more winding windows down! Another stage and the exhaust flexible joint gave up, the motor having no mounts must have ruined it. Luckily there was a bit of two and a 1/4inch galv fencing pipe in the service van so Josh borrowed a welder, cut the pipe to length and replaced the flex joint with it. He grabbed the handbrake for a corner and it stayed on, but overall the rear brakes didn't work so there was no braking to get it sideways, it was 'arrive at a corner and throw it in..' The 15" rally wheel is too big to fit in the boot wheel-well, so it was trailer-strapped in. It got loose and beat everything in the boot up. We strapped it in differently, and it got loose again and beat the cover off the battery.. Remember the flat floor we put in the RA40? Everything we worked on worked, it was all the stuff we never had time to touch that broke! Two cars dropped out because the navigators were so car-sick, the usual percentage rolled or ran off, or blew something up, everyone ended up very dirty and much poorer! Currently there is a massive lot of drinking going on in a large campground in the middle of the Southern NSW mountains, with hundreds of lies being told about how fast someone went into some corner or how far someone went off the road..
-
"that it might be a chainsaw motor, with blade & cutting chain removed " Yep,and it says everything about Josh that you need to know... The day was spent making fine adjustments to the steering tie-rods- To match our hunt for extra camber- We had a test run & then straight onto the trailer for a 4hr trip South and in the dirt tomorrow morning. Going, but not yet finished- So,how's the Celica coming along?
-
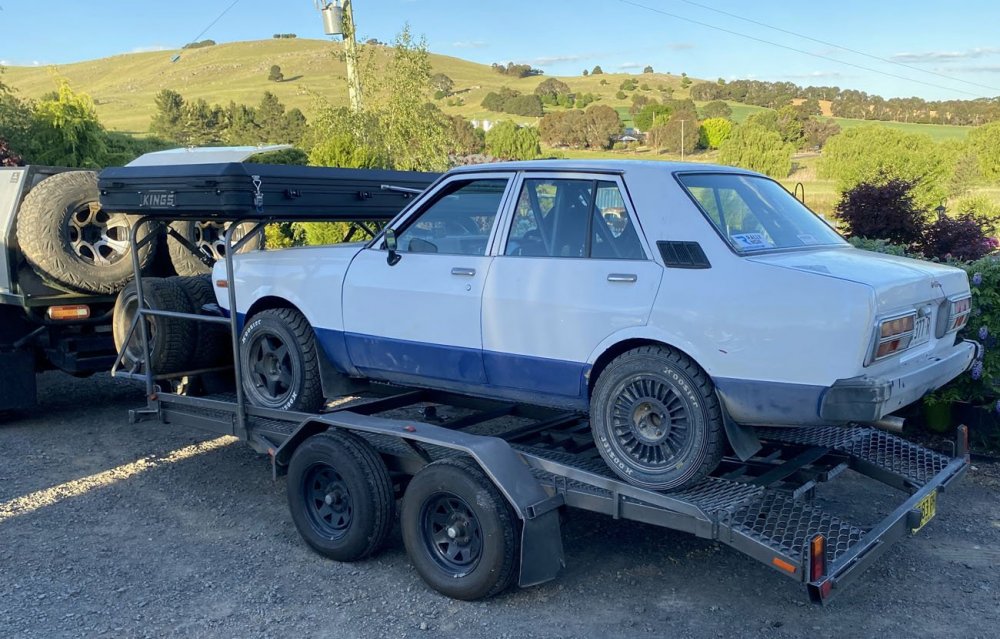
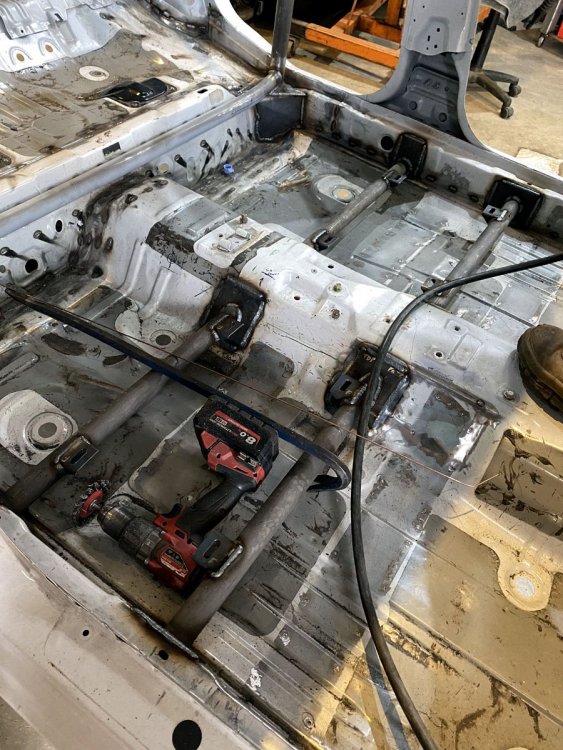
Well, we have a Stanza that runs, and hopefully tomorrow it can be driven, as it needs to be on a trailer and 5hrs South tomorrow night! Now, seat mounts... should you change your seats don't hack up the original mounts, just cut them out of the car and make proper rally mounts. Get some 38mm CDS tube, which is what roll cages are made from, and some 3mm steel plate, and do this- So make a plate of about 100-120mm each side and weld that to the sill- ..and to the tunnel. Cut the tube to fit exactly- Slice some 40x40 box section, use a hole-saw to cut a 38mm hole in it and drill a slot for 10mm bolts, then weld the stub to the tube. They are spaced to fit the seat mounts in width and length, so when welded up your seat rail can move forward and backwards, just bolting onto those tabs- You can use the whole 40x40 box as a mount instead of just tabs, with a tube for wrapping the crutch straps of the 6-point harness onto. You can weld a captive nut inside the tube where its needed, or if you can't reach it you weld the nut on the bottom with a crush tube inside the box section. That's what make tabs easier... You should end up with better RA40 than The Big Girl was...
-
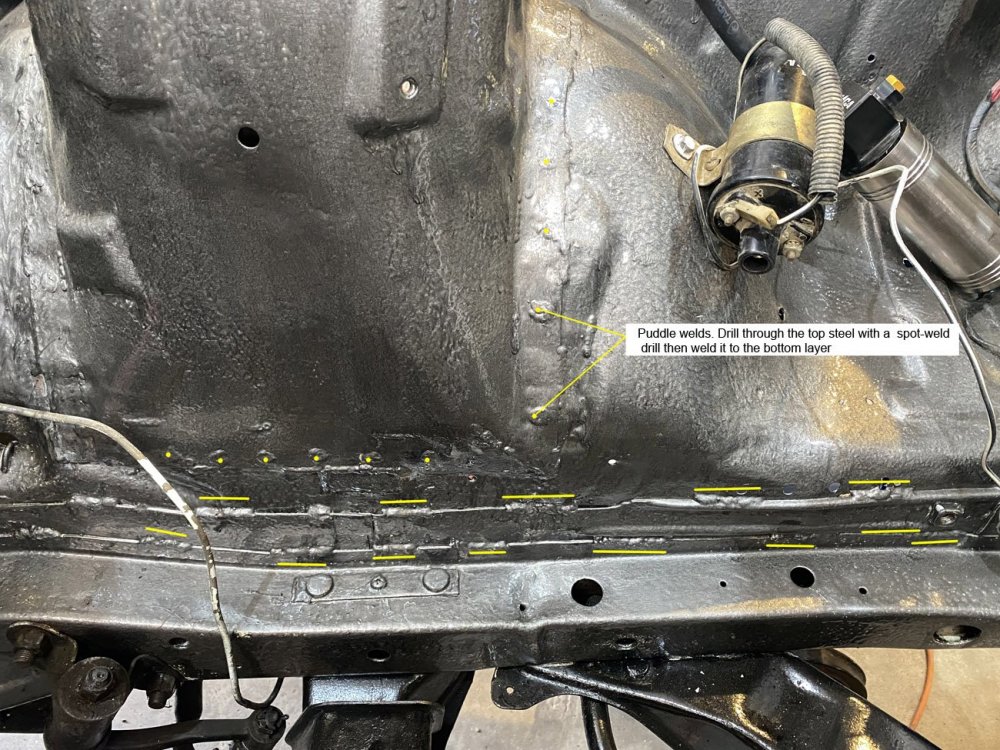
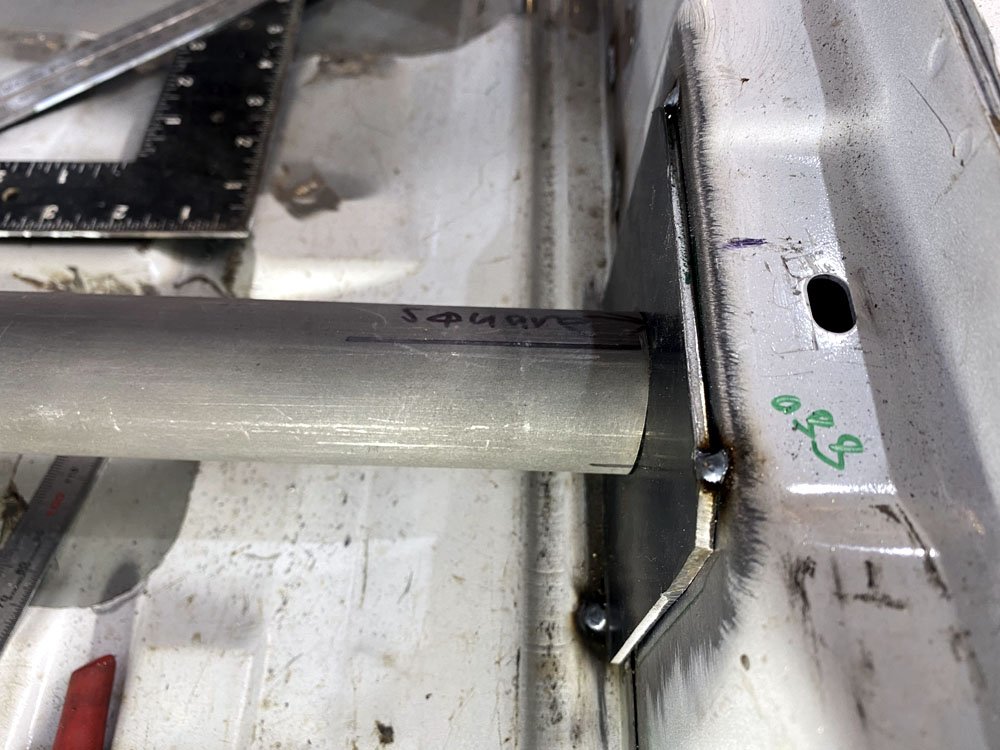
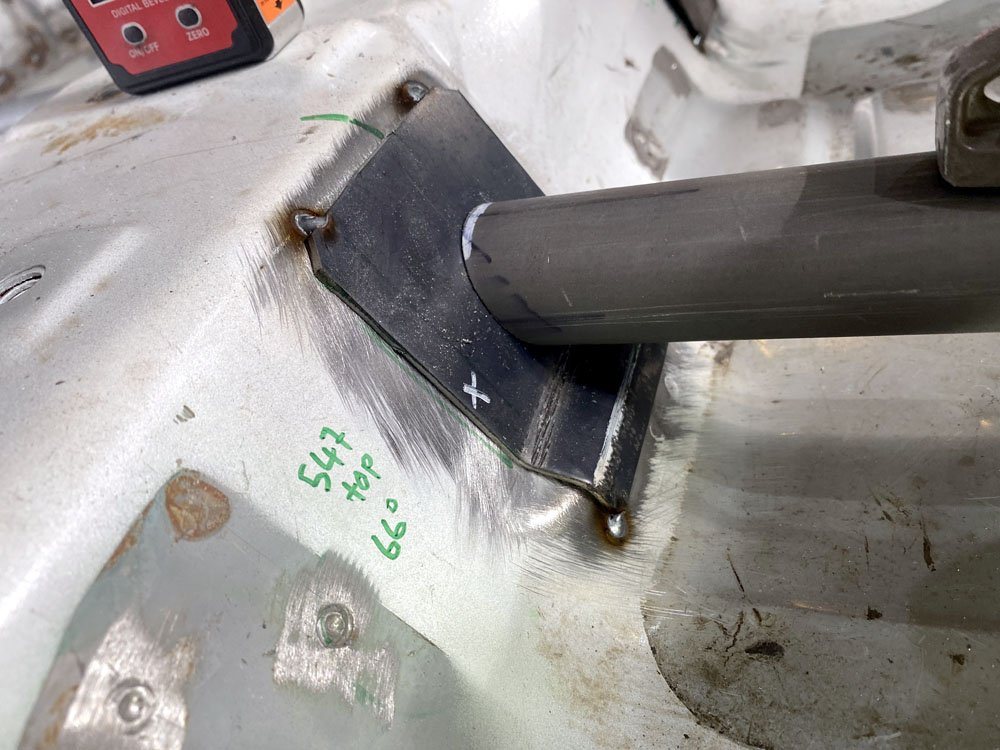
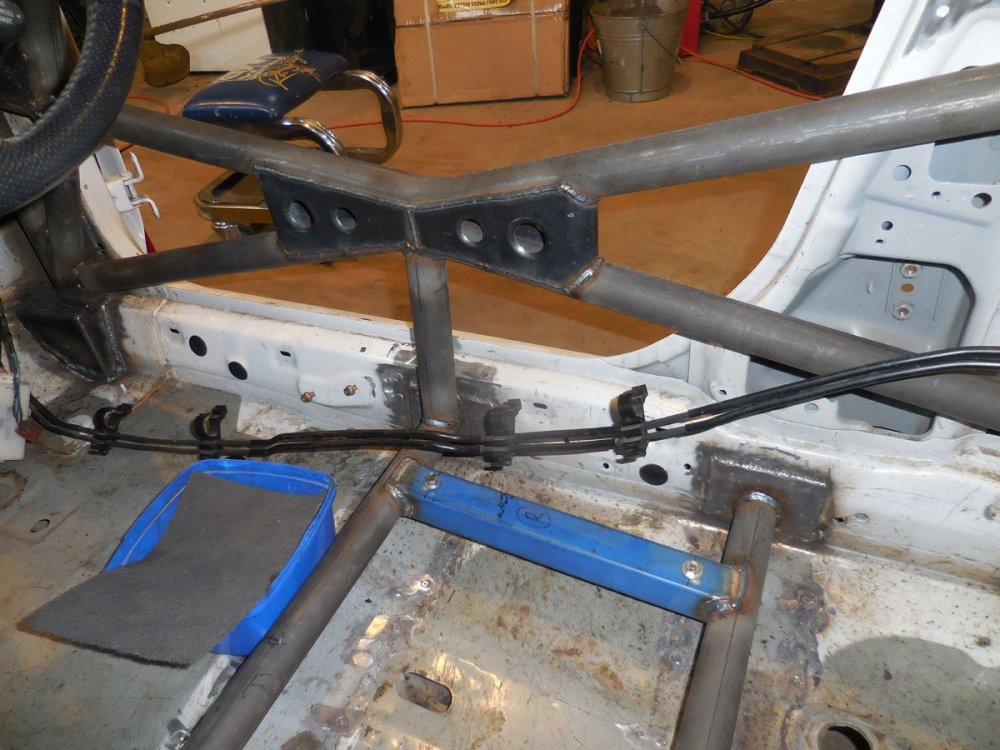
Cage finished yesterday, the rear bars were last, after I took this photo- The front tower bars join the front leg right where the top side-intrusion bar is, so it throws any stress right along the car. The rear bars go from the top side-intrusion to the rear floor near the rear spring perches, so the pipes join front to rear suspension rigidly, plus there are 4 running across the car in a box. The lower one across the main hoop is welded to the tunnel where the back seat went, there's one under the dash, one above the windscreen and the main hoop itself. So its all about making the car rigid rather than worrying about driver's rolling it, it will make the shell last much longer. The front is ready for the motor to go back in today-