drift freak
-
Posts
265 -
Joined
-
Last visited
-
Days Won
4
Content Type
Profiles
Forums
Events
Gallery
Blogs
Everything posted by drift freak
-
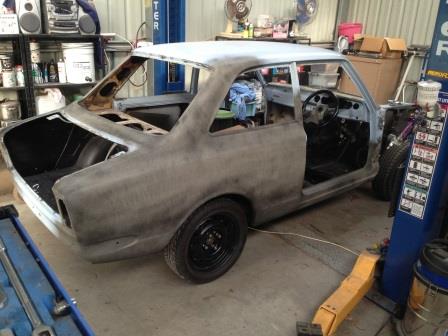
So I had a mate come around on Friday to do a major service on his '08 WRX, he also owns a KE20 3SGE Beams powered race car and I thought while he was doing that I should pick his brain about how he changed the timing belt on his car. I've done a few timing belts in my time but its always nice to have someone on hand that's done this motor before to fall back on if things get too confusing or something just isn't right. So I started by stripping the rocker cover and top cam belt cover off. I then rattle gunned the crank bolt from the harmonic balancer and used a puller to remove the balancer.(The photo shows the ratchet but this didn't work so the rattle gun came out). Once I had the balancer and lower cover off I rotated the crank until the small mark on the crank lined up with the arrow on the block, remember this is crucial to allow for easy re-alignment of the belt and pulleys (see last photo), I then removed the idler bearing you can see in this pic. This just gives you a little extra slack in the belt which makes all the difference in the next step. The next step is to compress the belt tensioner enough to be able to remove the timing belt from what I think is the oil pump (don't quote me on this) Number 1 in the photo is the gap that needs compressing and number two is the direction in which the tensioner travels to compress the gap (I used a large pry bar to compress the tensioner while my mate removed the belt from the lower left sprocket) Once the belt is removed from the lower left sprocket you can remove the tensioner from the motor allowing more freedom to remove the belt. I didn't get any photos of the next step but you need to compress the tensioner pin back into the body of the tensioner to be able to reinstall the unit. You can use a vice to compress it or a hydraulic press but remember to take it slow or you can damage the seal inside the tensioner. Once the tensioner pin is compressed use a small allen key to push through the hole in the body and pin to hold the pin until re-assembly (sorry for no photos here). From here I re-installed the timing belt ensuring the marks on the belt lined up with the marks on the camshaft pulleys and crank (I purchased a genuine timing belt from Toyota @ around the $85 mark due the engine being totally stock, if I had work done to it I would have gone after market but thought the genuine one will do fine for now). From here you re-install the idler bearing, align the belt with the timing marks on the camshafts and crank, then reinstall the tensioner. Once your sure the belt is on correct and the routing of the belt is good then pull the allen key out to place tension on the belt. From here it is a matter of re-installing everything in the reverse order to removal and make sure you tighten all major bolts to the required torque settings and use lock tight on the harmonic balancer bolt. I also got my car rolling gain and ready for the trip to the sandblasters in the next few weeks. Its actually quite inspiring to see it rolling again with the suspension in so hopefully I'll be able to make some headway into the remaining items over the next few weeks.(fingers crossed)


-
Good to hear orangelj!! Nice to know I'm motivating people who have motivated me in the past :) yeah I set the pinion angle myself. I bought an angle finder off eBay, measured the angle at the back of the block (removed starter motor and measured that mounting face then dialed the diff in with -2deg so that when the diff is under power and wrapping the leaf spring up the is no difference in the angle. I can draw a pic up later if that explanation isn't clear haha.
-
So its been a little while since I've updated on here due to being slack over the last few weeks being flat out at work and preferring to spend my spare time with the family rather than on the car. I have however made small progress in the finishing of the engine cross member and diff (fully welded all the mounts and brackets on over the last few days). So I welded the diff mounts on after having them tacked in place in the car. The new spare wheel well fully welded in that was supplied by Davros el Davros (cheers mate) Engine cross member fully welded and steering rack mounts gusseted. Finished welding the coilover kit onto my struts also Now I'm at the point of putting it back together so I can get it to the sand blasters, hopefully with a little more spare time over the next few weeks this won't be a problem to get sorted :)
-
Awesome work there!! I love that colour. Keep it up mate, will be following this build.
-
Not sure which way he would go. He has thousands of configurations and makes them all by hand. Because mine was a mix and match front end he came to my house (lucky for me we are both in the same town). I know he has made quite a few ke20 bars so just give him a call and he will let you know what he needs from you. His name is Todd Selby. Don't forget to mention you have larger calipers and need a little extra clearance.
-
Yeah on that topic OnPSI who are you getting to engineer your car??? I wouldn't mind getting in touch with them and asking a few questions.
-
Call Signature Sway Bars in Nowra NSW, he will make you a sway bar to suit your car, using the hopper stopper kit has given some people problems when turning full lock as the caliper hits on the sway bar. He made mine to suit the hopper stopper kit and its brilliant, plus relatively cheap for a custom one.
-
Mate the rules state that if you install a turbo motor the maximum capacity must not exceed 2.5 times the original body weight when delivered. So if your KE20 weighed 740kg from factory it would be 2.5*740=1850cc turbo. You can't put a turbo 12A in because the RTA states that a 12A is 2400cc and 13B is 2600cc. My advice mate is to consult an engineer that is registered with the RTA as a designated signatory. Like styler said, goggle NSW RTA NCOP regulations and have a read, its all there :) Good Luck.
-
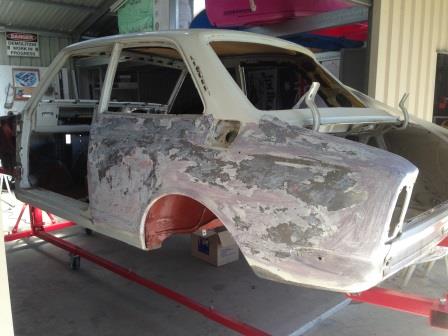
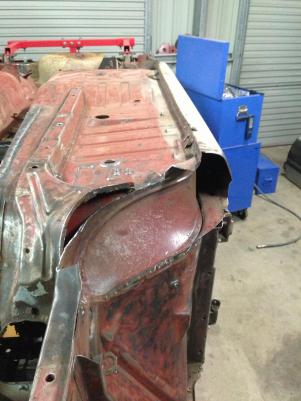
Yeah mate it really hits home how close it is to being drivable again when I look at it like this. I'm hoping to have it sand blasted in the next few weeks then ill just finish off the small amount of welding and start and prep it for paint.
-
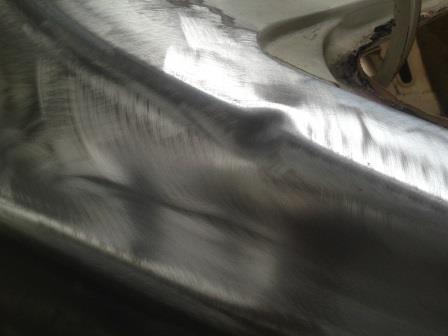
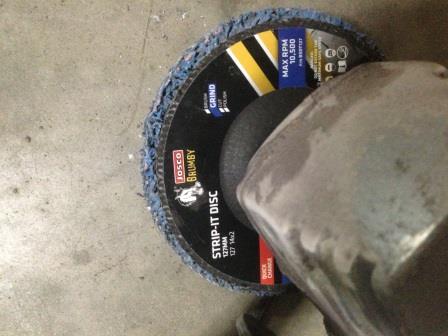
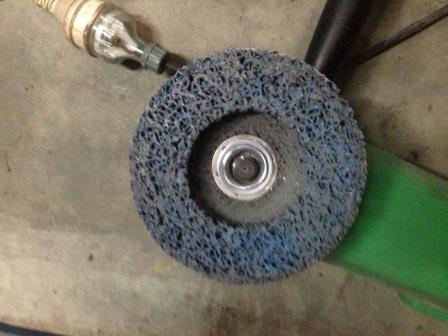
Thought Id just put some of the other photos up to show how well the stripper and stripping disc work together. After using the paint stripper and washing it down clean I also used rust converter on all the visible surface rust just to be safe. After that I also used the stripping disc to sand off what rust was left. Then just coated everything in etch primer :)

-
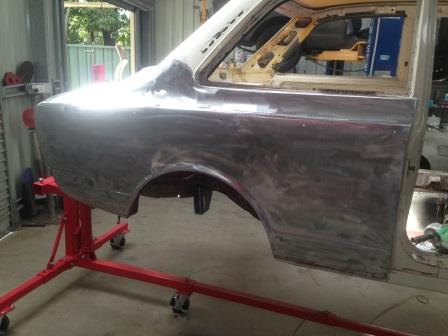
Haha no way Dave, the panel stuff will be left to the pros!! I'd rather spend a little cash to have a great job rather than try and bodge it up at home. I'd have to agree OrangeLJ jumping in the deep end is the only way to go!!! Just glad I did a little research first :) So anyway back to the updates. I spent most of my weekend (after wasting a few hours voting for those lying scumbags) paint stripping the shell ready for the sand blaster and my panel beater. I decided to strip the quarter panels and roof because I didn't want to risk any warpage of the panels during sand blasting. So I initially scratched the surface up with some 80grit paper to allow the stripper to bite in a little better. So I applied a layer of stripper to the panel, covered it with plastic and waited It pulled a reasonable amount of on the first go but it actually took me 3 turns with the stripper to get it back to reasonably clean panel. And one of the roof after stripping it twice Once I'd washed all the stripper off with water and dried the panel it was time for my new favourite tool to come out. This stripper disc works wonders on the remaining paint. I would say its comparable to 60grit paper in the way it strips paint and surface rust but doesn't create too much heat when pressed against the panel. I sanded both quarters and the roof before etching them to prevent rust. Although it is time consuming paint stripping the results speak for themselves and it eliminates the stress of sand blasting major panels. For the $40 in stripper (and I still have half a tin left) compared to $40/50 per hour for a panel beater to straighten warp panels I know where Id prefer to spend my money :)


-
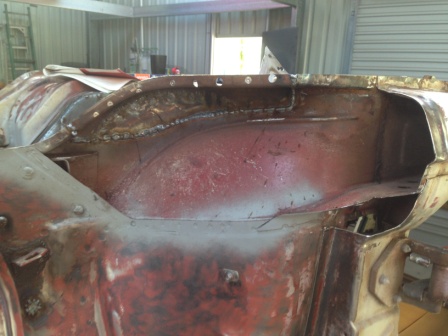
So I finally finished the rust the other day and I have to say I am quite happy with how it has finished up. After all the stressing about how difficult it would be it actually turned out easier than I expected. Once I'd broken the replacement pieces apart I found one of the pieces needed repairing before I could put it back into the car. I then cut and filed it to the correct size to fit the area I'd cut our and welded it in. I then etched it up with weld through primer (this stuff ensures I don't have exposed bare metal between the welded panel) and tacked in the first piece of the outer surface. Once this was in I then quick clamped the final piece into place and got it neatened up then welded. I then welded the last piece into place and etched it all up To have this part of the repair phase finished is so rewarding, it has been in the back of my mind for months now and I even thought about outsourcing the job thinking it was too big a job. I am so glad I just jumped in the deep end and had a go now though!!


-
Cheers Gotric3, yeah the old girl is getting there now. Not sure if I'd go beams again I'd probably go a worked 4AGTE but it's been a hell of a build so far and can't wait to get it tuned and give it breakfast!!
-
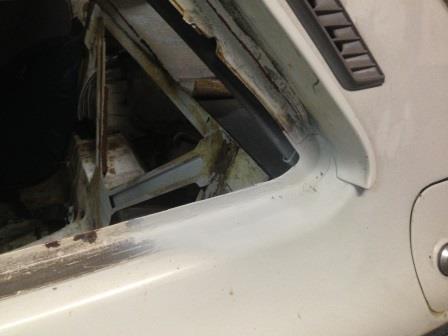
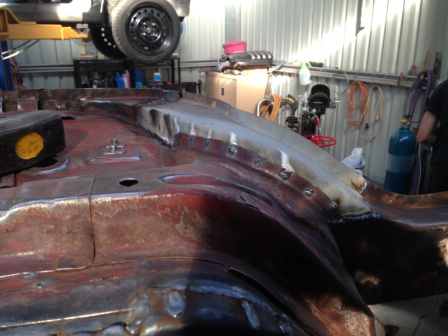
So I've been concentrating on the rust in the drivers side chassis rail. I was lucky enough to be able to get my hands on another section of body that was in much better condition than mine. So I just unstitched the area I needed to repair and cleaned it up. The replacement panel had some rust so I had to replace that too. I did this while the section was all together to ensure the panels didn't distort with the welding heat. From here I unstitched the replacement panels and got them ready for welding into my chassis. One of these panels also had some rust in it and I can't access it once the panel is welded into place so I repair this area once everything was separated. And here is it all starting to go back together :) I also got my extractors back from Jordain after he ceramic coated them for me. So stoked with how they turned out and I think they will really set the engine bay off!!!


-
I rolled it over one of my panel stands OrangeLJ. The sheet is quite thin and in most cases you can just hand curve it. The sheet is 1.1mm cold rolled mild steel.
-
Yeah Buz440 I've looked at it since putting the panhard setup in but there is no room on the passenger side due to the exhaust running through the available space, also the lack of room between the diff and spare wheel well is limited so fitting the diff bracket in would be super tricky.
-
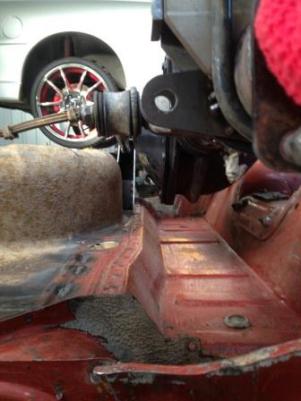
So I hooked in this morning and replaced the damaged section with the spare panel I had. I supported the front end of the car with my floor jack and some timber to stop the car from sagging when such a large section of the inner guard was removed. I positioned the floor jack where the original gearbox cross member would be located and took up some pressure. I then cut the bulk of the panel out leaving about 10mm of overlap to ensure I didn't take to much. I then re-marked where the edge of the new panel was and set about trimming the edges until the replacement section sat neatly in the hole. From here I tacked all the corners and stitched it up. I'll grind the welds on the inner side relatively smooth and re-weld the joins from the outside once its all sandblasted.


-
So the next challenge is to replace the damaged inner guard with a section I cut from the spare car I had. I haven't attacked anything this big before so if anyone sees something that they think I'm missing just shout out. So I've trimmed the donor piece of sheet metal to the approximate size I think I'm gunna need and marked out the outline of where to cut on the body (cutting the dotted line on the body so I can trim it to suit later) I have also braced the rails from underneath to try and stop the car flexing out of shape with this piece removed. I'm going to try and get this sorted in the next few days so if anyone has any comments let me know. Cheers guys


-
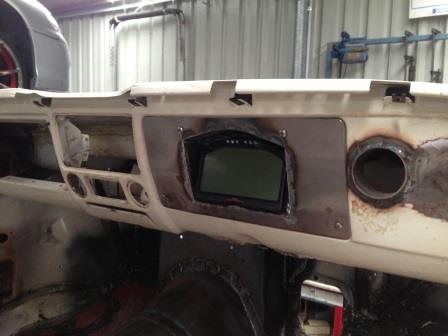
So I spent yesterday making up a new dash panel to house the LCD panel for my gauges. I had to remake this panel because the first one didn't quite fit properly and due to it being made out of the thicker 1.6mm was really difficult to work with. I remade this new panel using the thinner 1.1mm sheet and it turned out heaps better.


-
So a little more progress today which was good. Fabricated up a panhard rod mount and made an adjustable rod out of a KE70 item just to get things in and located. I welded the original KE70 diff mount to my EF diff and mounted the panhard rod (i'd already shortened the panhard rod by about 130mm and welded in a thread for adjustment) I then folded up some 1.6mm mild steel sheet in two pieces to make the body mount. I then welded both pieces together and braced the open ends. To ensure I drilled the holes in the right spot I marked one side with a centre punch and installed the rod end to ensure the mount didn't crush while I was drilling. Now I've had to position the body mount so that under full suspension compression the panhard rod will clear the spare wheel well and still be aligned correctly with diff mount when the diff moves back with suspension travel. Things are only tacked in at the moment due to wanting to put the car back on stands and make sure everything is going to clear properly with weight in the back of the car.


-
Wow good numbers mate, I might have to get in touch with this Col Potts as I've been told this setup can't be engineered not that this is the way I've gone but a turbo 3SGE beams would be similar engineering requirements. Where abouts is he located??
-
Yeah I reckon I'd have put down the mattress off my bed under it if mine was home made haha. It is definitely an experience that's for sure.
-
So I've been fairly busy the last day or two, Davros El Davros from Rollaclub has had his KE10 at the panel beaters for a few months getting the body straightened out and we picked it up the other day and brought it to my house, he will be finishing the last of the mounting jobs like pedal box, steering setup etc. here over the next few months. While we were there we dropped another mates rolla wagon off to be straightened up. I have made some good progress with my wiring loom now finished (WOOO FINALLY), the last of the sound deadener removed and I finally worked up the courage to roll the car over on the rotisserie. I have to be honest I was sweating bullets when we did this as I was worried it could possibly come loose from the rotisserie and damage some panels. So the next move is to start stripping the underfloor sound deadener/sealer stuff with the wire wheel and finish the rust repairs.


-
F&*ken set myself back a few days yesterday arvo!!!! After not working on the wiring for a month or so I thought I had it sorted but was tired last night and connected a door lock trigger to 12V power and fried the actuator circuit board and a bunch of wiring!!! NOTE TO SELF always clearly label wires and make notes on wiring diagrams. Apart from that some more split tubing turned up today so after my mates engagement party tomorrow night I will be finishing the loom next week.
-
So I got a bit more done yesterday and today, mainly more rust repairs and started sorting the wiring loom. I finished off the rear quarter rust section by welding a few more lengths along the top edge of the replacement panel and then etched it to prevent further rust. I also finished the front passenger pillar, I'd had to wait until I could get my hands on a can of weld through primer before welding on the last section, this primer was used to ensure I had everything primed up to prevent further rusting. The primer has a high zinc content which allows welding to penetrate without burning the protective coating off :) I then moved onto the rust holes beneath the rear quarter window, this wasn't too hard to repair with the larger rusty area being removed with the dremel and a hacksaw blade, however due to the tricky position of the smaller hole I used a die grinder to remove the rusty material back to solid sheet metal. I made a replacement piece for the larger hole and used an off cut that sat behind the smaller and filled it with weld, ground them flat and etched it up. I'd had enough welding and grinding for now so I focused my attention to the wiring loom. I had stripped it from the car a few weeks ago so I layed it out on the floor to assess what was needed to finish it off I required some more rolls of wire to hook up the central locking and alarm plus split tubing to cover the harness once it was finished. To make things easier on my back I brought it up to workbench height and starting connecting the remaining wires plus covered some of the finished wires with split tubing I had laying around.