Banjo
Regular Member
-
Joined
-
Last visited
Everything posted by Banjo
-
Hi Phil, Welcome aboard, & we will forgive your 40 year Mazda obession ! Most of us on here, are also "obsessed". I'm not familiar, with the "E" prefix on Toyota Corolla models, but on many early Japanese cars, the "E", usually designated, that the engine, had "Electronic" ignition; when electronic ignition, was new, & not in widespread use. There are a few members on here that have, or have had KE55Es. Just search the threads & you'll come across them. Here are a couple of pics, from this website depicting KE-55s, with both round & square headlights, with the different grills. I had a KE55 2 Door pillarless, coupe with square headlights, which went to Corolla Heaven, after suffering severe cancer, of the rear upper quaters. I'll dig out a picture of it later, & post it here for you. I stripped it, when it was no longer roadworthy, & believe, I still have the square headligh grill stored away. My personal feeling is, that the square headlight versions, were the most attractive. In fact, I liked the square headlight look, I converted my KE30 2 door sedan, from round to suare headlights. Where are you located ? Cheers Banjo


-
Hi Tomas, There are a number of people selling after-market KE-2X uni joints, on ebay. They are commonly available, in places like Malaysia & Thailand; where the early Corollas, were very, very popular, & they still keep them going. https://www.ebay.com.au/sch/i.html?_from=R40&_trksid=p4432023.m570.l1313&_nkw=universal+joints+Toyota+Corolla+KE25&_sacat=0 Here is a u-tube video, which describes how to change the uni-joints, yourself. https://www.youtube.com/watch?v=atxj3izLg3A Just look how dry the needle rollers are, when He pulls it apart. Let us know how you fare. Cheers Banjo
-
Hi Tomas, When a car gets to as olde as your KE26 is; things start to wear out, & clunk & rattle. The "drive train" from the back of the engine to the rear wheels , encompasses, gearbox, tail shaft & differential; all parts, which last a long time, & rarely receive any attention, until they make a noise, or a vibration, as is, in your case. Differentials, are usually easy to identify, as they make large clunking noises, taking up the wear in the pinion & gear wheel. The tailshaft, as you have identified, is probably the most likely cause of the vibrations. The universal joints, last years & years, but are made up of a number of small needle rollers, in a cup bearing, around the cross joint. These needle bearings, wear out & can collapse, especially if the uni joints are sealed units, without facilities, to pressure grease them ocassionally. Your suggestion, of taking the tailsft out, & having a specialist replace the uni joints, with new ones completely, sounds like a very going starting point. A Typical Universal Joint If you take out the tailshaft, after draining the gearbox, you should be able to feel any slop or wear in the two uni joints, just by hand. Considering the cars age, the tail shaft, may well perform better, if it is balanced also, whilst it is out; but a specialist, will be able to determine that for you. I think you are on the track, but being a very olde car, replacing the uni joints, may not be the total cause of your vibrations. However, it will be a good start. Please let us know what you find. Cheers Banjo

-
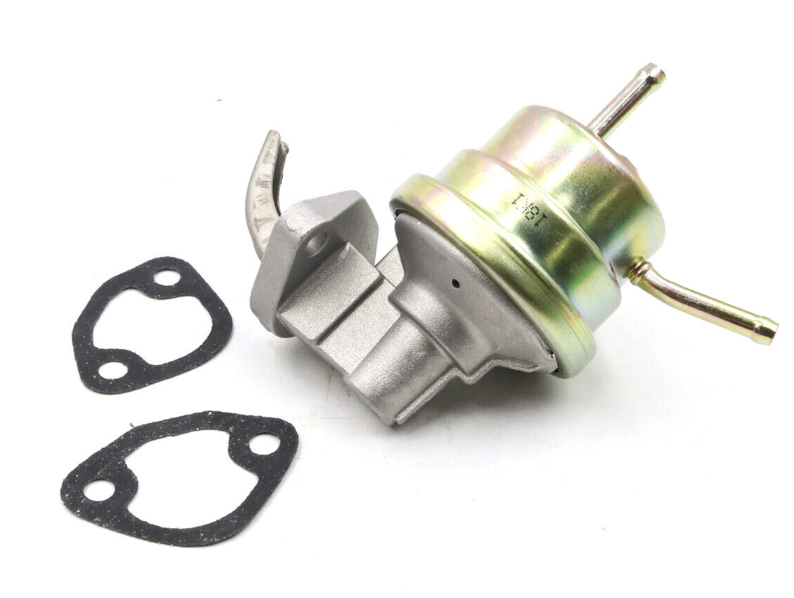
After reading your post again, I'm not sure whether you are referring to fuel, or oil pouring out ? The "spacer" / "insulator" is a fraction under 10mm in thickness, from the one I measured here this morning, fitted to a running engine. If it is oil, then it is simply a case that the preparation of the mounting land on the block, & fuel pump, have not been prepared well, or no gasket goo applied. There is a lot of oil being "splashed" around, inside the block, at that point. The seal of the fuel pump, to the block, must be totally secure. That's why all new pumps, are supplied with two new gaskets, (one either side of the spacer/insulator). Cheers Banjo
-
Remove the fuel pump, & insulator, between the block & the pump mounting flange. Measure the width, or thickness of the insulator. This is critical. If it is too narrow, the travel of the fuel pump action will be too great, & damage will occur. It's too late, & too cold now, to head out to the shed, & measure the correct thickness, but off memory, it's quite thick, like somewhere between 10-15mm. Most replacement pumps come with two (2) gaskets, that go either side of the insulator mounting spacer block, but do not supply that block itself. I'll check that figure in the morning, & post it here. Cheers Banjo
-
I think when I was young & stupid, there was a name for them, whether they were a Mitzy or any other brand. "Shaggin Waggons" Used to be very popular with surfers. Boards on the top ! What a line up ! If you look down the comments list in this link, There was a guy who had a Corolla "Shaggin "Waggon", at high school. Cheers Banjo
-
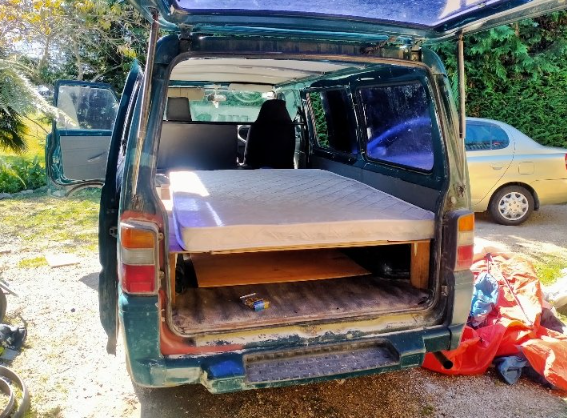
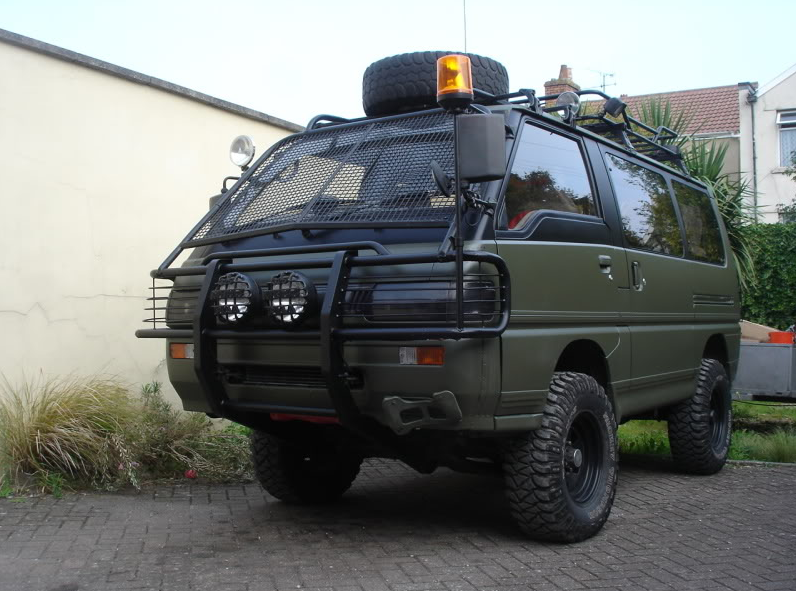
While eating my lunch today, I Googled images of the Mitzy L300 van, to see what people around the world do to; & do with them. Some are really remarkable. We need pics of yours, please. Cheers Banjo
-
Great sketch Duffman ! You've missed your calling in life. Excellent ! You could easily sell those on-line ! I'd buy them, to line my den ! Cheers Banjo
-
When reassembling an engine, assuming one gets, all the right bits, in all the right places, & bolt tensions are correct, there is not too many procedures that can go wrong, assuming, you "take your time". However, one area, where the novice can come unstuck, is setting ring gaps, if you are fitting a new set; particularly if the block has been rebored. The following article on HP Academy, is probably one of the best I have read, in a long time. https://www.hpacademy.com/technical-articles/get-your-gap-right-piston-ring-gap-explored/ Cheers Banjo

-
-
Hi Russell, Assuming the starter motor did turn over previously, & there is a good "earth strap" between the car's chassis & the engine block, then the first place I would be looking, is the "terminal bolt", attaching the heavy cable fron the battery +ve terminal, to the starter motor itself. If that is OK, then you will be looking for a lack of power to one or more "control" circuits. If for instance, if your lights all work, but the starter motor is dead, when you turn the key; then you have narrowed it down to the starting circuit. If however, everything is dead, then it may well be a burnt out in-line fusible link, that got "zapped", while hooking up jumper leads. P.S. Also remove the cover on the fuse block down below the steering wheel, & see if there is 12 volts on any of the fuses. If you do, find a fuse with 12 volts on it, check that there is volts, on the other end of that fuse. If not, the fuse will probably bee blown. Any fuses with no volts on either end, doesn't mean that the fuse is blown. Some fuses only have voltage applied to them, when the ignition switch is on. Let us know how you go. Cheers Banjo
-
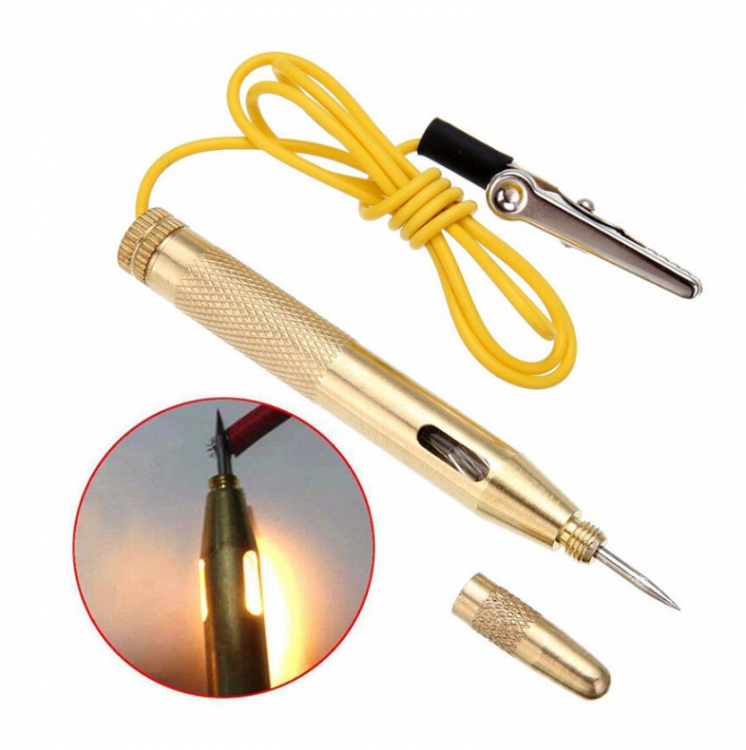
Hi Russell, Your best friend in this situation, is a trouble shooting light, which are cheap, & can be found at any auto supply place, or even reject & cheap shops. You simply, hook the earth clip to the chassis somewhere, & then probe at various points from the battery +ve terminal, until it all of a sudden, the voltage isn't there. There is a "master fuse link", that doesn't even look like a fuse, but is usually mounted close to the battery itself. That will show up the open circuit, very quickly. Let us know how you go, & what you find. Cheers Banjo
-
Hi Col, That is absolutely beautiful, & takes me back to when I had a KE55 2 door, pillarless coupe. What a car it was with a 5K & a 5 speed box. I do miss it, as it went to "Corolla Heaven", after suffering terminal cancer in the upper back quarters, behind the side rear side windows. Being pillarlees, that model relied very much on those rear quarters. It does live on a bit somewhere as I sold the rear floor & wheel arches to someone on the Sunshine Coast, who wanted to "Tubb" his rear end. I'm gathering that is straight off the boat, & has been imported from the UK ? I had a quick look at some of the video of the Lombard Rally, to see if I could spot it in action, but not knowing what year it last competed, I couldn't find it. I loved that model, as it seemed so perfectly proportioned, & attractive to boot. I gather this one was probably a KE35 SR model. I can't see the grill, or the front edge of the bonnet clearly. Fill me in. Those alloy wheels just suit it to a "T". So I guess we'll see it in the next East Gippsland Rally, amongst the trees ? Cheers Banjo
-
Bloody Hell ! Talk about a blast from the past. Haven't seen You on here for 3-4 years, I reckon. Yeah ! That was a long time ago. i joined back in 2004, I think. You were a little bit behind me, around 2008. However, I'll never get anywhere near your posts. 8000 + ! I haven't got to 1700 yet. Don't knock "small hippie towns in New Zealand". My grandfather came from Kaiapoi, just outside Christchurch, on the South Island. I used to travel back & forwards to NZ, on business. I used to love seeing those big ships unloading all the domestic Jap Imports, in Auckland. Little "narrow gutted" things, because they used to charge rego on the width of a car in Japan, because the city streets were so narrow. https://garagedreams.net/car-facts/why-are-japanese-cars-so-small Keep in touch ! Cheers Banjo
-
Hi Jack, According to the Wiki on Rollaclub, the No 3 Head is a standard head on a 4K engine, so looks like your head & block go together,, & somehow, it go fitted with a set of 3K shorter pushrods. Cheers Banjo

-
It looks like you've nailed it Jack ! However, if someone who put this engine together previously; made that big mistake, there could be other issues or mistakes "lurking". I'd be pulling the head off, & taking a look. If you don't want to pull the head off, which allows You to check bore wear, at the top; valves & seats; & most importantly, the colour of the build up in the combustion chamber; then the very least, you should do, is a compression test. The head number is cast into the head on the outside of the head, between no: 3 & no: 4 spark plug holes. It's directly up on the head, above the block serial number. Let's know what you find. Cheers Banjo

-
Hi Si, Yes, my first thought also. Time for the head to come off, methinks ? Cheers Banjo
-
Hi Jack, Doubt very much that wear in the camshaft, or bearing wear, would cause that much tappet adjustment required. Unfortunately, it's probably time for the head to come off, so you can take a good look at everything. I'm presuming that the engine is a 4KC ? There are several parts on K series engines, (3K, 4K, 5K) that are interchangeable, & others that are not ! In 280K klms, anything could have been swapping around. Rocker gear & pushrods maybe ? Take the head number off the casting between no:3 & no:4 spark plug, & check whether the head was originally fitted to this 4K engine. Give us as much info about head & engine type & engine block number, & we might be able to start assisting. First thing is get all those pushrods out, & see if any are bent, & what their end to end length is. Measure their length, as they maybe not original. I believe Datto pushrods were commonly used on K Series engines that had hydraulic lifters, that were changed to solid type. More info & pictures you post, the quicker someone on here, will spot your problem/issue. Cheers Banjo
-
Hi Rupert, I'm sure someone on here will have one somewhere. Most of us have one in our "special tools draw", which we use as a "clutch plate alignment tool"; rather than those universal tapered ones you buy at SCA & auto tools & parts stores. I'll certainly look around my heap tomorrow, & see if I can help. P.S. I'll bet it has been a bit chilly, down Tassie way in the last few days ? Cheers Banjo

-
Hi Geoff, Hats off to You ! You've got more patience than I have, but I sure it will look perfect, when you finish it all. Cheers Banjo
-
For what it is worth, I'd be leaving the respray until last. With a different engine install, there will be a lot of mechanical work necessary, & maybe the engine/s in & out a few times. Most heart breaking outcome, would be to spray it; then scratch or damage it, during the mechanical side. Where are you located gegraphically ? I'd love to have a look at your acquisition, if you are nearby. To find one of theses KE-17 Sprinters, without substantial rust, is a real find. Cheers Banjo
-
There is something about the rear roof rake on the Sprinter models, that was/is so appealing. Forget about the 20V or 2TG conversion. I asked the question on here sometime back. Who is going to be the first to do an EV conversion on a KE. Your KE17 Sprinter is perfect. It would be the first, & only one in the world ! (I Googled it, & couldn't come up with anyone whose done it) Here is the standard in early model Corolla KE resto. https://www.wapcar.my/news/goldmine-brand-new-1972-toyota-corolla-sprinter-trueno--4057 No pressure to make yours as good or better than this one. Love this guy ! https://www.roadandtrack.com/car-culture/classic-cars/a12475265/teslas-shop-foreman-has-owned-36-first-gen-toyota-corollas-so-far/ Cheers Banjo
-
Welcome back ! Oh WOW, a KE17 Sprinter ! Arn't you a lucky guy. Carol looks in good shape for a resto. Will be really keen to see what you discover. Does it actually run, as it is ? So many of the KE17-20-25 series now are full of rust, but Carol looks likes she "has been loved", at some time in her life. Excuse my ignorance, as I've never got up close & personal, with a KE17; but is the circled component below a water heater control & shut off valve ? I've never ever laid eyes on one of them before ! Cheers Banjo

-
Hi Graeme, Not quite a Christmas Tree, but a a full set of clean; clearer, & brighter lights, which does give it a fresh new feel at night. Cheers Banjo
-
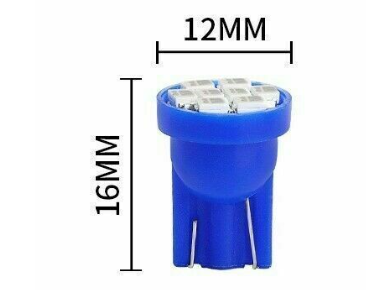
The LED changeover of all lights on my KE-30 has been finally completed, after the last LED bulbs for the rear ‘Number Plate illumination” arrived yesterday, & were fitted last night, with a really good result. I thought I would list them all, & their cost, so anyone else contemplating the changeover, will have the LED bulb type/model knowledge, & cost. There are a total 18 off bulbs involved . . . . . None of the bulbs required any modifications to connections or wiring. Headlight Bulbs: Two (2) off @ 36.57 total. eBay Description: 4-Sides H4 HB2 9003 LED Headlight Kit Light Bulb Hi-Low 2500W 375000LM 6000K HID _____________________________________________________________________________________________________________________ Front Side Guard Indicator Bulbs: Two (2) off 12V 5W Wedge Bulbs @ $ 2.00 ea. ________________________________________________________________________________________________________________________ Front Turn Indicator Bulbs: Two (2) off Front Parking Bulbs: Two (2) off Rear Stop Bulbs: Two (2) off Rear Reversing Bulbs: Two (2) off Rear Turn Indicator Bulbs: Two (2) off Rear Parking Bulbs: Two (2) off Total off 12 bulbs Three (3) off packs off 4 @ $ 5.99 ea. Total Cost: $ 17.97 eBay Description: 4 X 1156 BA15S Car While Globe 18 LED Brake Revers Turn Stop Tail Light Bulb 12V ___________________________________________________________________________________________________________________________ Rear Number Plate Illumination Bulbs: Four (4) off @ $ $ 7.48 (note: You only need two, but the pack includes 4 off) eBay Description: 4X BA15S 1156 CAR GLOBE 50 LED BRAKE REVERSE TURN STOP TAIL LIGHT BULB WHITE 12V _____________________________________________________________________________________________________________________ Interior Dome/Ceiling Light: One (1) off @ $ 6.65 ea. (note: You only need one, but the pack includes 2 off) eBay Description: 2x CAR 12V LED 31MM FESTOON INTERIOR WHITE LIGHT BULB 18SMD AUTO DOME GLOBE _________________________________________________________________________________________________________ You will also need to swap your turn indicator flashing unit, over to a model suitable for LED lamps, as the existing one, (designed for high current bulbs) will “hyper-flash", if used with LED lamps. LED Flasher Unit: One (1) off @ $ 12.99 ea. ebay Description: 3 Pin LED Flasher Unit Relay Indicators 12V For LED Light Turn Signal So all up cost is about $ 100.00, & you get a couple of spare bulbs, to pop in the gove box. The results were more than pleasing. There was no mods carried out to the wiring or connections needed. Obviously, whilst, you've got the "lenses" off to swap over the bulbs, you will give the lenses a good clean. I found the little rear bumper bar mounted licence plate glass lenses, needed a very good clean. The flasher unit, is simply a plug out; plug in; requirememt. It is located down behind the plastic panel, next to the drivers accelerator pedal & leg. The only other advice I can provide, is about the electrical contact points in the car, for all these bulbs. The existing filament bulbs carry reasonably high currents, that "burn through" slight corrosion on the electical contact points, in the sockets. However, the LEDs, have very small DC currents, by comparison, & I would suggest giving all the electrical contact points a good clean, before inserting the new LED bulbs. I found an easy way, was to a bit of steel wool wrapped around the end of a pencil, or similar object worked well. Just make sure to blow out any tiny bits of steel wool, before inserting the new LED bulbs. For complete safety; this cleaning suggestion, should be carried out, with the negative terminal of the battery isolated. Probably the best results, I've had on my car, for a $100 spend. Cheers Banjo