

Banjo
Regular Member
-
Joined
-
Last visited
Everything posted by Banjo
-
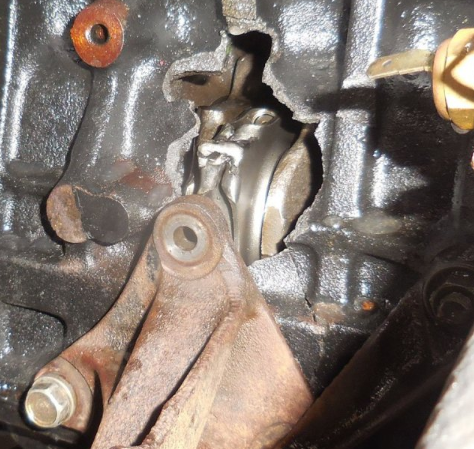
The U-Tube video clip in my previous post, describes the general operation of the IAC / IACV / ISC which are terms that are used for this device. IAC = Idle Air Controller IACV = Idle air Control Valve ISC = Idle Speed Controller The guy in the video is a tech teacher in Kiwi Land, & is a good communicator. He obviosly did a lot of reseach for the presentation, which He mentions, was hard to find. I did actually find a place where I could download the 7K-E factory manual last night. 50Mb & 264 pages. However, still doesn't provide the specifics of what I need to know about the electrical controlling of the IAC valve, in terms of frequency, & PWM requirements. The particular Toyota IAC valve he was using, did infact have a small adjustment of the bi-metal coil, which is totally under the control of the coolant temperature. As the 7K-E throttle body, has an end stop adjustment, you could use the IAC valve, without the ECU input, & just use it for increasing the idle speed on a cold start. However, the possibilities once the engine is up to temperature, & running; especially in motor sport applications, & traction control, are awesome. Once I receive the new IAC valve & actuator assembly, I bought on-line, I can play with the electrical ECU controlled actuator, & work out how to drive it. It is done by two electrically induced magnetic fields in balance. Moving the actuator, is achieved by increaing one magnetic field, & reducing the other. I have no intention of using an olde 7K-E ECU, (even if you could get hold of one), to control & drive this arrangement. All good fun ! Ouche ! Couple of tubes of Araldite or Gorrilla Glue should fix that ! Cheers Banjo
-
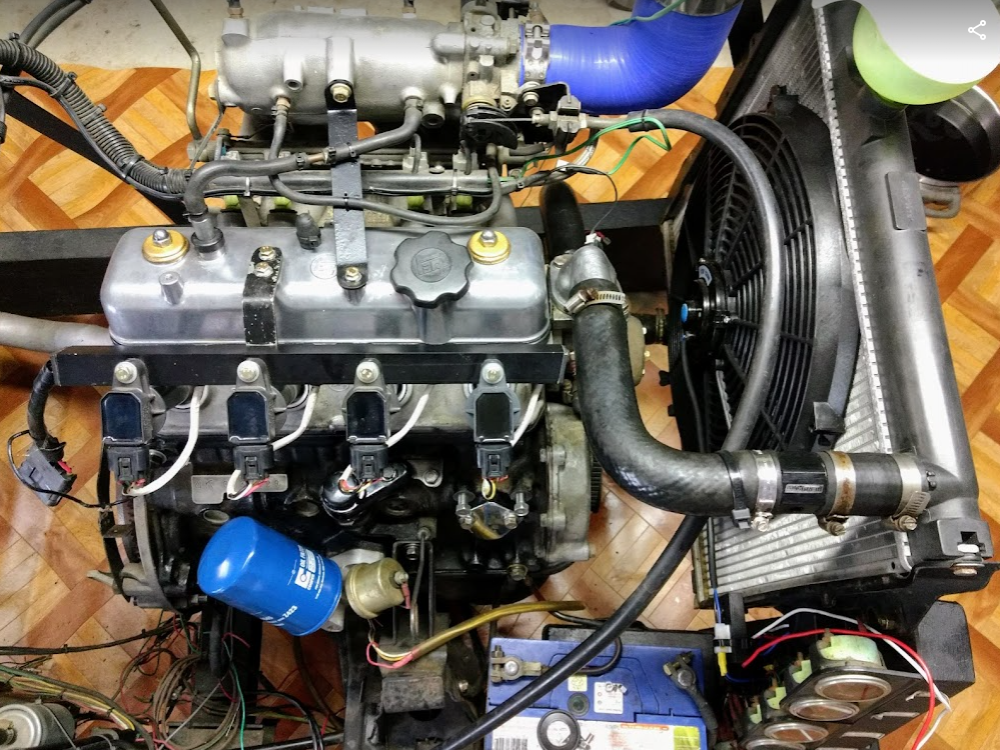
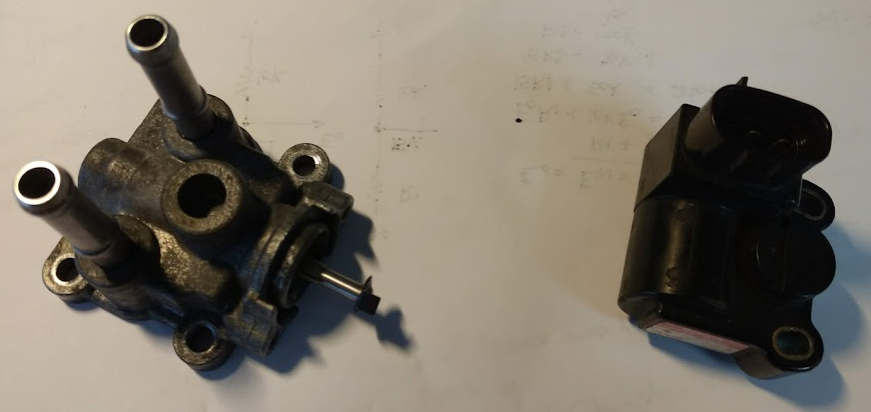
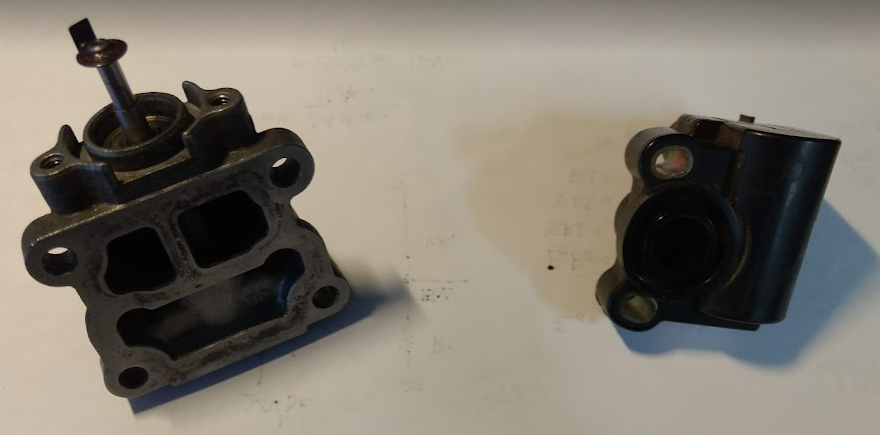
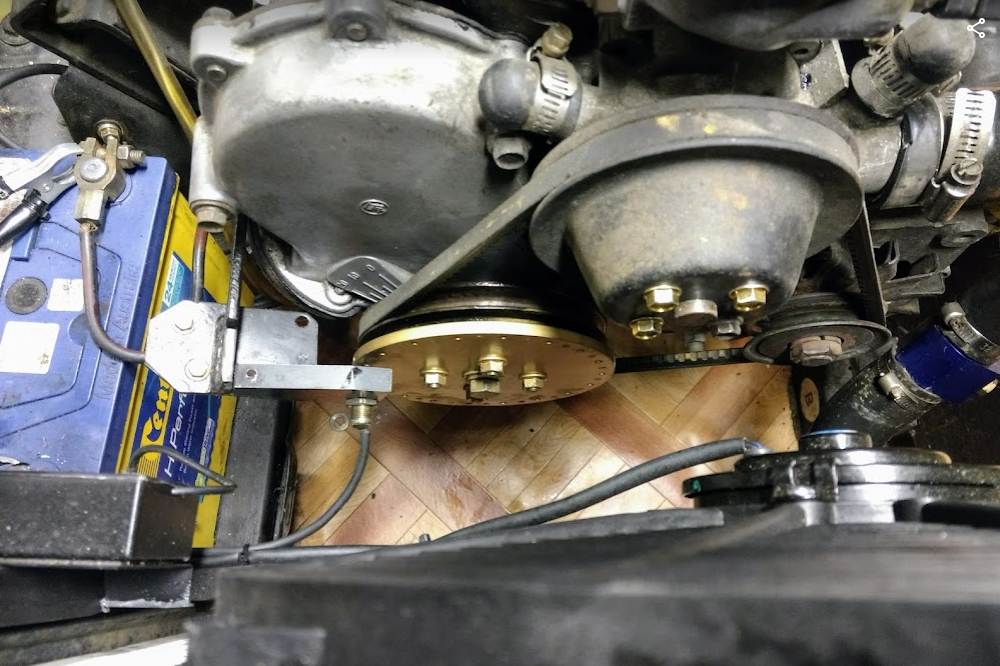
Been a few years, since I built this test rig, but after getting all the trigger sensors alright on my 5K test rig, with a Speeduino ECU, I've moved the COPs & trigger disk/wheel over onto a 4K with a 7K EFI setup. Only got the fuel tank with inboard submergible pump to sort out, & then I'm almost there. The trouble I'm having is trying to work out how the Idle Air Control Valve (IACV) is powered/controlled. The IACV has the coolant plumbing, which appeares to heat up some sort of sealed wax of the like. (no removable plate with bi-metal spring like some IACVs I've seen on the net) https://www.youtube.com/watch?v=Z_TmW0GCRpI The one I've got is stuffed, as the spindle turns easily. The electrical drive at the other end, has a 3 pin plug, which I believe needs a switched +12 or +8V volt source on the centre pin, & a high frequency earthed pulse train on the two outer pins. I've ordered a new IAC Valve & actuator, which in a DENSO model 22270-06020. As I will be controlling this via an aftermarket ECU, I need to know what the two control signals look like in terms of voltage, frequency, & PWM (pulse width modulation) requirements. Has anyone on here had any experience with this particular IACV ? I've spent 2 nights on the Net, & can't find anything specific, about it's driving signals requirements. These were used on 7K-E engines, on Toyota Lite Ace vans & the like. P.S. Anyone got a 7K-E Toyota Workshop manual, in pdf format or hard cover, they want to sell or loan ? None of the pdf links on the web seem to work. Cheers Banjo
-
The fuel pump is at the front of the engine, but the pick up point in the tank, is a long way back. That makes the suction line nearly 3 metres long. I have found quite clearly, that the smallest leak in that fuel suction line, anywhere between the pump inlet, & the tank pickup, will result in no fuel arriving at the carby. It has happened to me, & the tiniest leak, reduced the suction so much, "it wouldn't pull the skin off a custard.". I'd check the complete fuel line out, under the car, & on top of the tank in the boot. Anywhere there is a rubber joiner is a possible leak point. The rubbers go hard, & the leaks occur. Replace any rubber joiners. You'll be surprised how hard the olde ones get, after all these years. Cheers Banjo
-
Hi Wes, If you Google "maximum wheel offset that can be used on a Toyota KE70 ?" it will find four (4) off subject discussions on this RollaClub site, between 2006 & 2012, covering this topic. If you have a read through those threads, you might be able to gain from the experience of others, & obtain the answers you need. Cheers Banjo
-
Hi Neil, I gather you are referring to these little clips, that hold the window winder handle in place ? You need to make a simple hook, out of an olde thin wire coat-hanger. Push the door panel in hard, just above the handle, & you will be able to hook the pin on it's loop, & extract it. Has always worked for me. P.S. A thin long nosed pliers can also be useful. Hope that assists ! Cheers Banjo

-
The T3 AE86 will live again! How is it we forget that passion is the real reason we do these things? I started working on my AE86 in 2000: constantly developing parts, tracking and daily driving it until it reached its peak completed form with the F20C installed in August 2004. I enjoyed the hell out of it all the way up until about 7 years ago when I drove to our new shop in Shingle Springs and we tore into it for new parts development. Over the next few years, the car slowly disintegrated into a pallet of loose parts. I had a few excuses for why the car came apart and never went back together. Business is more important! Development is more important! It’s gotta go back together better than before! But those were all just excuses. The real reason the car didn’t go back together was because I didn’t think I deserved it. See…the AE86 was “MINE”. This car was the launchpad for T3 the company. It was used for much of our early publicity, including two magazine covers, the Hotversion American Touge video, as a test bed for our Formula D car, countless drift and racing events, etc. However, I still had it in my head that the car was “mine” and that rebuilding it through/at T3 would be an act of selfishness. In my head, I couldn’t possibly pull resources from T3 to rebuild something that I considered something personal. All this time, I’ve been collecting ideas of how I wanted the car to go back together and all the new and neat things I wanted to explore, but the time just never seemed right. The guys have been bugging me to put it back together for years now, but I just couldn’t let go of the idea that doing something I was personally interested in had to take a back seat to everything else. Somehow, I forgot that the passion for the build is what MAKES this company and that feeding that passion only makes it stronger. We finally hit critical mass. The crew had had enough of my BS and basically sat me down and said, “this is what is going to happen”. Once the decision was no longer mine and I was able to see things from their perspective, I was able to get behind it one hundred percent. Their excitement and fire reminded me of what is important. All the fun we have here at the shop, all the love we pour into these projects just makes us better at what we do. Doing things, especially new things, teaches us how to better make parts. It gives us new challenges and new solutions to those puzzles. It’s on. The T3 AE86 will live again and hopefully be even more fresh than the first go around. The passion is here and the fire is raging with more fuel than it can handle. Ideas are coming, and sleep is suffering. I can’t effin wait! Don’t take as long as I did to figure it out. Whatever you do, do it for fun, do it for passion, do it for love and do it now! Or if you can’t do it now, at least start wiggling your toes in that direction! Get out there and #buildsomethingawesome! Gabriel Tyler
-
I'd sort of got a bit tired of watching Project Binky, as it is a bit like watching grass grow. Last time I looked was probably about episode 32 or 33. But as Google does, it advised me, that episode 37 was available. Project Binky Episode 37 I had a quick look, & good golly, the little Mini is running, . . . . . . . . but alas, not for long, as you will findout, if you have a gander. The exercise of Project Binky, appears to be a constant effort to place things in places where there is "not enough room" Episode 37, is filled in part, about a modification need for the clutch pedal, which just beggers belief. What worries me about this project is, that they keep talking about crashing it; & if & when they do, it will take another 4-5 years to strip it & repair it again. At least if my Rolla "conks out", on the side of the road; I can lift the bonnet, & with a few general tools fix most things. If Binky stops, & it is something at the back of the engine bay, it would take you a week to even get at the area you need to. I'd love to know, how much this project has cost. Pretty staggering methinks ! Cheers Banjo
-
Hi Randy, Certainly a work of art ! I can understand why you are trying to find out everything about it, as I'm sure when you display it at your fair, there will be lots of people like me, asking all these sorts of nitty gritty questions. My guess is that with the 3K engine, you could have easily 2-3 times the power at the back wheels,from the original mower; so it should be good at pushing snow, or towing. I gather though, that it is single speed, & that there is no gearbox involved down under the seat, that we cannot see ? I can see a little handle & a slotted gate, below & in front of your seat, though ? Keep us updated ! Cheers Banjo
-
I love this ! A 3K engine driving a ride-on lawn mower only. Don't know where I got the idea, that it was also a mobile water pump ? Maybe the size of that great big pipe over the top of the engine from front to back. After listening to the engine, on your utube first venture out of the shed; round the tree; then back to the shed; it appears to run quite well. What was the capacity of the original engine, that was in this mower, as standard ? I would suggest that the capacity was much smaller, than the 1200cc of the 3K engine. As you are using the oriiginal carby, on a much bigger motor, you may well be able to release a lot more power from this setup, if you returned the carby to something more fitting, a 1200cc motor. Maybe the guy who originally modified this simple drilled out the jet in the original caby. Just a thought. You could still retain the side draught arrangement, if necessay, by grabbing a suitable sized SU or equivalent. Regarding the crankcase breathing setup. As you already have an electric fuel pump, & there is already a plate over the flange on the engine block, for the original mechanical pump; then by all means, drill a hole in this plate & mount your existing breather filter, from the top of the engine. Leave the other hole on the rocker cover blocked, as you have done, (actuially that blocked hole is the original intake) & refit a PCV valve & feed that point to the inlet manifold. The early 3K engines, had a "push on" rubber oil filler lid. When these became old, they tened to pop out, if pressure built up in the crankcase, which resulted in oil all over the engine & bay, next time you lifted the bonnet/hood. Later JK Series ricker covers came with a hard plastic/balelite screw in cap, to overcome this issue. If it was me, I would remove the whole existing water pump arrangement & fit a 3K original, which would make it so much simpler, than what you've inherited now. It would completely change the appearance, of the " That system looks pretty frightening." as Altezzaclub decribed it above. Only other question I had was the size of those monster rear wheels & tyres. Were they the original size on the mower as standard ? If you up this performance of the 3K engine, with those large tryes, you could almost go drifting, or lawn mower racing, which is a popular recreational activity here in rural areas of Australia. https://www.abc.net.au/news/2022-05-09/lawn-mower-racing-championships-forbes-largest-ever/101047264 https://www.carsguide.com.au/oversteer/forget-supercars-lawn-mower-racing-is-australias-best-motorsport-68574 Cheers Banjo
-
Hi Randy, All I can say,; is that this guy had plenty of time on his hands ! There is a lot of work gone into that. It might be a contraption, but it has all been done well. Even the way the 3K inlet manifold has been installed 90 deg to original, & turned around, to adapt to a side draft carby of some descript. There is no hole in the timing chain cover as standard. However, when you remove the timing chain cover, there is a casting circle usually on the inside centre, & being aluminium, it is easy to drill & open out a hole, where I fitted mine. The best sort of crankcase scavenging is to exhaust the air from the top of the engine, using the inlet manifold suction, & allow fresh air to enter at the fartherest point in the lower front, you can get to. Another place that is good, is the fuel pump flange on the block. Lots of us use an electric fuel pump, as those mechanical pumps don't work well, when the tank is at the rear, & lower than the pump; & there is a tiny leak in the inlet line to the pump. You can get, or make a blanking plate for the fuel pump flange on the block; & that would be a very easy point to attach a fresh air intake filter for the crankcase ventilation. The COPS just allow you to do away with the distributor altogether, & use a sold state ECU to control the ignition with advance & retard, of timing based on revs & load on the engine. You can use the COPS in a waste spark, or full sequential firing system. The little blue sensor in the pic above of the inner timing chain cover, provides a "synch" pulse to the electronic ecu, so it can fire at the right time. Here's all that's left, of where the dissy used to fit. Ha Ha ! Your pics in the fist post didn't show that radiator tucked down there between those large rear wheels. Did you buy this because you have some other use for it, other than mowing the lawn? Like using the onboard water pump ? Sounds like a lot of fun. I would imagine, the 3K engine would have a bit of grunt, with a resonable power to weight ration. There was a larger 1.5Litre 5K version of the K Series engine, which had more torque, & was primarily used in Toyota utes & vans; & forklifts. Thats a 5K sitting on my mower frame. Have fun, & post on here, when you fully work out, how it all works. Cheers Banjo


-
Well I think I just saw & hear it running ! https://www.youtube.com/watch?v=T6J6s3Hcm98 Looks like the same garage Randy ! Sure doesn't sound like a 3K, but sure looks like the real thing. Here is a few more tractors, but not with 3K engines. These tractors were running before Toyota was even a company. No drifting in these ones. https://www.youtube.com/watch?v=QLcI5X2O-xI Cheers Banjo
-
Dave, yes indeed. Over lunch, I maximised the pics, & zoomed in to the pics, to see how it all works. Unbelievable ! The damn thing even has rack & pinion steering, from what I can see. The unsupported extension on the very front of the crankshaft is a monster. Can't see a fan, to drawn air over the engine. Appears the engines internal coolant, is infact the same water, being pumped ? Would love Randy, to give us a bit of a description, of how it all works ! Cheers Banjo
-
Hi Randy, Welcome aboard, & thanks so much for your post. I absolutely love the idea, that some compay years ago, fitted an early 3K motor to a combo ride-on mower & mobile water pump. It caught my eye, as I have a working 5K motor, that I use for developing a COP ignition & triggering system. I needed to be able to move it around, due to lack of space in the garage; so I mounted it on an old ride on mower frame. It does not drive the mower, it was just convenient, as a set of wheels. I have zoomed in at the photos you posted, & am facinated how they orriginally mated pump & take-off for driving the mower. Belts taking very unusual paths, to get to the cutting deck. Your Jackass looks to be in remarkable condition, considering it's age. Looks like it was stored well. I wouldn't worry to much about the PCV valve, unless you plan on feeding it back into the inlet system. They never worked very well on the K Series motors, as the fresh air inlet & outlet to inlet manifold, were so close to each other, on the rocker cover. If you want to replace the PCV valve & use the scavenging system for the 3K engines internals; then I would suggest, blocking off the inlet on the top of the rocker cover, & fit a filtered air intake down on the timing chain cover. On of my daily drive Corolla, I even fitted an oil catch can,, between the PCV valve & inlet manifold. Cheers Banjo


-
Hi Gavin, If you need any more convincing, that you should dice the standard fan, & fit an electic one; I would suggest you read through a very long thread on here, about 4-5 years old, where many thoughts & experiences were related about radiator, thermostats, fans etc, etc. We even did some tests with a temperature data logger, to see graphically, after the event, how the system & mods worked. https://www.rollaclub.com/board/topic/73676-oil-pump-failure/#comments Cheers Banjo
-
Hi Gavin, No offense, but agree with Pete totally. Even the standard plastic fan, reduces power from the engine, that should be going to your back wheels. Bear in mind what the fan is for . . . It is there to force air over the engine, when your Rolla is not moving forward on the road, when normally, the force of the air passing over the engine, without fan, is totally sufficient to completely keep the engine at normal operating temperatures. It appears you have a large capacity aluminium radiator, which will be far more efficent at remove engine heat that the original factory radiator, from bygone years. My honest suggestion, would be to put the water pump pulley back on, & dice the fan you have there altogether. Then add a simple electic fan to the rear of the radiator, which is easily accomplised, as the electric fans come with all mounting hardware usually. Check ebay, & you'll find they are freely available, to suit the aluminium radiator dimension, you have fitted.. The fan is then activated by an additional water temp sensor thermostat, that switches the fan on, once the coolant temp, rises above 90-95 deg C. I put an electric fan on my 5K & 4ks, & I have a light on the dash, which indicates when the fan has been automatically switched on. Without a word of a lie, the fan, rarely comes on. Ocassionally in hot weather, it city traffic, waiting at the lights, it will be activated for a couple of minutes, but as soon as you drive off, within 1-30 sec. it turns off. When I first fitted it, after having driven for years with an engine drive fan, it was noticeable, how much more power was available to drive the car. I'm sure others on this forum, will testify to what I am advising you. Keep us updated. Love the detail & work you are putting into this project. Cheers Banjo
-
Hi Max, Welcome aboard ! Have you got a Rolla ? Have you ever had a problem with a sterter ? Cheers Banjo
-
Wheel spacers are very common; & readily available on line; but there are some serious implications if you "go overboard". Are you wanting to put bigger wheeels on, just for "appearance", or are you wanting to do it, as a performance improvement to the car ? Once you start fiddling with the geometry on front suspensions of cars with McPherson struts, then you have to get the geometry right, or you will finish up with "srubbiing" issue with you front tyres. Here is a good article, that describes the implications; with diagrams; much better than I can. https://suspensionsecrets.co.uk/why-you-should-not-fit-wheels-spacers/ Have a read, & if you have any more questions or queries, please come back, & ask them. P.S. I love what some of you Rolla owners do to Corollas in Malaysia. You really worship your cars ! Cheers Banjo
-
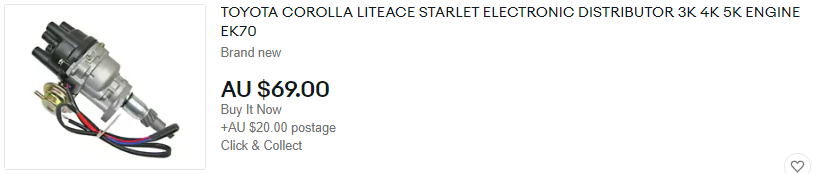
Hi Graeme, Yes you have something there, that could well be the case. All the dizzies that appear on ebay, are titled as being suitable for 3K, 4K, & 5K. The 5K was only used in commerical Toyota, like vans & forklifts etc. They are designed for torque, but can be made to rev well, if given the right curve. I'm a great fan of the 5K, as it is nearly a perfectly "square" engine. I had one in my KE55 coupe for years, & I got it perculating very well. Many of the 5Ks here in Australia had hydraulic valve lifters, & were very reliable. I bought a stripped down 5K a few years ago, for $ 100, from a guy up in Gympie Qld., who had modified it for speedway racing. With good preparation, & balancing, they could easily achieve 8K revs plus. The bottom end of them was almost unbreakable. I know Altezzaclub used to "play" with the springs in dizzies, to change their curve, but there is nothing like a locked up dizzy, using it as a trigger only; & feeding that signal into a progammable ECU, where you can play to your hearts content, with advance & retard curves. Cheers Banjo
-
I complete concur with Altezzaclub's conclusion that the extra weight in the mass of the double row camshaft sproket & chain, would have little, or no tangible effect on the total rotational mass load on the engine. It's good to hear your fitment of the new chain & sprockets has instantly improved the idling & mid range performance of the engine. It's now simply a matter of finding a way to improve the top end, in that 4500 - 6000 rpm range. Over the years of "playing" with K Series engines, I've changeed a few timining chains & associated sprockets. I've never been able to get a complete kit here in Australia, with all the components you listed, as being in yours. I've always had to purchase them indivually. i did, in recent years replace sprockets & chain on a 5K, & was interested to note that the camshaft sprocket did in fact have three hole in the back sde of it, to fit to the location pin. I had never seen this on any other aftermarket double row sprockets I had purchased previously. I was very tempted to try the alternative position to get the valves to open a little earlier, & see what effect resulted. Hoewever if it didn't work out; & I had to revert to the standard pin position; I would have to go & remove everything again, and changing timing chains & sprockets is an absolute pain, with the engine in situ. There are other simpler ways of maybe improving the top end performance, if it is impeded by something else. The standard ignition coil is well known to drop off it's output at higher revs. If you already have a electronic distributor, it is possibly one with the "ignitor" built in. You could replace your coil with a low impedance "sports type" coil, which will improve the top end performance noticably. You may however find that the electronic dissy you already have; has an ignitor that may struggle to switch the higher primary current of a performance coil. A simple way around that, is to use the existing ignitor in your electronic dissy, switch an external heavy duty ignitor, that will power the sports coil. If that works, & I'm putting myself out there, & saying it will; then you might even be interested in fitting a programable ignition system, which will not only be able to drive the sport ignition coil, but would allow you to map an ignition advance/retard curve perfectly, to give you the best perfomance possible with the engine, as it is. I did that to a 4K engine in my daily runabout years ago, & it works perfectly; & I've never touched it since, as it is totally maintenance free. https://www.rollaclub.com/board/topic/73743-electronic-distributor/?tab=comments#comment-712657 Cheers Banjo
-
I'm not questioning that you've noticed a difference, in the performance, but there could be a couple of reasons, which may not be related to the timing chain at all. 1. Did you ensure the little location pin between the back of the camshaft sproket & the front of the camshaft was reinstated, when you fitted the sproket to the camshaft ? The crankshaft sproket has a giant keyway, that locates crankshaft pulley & the timing chain sprocket. The camshaft sprocket does not have a key, but a pin, that it relys on totally to lock the camshaft & chain, in the correct position. There have been those on here, that have had this pin shear, with dramatic results. 2. Did you replace the tensioner at the same time, as I assume you had a kit with it in ? 3. It could be that with the sloppy old chain, & a tensioner not working well; that the timing was out enough to effect the performance slightly, as the cam shaft drives both valves & the distrubutor; & hence has a slight effect on the ignition timing. It could be that you have to adjust the ignition timing slightly, in both directions, in increments, & see whether it makes any difference. Have you got a timing light ? That could throw up the fault, as it will indicate, whether the automatic advance/retard mechanism is working OK. Have you got a standard points type distributor ? Maybe it is time to give that an overhaul ? Let's know what you find. Trust this assists. Cheers Banjo
-
https://www.youtube.com/watch?v=lcv5pyXVV1Y I don't think I've ever seen Scotty smile so much ! Enjoy. Cheers Banjo
-
Hi Graeme, The KE70 is a wee bit easier to remove the starter, as it has a rack & pinion steering; mounted down there behind the front cross member. The earlier KEs have the cross tie rod, & pivot points thereof, which get in the way just a bit. I had to unmount the cross tie rod pivot point on the exhaust side of the car, & pull it down, to be able to remove my KE30 starter. Cheers Banjo
-
Putting a thermostat in that starts opening at 76 deg C, is not the answer. The engine should run at say 86 - 92 deg C, for best engine operation. That's why Toyota put a 92 deg C thermostat in the engine in the first place. That's why in very cold climates, they block the radiator off, to push the engine & coolant temperatures back up. What part of the world do you live in; & what are the outside abient temperature ranges in Summer & Winter ? Get rid of the kink in the lower radiator hose. Ensure there is no air at all in the coolant system, as described earlier in this thread. If the radiator is new, we can assume it has no crud in it, & is not partially blocked. Does that "blue" aluminium block in the top radiator hose, house the thermo-switch for the electric radiator fan ? That is the right spot ! What are the On & Off switching temperatures for this switch. If it is not a new switch, it might be worth testing it in pot of water on the stove. is there a gap on the LHS of the radiator, as the Honda Civic radiator is narrower, than the original ? If this area is blocked off, it might force more ar through the radiator, but might also restrict air flow to the RHS of the engine, where the exhaust manifold, creates the hottest engine bay temperatures. Let us know what else you find, & whether you can sort this issue out. P.S. Do you have a temperature guage in the car, where you can "watch" the operation of the cooling system. I have one right behind my steering wheel, & it is a wonderful engine monitoring tool. Cheers Banjo
-
Interesting set of issues. The results you describe are certainly "not normal", & unsustainable, long term. You haven't advised where you are located, & what the ambient temperatures were at the time, that these observations of increased coolant temperatures occurred. If you drive the car at night; when presumably the ambient temperature is lower; does that make any difference ? Prior to changing the radiator ( which I assume was recently), was the engine coolant temperatures normal ? What was the reason for changing the radiator to the Honda Civic radiator, in the first place ? Did you ensure there was no air trapped in the "coolant system", when you first filled up the system, after fitting the new Honda radiator ? If all else is normal, then the answer could well be in the first line of your post. It could well be, there is simply not enough air passing through the radiator. Another question. How long, prior to changing the radiator, did you fit your 4AGE 16V big port engine ? Removing the thermostat permanently, should not be a permanent solution, as it is only "masking" what ever is the underling issue. If you can answer some of my queries above, it may assist getting closer to the cause. However, if the coolant temps were OK, prior to changing the radiator; maybe the quickest way to solve the issue, is to get hold of a new radiator, the same as the one, that was in there previously. P.S. Sometimes a picture tells a thousand words. Maybe if you add a few pics of the radiator & engine setup, it may indicate to some one reading this thread; what the problem is. eg: Maybe the smaller radiator is reducing the amount of air passing around & over the block of the engine, & that is creating a situation, where the engine block is hotter ? Cheers Banjo Cheers Banjo
-
From my comments in the link, in my previous post to you, regarding removal of the starter motor. A multimeter would help, but even a test lamp, will display a sagging battery voltage, by a dimmer light. Cheers Banjo


