Leaderboard


 Global Moderator
Popular Content
Showing content with the highest reputation since 07/27/18 in all areas
-
HEY it's about time I sanded it back to metal and started this process all over again 😂3 points
-
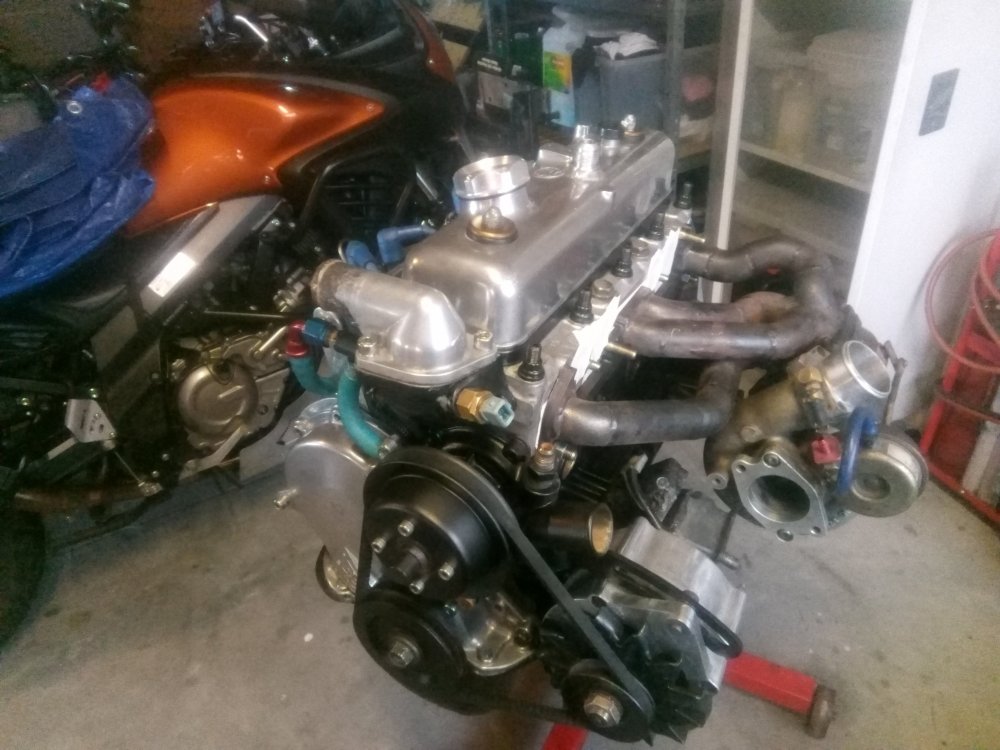
Hey Chums, Bit of an update on the rolls. So I bought it earlier this year, had it running with the mighty K motor for a few months. Decided the 3k just wasn't doing anything it for me and had some spares kicking around from my Celica, figured I'd 3tc swap it... And while I was in the process a turbo and j160 6 speed would be easier to do at the time rather than down the track. So I rebuilt the 3t with stock 3tgte internals, made a manifold, tail shaft, cross member, converted it to hydraulic clutch, remote brake booster etc. Thats pretty much it for now, just been running on 7psi and having a bit of fun with it. In the process of sorting out an intercooler, before I up the boost a bit, going to run a water to air cooler on top of the rocker cover. Also have a M78 commodore diff I'm shortening at the moment for it. Cheers Jack.


 3 points
 -
Hi Michalis, It's not too hard, as your olde 30A alternator (first picture) & the newer 40A alternator are both designed for an external voltage regulator. Both have the exact same connections, just in different places. So the top picture You depicted, is a 3 wire plug connection, with 3 wires, The second picture also has F, N, & Earth point, except it does accept the plug on your harness. You will have to cut the plug off the harness, & connect the three wires, to the corresponding three (3) points on your replacement alternator, marked F, N, & E. The last connection, is the +ve or "battery" wire, which will be the thickest of the cables, On your olde original alternator, there is a big "B" for battery, moulded into the alternator aluminium casing, right next to the terminal. On your replacement alternator, there is also a big "B"; moulded into the aluminium case. Hope that assists. Cheers Banjo


 2 points
 -
That photo I came across; of a beautiful K Series motor preparation, (see earlier post in this thread) has had my mind racing this week. Although the "specialised camshaft sprocket aluminium cover", looks like it is professionally made; I couldn't help but think, that I want one ! So if you can't buy one; could I just make one. I really need all the space in front of the engine, so a bracket that holds the Hall Effect sensor; vertically facing down to the edge of the trigger wheel; would provide the best solution. My "lash up", to prove my concept of a "no missing teeth trigger wheel", using rare earth magnets, with a separate single inboard magnet to create the crankshaft positional signal. However, since then, I've purchased a Haltech double Hall Effect sensor, where the sensor barrel, contains two Hall Effect devices. One detects North pole magnets, & the other detects South pole magnets. Being the same housing means there only needs to be one row of magnets around the aluminium disk edge. I have 35 magnets around the edge, with south pole facing the sensor, & one magnet, with the north pole facing out. This then produces the same result as a 36:1 toothed wheel, from the "South Pole" Hall Effect device. However, the single pulse per revolution, positional sensor signal, can be "OR'd" with the 35 pulses, to produce a very accurate signal, with no missing tooth gaps, for determining high accuracy & resolution, for extremely accurate RPM measurement. Accurate RPM info is most important, as it determines where on the MAP, the ECU takes its preset response curve. The picture directly above, shows two Hall Effect devices, & the single positional indicator magnet is located inboard, in line where the missing tooth is located. The single Haltech Hall Effect sensor I'm now using, simplifies this above depicted arrangement, as it has two individual Hall Effect sensors, both mounted in a common housing, but with two (2) individual, electrical outputs. With a single Hall Effect sensor, with two Hall effect sensors therein; this allows a single row of sensors around the outside of the aluminium trigger disk. 35 off magnets, with "south" pole facing out, & one off magnet with it's north pole facing out. It all works, & I have had the engine actually running like this, in full sequential firing, via the Toyota Echo COPs, I've mounted on the engine; albeit, with only fixed advance of 10-12 degrees. However, the Haltech Dual Hall effect sensor, is longer than the two (2) off single output Hall effect devices depicted above. It looks like this . . . . . That means, the Haltech sensor sticks out horizontally, even further. So my intent is to mount it vertically, off the camshaft sprocket aluminium cover. I've dug out an olde 5K cover, & ground the slight dome off the front of it's external face, so I can mount the 6mm x 120mm thick aluminium disk, which should arrive in a couple of days. It won't look as good as that professional one, depicted on the web photo, earlier in this thread; but it will provide me with a solid & firm base to mount the sensor, as vibration from brackets sticking out in open air, provide a source, to create missed sensor signals, where air gaps are small, & missing positional signals, are not welcome. However, solving one problem, introduces another consideration ! The mounting of the sensor vertically, requires that the rare earth magnet end faces, also meet the Hall Effect sensor face vertically. This is because the magnetic field is stronger; close to the "poles", where it is concentrated. This will require embedding the magnets in "the edge" of the aluminium disk. The face of the Hall Effect sensor is 10mm in diameter. Obviously, that would require a very thick aluminium disk. I've settled for some 4mm rare earth magnets, I have here, & have ordered a 200mm dia. x 8mm thick aluminium disk, to embed them in. The magnets will be 20mm long. The problem is that mounting the magnets in that fashion, exposes them to the centrifugal force of the spinning disk, trying to "shed them" . This does not happen presently, as the magnets are contained securely from centrifugal forces, as they are pressed in from the side of the disk. My technique previously, was to drill the holes in the disk, slightly undersize; & press the magnets in, using a vice. I'll use that technique again, & fill the hole with Araldite, before fitting them. Then laying the disk on it's side, on a hard flat surface, A simple centre punch to the side of the disk, in the middle of where each magnet is embedded; should result in no movement in magnets at all. However, I have seen pictures of professional Aluminium trigger wheels with magnets, so went looking at what others have done. Holley / MSD produce something like this . . . In this case, the magnet face is pointing to the side of the disk, rather than facing the sensor. The answer to this query, is actually in the photo. The sensor only has two (2) wires coming out of it. It is in fact; not a Hall Effect sensor, but a common VR, or variable Reluctance sensor, which requires no power. It is interesting, because the picture of the K Series engine above is also using a single VR sensor, & a ferrous "missing tooth" trigger wheel. I do not favour the VR sensors; although I know manufacturers in the USA & elsewhere, have used them for decades. My objections are two fold. One, the waveform from the VR sensor is a badly formed sinusoidal waveform, & requires extra electronics to "square" it up, so the time information is accurate. Two, "the amplitude" of the waveform, is quite low, at low revolutions; (whilst cranking), & therefore, the very time at which you are trying to start the engine, on a cold Winters morning; the sensor is providing it's lowest amplitude. So when I receive a 200mm dia. x 8mm thick aluminium disc, this coming week, I can then work out, how I'm going to set it up, to drill 36 off 4mm holes, 20mm deep, around the narrow, (8mm) wide edge. P.S. One of the nice & convenient things about my little project; is that I can pop the original dissy in; remove the COPs, & run the engine, whilst lining everything up on the trigger wheel, & checking the Hall Effect sensor outputs on the CRO. Cheers Banjo


 2 points
 -
Thanks banjo, I know it's funny but when I started the restoration 18 months ago I had never welded or done any form of metal shaping. I know I took Tafe courses and spent time at a professional shop to learn the skills, but for a complete novice this is a daunting task. All that said I do really enjoy it, you're right in that the process is gratifying to see how this is turning out. But it's funny to think I'm now doing the work at home, and hopefully someone will read this blog, my journey of learning and it inspires them to restore their car. Because if I can do it, well anyone can2 points
-
And just like that, it's finished, slight change of plans on a few things, been on the road now for almost a year, and took 6 months of "trial and error" to get it to finally run as it should!


 2 points
 -
Indeed it was a long term proyect, but ever since I rented the garage, the work took of and it got a lot of momentum and its getting closer and closer to the finish. Thanks a lot for the kind words, and as you say I have a lot of updates to post Well at least after a while you'll have a pool and a garage to have fun with hahaha, so the wait it's worthy Now I have some short posts, but I tried to split the photos into diferent sections of the car while I was fixing them And we start with the rear end of the passenger side. First of all let's cut all the rotten metal, and we end up with something like this And then we have to make all this metal from scratch Little by little, with a hammer and patience each of the parts for this puzzle come to life The process is simple and the same for every part, take some measurements, find a piece of metal with that size, cut, hammer and bend to shape, and fit and refit and test fit until the shape is right. When you are happy with the fitment, and also checked with all the other parts in the vicinity, get the metal glue gun, and zapp all the parts together, then a little weld through primer and on to the next piece Test and check and weld And with that we have all the corner looking like new Onto the next part2 points
-
Cowrolla
 2 points
 -
Pretty straightforward- Screws into plastic clips in the rubber strip across the car under the bonnet, tabs on the scuttle panel that slide out under the screen. Clean the box out the best that you can, a lot of leaves and dirt gets in there and hold moisture in so it rusts. Oil the joints in the wiper arms while you're in there too. I can't remember if you HAVE to take the bonnet off, or if it just helps to make it easy. I'm only taking the scuttle off when I have the bonnet off anyway.2 points
-
Ooh I didn't know you were a mountain biker Stu! Byron and I are off to Derby tomorrow. We normally spend most weekends these days doing dirty jumps somewhere. You've probably never seen his YouTube channel....I don't exactly plug out here.2 points
-
Thanks man! Looks well here for now. Brought it on local shop for fenders and door alignment, minor body repairs and paint restoration. Rusted parts are removed and replaced by fabricated sheet metal.


 2 points
 -
Few more progress photos.


 2 points
 -
...and not only that but those Goss pumps are noisy! Hang it off a lump of rubber if you buy one.2 points
-
You can't see it's...ugh... not so healthy side, so we'll stick to the propaganda view for a while. Steve, you are a legend for the photo & making it look like that! :)
 2 points
 -
So long overdue update. Guess I'll be doing what will become inevitable in a lot of backyard garages in the coming months (Hey let's look at the positives) and getting some work done in this!! Where to start... So shortly after run in and the initial tuning I started having some clutch issues. Wouldn't disengage fully making it hard to get into gear (especially grinding reverse) and would also want to nudge forward at the lights etc. Spent months chasing my tail with it getting new master cylinder, throw out bearings, having the fly wheel refaced etc etc etc. Finally worked out it was loose rivets in the brand new exedy pressure plate. Essentially the clamping part of the pp want disengaging parallel to the flywheel causing an edge to drag. After a pretty drawn out warranty process with exedy they finally decided to replace the kit. I can appreciate from there side though that this was: a TE72 clutch kit, mounted to a modified k series flywheel, inside a rare as rocking horse shit bell housing, using TA22 hydraulics behind a motor making about 4 times what it really should! 😂 There's still a little frustration around the situation as I spent a lot of time and moon by trying to find and fix the problem. Also that faulty pressure plate was the one that was balanced and indexed to my rotating assembly balancing for the rebuild. Anyway... I'll install that soon with another t50 I got recently as the current one likes to jump out of 4th sometimes. Head gaskets 🙄 I'm not entirely sure what's going on at the moment. When I rebuilt the motor I used a permaseal head gasket. About 500km or so in that 'blew' and I got the last 2 genuine 5k gaskets left in the country. Stuck one of those in (with the ARP's as well) and it went again not long later. When I say BHG... the only real symptom is when you start it first thing in the morning it'll run on 3... or maybe even 2 because of wet plugs where water has entered the cylinders overnight. Not heaps but enough. This is actually a slight problem a had a few years ago before I rebuilt three engine! I'm weirdly kind of 'hoping' this is a crack in the head, not really blowing gaskets! If it's not that, then it's a possible crack in the block... and that's harder to fix. Pretty sure that may have been found when the machine shop had the block for boring as well. Anyway watch this space. Things happening soon to 'help contain fluids' 😏 Oh and the contents of that cardboard box is a whole other side project!2 points
-
Got some good photos... Now it a matter of grinding & welding.. I came back to Orange today for a dental appmt, and 50km out they ph'd and said the University is cancelling all the clinics. So, we should be back into it this weekend! Nothing unexpected broke, everything we manufactured worked well, especially the suspension, so its a case of copy it over and improve each piece a little.


 2 points
 -
Exciting news news in the Parrot household as I finally have a shed that does justice to the collection! A three car garage! I will now have all three cars in a position where they can actually be worked on, instead of crammed down the side of the current garage where they are essentially inaccessible. Meanwhile the AE86 won’t be permanently covered in sawdust from son’s bat repairs. In a few months after settlement you can expect a photo with the doors up and cars inside! Wife says, you will have to throw some of your old parts out. Err no says I. I’ll be putting in racking for those. Oh, there is a house attached but that’s the boring bit.
 2 points
 -
I had the same issue with my daughters KE55 auto. It was a blocked idle jet. Best thing to do is rebuild the carby. I think I paid $45 for the gasket kit. It took me about 2 hours to remove strip clean and rebuild it. Heaps cheaper than a Weber and a whole lot less hassle.2 points
-
wow how about that. nearly a year since my last post. well I m still alive and married and still have the project cars. soon to have a "proper" sized shed to put everything in so I can actually do something with these things too...…..2 points
-
Such even dramatic drop in compression almost leads me think about cam timing. You definitely had the cam belt and timing marks all lined up properly? 90 psi is terrible for any engine.2 points
-
That is fantastic.2 points
-
While I was at it, I decided to fish out an intake and some wheels I've got sitting around, what you guys think?😂😂

 2 points
 -
Nearly there, battery is a bit down on charge so no start today. Finished that steering wheel too, looks mint. Repco stock this zinc stuff, so put some in the oil to help the cams bed in Beer That is all, maybe start tomorrow.2 points
-
The missus finally out of Hospital and into rehab. One step closer......2 points
-
Big relief to see the missus without a tube in her head today2 points
-
Looks a bit more like a motor again! Tried to bolt the manifold on this afternoon and managed to pull a stud out of the head 🤬 will have to wait until Monday now to get a helicoil for it. Once I've done that, it's manifolds on, flywheel, clutch and gearbox and back in the car! Oh and have to change the pilot bearing as it's a bit tight and crunchy.

 2 points
 -
Very sorry to hear of your wife's brain bleed. Really trust you get a "Good Christmas News" that She is showing great improvement. Being Christmas, which is really for kids, & lots of fun, I can imagine, how you & your kids feel. As Dave says . . . It sucks ! I really, hope that in a couple of months, She is making a full recovery, & that you can look back at this period, as a very bad dream, in the past. I'm sure the thoughts of all of us here on Rollaclub, are with you & yours, at this time. Please yell out, if we can be of any practical assistance. "We are family",. . . . . although many of us, have never physically met. Cheers Banjo2 points
-
Had this car for a while now and slowly getting there. It came with the green backyard paint job, jellybeans, threaded bolts, wheel well half full of water and spaghetti wiring amoungst other stuff. Needed a bit of tidy-up. Ive had a few 4 doors over time and managed to hang onto a few bits which went into this car. I bought a written off AE82 twincam and did the conversion. I rebuilt and installed an AE86 front end still with ADM calipers. Its not quick but I like the 4AGE. Grant from NZ did the interior, He's a legend. I love the styling of 70's 2 door OZ fords, Holdens, Chargers so I like my rollas to look ADM if that makes any sense. Theres been a few guys on this site that have helped me with info and cheap parts - cheers short term plans - Dash Refurb in coming weeks new carpet I have steering issues but have parts to fix so need to sort that. Think engine mounts might need replacing (ford laser) Thinking of putting rubber bushes back in the rear suspension, rear end creeks Longer term plans - I have SSR meshies 16 x 7 fronts and 16 x 8 rears that will go on ( everyone rolls eyes but hey, its my car ). I also have some Aussie delta 13x7 that I'm refurbishing. The MK1's will go on my other Corolla. T18 diff Redo the wiring in the engine bay spare 4AGE that I will rebuild at some stage with a little more poke. I don't know much about engines so might aswell have a go and learn something new. Respray entire car, have XB side mirrors mirrors I bought to throw on at that stage if it suits.


 2 points
 -
While waiting for some paint to dry at the weekend, I thought I'd better replace the manifold gasket on my 5K engine, currently on the engine stand, for my distributorless project. I've not had this engine apart before, but like almost everyone who has worked on a K series engine, I know this is a weak point in the design. So off with the manifold, & "sure as eggs", those tell tale black sooty marks on the head facing, at the centre, indicate it has been blowing by. Twenty minutes with a sharp knife edge & a soft wire rotary wheel, on the hand drill, & the result looked like this. Now most; if not all K Series engines, were fitted with manifold "bolts", to tighten the manifold to the head. These are well known for coming loose. Most people tighten them up a couple of times a year. However, as the steel bolt, is screwing into an aluminium head, and that head becomes "softer" over the years, the danger of stripping the threaded holes in the head, becomes more likely. For that reason, I always replace the bolts with steel manifold studs, which results in the steel stud only ever being screwed into the head once. The manifold studs are a generic stud 10mm dia. x 1.25 by 40-41mm long. I saw some of these exact size, on a rack in an auto store, labelled as suitable for a Gemini. Available pretty much anywhere. I picked up a set, complete with nuts for under $ 20. Clean the threads out in the head, with a final tap, or an old 10mm x 1.25mm bolt with a hacksaw cut down the length of one side. Put a bit of Loctite, or similar, on the thread, and screw into the head. If it is a bit tight, & you haven't got a stud remover/insertion tool, then two (2) nuts, tightened back to back, on the outer end of the stud, will do the trick. Your head should then look like this. The original Toyota two (2) piece gasket is not the way to go. This is what, they look like. The one (1) piece gasket is thicker & better made for this arduous application, and are made by several gasket manufacturers, like Durapro, Permatex etc. They are often described as an "extractor gasket". All have the identication EMS30 in their part number somewhere. The current price is around the $20 mark +/- a $ 1 or so. It will be the best $ 20 investment you do for your K Series engine. The manifold nuts are most commonly, deep, heavy duty, & of brass construction, so they don't bind & rust onto the manifold threaded steel studs, with all that intense heat. Before you refit the manifolds, run a straight edge across their mating faces, & make sure the mating surfaces of both manifolds have no air gaps between manifold & the straight edge. (A 200mm S.S. ruler is usually pretty good tool for this application) You will also need some heavy very thick washers, with a 10mm hole, to clamp across the gaps between the aluminium inlet manifold, & cast steel exhaust manifold. Do not fit the manifold without these, or be tempted to use ordinary washers. If you do have issues sourcing some, you could always recover the capitive washers, fitted to the bolts you removed, or I think once, I used some head bolt washers, which were the correct size, which were really nice & thick. Once you refit the manifold & tighten them up, run the engine until it reaches operating temperature, then after it has cooled down a bit, retighten them. Some people like to put a bit of loctite on the outer thread for the nuts, but I've never found it necessary to do this. Retighten the nuts after a week or so, & you should never have another manifold gasket issue. Cheers Banjo


 2 points
 -
Well I don't like to brag but this time I can't help myself. The Garagmahal is finally complete. Just a bit of a shack to store the Princess' rolla and all the family cars with a bit of room for a long overdue work space. No more laying in a gravel driveway swapping a gearbox for me. I am currently in the process of linning it with a bathroom and kitchen as well as living and sleeping quarters. You see fellas this time I got smart, I bought the land, I got the shed before the house so if I run out cash ooops sorry no fancy kitchen instead of too bad not enough coin for a decent shed. We will be living in it until the house is built then its mine to do with as I please. I was even thinking of getting my own project rolla as well as looking after the Princess' KE55 but we will see. #Rollahouse

 2 points
 -
No worries. I intend to keep the lights on for as long as humanly possible. The fact that 80%+ of our traffic comes from google these days suggests people are finding something valuable here. Things are looking pretty stable now and I blacklisted the worst offending bots that were causing significant resource consumption.2 points
-
2 points
-
2 points
-
I had a drive of a new ford mondeo something (work car) and it had the radar based cruise control. Absolutely bloody brilliant! Probably the best new car feature i have experienced. hows the interior on these things? is it an improvement over the last few corollas? where it feels like the inside of a plastic milk bottle? 18" wheels on a corolla, who would have thought:)1 point
-
Nice work, nice old rola out and about. Not sure if this is what you mean, i have polished a fair few plastic headlight lenses, they come out like new. Same process as polishing wheels really. Sand with course paper 120 grit dry if they are bad enough to need it, or finer if they not too bad. Then work down to 800 wet. Then use buffing compound for 2 pack paint and a sander/buffer with foam pad for paint, coarse compound then fine grit, they come out like new.1 point
-
Id like to tag along to one of these things.1 point
-
Buy a 110deg thermometer and stick it in the radiator. Cover the front of the rad & let the motor idle from cold to hot and check the gauge against the thermometer. At least you'll know what temp the gauge marks mean. Your sender may not be compatible with the gauge, or the gauge might be crook. I found the 4AGE gave incorrect (well, different to the 4K) readings on the KE70 dash, but now I know what temp the marks are at. A mate blew the head gasket in his Maxima because at boiling the gauge only read 'half'....1 point
-
Preservation of life is a big motivator. A lot of the service/repair stuff was completed over 3 days when I went to inspect a belt squeal. I just kept finding shit that needed to be done. The further I went it was just easier to fix more seeing as I'd already pulled shit off to repair that was blocking access it lol. One of the front tyres has a leak. Dam it. Oh well I'll take the front wheels off, put the 15x8 zero from the rears on the front and whack the 15x9 zero spare pair I got when I bought this set , that have never been fitted, on. Might need a bit more hammering, both front and rear. The pair on the front at the moment are not the same make as the other 4. Definitly not as well made as the others. Pretty sure the 4 good ones were made in the early days of rep wheels, they definitly have a much more refined, well made feel and finish.

 1 point
 -
I know who has it.1 point
-
Later on we had broken up. Then someone crashed into it as she went through an intersection. Her girlfriend calls me to console her and we got back together. Meanwhile the car gets towed away to a crash repair place where the insurance wrote it off. Last we heard, the repairer bought it off her to become the works loan car. Maybe he knew something and has a warehouse full of cars destined to explode in value. I hated the bloody thing1 point
-
Find as many prices for similar Corollas so you have a value in mind that you can demonstrate to them. If you want to have it repaired, bargain for the right to the car, as many companies pay it out then take posession and auction the wreck. I'd expect it takes a tiny accident to write these cars off, labour at panelshops is so expensive that minor accidents are writing off 10yr old cars now. I'm amazed as what I see at Great Western Wreckers. Best-case I expect will be to get a thousand bucks from the insurance company and retain ownership of the car. Then you need a mate who is a panelbeater to help you strip and repair it. A chassis machine can pull a chassis straight, or a donor car can be cut and the rear-end welded into place. Look up regulations for statutory writeoffs, you don't want the car declared that or it can't be repaired for the road again. Good luck-1 point
-
I put one a vdo one on a 4k. I don't recall having any issues. The threads are all standard sizes. Worst case you'll just have to get a threaded reducing bush. M12 to m10 or something. I only said vdo cause they are a known brand and are dirty cheap. And the gauges look fairly OEM. On my old ke70 I put the vdo temp gauge inside the cluster where the old temp gauge was. Just hacked it up and stuck it in. Looked factory. Any gauge with numbers is the go. Like banjo suggests even a $10 jobby will do! I'm a sucker for data so I always put a proper temp gauge in my old cars. Gives me something to stare at in stop start traffic.1 point
-
"The best way is to install a proper temp gauge and use a thermometer to check its accuracy. " Yep- buy a 110deg thermometer for $10. Then idle the motor from dead cold to the maximum it gets to with the rad cap off and the thermometer in the top of the radiator. You can slip a sheet of newspaper down in front of the rad to help it as the motor isn't under load. Note down the temp and time it takes, and you will get a curve. If the temp gets to 100deg you have a problem, the cooling system just isn't up to it anymore. It should show cold, then quite quickly go to 75deg or so, and slowly climb to maybe 80 odd. Then you will know what temperature the marks on the gauge really mean. In pouring rain it shouldn't get hot at all.1 point
-
A $50 vdo temp gauge is worth its weight in gold.1 point
-
Hello guys and girls. It's with sadness I login to report to you today that a few months ago I did decide it was time to sell the KE70 on and allow myself to focus on the Supra. Sadly it had remained essentially stock with 4K, chopped springs and the Nemoto Sprints I bought for it until I sold it. I had huge plans for it and would have liked to have completed them, however with 2 vehicles dedicated in Jonos name, I simply couldn't financially justify spending money on the Corolla when the Supra has been a significant money sink, however as most could imagine, an incredibly worthwhile one haha. If anyone is interested in keeping up with what's happening with the Supra, i've started a build thread over on Supraforums.com.au which can be accessed without a login here. The thread is a work in progress currently, however I have some huge plans coming to fruition in the latter part of this year, which you're all invited to be a part of the ride of. I sincerely hope everyones builds are progressing and/or completed (are they ever though) by now haha. Kind Regards, Ethan. P.S. I still love Corollas dearly and vow to return to the life one day, and when that day comes you will see me again! Haha :)1 point
-
Thanks all! Chances, no squeaks but a few noises from the front right wheel rubbing against the back of the inner fender. I gave it a tap for clearance and now she's perfect. The bushes and shocks really seem in good nick, she drives nicely. Work yesterday was on the exhaust - I knew it was a bit pinched but didn't realise it was this bad! No wonder she feels breathless over 80kmh. I got some 2" pipe to slip over the stock stuff and its going together fine. The larger pipe just means I can clearance the subframe without losing any flow, although the welding job is a bit more complicated with a bit of fill and patch work involved. More as it happens.
 1 point
 -
Yeww!
 1 point
 -
Matt I almost found some photos of your car! The raucous din of ITBs on greasy suburban roads, cutting through the still morning air on the way over was a highlight

 1 point
 -
Sick find. I love Australia. Shirtless guys in the dark with a torch working on one of a kind engineering projects in the backyard. I feel pride.1 point
-
Hello What I used out here in the states is a called a Tow Dolly Carina is 1972 TA12 witha toyota tacoma (hilux) stovk W59 tranny and 2rz power plant all stock lock and internals with Haltech 1000, 1000 injectors and Prescision 6262 turbo pushing a little over 323hp I'm at the moment sourcing another motor to build i would like a good streetable 450-500hp set up with either a R154 or W58.1 point


