


altezzaclub
-
Posts
6830 -
Joined
-
Last visited
-
Days Won
134
Content Type
Profiles
Forums
Events
Gallery
Blogs
Everything posted by altezzaclub
-
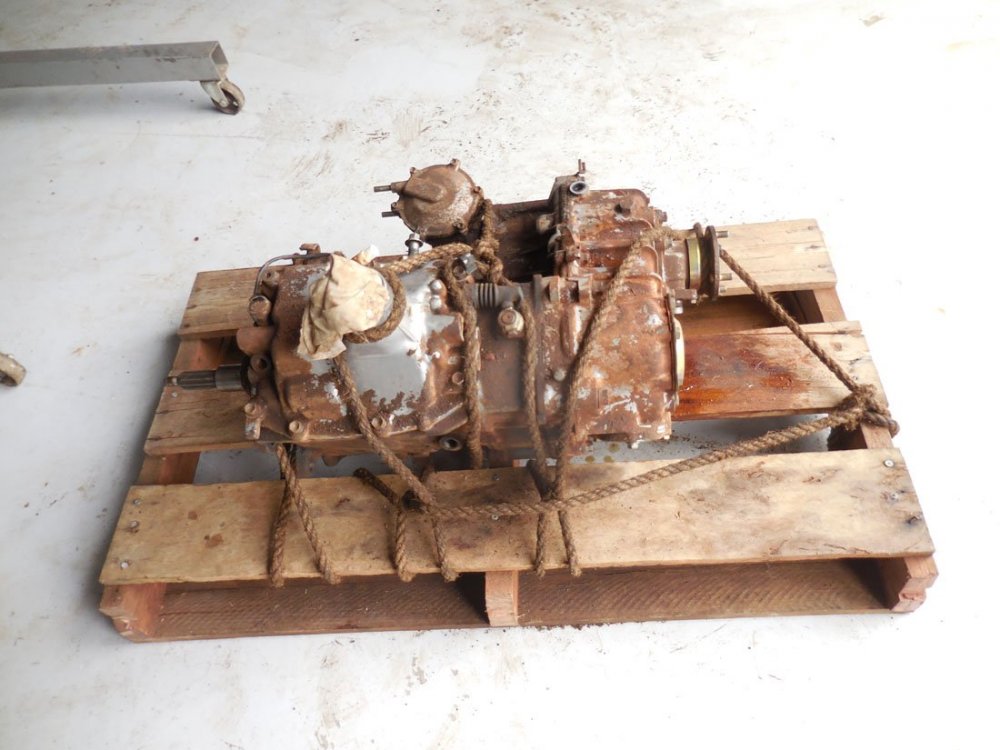
Well, the best-laid plans of mice and men go aft astray.. The Girls KE70 died on me, my fault entirely, and that head gasket change is in the build thread. It did mean I spent May and half of June up on the farm. i suppose it started one night at 2am when I vaguely woke up and heard water dripping.. I leaned over and put the light on, and thought "its coming from the armchair where I throw my clothes".. but when I sat up and knelt over on the bed a drip hit me on the butt! It was dripping onto the bed, through the joins in the tongue & groove ceiling.. So I moved the bed and got a pot..when the drip moved over a board I moved the bed again.. and so on! Next morning trip in the ceiling showed the drain tray on the gas heating unit had rusted out, and it took over a week to get a stainless one copied. So THAT was the start of this trip! Meanwhile we had the benches all welded up, then cleaned and painted. The mobile work bench was earning its money! I will say that working on clean white benches is just so nice!! The first big customer for the hoist was Cobar the Landcruiser that didn't like to go into 2nd gear. Yep, you could lift it up and still walk under it upright! The new gearbox jack made that job simpler too. The box was mailed to Terrain Tamer for two or three weeks, and is now back to be fitted this weekend. Dammit! THAT's where that rope went, I was looking for it yesterday!


-
Well, I'm stopping at an intersection and the car dies as it idles.. not unusual, the cams give it a rough idle, but this time it was 3 cylindered and it stayed that way the couple of minutes home. So I spent a week chasing the problem until I was due up at Woolshed rallying, and this happened.. Steve to the rescue and we headed up to Walcha. It was head off time, to find a perfect fossilised imprint of a phillips screw in the top of a piston- One of those experiments with the idle speed had got out of the cage some months before, and the screw had popped in, got stuck beside a valve and on the next stroke jammed the valve and bent it! So a couple of valve seats got recut, a new valve and a precautionary skim, and its back together, sitting outside on the verandah ready to drive home tomorrow. Of course it didn't take the month I've been up here, but that story is in How To build a Rally Car, or better named, the 465th reason we are not rallying!


-
Your Y/G wire is for the temp gauge accoding to the wiring diagram. There's a good copy up on rollaclub somewhere.
-
What does or doesn't it do?? Do you get 12V at the coil with the key on? 12V when you're cranking? Do you get 12V at the points when the key is on and the points open? If you have a short where the wire goes into the dizzy or at the points the coil won't work.

-
Grab a larger diam master cyl from the wrecker if the throw is insufficient. I don't think you'll notice the heavier pedal.
-
That's obviously the breather that goes into the charcoal canister on the KE70. The outlet on those goes into the chassis rail. How about running a plastic one up around the boot and out somewhere inconspicuous with that non-return valve on the end? That's what Datsun did.
-
Try the nut without the shock in and note how far it screws in. Then put the shock in and try it, and the nut should be maybe 4mm above where it was without a strut in there. Then you know you're clamping down the shock onto the bottom of the strut + spacer.
-
So, if you suck on just the diaphram units neither of them move the arm in?? Do they leak air through into your mouth? Does the base plate turn easily with your thumb? They are swaged over so wouldn't be repairable, but I expect you can by a new one from some distributor tuning specialist.
-
Can you turn the base-plate by hand?? If it doesn't move around freely & smoothly take it out and lube the rusty ball bearings it sits on. Unless the vac diaphram has really died...
-
"Apparently I'll need a spacer in the bottom of the strut body to make it compatible?" maybe... when you do the strut nut up on the new shock it should clamp down on the shock body & hold it in the strut tightly. If the shock can move up and down a little then yes, you need some sort of spacer under it in the strut. Just measure how much play there is with the nut done up, then find a couple of big washers or whatever you need to match the play plus a few mm. Let us know if there is any play in it and how much.
-
Well, apparently a KA67 is a Carina, so surely you have the right shocks. All you have to do is put the shock inside the strut...
-
Nice work, that's a pretty subtle problem!
-
You're confusing me with shocks and struts.. So, the original toyota shocks would have been a wet shock inside the strut. That is a twin-tube system with the strut full of oil. The shock you bought is a sealed unit that needs to go inside the strut to replace the original wet shock. You should pull the big nut off over a container with the shock in the vice like you have and catch all the old oil. Collect the wet shock and put it aside, and clean the strut out. Put your new shock in the strut, fill it with oil to an inch below the top or so & screw that big nut back on. Keep the wet shock as you can rebuild and revalve them for fun if you can find seals for them. That's how you adjust your own shocks, whereas the sealed units you can't do anything about. If you open the strut and find a sealed shock inside you know somone has changed them in the past.
-
I've done it to all of them with silicon or no-more-nails, its stops them rattling so much & makes them much stronger. I put it on the lawn upside down, glue it up and put bricks here & there on the frame. The only disaster was the rally car one that the cows walked on overnight!
-
Dammit! Left my camera up there.. sorry Team, I'll get it next week. Needless to say, the hoist is in full work and we still haven't finished a workshop! Meanwhile, Toymods came along and Mao had work to do at the gymkhana!

-
 maybe I was being too harsh, the guy might own a Rolla.. Still, free advertising is not what this forum is about. Embarassing for Perth people.
 -
That'll be this problem- "I would suggest that your KE55 is wired up for a a ballast resistor before the ignition coil. It could be missing or open circuit. That would explain why you get power in the start position, but not in the "run" position of the ignition key. " Two wires must go to the coil, the one through the ballast resistor from the 'run' position of the key and the one directly to the coil from the 'start' position. You only have the one from the 'start' position working. The ballast resistor drops the coil voltage as they are a 9V coil.
-

4KC Electronic Distributor no vacuum advance
altezzaclub replied to MidwayKE70's topic in Automotive Discussion
Can you take a photo or two?? Did the weights rotate the shaft when you pulled them out?? At idle the timing mark should start at 10deg to the left (anti-clockwise) of the zero deg, TDC, on the timing cover. As you rev it the timing mark should move further anti-clockwise, out past 20deg. This photo is set up with timing at 10deg BTDC, it will have the pulley marks move downwards (anti-clockwise) as it is revved. I had the daughter watch the tacho and hold the revs at every 500revs while I held the timing light on it. All this timing is done with the vac hose off & blocked, as Rebuilder said, we are just measuring the effect of the weights.
-
We drilled a hole in the backing plate at the top. I can't remember what the bolt arrangement is, but I'll take a look & photo it tomorrow.

-
4KC Electronic Distributor no vacuum advance
altezzaclub replied to MidwayKE70's topic in Automotive Discussion
There are a few online spring rate calculators around, they work for tiny springs as well as car springs. All you need is a good set of verniers to get the wire thickness. http://www.pontiacracing.net/js_coil_spring_rate.htm With 10deg initial advance at idle, you should go out to 35deg at 3000rpm. just mark the pulley with a white pen out to 45deg. Look out for having too little spring strength as the arms may be halfway out at idle and you only get 20-25deg advance at 3000. All this work is done with no vac advance attached. -
4KC Electronic Distributor no vacuum advance
altezzaclub replied to MidwayKE70's topic in Automotive Discussion
Not quite the same as mine, but it works the same. Those weights should pivot outwards against the springs and they will turn the shaft a little as they do. That is what gives you igition advance, about 25deg. Sometimes they freeze on their two shafts, as you can see in the photo. You can also see that fitting weaker springs lets the arms go out earlier and you get more advance faster. You could run the motor up to 3000rpm with a timing light on it and check the timing as it revs, then take off one spring and do it again. Let us know what happens.. The vac disphram you can activate by sucking hard on it. As the arm gets sucked inwards it pulls the baseplate of the sensor around & retards the timing. -
4KC Electronic Distributor no vacuum advance
altezzaclub replied to MidwayKE70's topic in Automotive Discussion
So its been really flat to drive? No sparkle at all?? I found that when I installed mine & set about fixing it. You should pull the base plate out and look at the weights underneath, sometimes they are seized up from grease drying out. If they are not frozen, then it is just the advance curve that they programmed into the dizzy at the factory. here's what I did- https://www.rollaclub.com/board/topic/49927-how-to-fix-your-brand-new-ke-motorsport-electronic-distributor/?tab=comments#comment-511594 -
Nice! Now it all makes sense. Its impressive how hard that thermostat works!
-
Not hard, like Littleredspirit said. We use the dust cover behind the hub usually, the sensor has two nuts on the outside so it locks into a hole at any depth you like. The bolt is just an 8mm tapped into the inner part of the disc where the pads don't rub. One bolt does fine. on a Terratrip T005 sensor. http://terratrip.com/probes.htm
-
Ae71 rear end swaying ( almost death wobbles )
altezzaclub replied to succulent eye's topic in AExx Corolla Discussion
Just as likely in the front suspension/steering, so go over that too. Get a wheel alignment done in case the rear is toeing out. Your stiffer springs might need stiffer sway bars. If everything is tight, it might be mis-matched shocks. The response from the rear might be slower than the front, so you might end up swapping shocks at each end for anything you can scrounge from someone else for a test run. If there is a wrecker nearby with a KE70 or any old 80s Toyota you could find something to try for under $50.


